The Ghiacciaio Fellaria Hike, How to visit the Italian Glacier Lagoon
The Ghiacciaio Fellaria Hike is one of the best-hidden gems in the Italian Alps. While it’s relatively popular among Italian hikers and mountain livers, the Fellaria Glacier is little known outside Italy.
I have seen a lot of very beautiful places but this is one of the very best I have seen in recent years.

But what’s so special about it? Well, apart from the landscape you have a beautiful glacier with a glacial lagoon, where two caves have formed. Small icebergs float around the lagoon. The glacier is split between an upper and lower part. In between the two parts of the glacier, there are some amazing waterfalls.
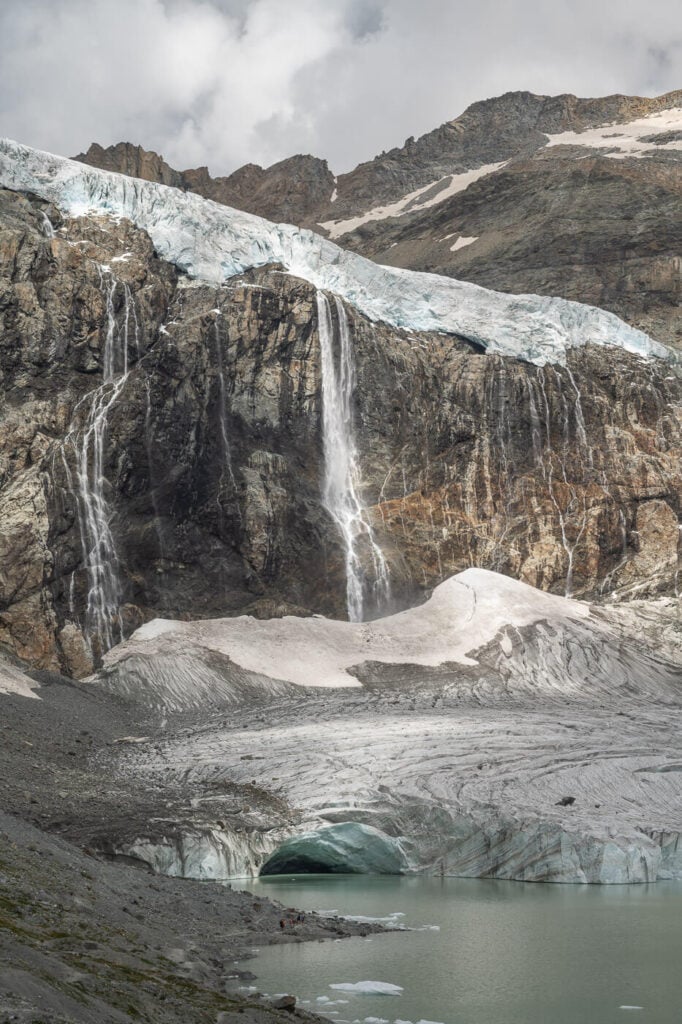
The main waterfall at the glacier.
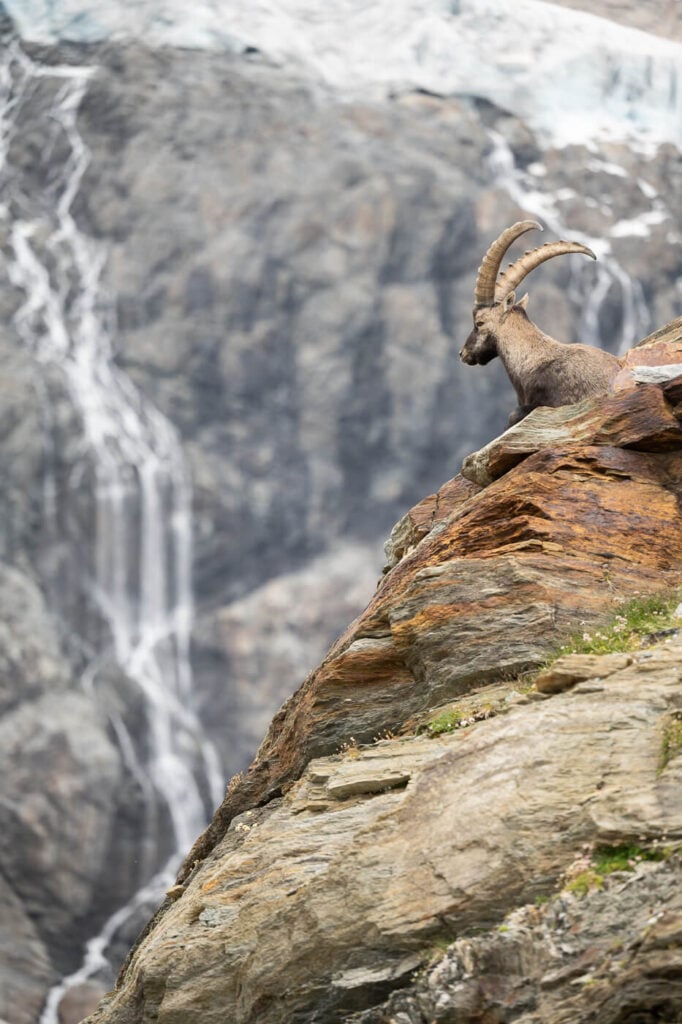
It’s also fairly common to see Ibex roaming around or basking in the sun in summer. I have seen several of them when I was there. All the ingredients to experience the best of the Alps.
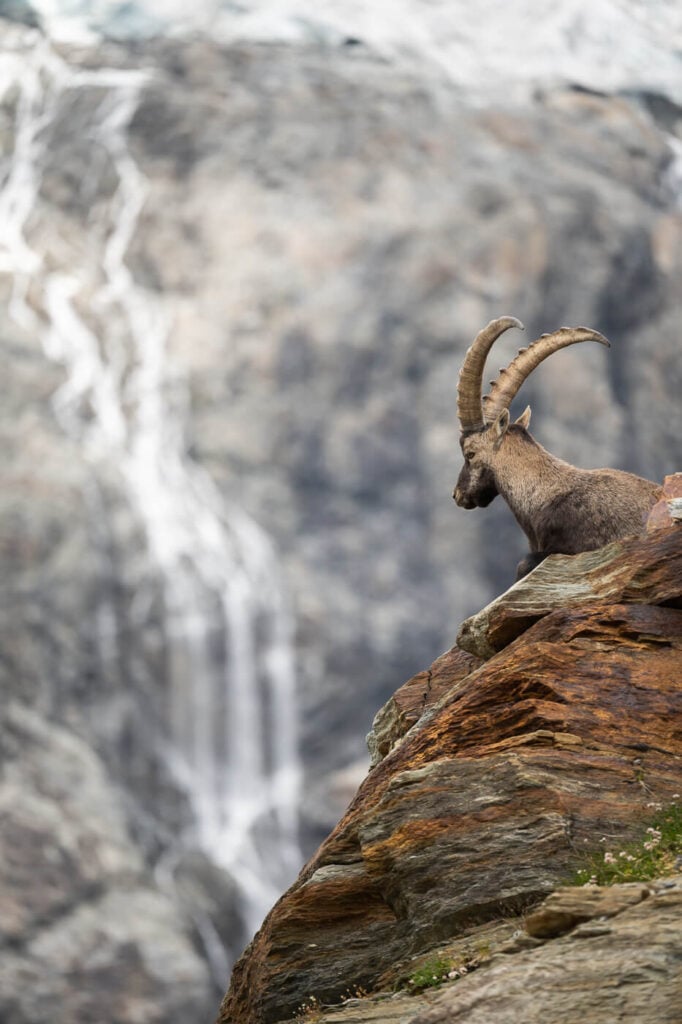
Ibex at the Fellaria Glacier.
So, why isn’t this location more well-known? Well, the glacier lagoon didn’t exist in its current shape until the early 2000s. The Fellaria Glacier lagoon only formed in the last two decades, due to the melting and retreating of the glacier. And, by the looks of it, it may not be around for many more decades.
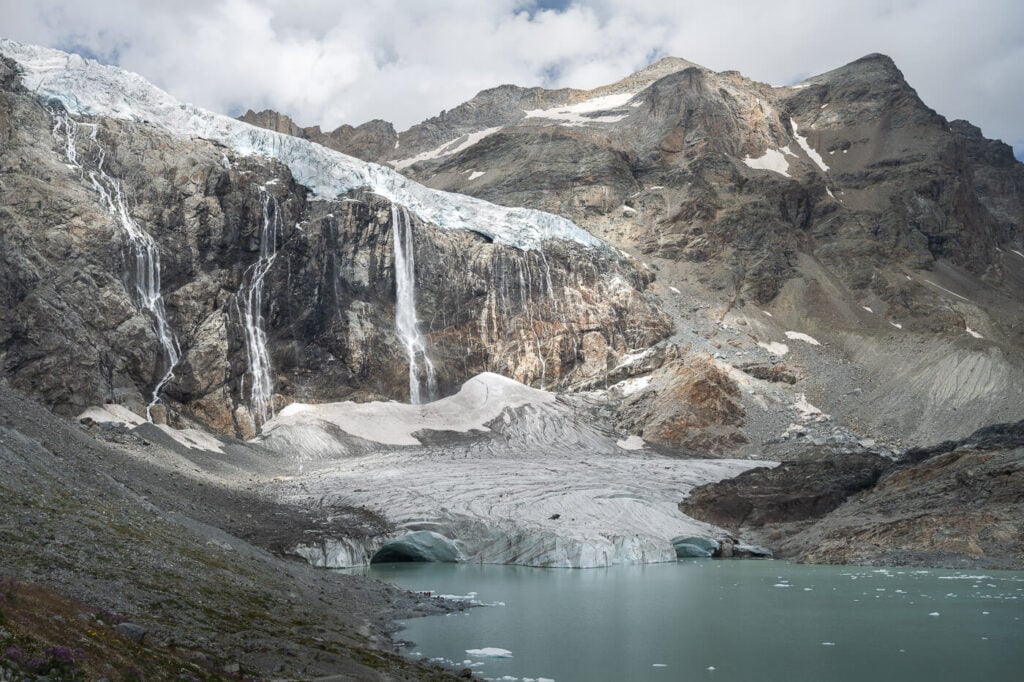

Small icebergs floating in the Ghiacciaio Fellaria Lagoon
Table of Contents
Overview of the Ghiacciaio Fellaria Hike & Map
You have a few different options if you want to hike to the Fellaria Glacier. The most common path starts from Campo Moro, just below the Alpe Gera Dam. From there, you hike first to Rifugio Bignami, and then from there you follow the “Percorso Glaciologico C” (Glaciological Path C) to the Eastern side of Ghiacciaio Fellaria.

This is also the route I took. The only difference is that I also explored the “Percorso Glaciologico B” (Glaciological Path B) and closed the loop around the Alpe Gera Lake on the way back.
I’d recommend this route too, excluding “Percorso Glaciologico B”. If you are doing this for the glacier, you won’t have a good view of the West side of the Fellaria glacier from there. Still, that is a beautiful part of the mountain.
The best time to visit Ghiacciaio Fellaria is from Summer until early Autumn; it’s not possible to get to the glacier in winter.
Anyway, here are the details of this hike:
| Max Altitude | 2,600 m |
|---|---|
| Distance | 18.9 KM |
| Elevation gain | 1,020 m ↑ / 1,020 m ↓ |
| Hike time | 06:00/ 07:00 Hours |
| Hike Difficulty | Moderate to Hard – mostly a long hike |
Also, here you can find the map of the hike to the Fellaria Glacier. You can download the GPX file for free if you click on the activity linked here below.
I’d recommend having a GPS track when visiting the Fellaria glacier, I had one with me too. While the general direction to the glacier is quite intuitive to follow, there are many trails in the area. The markers on the path aren’t always clear, so I’d recommend having a GPS track at hand just to check you are on the right path.
How to get to Ghiacciaio Fellaria & Parking
First thing you should be aware of is getting to the Fellaria Glacier requires some dedication. This does not only apply to the hiking effort, but to the driving part as well. the road to Ghiacciaio Fellaria is a long, narrow, winding road with a rock wall on one side and a cliff on the other.

View of the trailhead and parking area (in the distance, next to the lake) at Campo Moro.
Quite often, the road is wide enough for just one car. There are a few wider areas here and there to allow for maneuvering when you come across another vehicle coming from the opposite direction. Still, this is a slow drive that requires carefulness. Timing is crucial too. Best very early in the morning or in the early evening to avoid traffic.
With that part out, here are the driving and parking directions.
- Driving Directions: if you are coming from the north, so Switzerland and the Bernina Pass, you’d have to cross the border to Tirano and then drive to Sondrio. Generally speaking, you’d have to reach Sondrio from any other direction. From Sondrio
- Parking: you can park by the Campo Moro Dam, just below the Alpe Gera Dam. Parking costs 6 euros for the day. If you want to dodge the parking fees, you can park in another rather big free parking area about a KM before reaching the end of the road by Alpe Gera.
- Public Transportation: If you can make it, you can make it to Sondrio by train, or you can take the bus from the train station to Campo Franscia (summer only). From there, you’d have to hike the rest of the way to the Alpe Gera Dam. That’s about 6km, with a total elevation gain of about 600m.
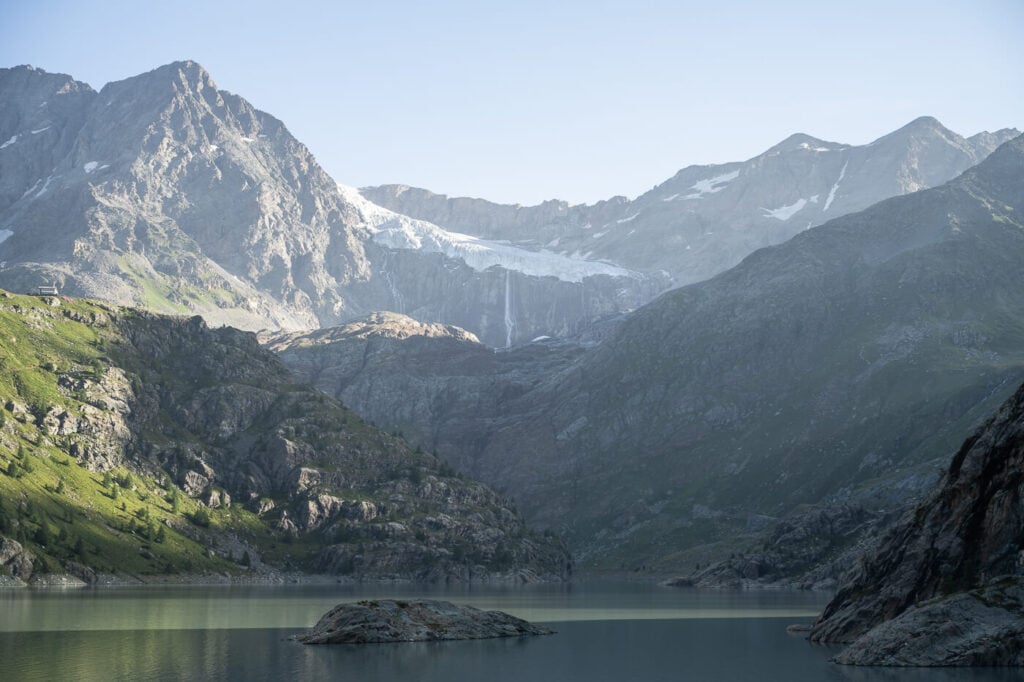
View of the Alpe Gera reservoir at the beginning of the hike.
The Ghiacciaio Fellaria Hiking Trail
From the parking area below the Alpe Gera dam, which is the second tallest dam in Italy, you first have to walk up to the dam either following a trail at its foot, or the service road that leads up to it. Here you have two choices.
You can either cross the dam and take the trail on the left side of the lake, you you can take the trail on the right side. The trail on the right side of the Alpe Gera Lake is the shortest way to reach Rifugio Bignami first and then the Glacier. Great views too.
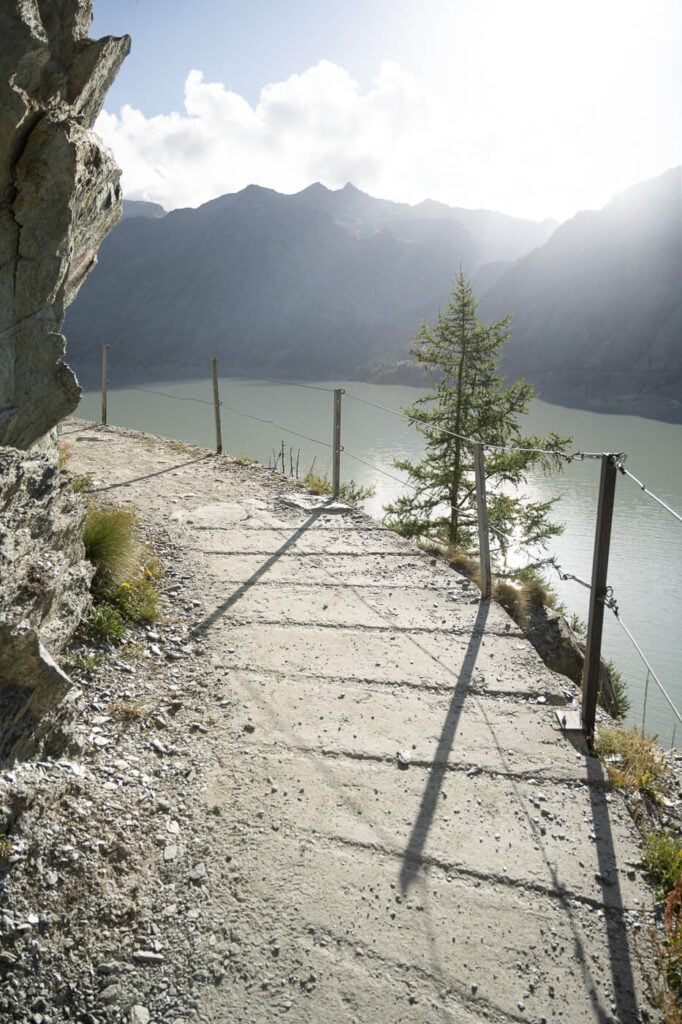

The Alpe Gera Lake and the mountains around it in the early morning.
The other way is a little longer and with more elevation gain. You also get fantastic views of the lake and the glacier from there. You can do both trails as a loop, which is what I did.
On my way up I took the shortest trail to Rifugio Bignami, which is the most common choice, and an out-and-back hike too. This is the direction of travel I chose and the one I’ll use to describe the hike. the reason I chose to do the hike clockwise is the light. Better light from the left side in the morning, and better light from the opposite side in the afternoon. Best of both.
From Campo Moro Parking area to Rifugio Bignami
Once you’re up on the Dam, it does not take very long to reach Rifugio Bignami, the trail will gradually gain elevation without ever being too steep. from this part of the trail you get great views of the lake and the mountain on the opposite side. So good it’s easy to forget this is a reservoir.
You’ll reach Rifugio Bignami in less than an hour, on average. You want to stop here to soak in the views. Walk behind the hut to the first epic viewpoint of the Fellaria Glacier and its waterfalls.
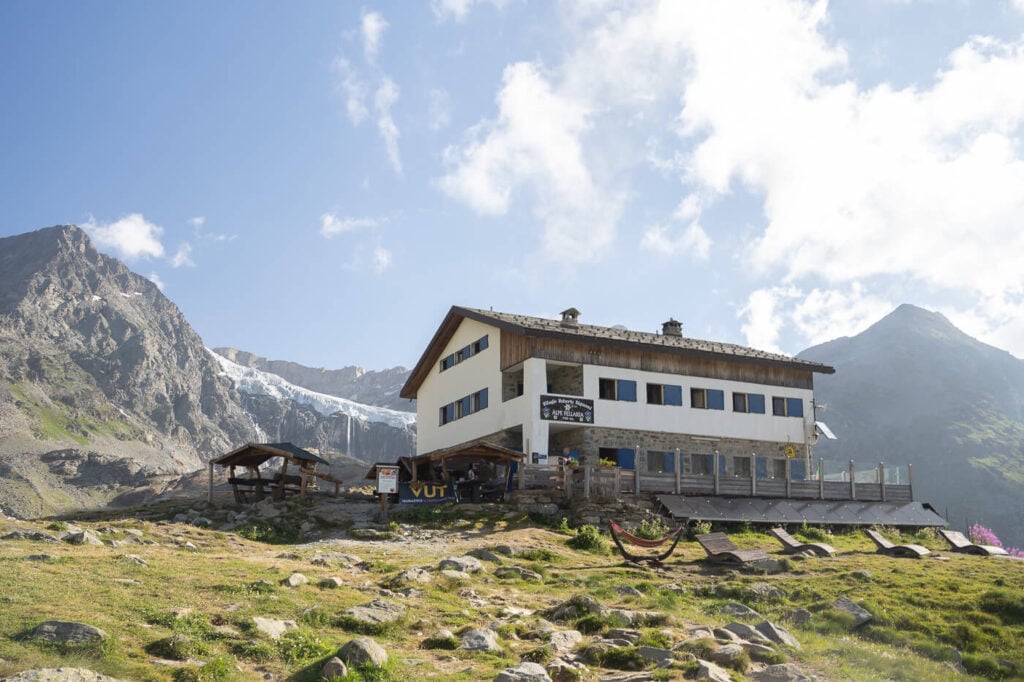
Rifugio Bignami

View of the Fellaria Glacier from Behind the Rifugio
From Rifugio Bignami to Ghiacciaio Fellaria East
As you leave Rifugio Bignami, you can follow the marked trail “Sentiero Glaciologico”. That sign will disappear from the trail soon after.
However, you will start to see green signs pointing to “Percorso A”, “B” or “C”. The one you want to follow is “Percorso C” which is the one that leads to the East Side of the Ghiacciaio Fellaria. that’s the one with the glacial lagoon.

Path B leads to the West Side of the Fellaria Glacier, but you won’t have any real good from there. That’s more of a path of Glaciological interest where you can observe the morainic deposit. Path A leads to a small alpine lake, also overlooking The West Side of Ghiacciaio Fellaria.

Part of the trail between the Rifugio and the GLacier, visible in the distance.

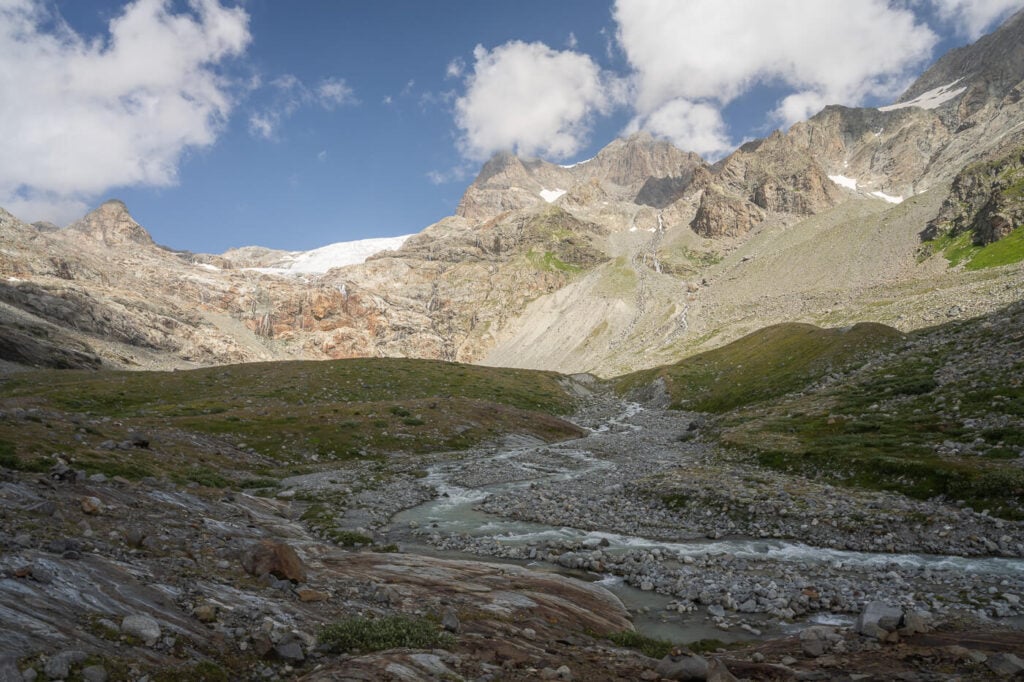
View of the west side of ghiacciaio Fellaria (in the distance)

Same view, from the bridge crossing the river.
Back to Path C: the trail goes through various terrain. Initially mostly packed dirt, then through some rocky terrain. No scrambling is required. Once you pass the deviation to Path B, you’d have to cross a small wooden bridge. Then hike up the last rocky ascent, at the top of which you’ll have the first, glorious view of Ghiacciaio Fellaria and its glacier lagoon.

First viewpoint of the Fellaria Glacier and its lagoon.
The Fellaria Glacier Lagoon
Once you’re at the lagoon, you have two options. Most people will walk up the side of the lake toward the glacier. Technically, that is a hazardous zone, because of the rockfall risk and possible collapses of the glacier. If you go there too, you are entering this area at your own risk.
Also – do not try under any circumstances to walk on the glacier. There are several crevasses and this is a very active location.

A trail leads down to the side of the lagoon.
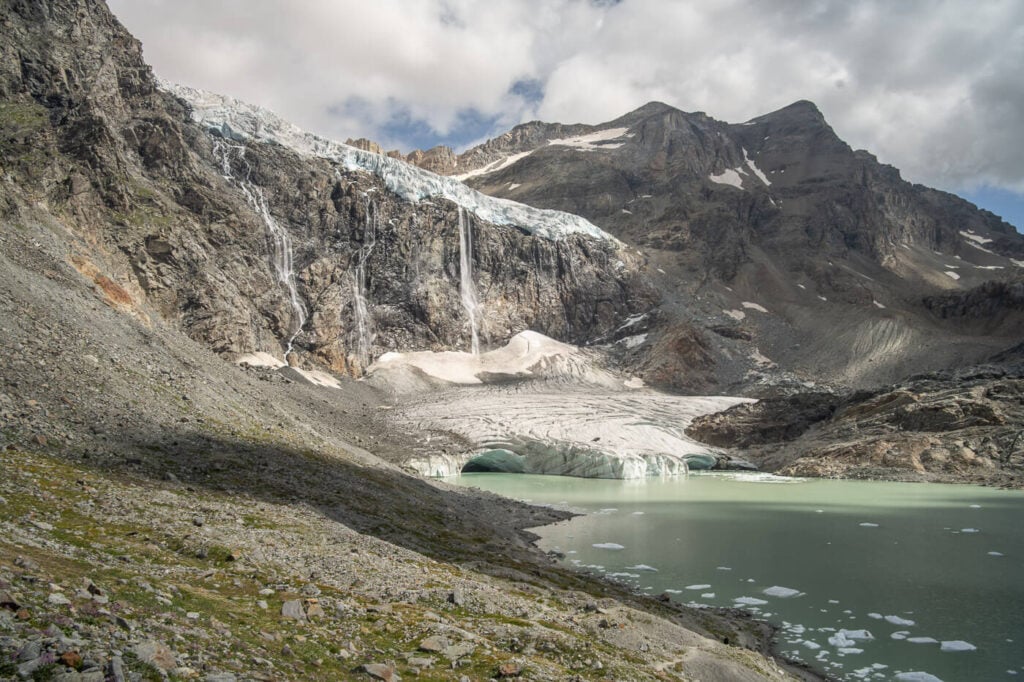

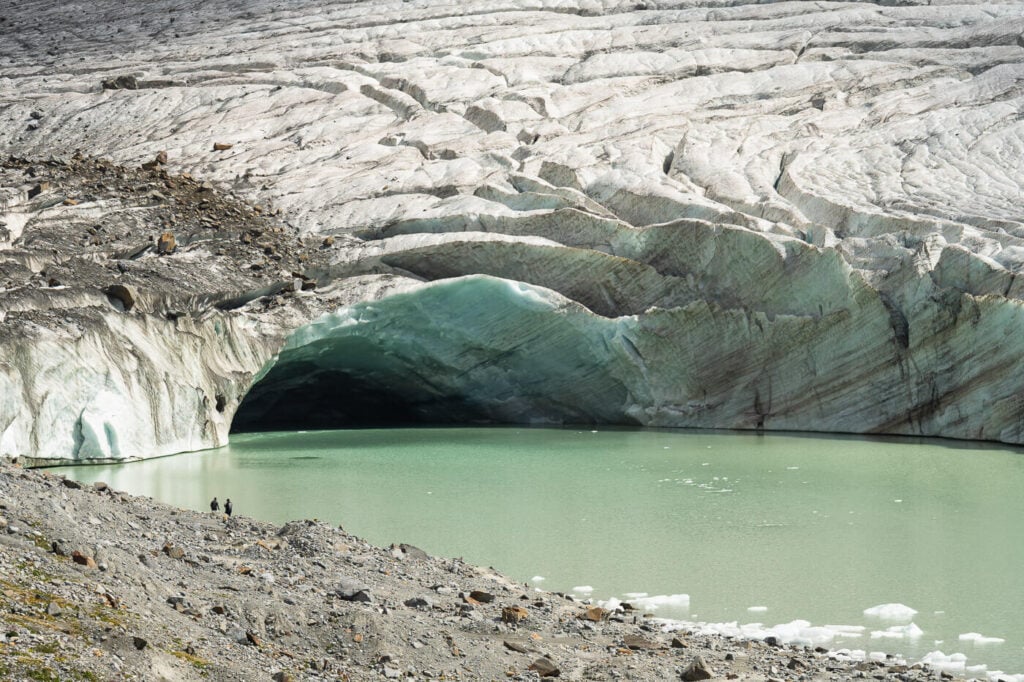
One of the two caves – can you sport the two hikes by the shore?
Then, you can also walk up on the small outcrop right in front of the glacier. It’s a short walk to get up there, and it’s easier than it looks. To me, the views were worth the effort. it would just take an additional 30 minutes to get there and back – and you will pass by the lagoon shores too.
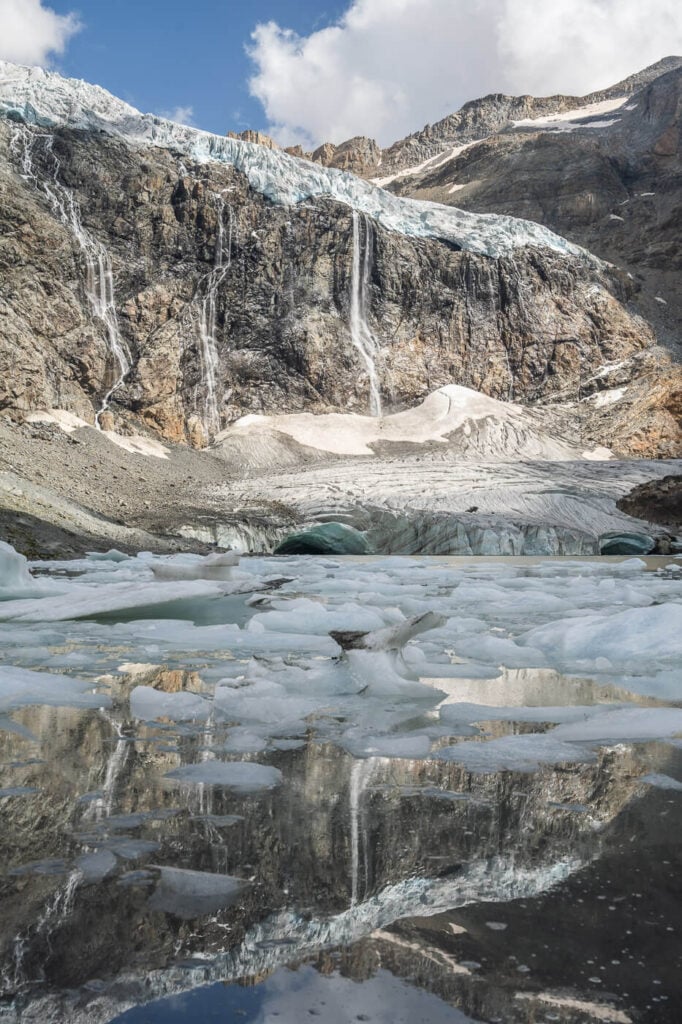
View from the shores of the lagoon

Hiker on the upper viewpoint in front of the Fellaria Glacier.

Panoramic view from the upper viewpoint.
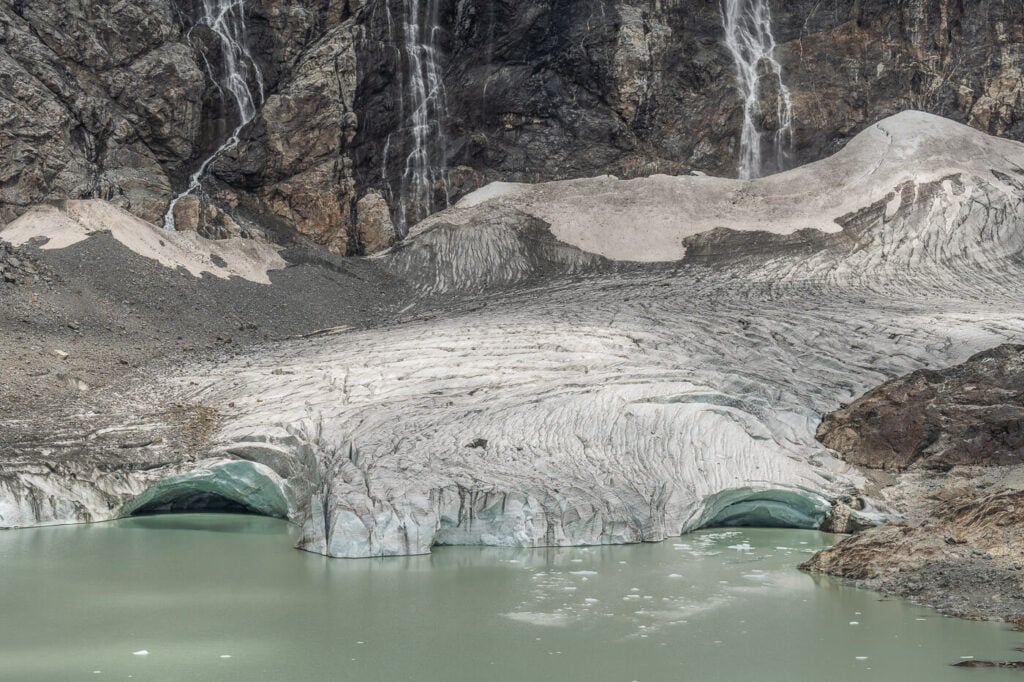

This is also where I saw the Ibex, seemingly chilling in the sun as if they were enjoying the landscape around them too.


Loop hike around the Alpe Gera Lake via Alpe Gembré
There are a few, unmarked trails that could work as shortcuts to reach Alpe Gera without having to pass by Refugio Bignami. I can’t vouch for their conditions as I did not take them. I mentioned them because all the most popular hiking apps will try to send you there – but keep in mind they are unmarked, unmaintained trails, and often their condition is not the best.
The easiest way is, however, to pass by the Rifugio again. It’s also a good occasion to snack on something to get a drink, or some food, or to enjoy the views a little longer.

From Rifugio Bignami, you can hike down to the lake to close the loop around it.
From there, the trail steeply descends into the valley toward the lake, You’ll pass by a few small waterfalls and a relatively big one – which is well worth the detour in my opinion.
Also, the landscape of the views and the glacier from the opposite side of the Gera Lake are well worth the loop hike. Make sure you turn around from time to time to soak in those views. The best ones are from the various viewpoints after the small village of Alpe Gembré.
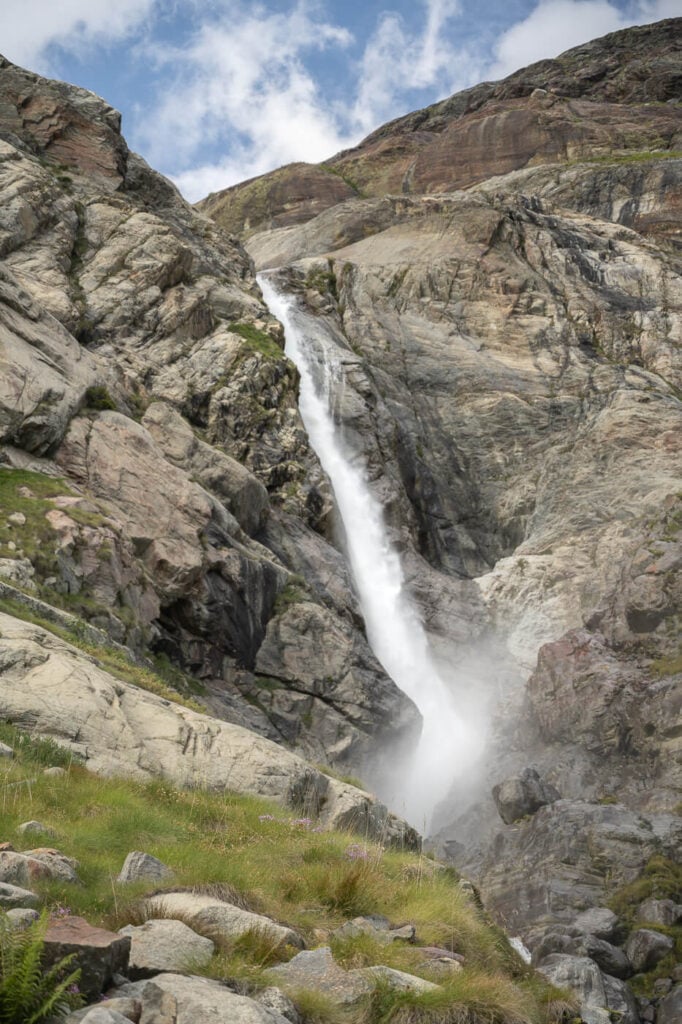
Waterfall on the lower part of the trail on the loop around the Lake.
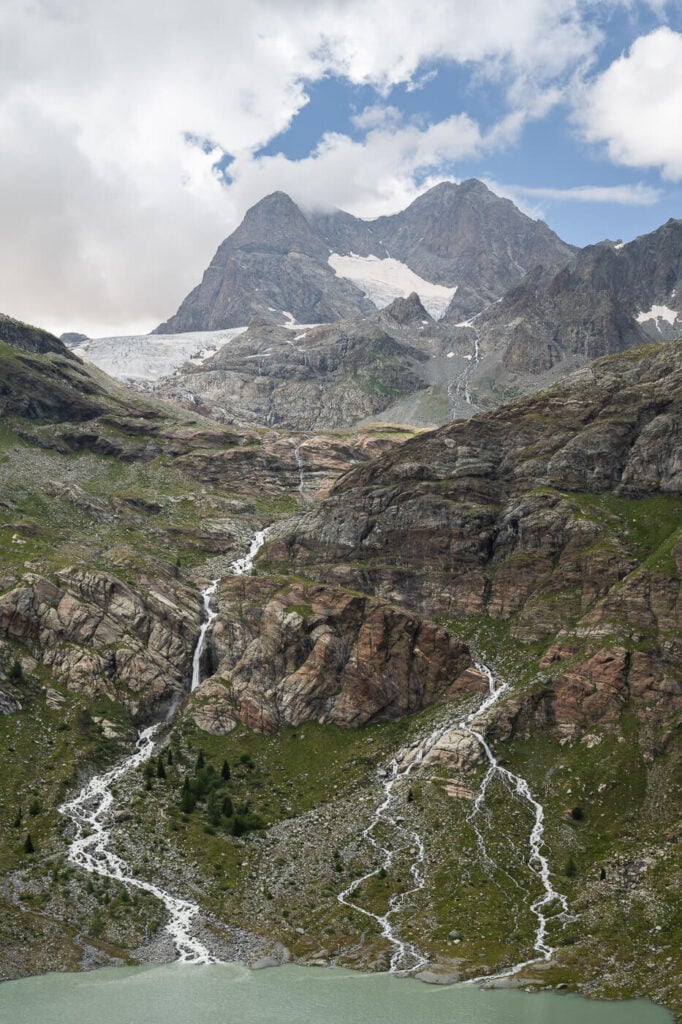

View of the Alpe Gera reservoir.
Ghiacciaio Fellaria Photos, Photography Tips, and Best Viewpoints
To start with, this is a location where I took tons of photos. Even for this post, I ended up with more than 8o photos I processed. Apart from the beautiful landscape, the views are wide open right from the beginning of the hike, and there are many different elements and mountains all around you.


On top of that, you can see the upper part of the glacier and the waterfall right from the trailheads, which allows you to have several different compositions with the same subject (the glacier and the waterfall), with different foreground elements and different perspectives from different parts of the trail. All worthy.
I used mostly my 24-70mm lens full frame, but also my 70-200mm. That lens allowed me to capture some of the farther-away details and to zoom in on some beautiful parts of the glacier.
Lastly, as the glacier more or less faces south it gets good light for most of the day, both in the morning and in the late afternoon
Telephoto lenses are recommended here to capture the details of the glacier and the waterfalls. I used a 70-200mm full-frame lens, and it came in extremely handy to capture the waterfalls as well as the beautiful Ibex roaming around.
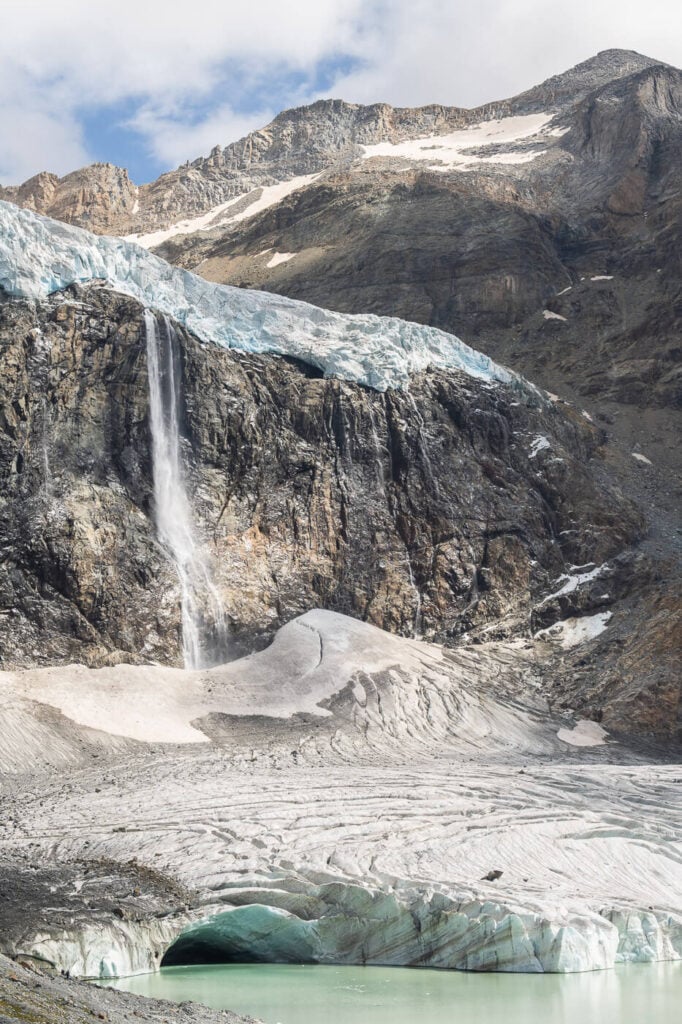

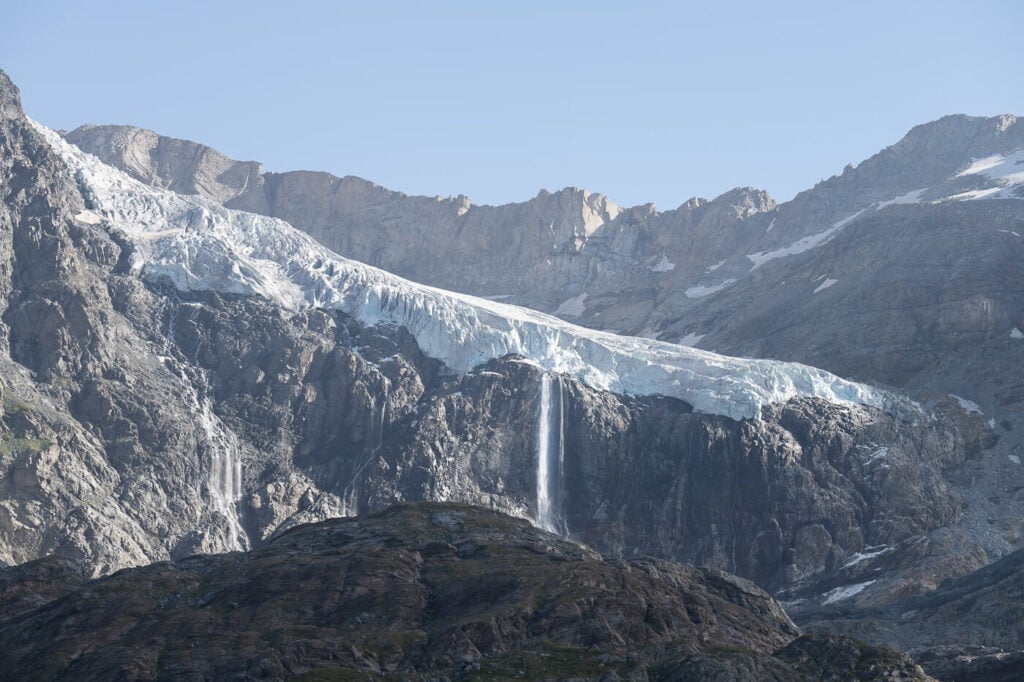
Ghiacciaio Fellaria Best Viewpoints
The first great viewpoint is the one behind Rifugio Bignami. This is one of the most and easiest views to reach on the hike to Ghiacciaio Fellaria. he view of the valley with the glacier in the distance is absolutely epic.

View from Behind Rifugio Bignami.
Then there are several good ones along the trail, too many to mention. the other major one is the first view from the top of the hill at the end of the trail.
From there you can reach two more viewpoints. A lower one on the side of the glacier and another one on top of a hill right in front of it. I mentioned both earlier in this post – both are worth it, but keep in mind the lower one that leads close to the glacier is in a hazard zone – there’ risk of rockfall and glacier collapses.
The lower viewpoint offers great views of the icebergs in the lagoon, while the upper the best views of the entire lagoon.
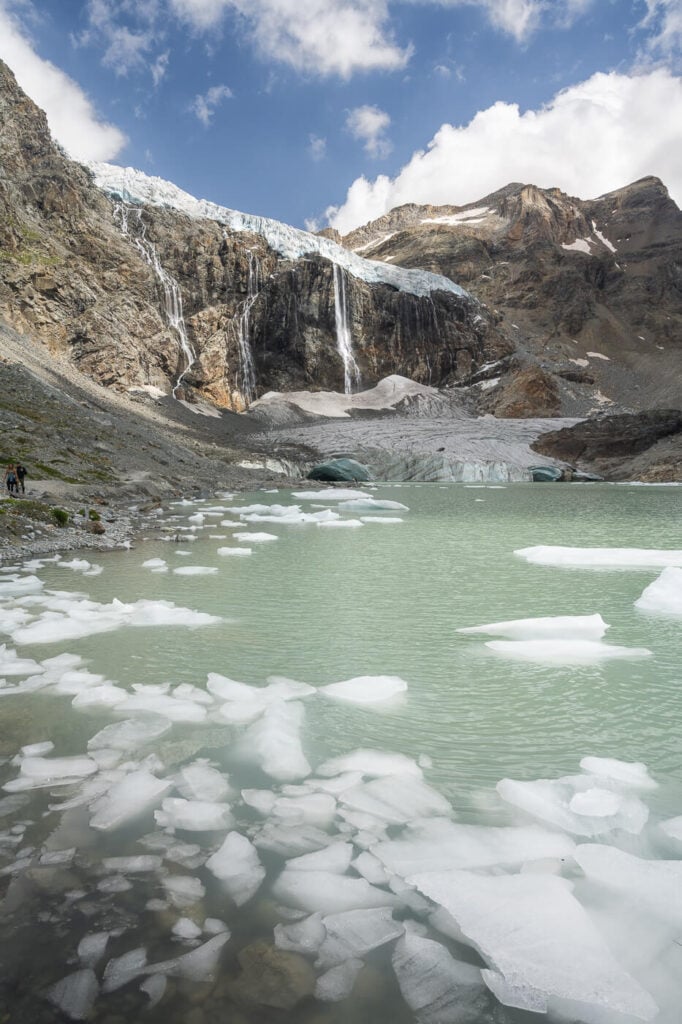
Lower viewpoint.

Lower viewpoint.

upper viewpoint
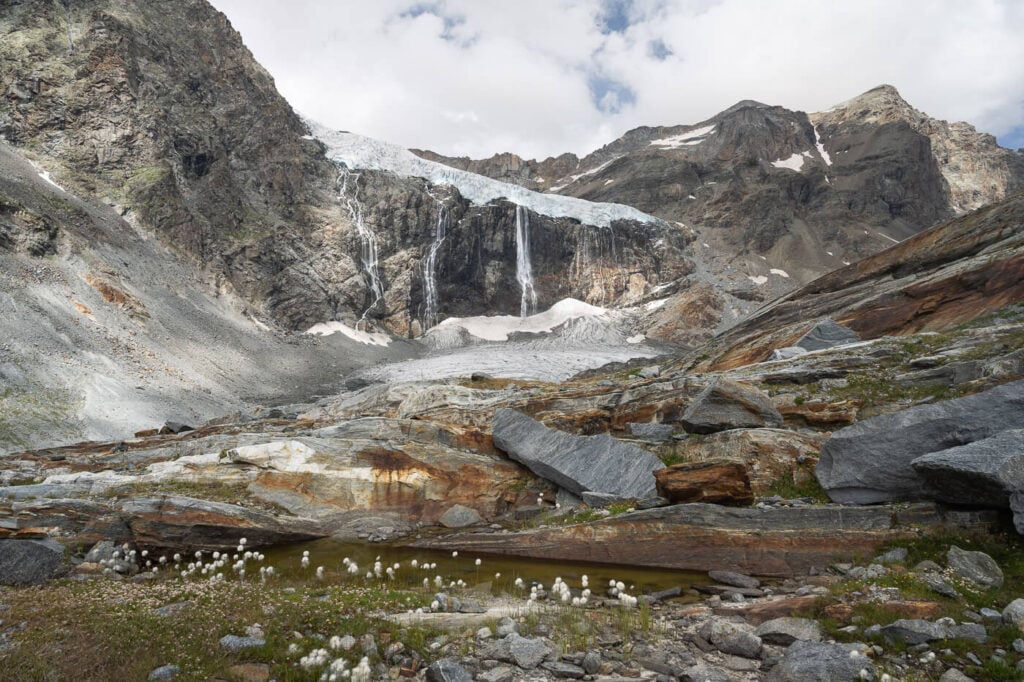
Upper viewpoint
Ibex at Ghiacciaio Fellaria
While I am no wildlife photographer, I do enjoy those few occasions when I get to photograph some. In that regard, the Fellaria glacier is a good location to photograph Ibex when they are around.
When I visited there was a small group roaming around the various viewpoints, as if they were enjoying the views and the sun like any other hiker in the area.
Obviously don’t try to approach them and keep a safe distance – they are still wild animals.
Anyway, that is just to say once more – if you have a telephoto lens one more reason to bring it, you won’t regret lugging its weight around on this hike.

Ibex at the Fellaria Glacier.


Video of the Hike
Last but not least, here’s a video of this hike. It’s all in there. The trail, the waterfalls, the glacier and the Ibex too!
Where to Stay
You can camp at the parking/barbecue area by the Campo Moro Lake. Camping is quite cheap, 9 euros for the day plus 2 euros for each additional day. there are two compost toilets available but no showers – it’s a parking lot after all. There also are a few tables with benches on the lawn.
I camped there in my van, but there were also other car camping as well as larger RVs. Camping with tents on the lawn in the barbecue area seems to be ok, there were quite a few tents there.
If you are looking for something more comfortable there are a few more options a little further down the road., like Rifugio Zola.
Additional Resources
- Check out my main page on Hiking in Italy
- If you want to watch an additional, informative, video about the History of the Fellaria Glacier, check this video on YouTube. It’s in Italian, but you can switch to auto-generated English subtitles.
Leave A Comment