Hike to Trolltunga and Trip Planning Tips, Norway
The Hike to Trolltunga is perhaps the most famous and well-known in all of Norway. Standing on the “Troll’s Tongue” is probably the most popular bucket list item and hike for anyone visiting the region or Norway.
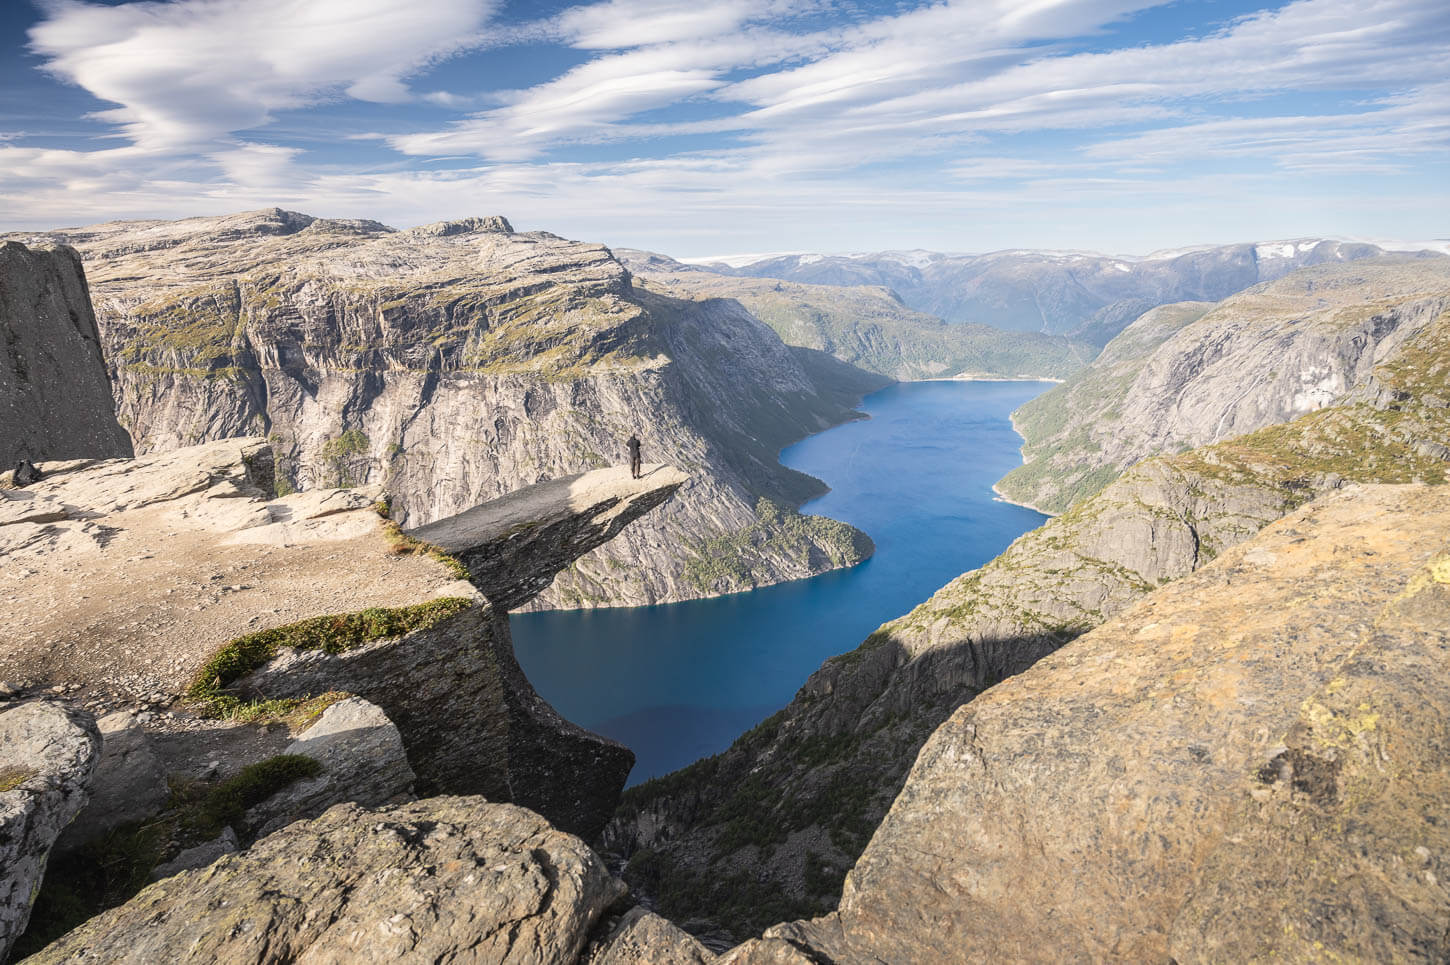
Trolltunga.
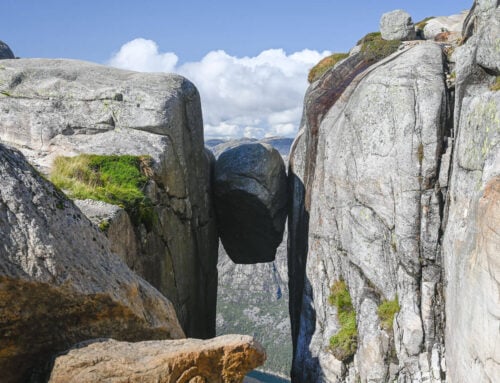
The Troll’s Tongue is a genuinely bizarre, unique rock formation. Not only that, the beautiful backdrop of Ringedalsvatnet lake and the surrounding mountains make it a truly beautiful location. And, along with Kjeragbolten and Preikestolen, it’s one of Norway’s most iconic rock formations.
Located at an altitude of 1,126 meters and 700 meters above Ringedalsvatnet, the wide-open panoramic views and the landscape around it are impressive. A great reward for the effort it takes to hike there.
Trolltunga
However, the hike is hard. The options range from 20 to 27km or more, and getting to Trolltunga requires some planning. Regulations, different parking areas, and transportation options – all have to be considered. It’s a bit confusing when you start to look at all the options, especially if you just want to hike up the mountain. So I’ll also add some tips on how I did the hike, and why.
But once you get there, it makes it all worth it!
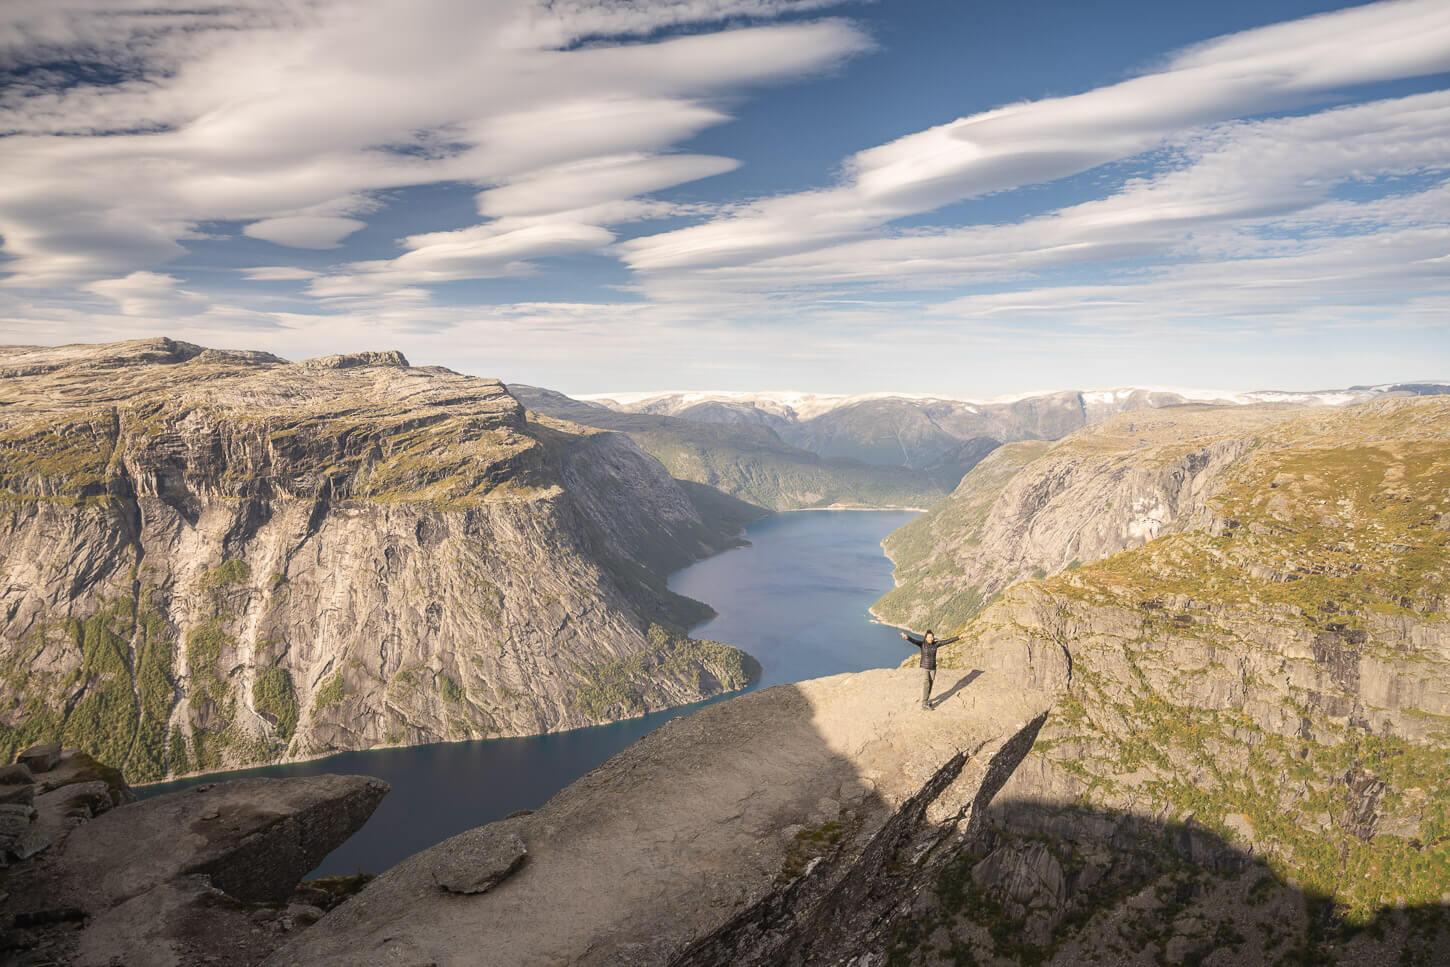
Random hiker happily enjoying Trolltunga.
Table of Contents
Overview of the Trolltunga Hike & Map
The hike is known to be quite hard and usually only possible from early June until October. The official opening dates are posted on the official Trolltunga Website, together with information about road conditions, closures, or other notices. Make sure to check it regularly in the days before your planned hike. Also, regularly check the Weather forecast for Trolltunga on yr.no.
Outside of the official hiking season, you can still visit Trolltunga, but you would need to hire a guide, and need to be prepared for Winter conditions.
Overall, the hike to Trolltunga is not very technical, but it’s long and strenuous. The total elevation gain from P3 (800m or 2,625 ft.) is considerable. That, in combination with the up and downhill sections, does put a strain on your legs.
Plus, the sudden change of weather that can happen can create a dangerous combination of factors you should be prepared for. It’s one of those places where it’s better to be overprepared – and always keep an eye on the forecast and weather conditions. And, despite its popularity, keep in mind it is a remote location.
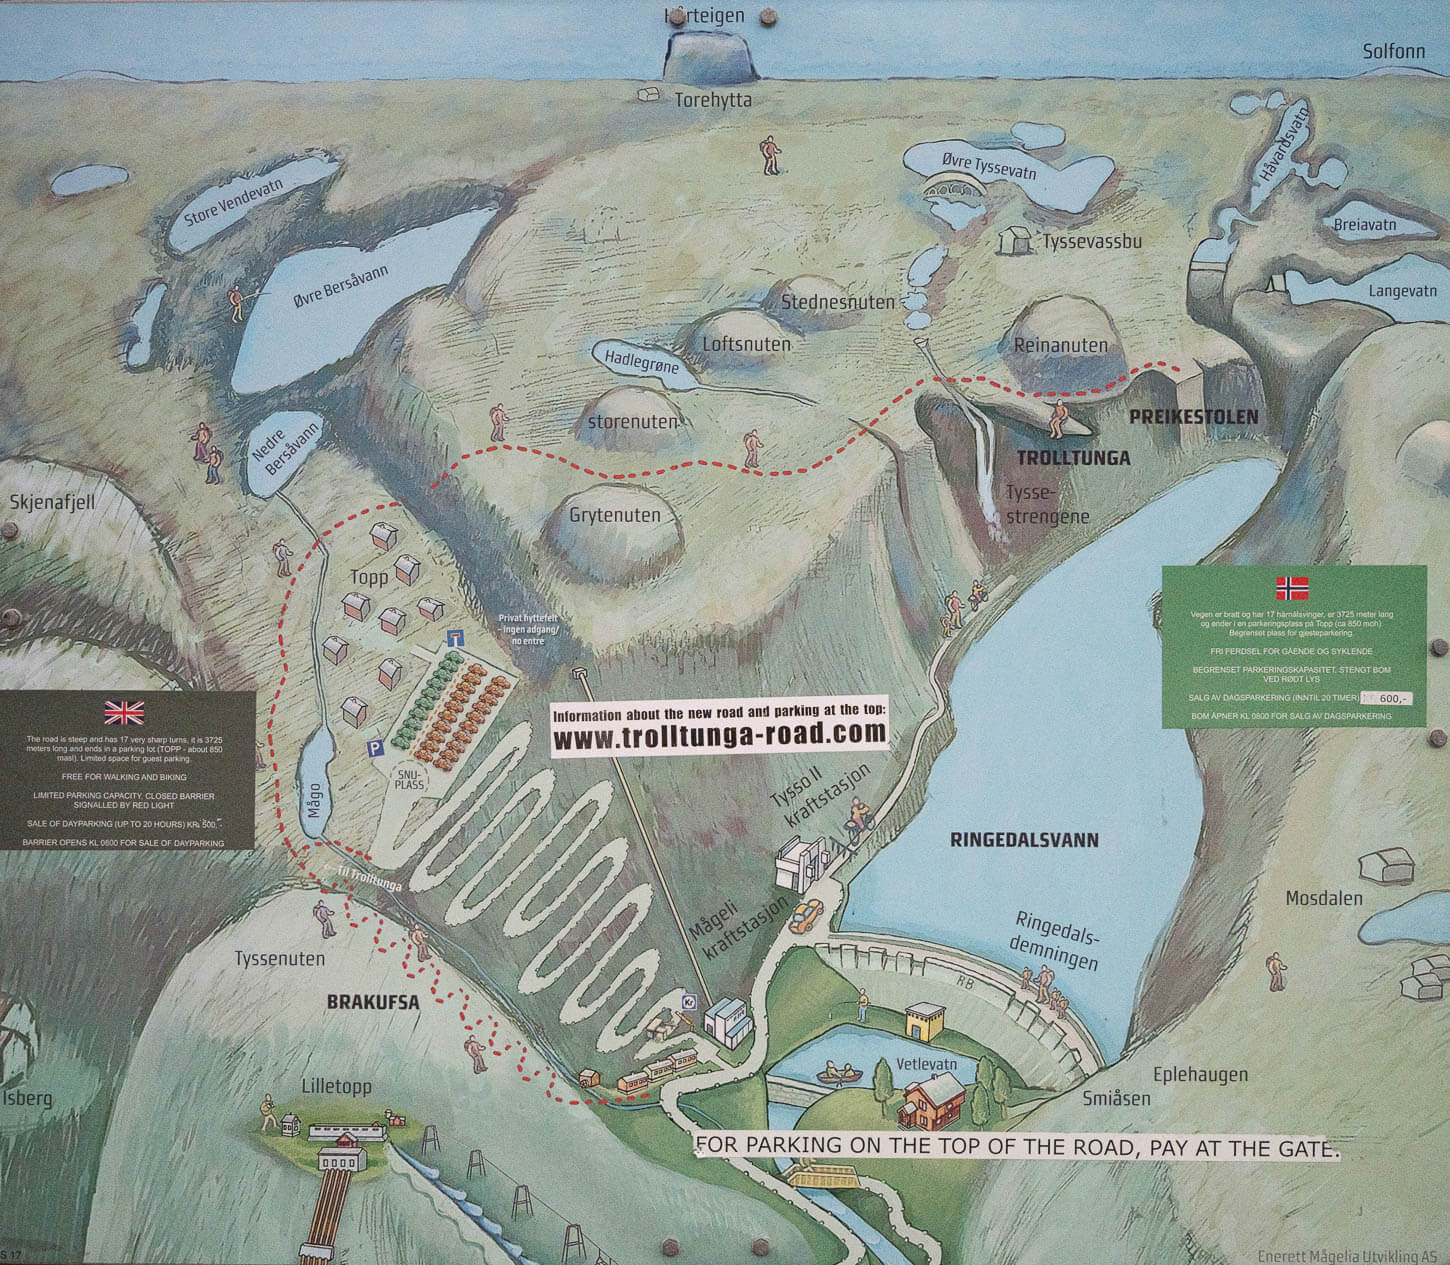
Overview of the Area, from a sign at P2. Note P2 is missing from this sign, and the parking area pictured here is P3.
Trolltunga Hiking options
There are also several ways you can hike this trail, and the most common are hiking from P2 Skjeggedal or taking the shuttle from P2 to P3 Mågelitopp and hiking from there. Here are the most common ways (based on the Strava hiking heatmap):
- From P3, at the arrival point of the shuttle from P2.
- From P2, hiking the paved road up the mountain to P3.
- From P2, hiking the old trail on the side of the mountain instead of the paved road.
From P2, the out-and-back hike is about 27 km, while from P3 Mågelitopp is about 20km. Starting the hike to Trolltunga from P3 Mågelitopp instead of P2 also saves about a total of 500 m of elevation gain. Where you start the hike would also depend on how you are planning to get there (see next section), as there are some restrictions on the access road.
Here’s what I did: on the way up, I took the shuttle from P2 to P3, hiked to Trolltunga from there, then walked back down via the paved road to P2 on the way back. I originally wanted to hike the “old” path from P3, but with bad weather forecasted for later, I took the shuttle to have more chances of getting to Trolltunga in nice weather.
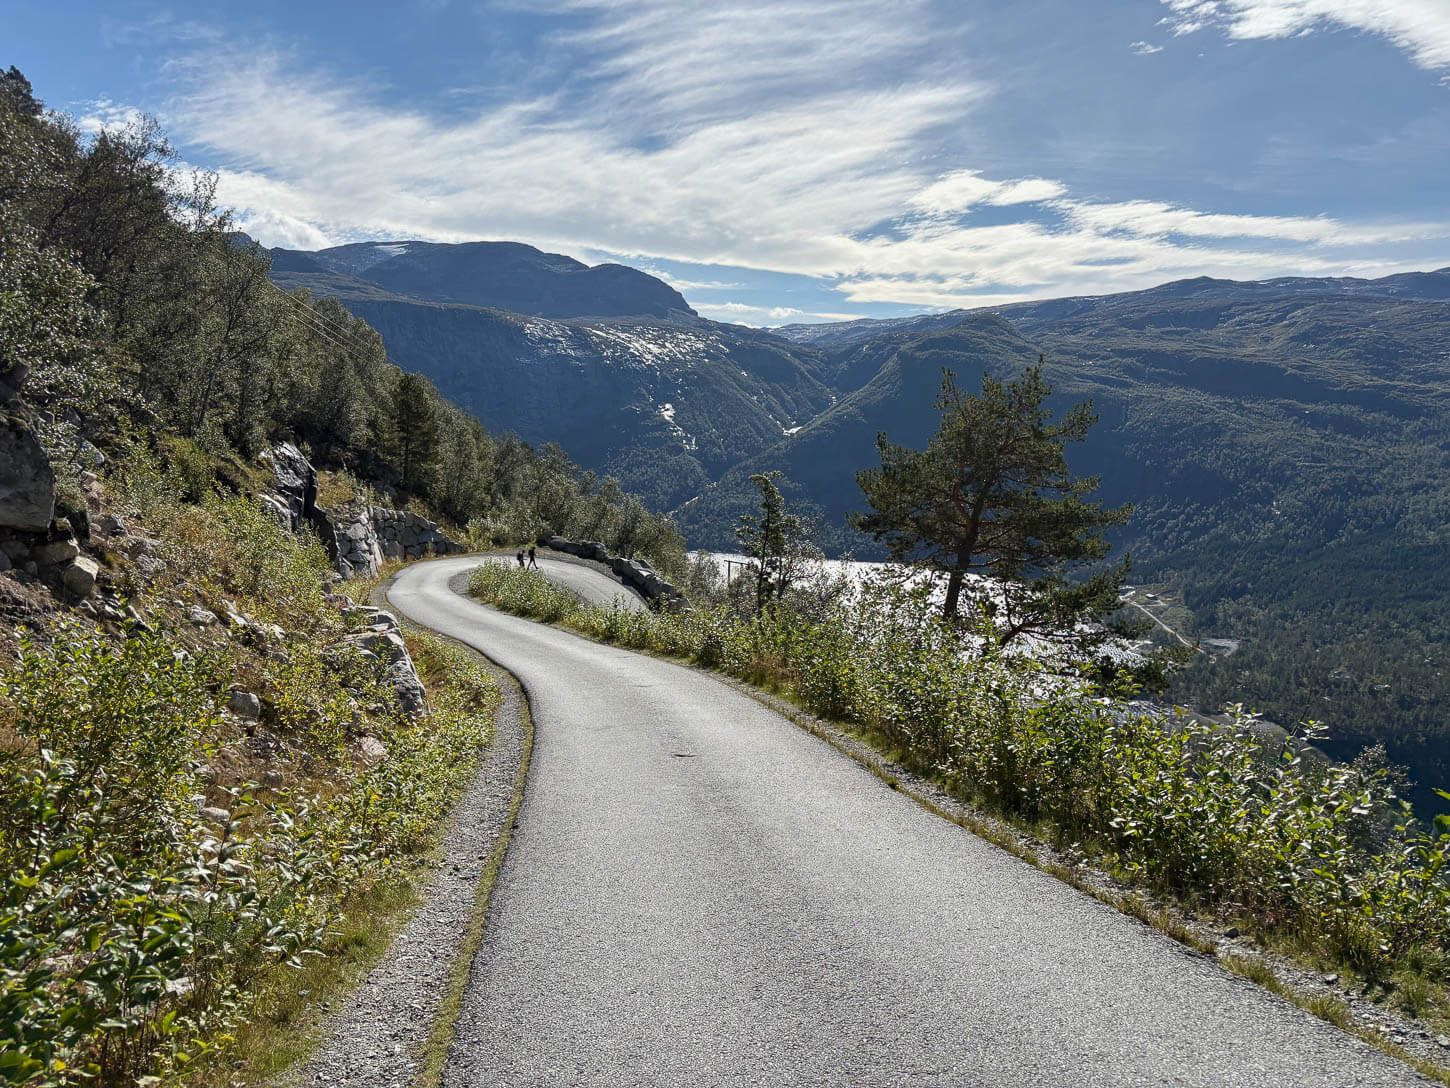
The paved road that connects P2 to P3.
Do note that the bus back from P3 to P2 runs a bit of an erratic schedule. It can’t be booked or paid for in advance, and it seems to be running either on a “wait for enough people” or “whenever” schedule. Here are the details of the Hike to Trolltunga from P3.
| Max Altitude | 1,210 m (3,969 ft) |
|---|---|
| Distance (P3) | 19.6 km (12.17 miles) |
| Elevation gain | 800 m ↑ / 800 m ↓ (2,625 ft.) |
| Hike time | 05:00/ 07:00 Hours |
| Hike Difficulty | Hard |
Here is the map of this hike. You can download the GXP file for free from the activity linked below.
How to get to Trolltunga, Planning the Hike & Tips
To hike to Trolltunga, the first thing to do is to get to the town of Odda. Located along the scenic Road 13, it’s about a three-hour drive from Bergen, three and a half hours from Stavanger, and about five hours from Oslo. The access road, Skjeggedalsvegen, is located in Tyssedal.
If you are planning on driving as close as possible to the trailhead, there are two main things to consider:
- Vans/RVs are not allowed beyond the P1 Tyssedal area. Beyond that point, it’s a narrow, winding mountain road, sometimes exposed to cliffs, and there may not be enough space to maneuver larger vehicles if you come across a shuttle bus coming from the opposite directions
- As above: It’s a narrow, winding mountain road, sometimes exposed to cliffs. If you don’t have experience on such roads, it’s a good idea to take the bus instead.
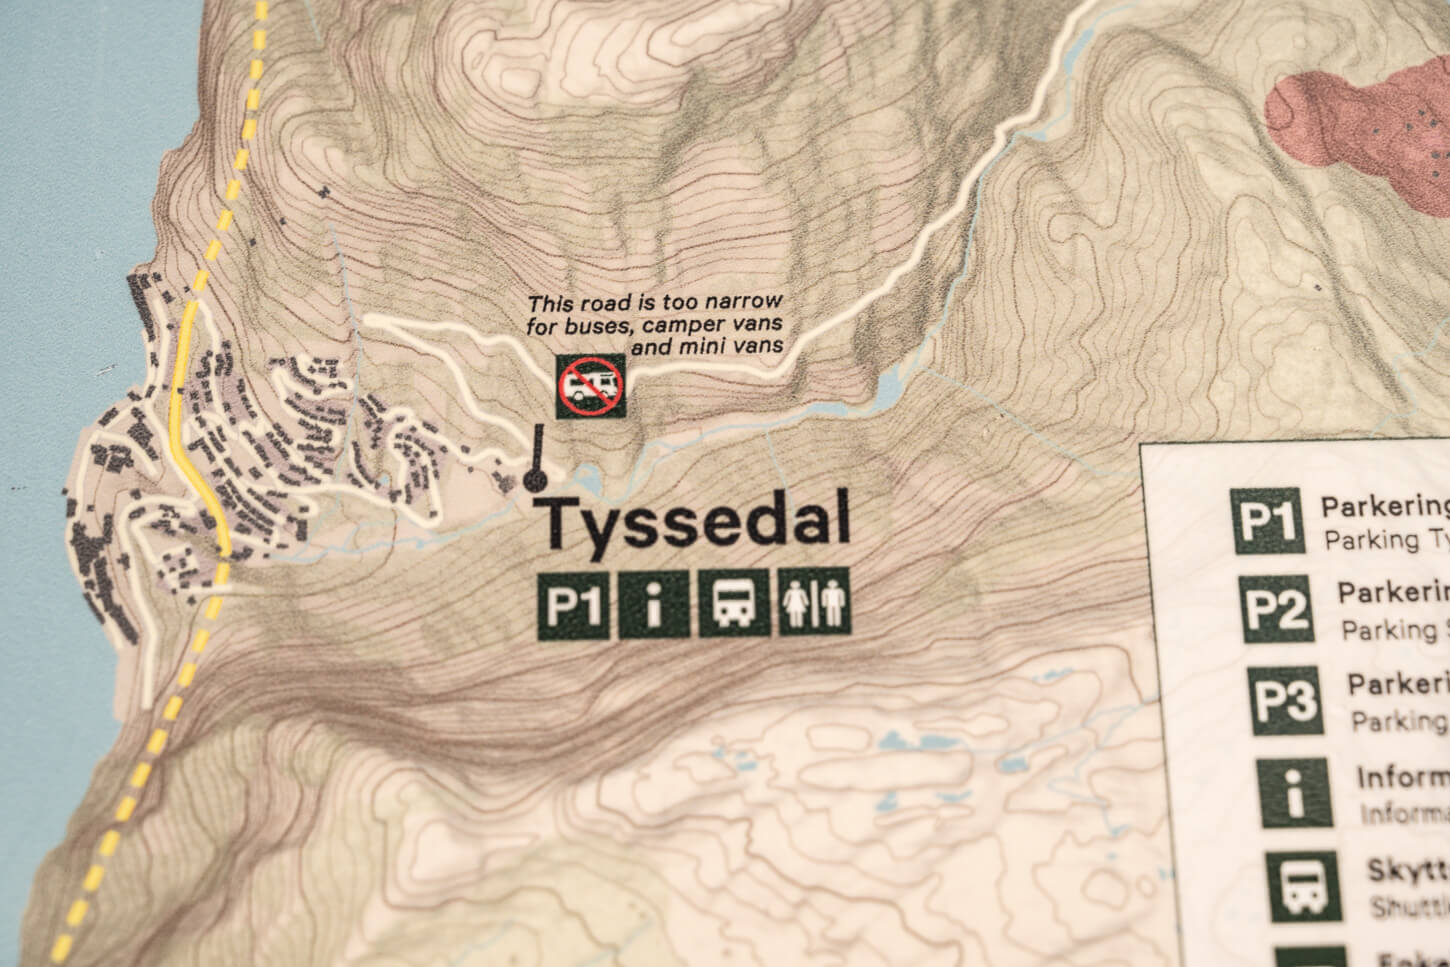
Private vans, campers, and small buses are not allowed beyond P1 Tyssedal.
With that clarified, here are the main options to get to the Trolltunga trailhead.
- Drive to P2, Skjeggedal, the biggest parking area, and either hike up or take the other shuttle to the P3 Area.
- Drive to P3, Mågelitopp. This requires advanced reservation, and it is a road with additional height limits.
- Take the Shuttle bus that leaves from Odda. There are several stops in Odda, starting from the Campsite. This was my choice
- Take the Shuttle from P1 at Tyssedal. This is the most popular option for vans/RVs, as neither is technically allowed on the road beyond the P1 parking.
If you want to drive to P2, get there early in the morning or late in the afternoon, in case you are planning to spend the night in the mountains. If you find the P2 parking full, you need to drive back down to P1 or Odda and take the next shuttle.
Shuttle Bus rides can be pre-purchased via the official site.
My Personal recommendation: take the shuttle up to P2 either from Odda or from P1 Tyssedal. Also, if you have back-to-back hikes on the previous and next day, you may want to save the climb up and take the shuttle from P2 to P3. If you have a more relaxed schedule, consider hiking up either the paved road or the old trail, which is still accessible.
What I did was: I booked two nights at the Odda campsite. I arrived in my van the evening before the hike, took the first shuttle up from the Trolltunga campsite at 5:45 AM, and stayed there one more night on the day of the hike.
Trolltunga Trailhead at the Shuttle drop-off area near P3.
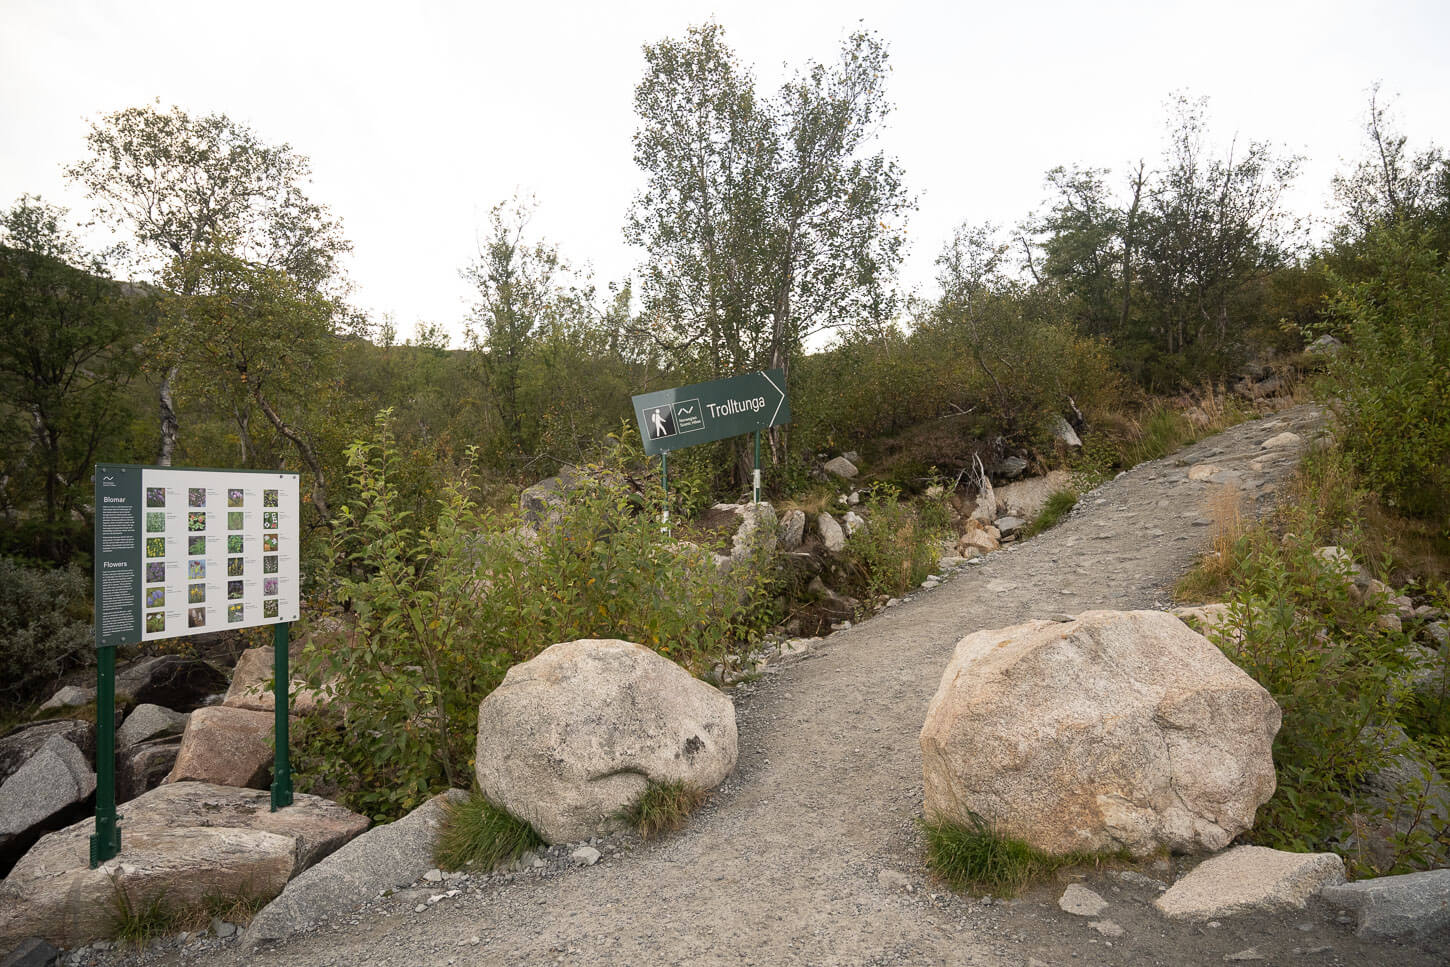
The Trolltunga Hiking Trail
If you take the shuttle up the paved road, you will probably arrive a little earlier than the first hikers who also arrived with the shuttle from Odda. Not much of a difference, to be honest, it was about five/ten minutes earlier. The shuttle will leave you at the last turn before reaching the upper parking area.
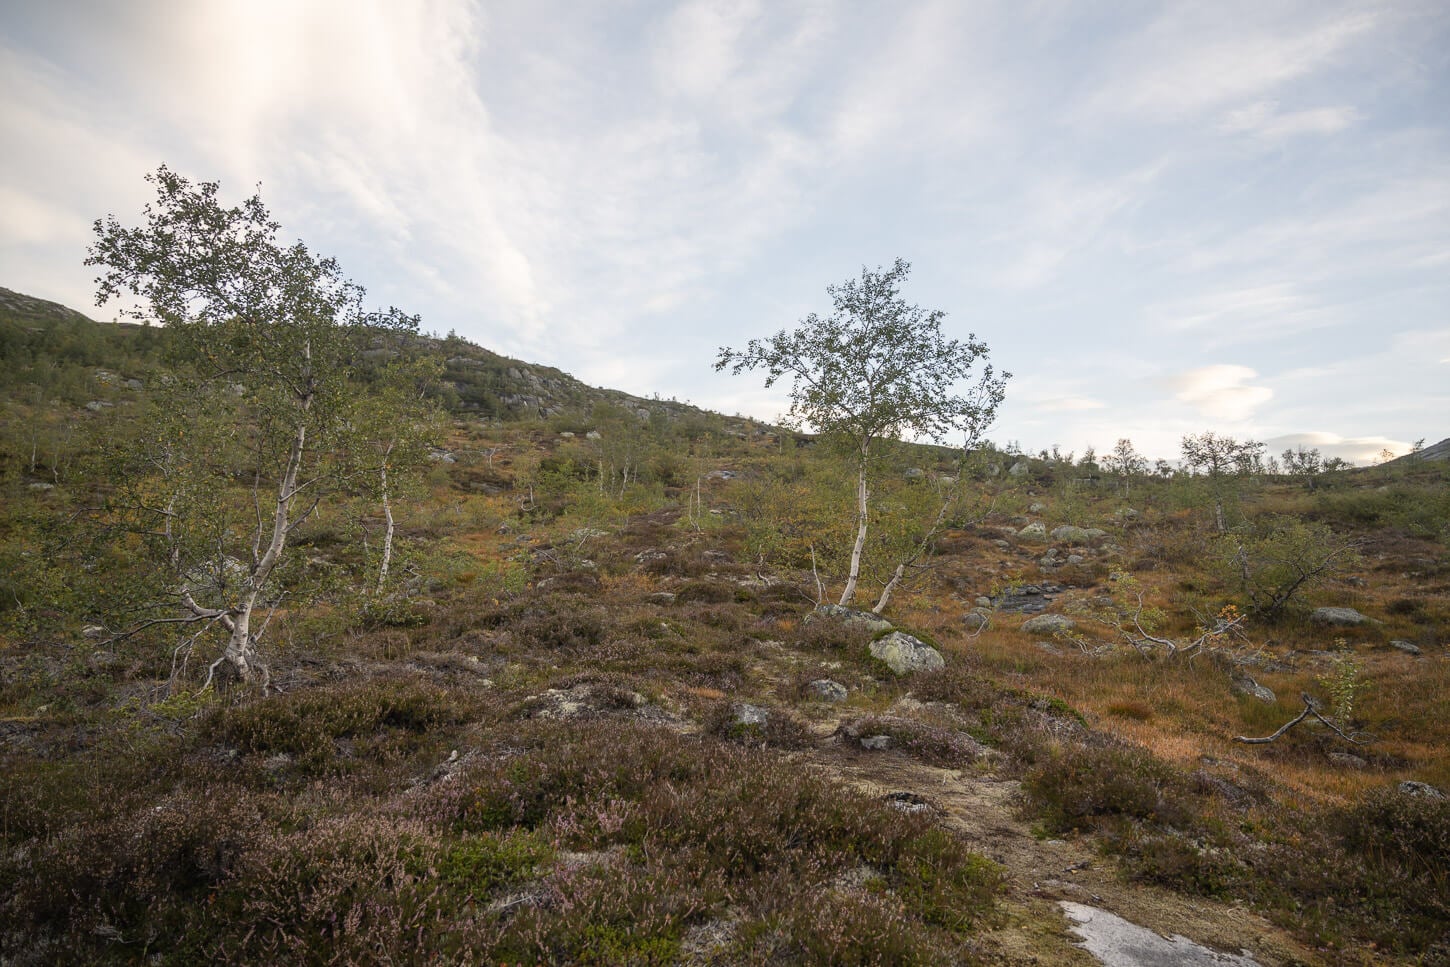
From there, the trail will cross a high plateau where there are also some private summer houses/huts. For the first kilometer or so, the trail slowly gains elevation before reaching the first relatively short climb that leads to another high plateau area.
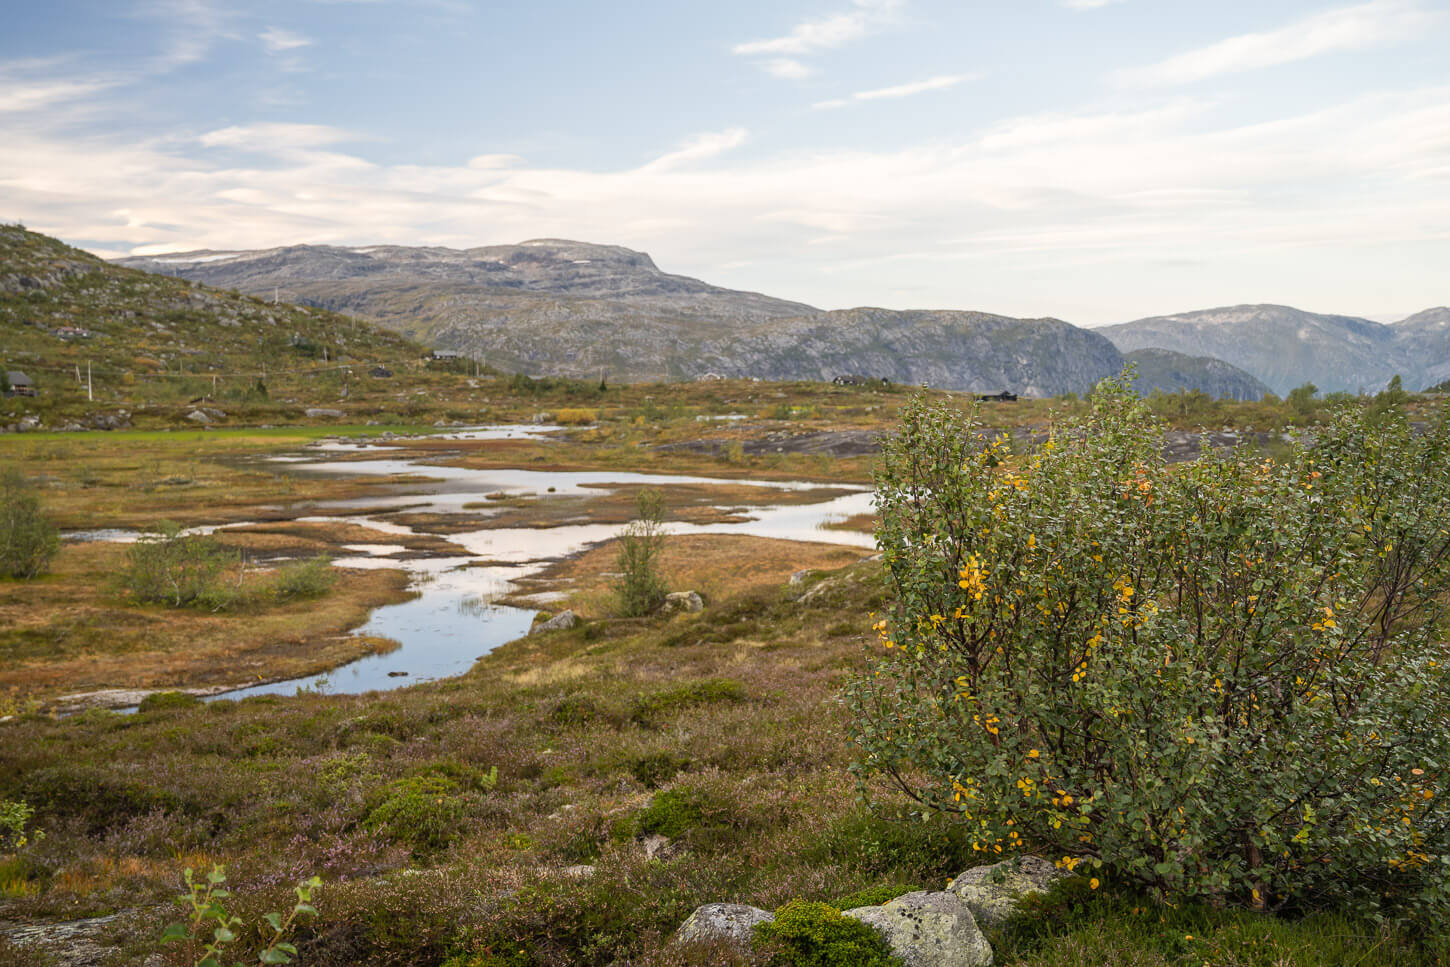
The first section crosses a small plateau.
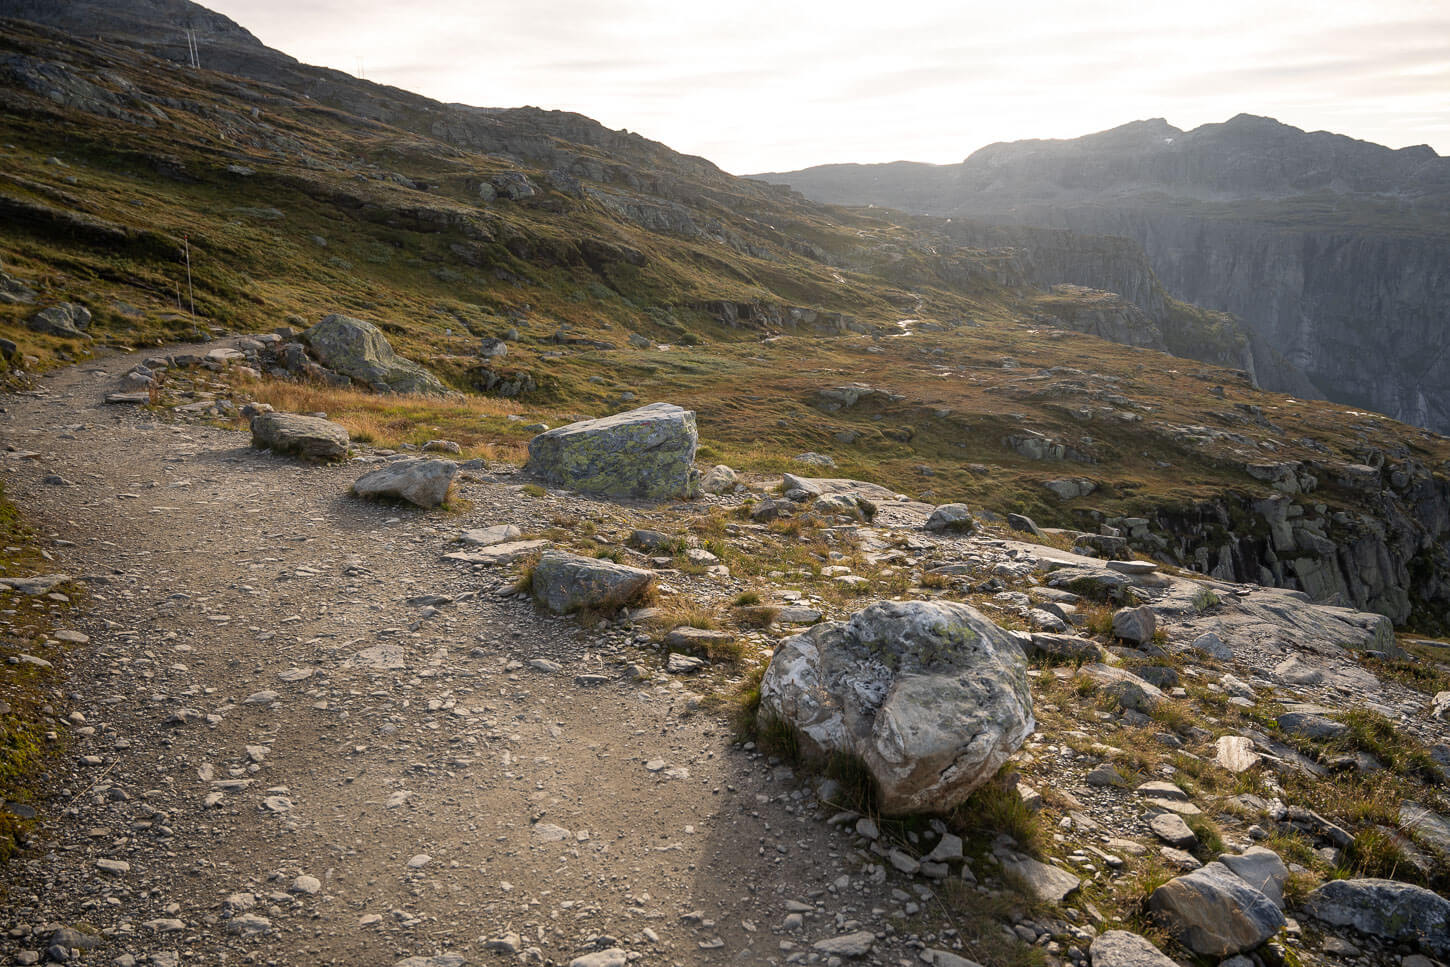
After the plateau, there’s a relatively steep uphill section that leads to another plateau.
On the plateau, the trail widens
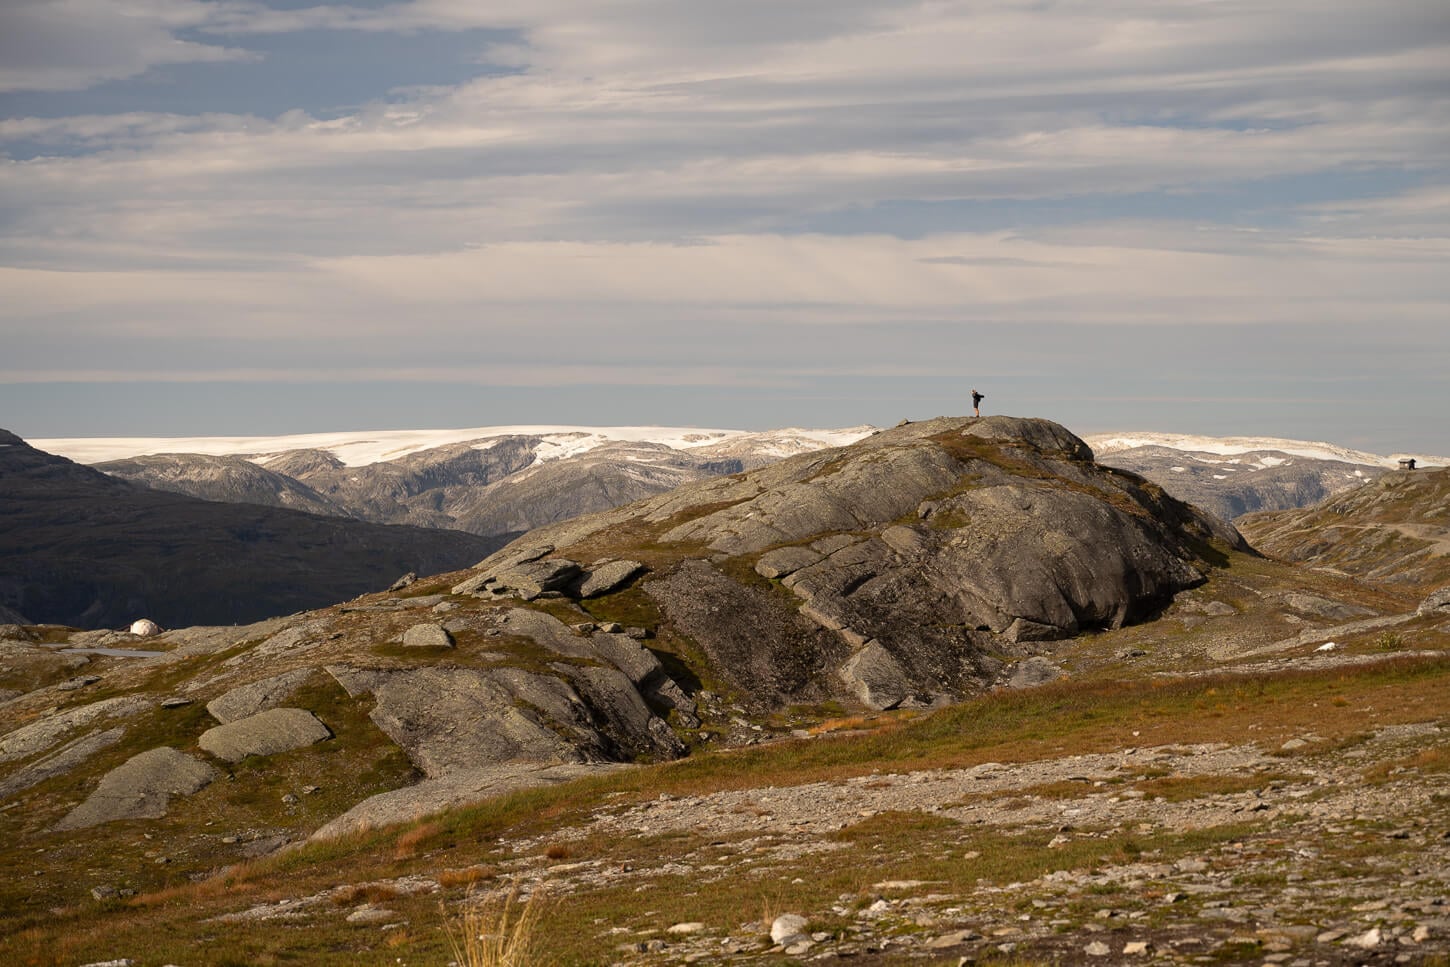
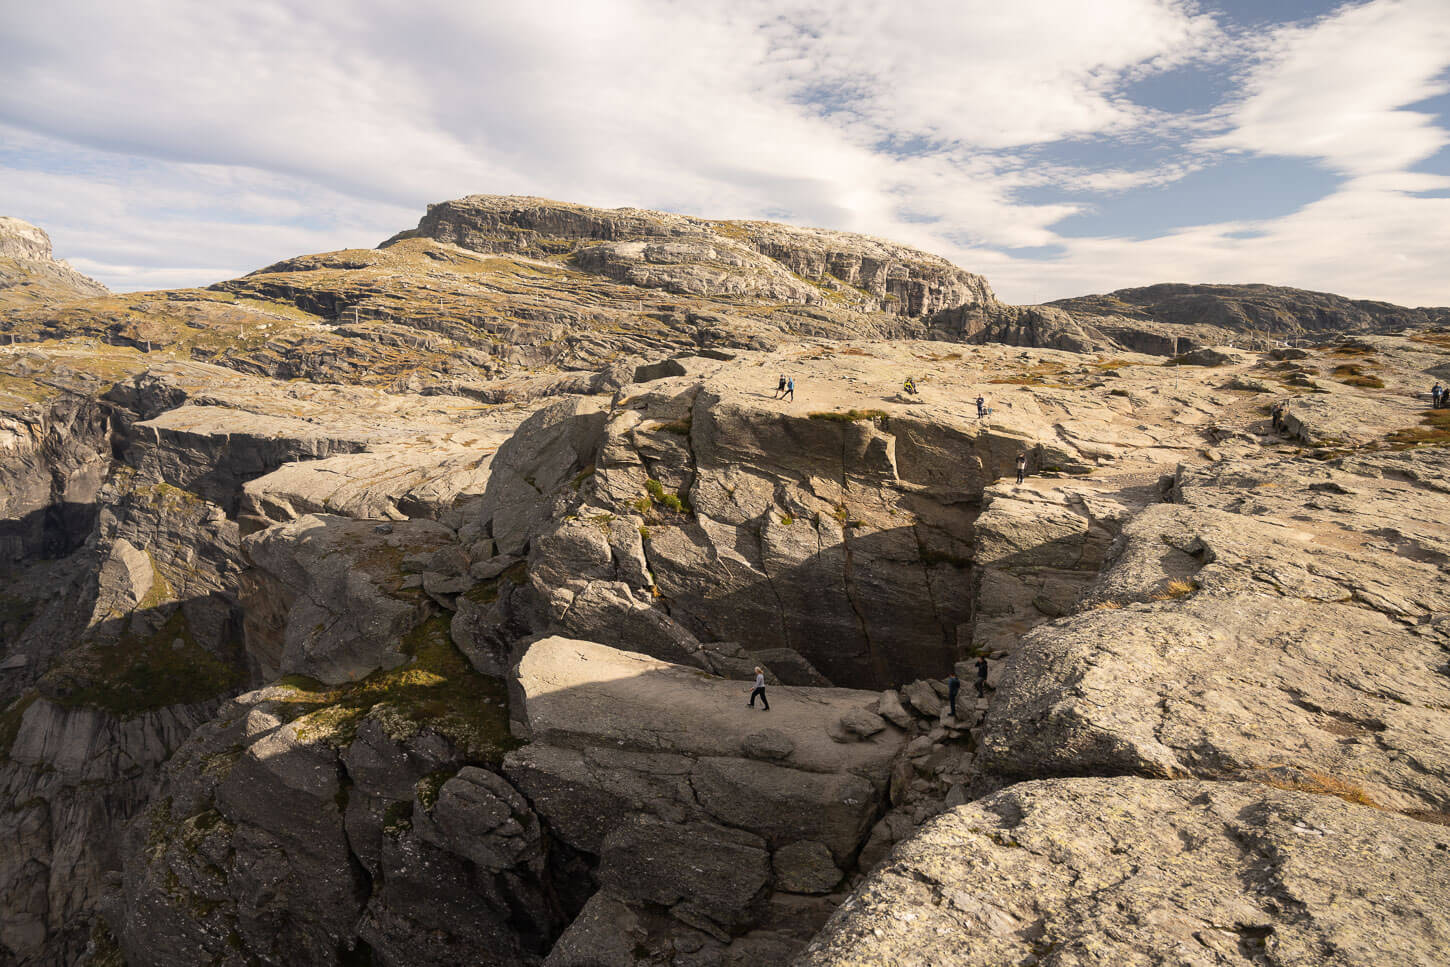
From this point onwards, the trail continues to follow the plateau with several smaller uphill and downhill sections. The high plateau around the area dominates the views. Apart from that, initially, you will also have some views of the Glaciers in the Folgefonna Park in the distance to the west.
For long stretches, the Trail is rather wise.
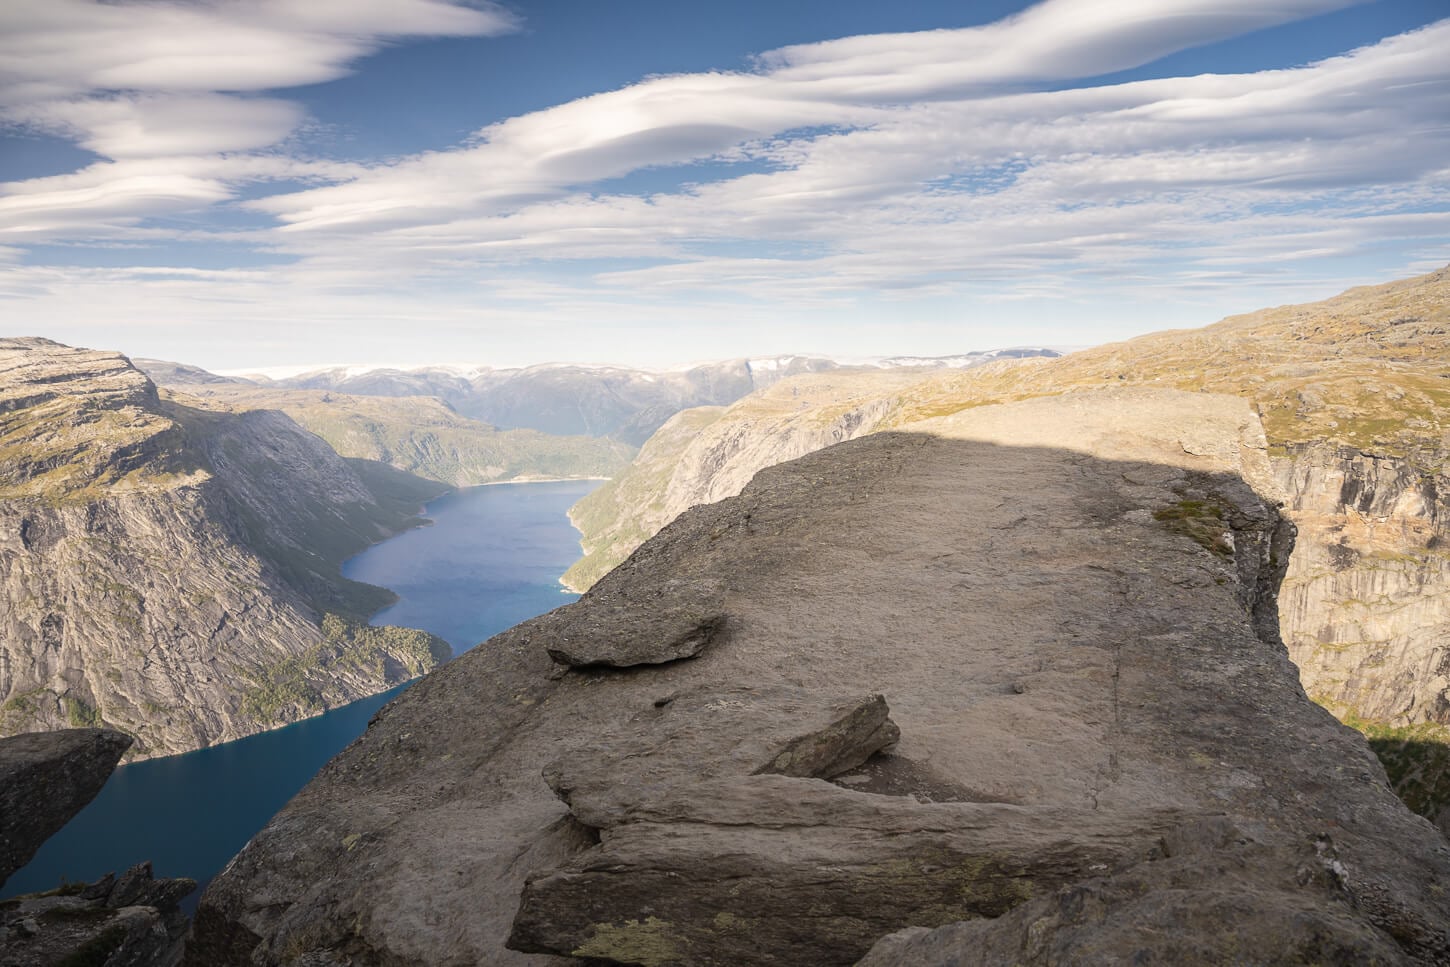
For the most part, that’s how the trail continues, between up and downhill sections, small lakes, and rocky paths. About halfway through the trail, there are also some lookouts where you can enjoy the views of the steep walls of the mountains around the lake, and their sheer vertical drops to the lake.
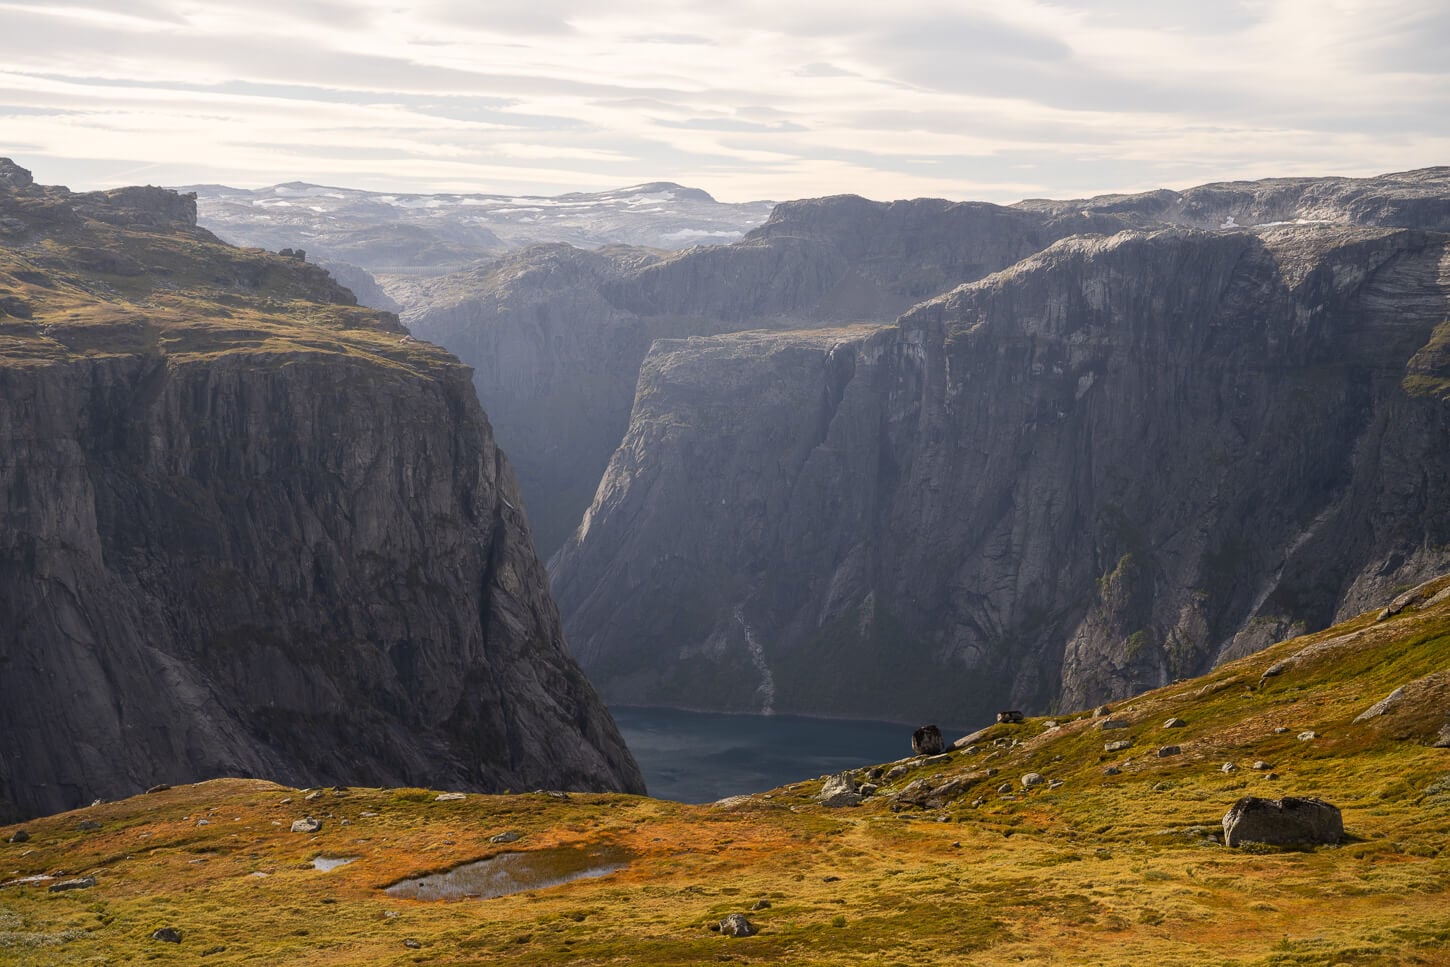
View of the cliffs around Ringedalsvatnet.
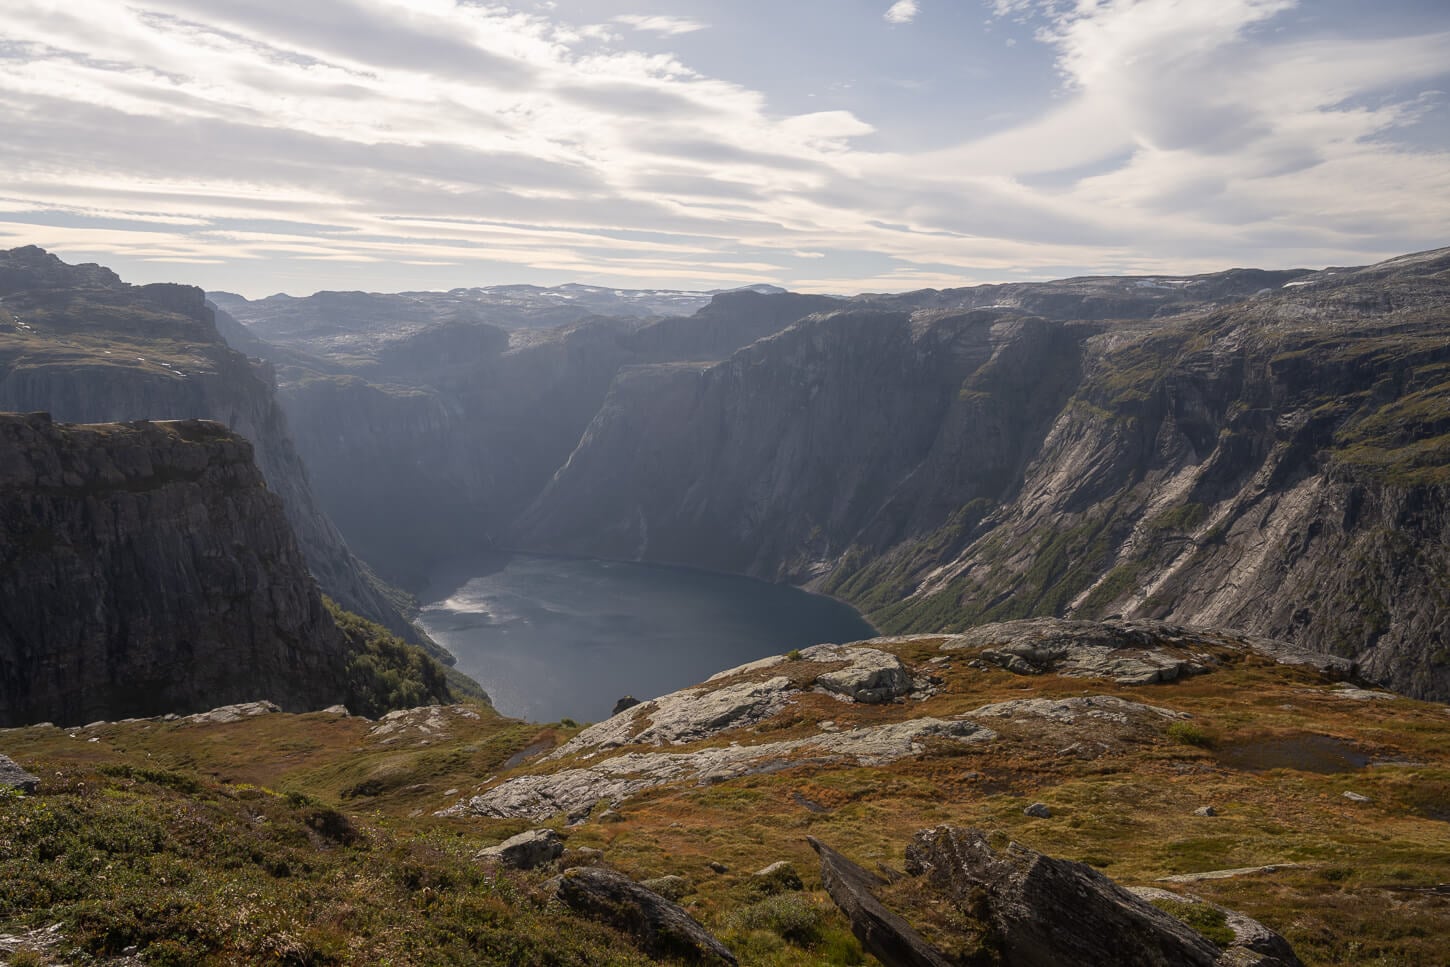
Ringedalsvatnet.
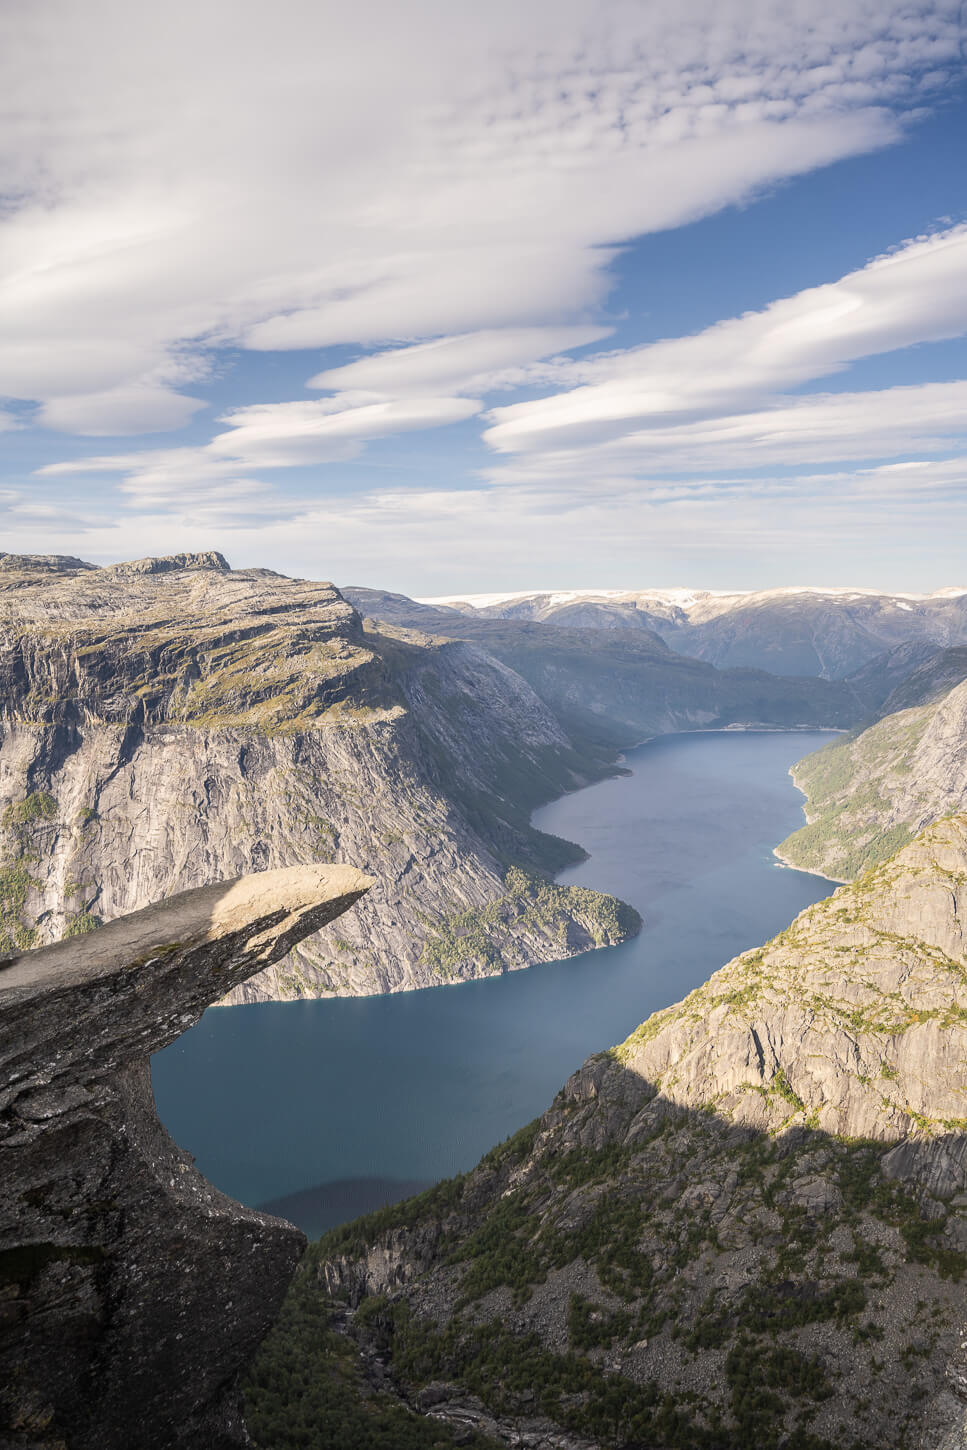
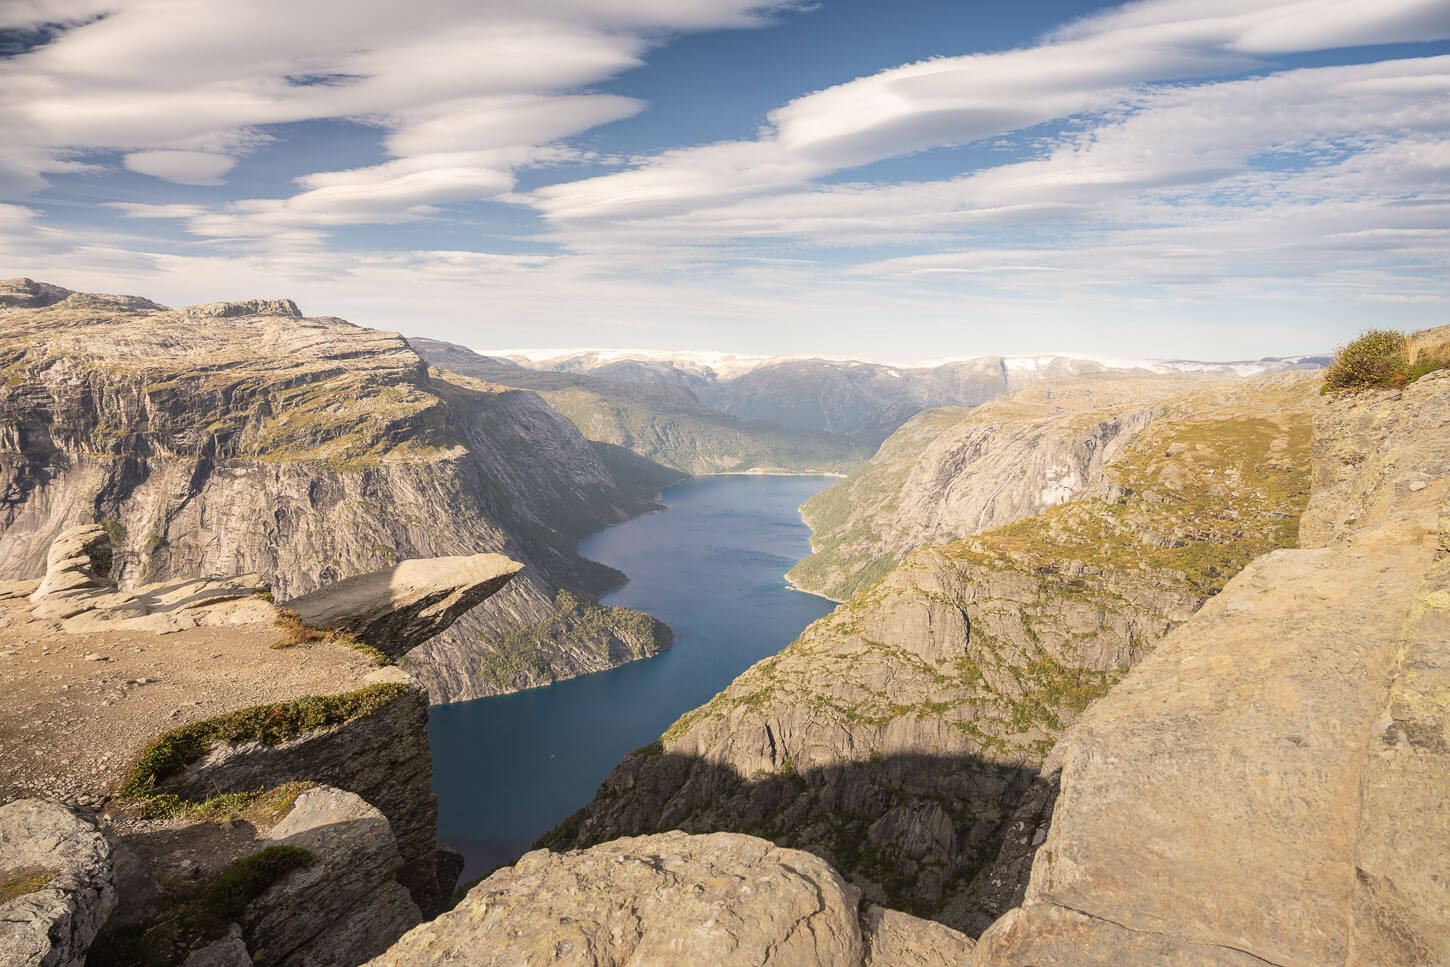
Then, as you approach the last emergency shelter on the trail and hike past it, Trolltunga will come into view. It’s only visible once you are essentially upon it, as the trail ends at the main lookout from where the classic shot is taken.
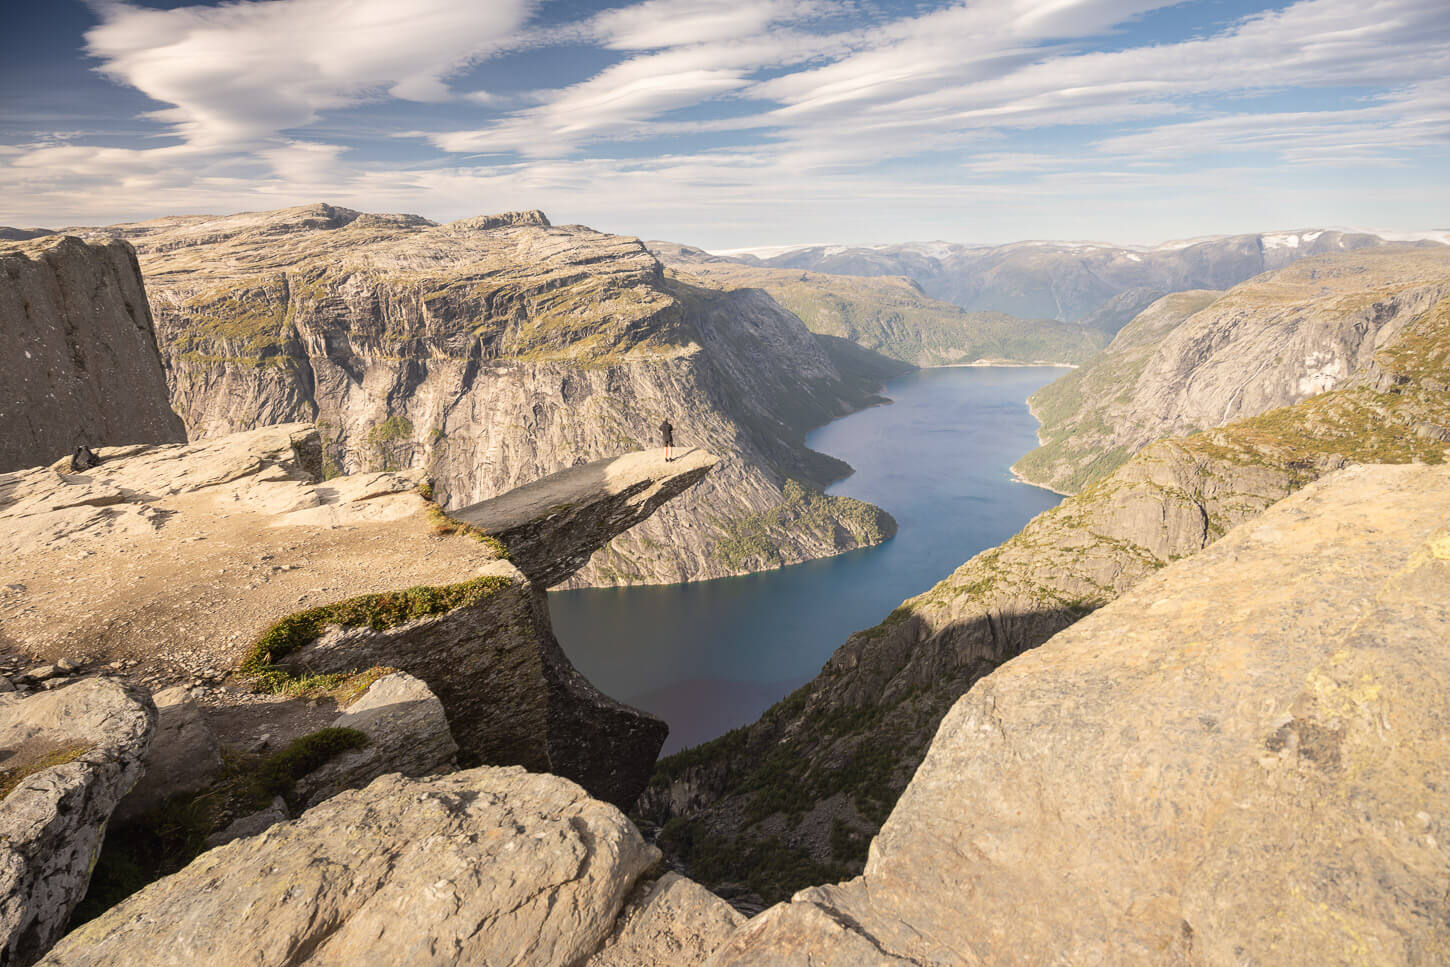
Trolltunga appears as you approach the main viewpoint.
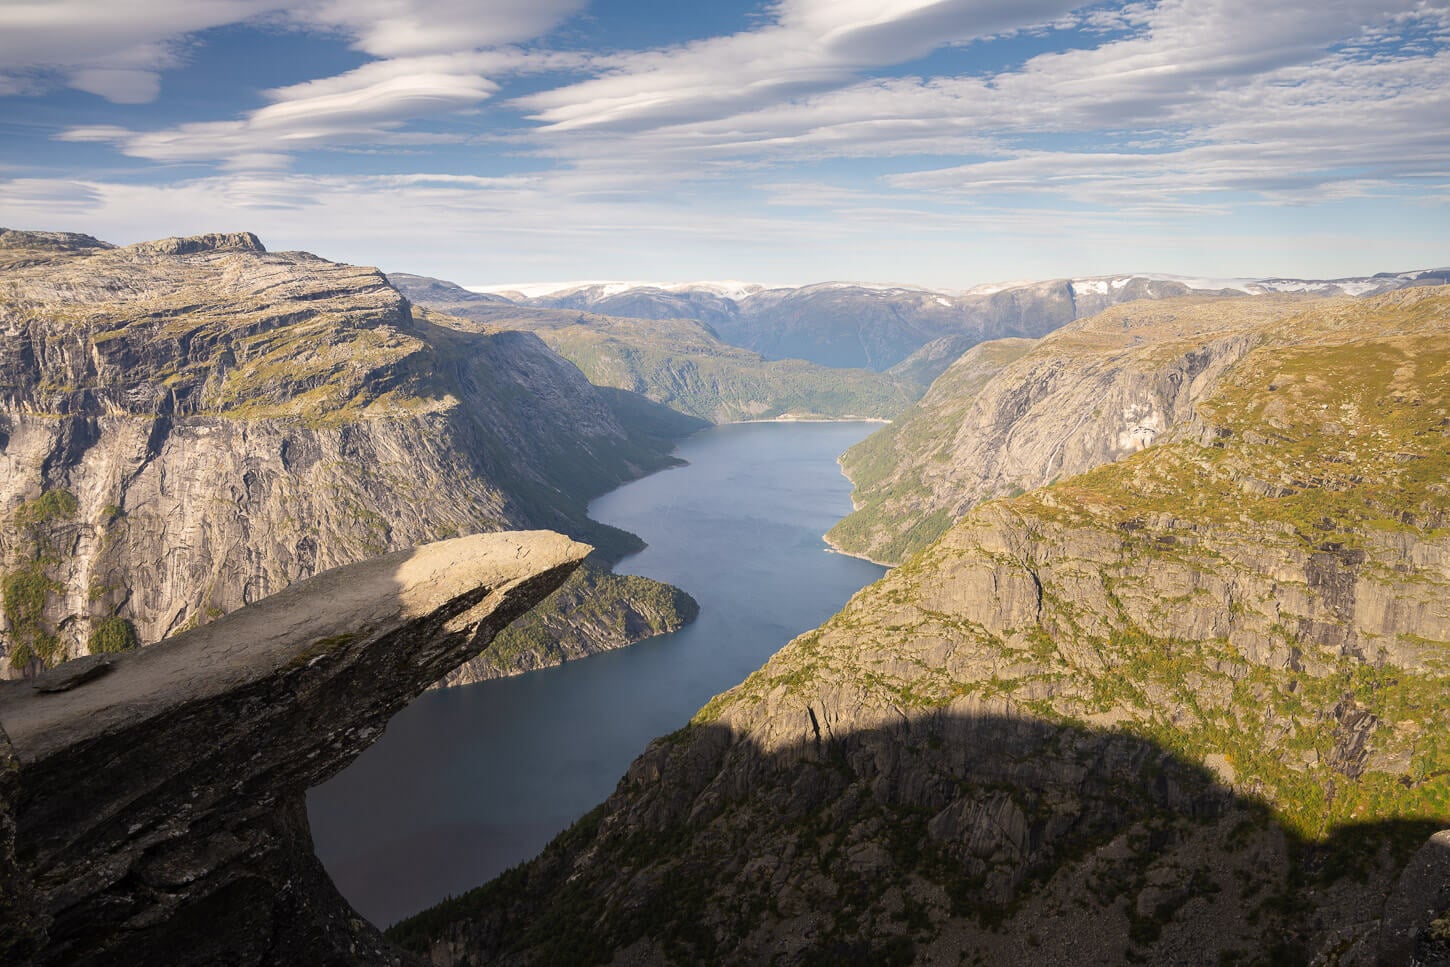
Trolltunga viewed from the main viewpoint.
Standing on Trolltunga and Viewpoints
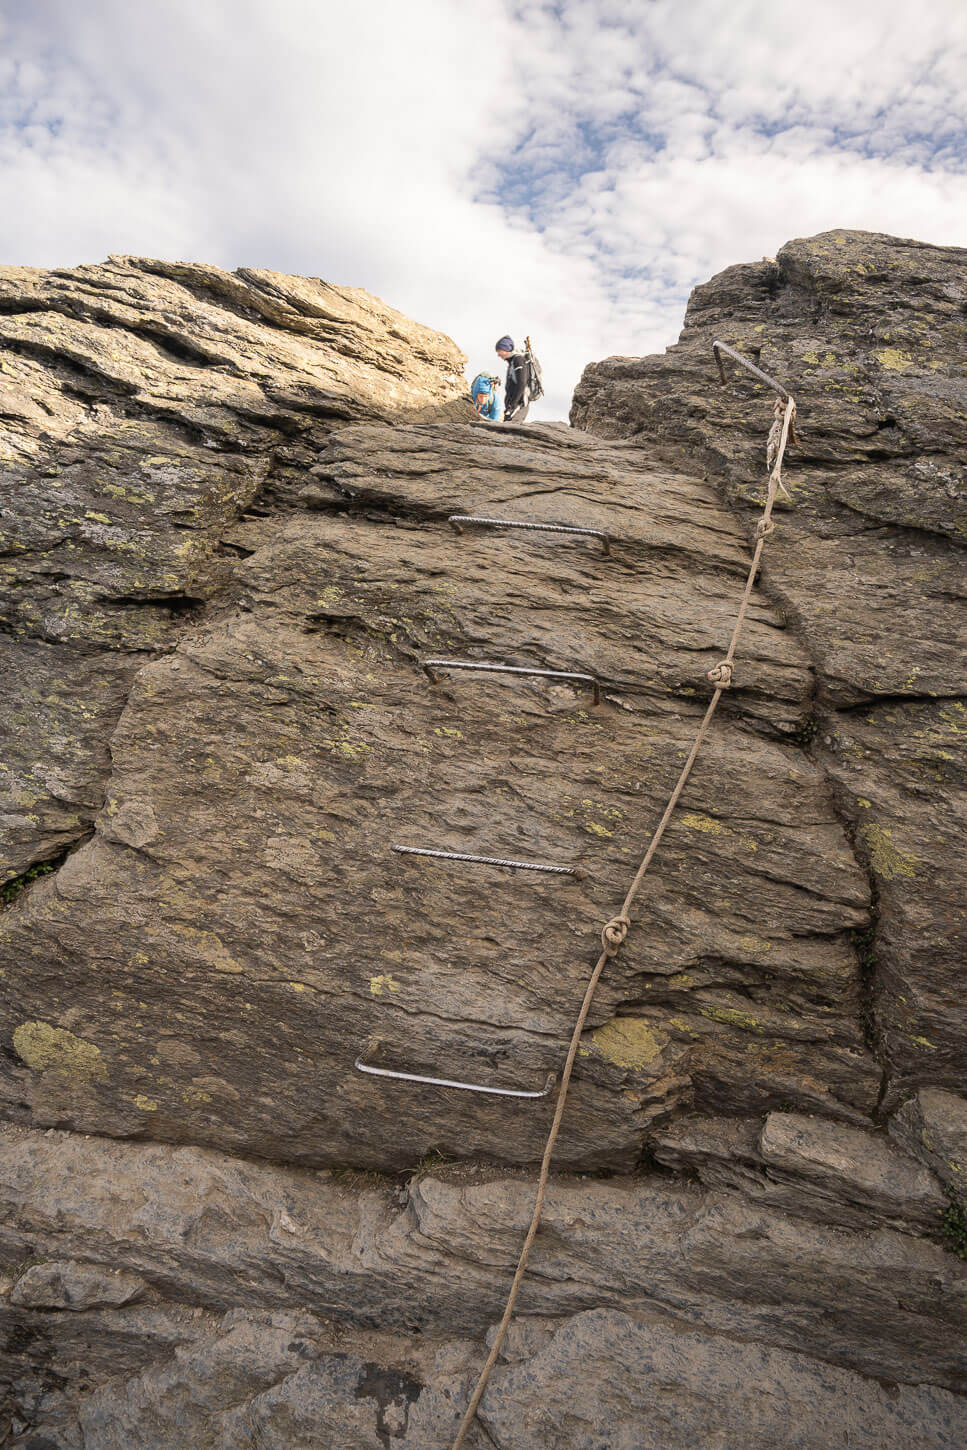
If you arrive early in the morning and there’s no queue, you may want to step on Trolltunga right away. To do that, you will have to climb down some metal steps bolted into the rockface. There’s also a rope you can use for balance.
It’s not as bad as it looks, and it’s probably 2.5/3 meters in total.
Once down, you are already on that rocky outcrop that is Trolltunga, and you can walk toward the top of the tongue. It’s rather wide too, but it obviously requires massive care. And it obviously is no place for anyone suffering from heights.
The access point viewed from below
Stepping on Trolltunga.
The way out is the same as the way in; there’s no other way around.
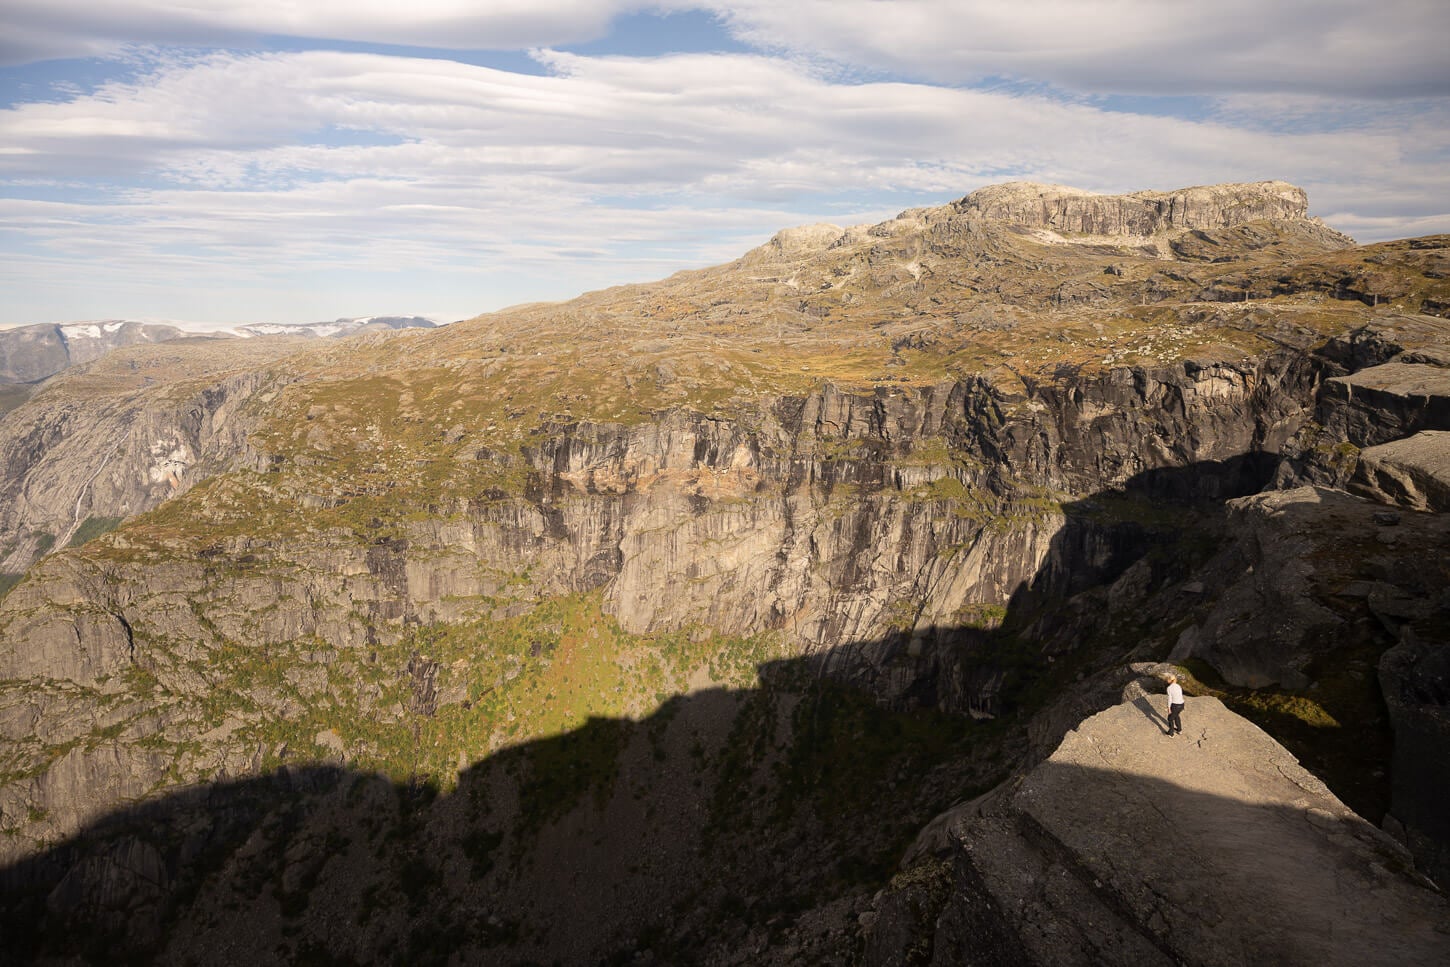
However, you can also walk behind and on the opposite side of the main Trolltunga viewpoint. You rarely see any photos of Trolltunga from that viewpoint, also because it looks nothing like the epic landmark view. Literally.
It looks like a random, anonymous rocky outcrop from the opposite side of the rock. I have included those views too, as I had never seen them online when I was preparing my hike.
Trolltunga from above.
Trolltunga, viewed from the opposite side of the main lookout.
Trolltunga Photos and Photography Tips
First off, the photo everyone will likely want to take at Trolltunga – standing on the Troll’s tongue. People will take turns to stand on the rock, and this is generally respected by everyone. By that, I mean it’s unlikely anyone will step in on your shot. A very respectful queue will form around the main area, with everyone waiting for their turn.
If you are solo or in two, wanting to have your shot taken, you will have no issue finding someone willing to take a shot for you. It was actually quite common.
And the general position from where the classic photo is taken is where you see those people standing above Trolltunga, on the higher plateau. The area is rather wide, so there’s also plenty of space to move around and look for slightly different compositions.
Camera Lenses For Trolltunga
In terms of lenses: all the photos in this post were taken with a 24-70m full frame lens. That’s the only one I lugged up the mountain on this hike. It worked well 90% of the time, but I wish I had a wider lens. Probably at least 18mm for Trolltunga. Nothing you can’t work with moving around a bit, but for my personal preferences, a little wider might have worked better.
Also, perhaps a little longer if you swat to work with Lens compression with the “human element” on Trolltunga and the vast background. In that sense, for me, 70mm was enough.

Photo taken at 51mm, full frame.
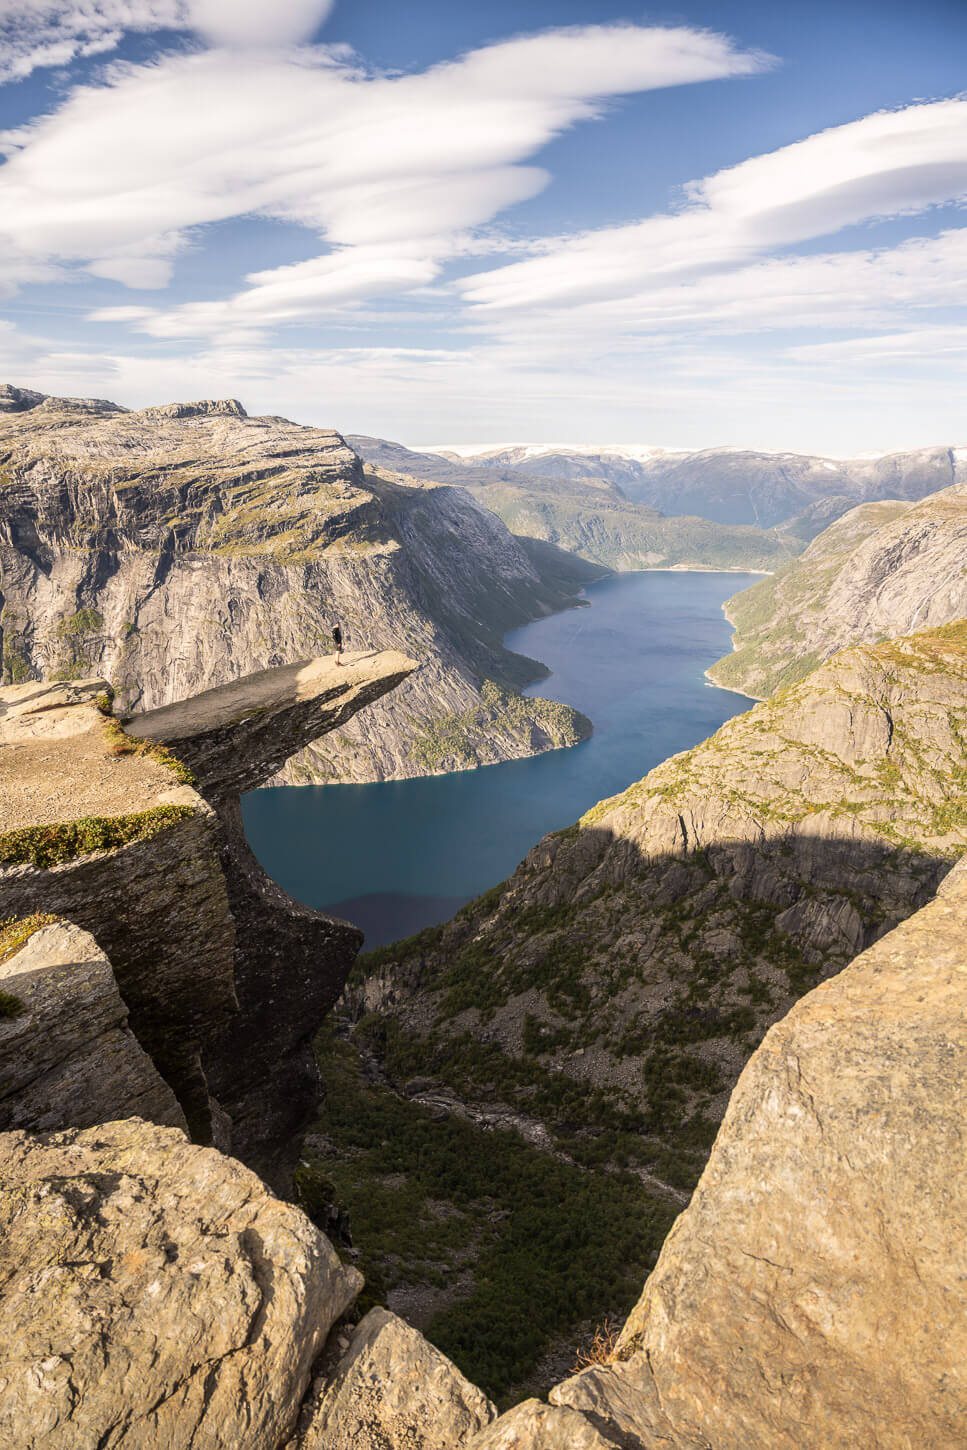
Photo taken at 24mm, full frame.
24mm, landscape orientation.
What I would have done differently
So what would I have done differently? If I had the opportunity, I would have hiked there for sunset, stayed the night, and left after sunrise. That would have allowed me to capture both Sunset and Sunrise.
Actually, sunset and the afternoon golden hour would be the main priority. When the sun moves toward the west, you can have some front and sidelight instead of the backlight of the morning.
I could not make it work this time around, as clouds and rain were forecast later that day, but otherwise that would have been my choice. If you can, I’d recommend that.
For reference, I took these photos on September 8th, at about 10 AM.
Video of the Hike
Here is also a short video of the hike to Trolltunga, with more views of and from the trail.
Where to stay
Again, if you can, stay up on the mountain. Within the limits of the Allemannsretten, and of course, within the local regulations and restrictions, camping is forbidden in some areas. All you need to know to camp along the Trolltunga trail can be found here on the official Trolltunga website.
If a night in the mountains is not feasible, Odda would be the most obvious choice. I stayed two nights at the Trolltunga campsite in Odda, where I left my van. That worked well, as you have a place to come back to and don’t have to pay for additional parking. Facilities are ok, but the place is beautiful, especially the lakeside area.
Apart from the campsite, Odda has no shortage of accommodation types, but best to book in advance in high season.
Additional Resources
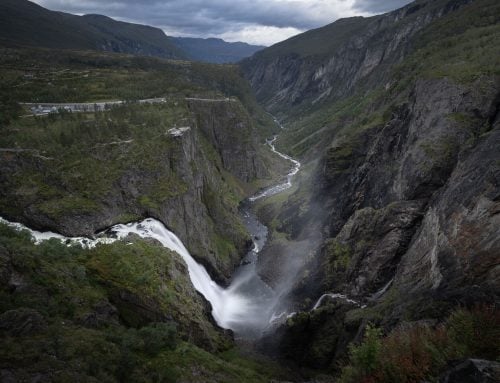
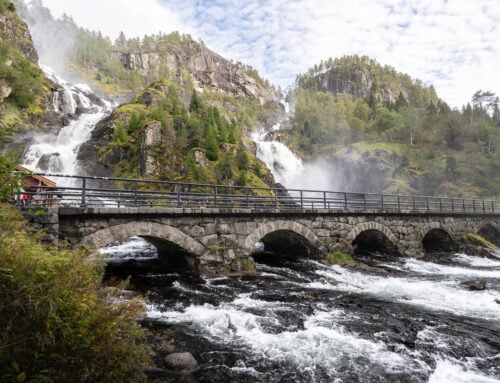
- Check out the beautiful waterfall Låtefossen if you are in the area. It’s just a short 15-20 minute drive south of Odda.
- Check out (many) more Hikes in Norway, with Maps!


Leave A Comment