Base Torres Hike, a Classic Sunrise Hike, Patagonia, Chile
The Base Torres Hike is one of the classic sunrise and Day hikes in Patagonia. The viewpoint at the base of the “Torres” (Towers in English) offers a unique view of one of the most beautiful landmarks in Patagonia.
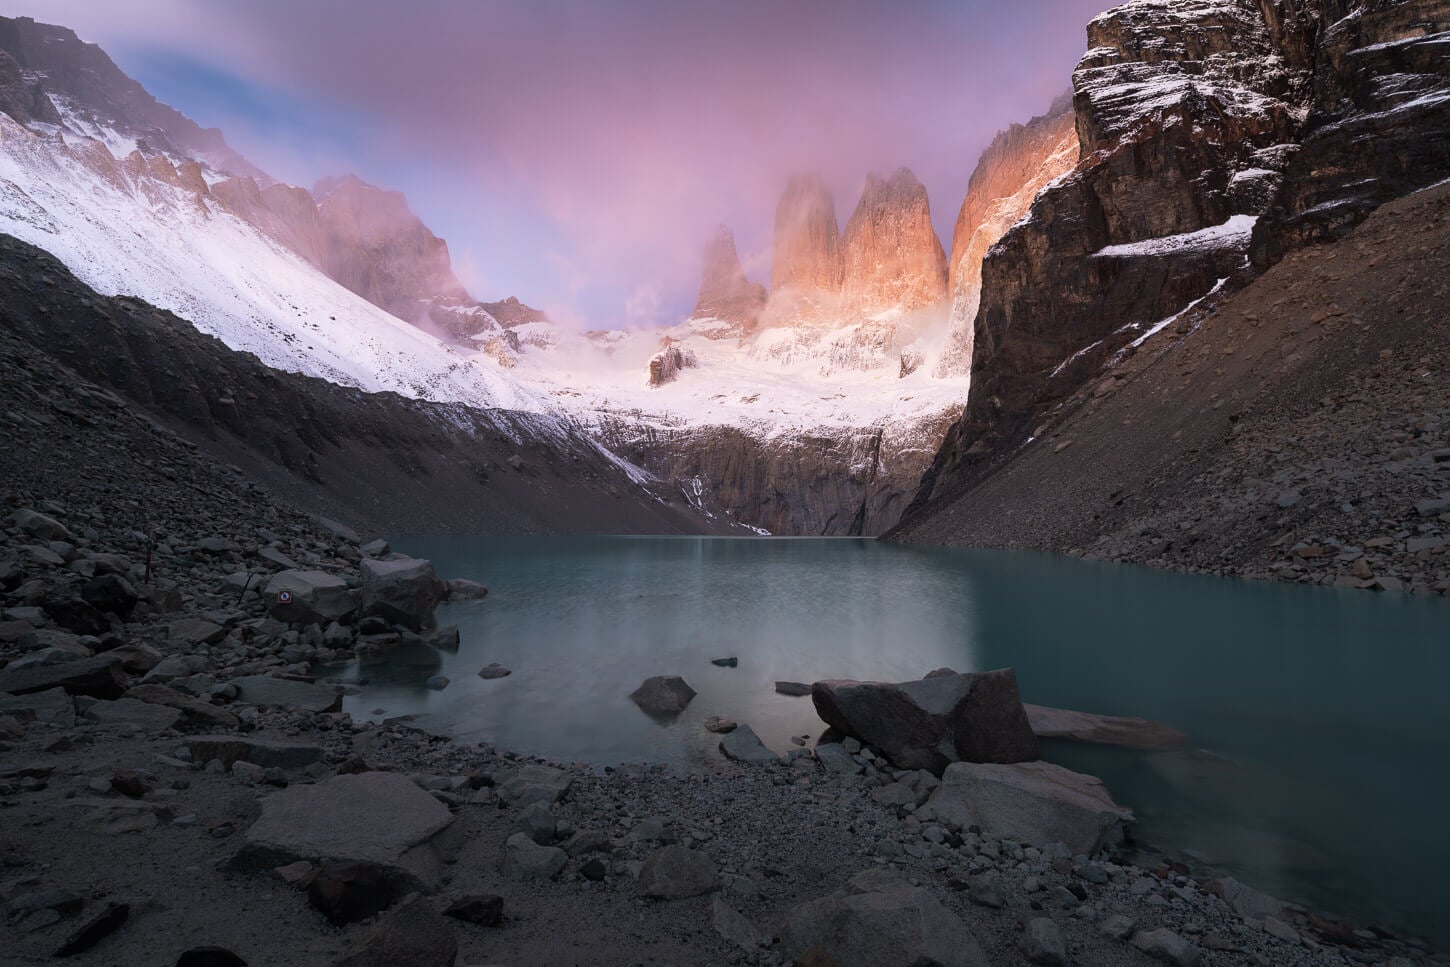
Mirador Base Torres at Sunrise.
While the hike to The Base Torres viewpoint is quite hard, with a total of 22km/13.6 miles and 1,280 meters / 4,199 feet of elevation gain, the view of the Torres is a great reward for anyone who can make it up there.
The base Torres is also a classic Sunrise hike, even though the trail is officially closed at night – more on that below. It can be done as part of the larger trek circuit around Torres del Paine, or as a day hike, both equally popular.
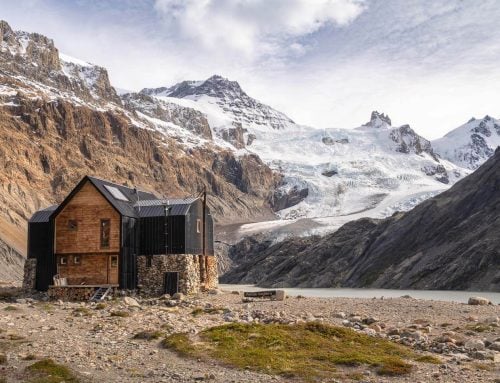
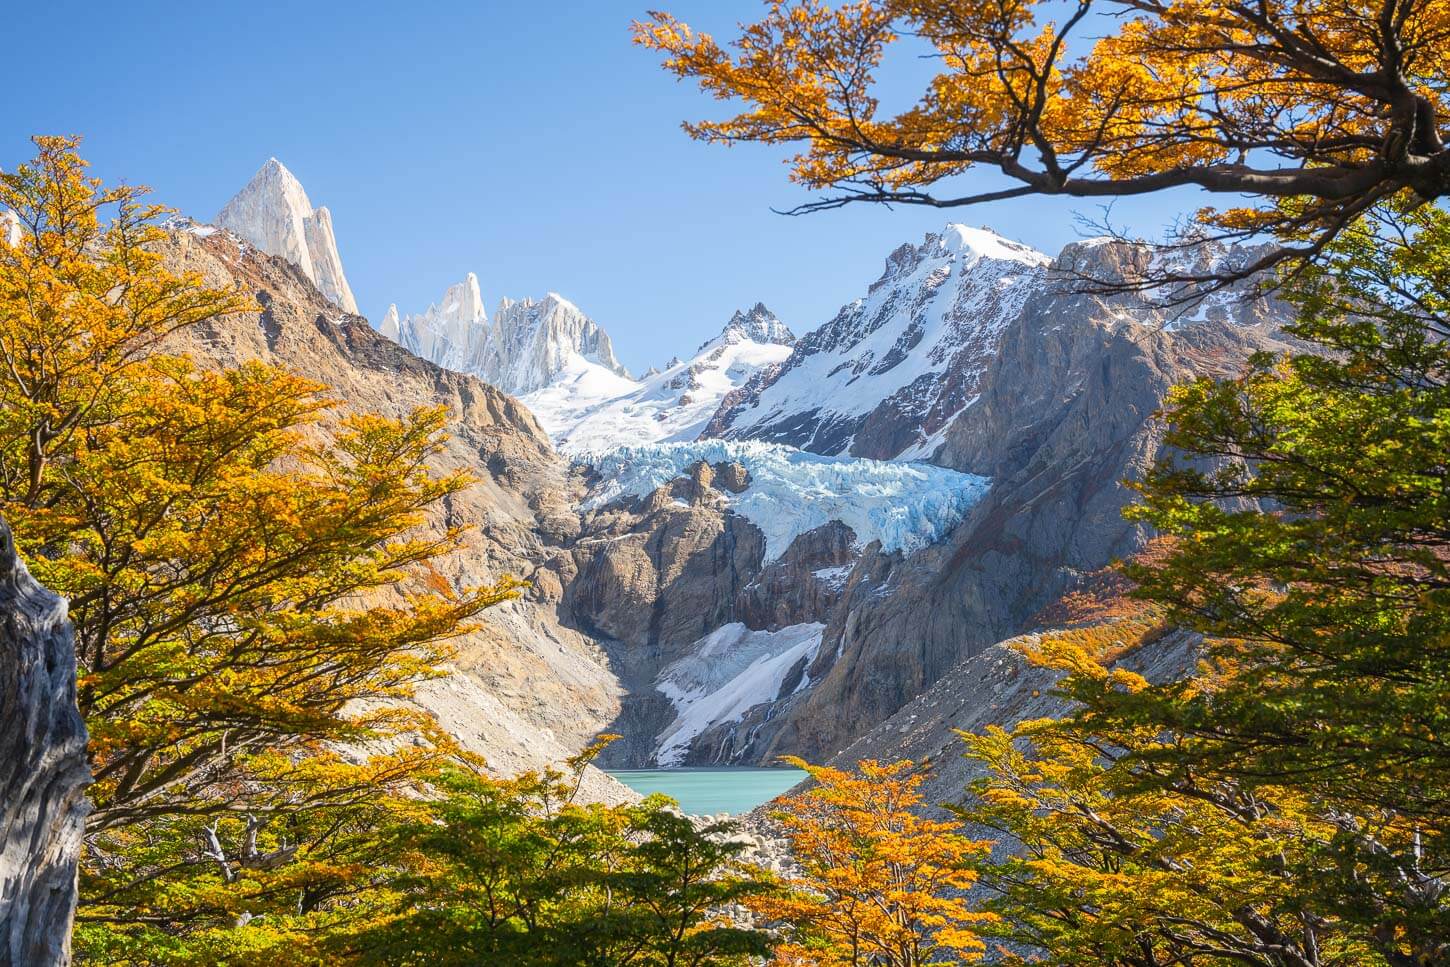
The spectacular Torres originally formed approximately 12 million years ago as magma intrusion under the Earth’s crust. Subsequent activity further lifted the whole area upward; then glaciers and erosion did the rest of the job, removing the softer rock layers around the original magma intrusion, leaving the towers exposed for us to admire. So when you are looking at the “Towers” at Base Torres, you are looking at magma that solidified in that shape, more or less, that did not erupt. The Three Towers are called, from left to right, D’Agostini, Central, and Monzino.
Now let’s get into it. In this post, I will not only provide an overview of the hike but also tips on how to read the weather forecast and what gear to bring. Both points are critical for a successful and safe hike to the Base Torres lookout.
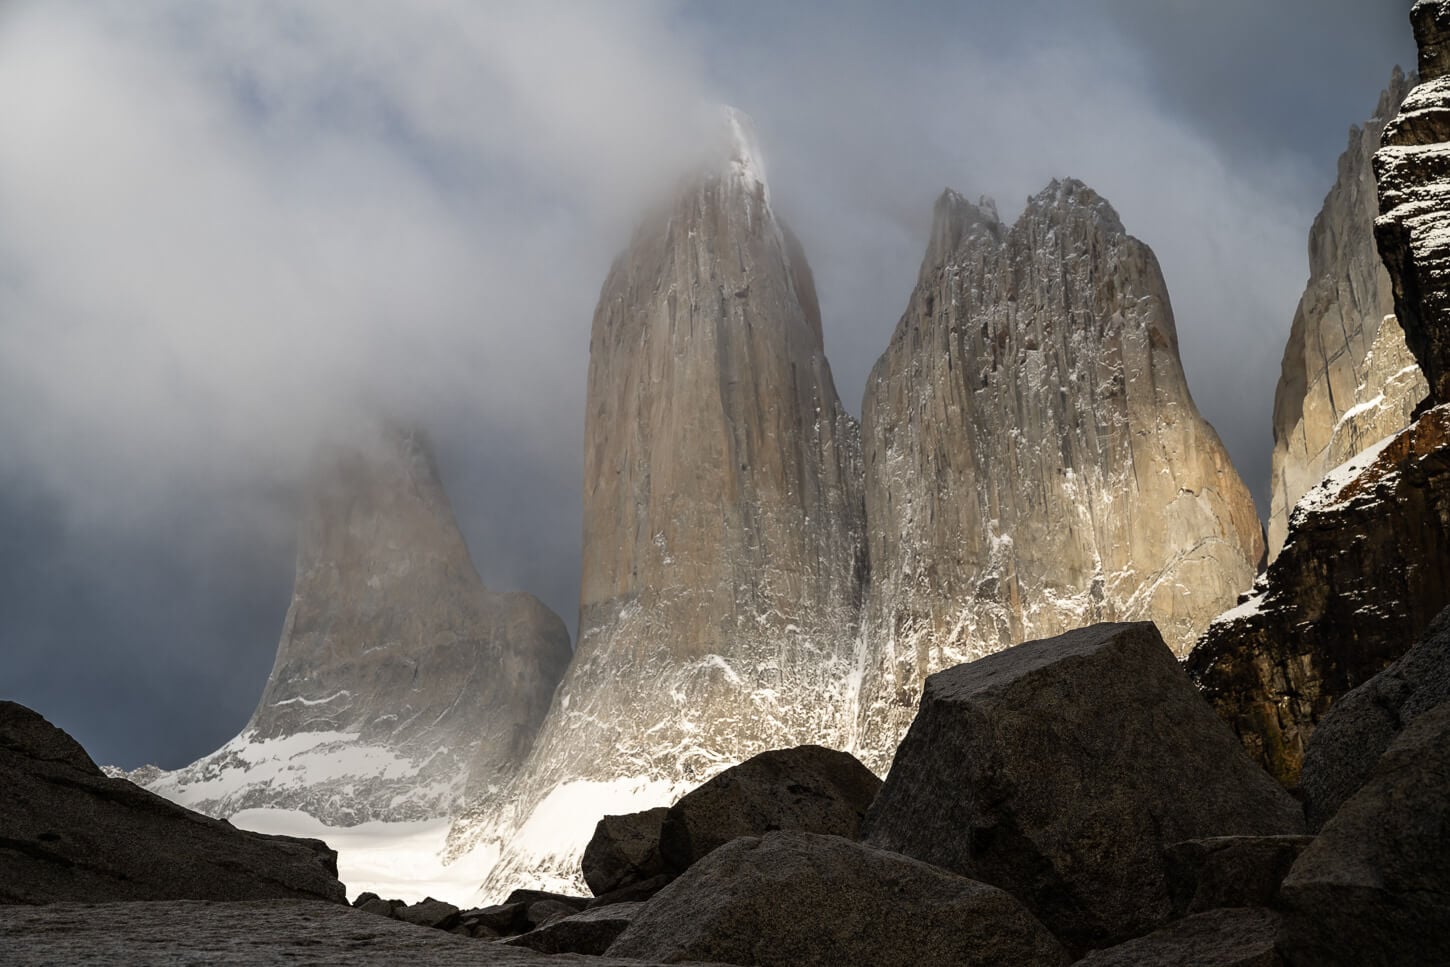
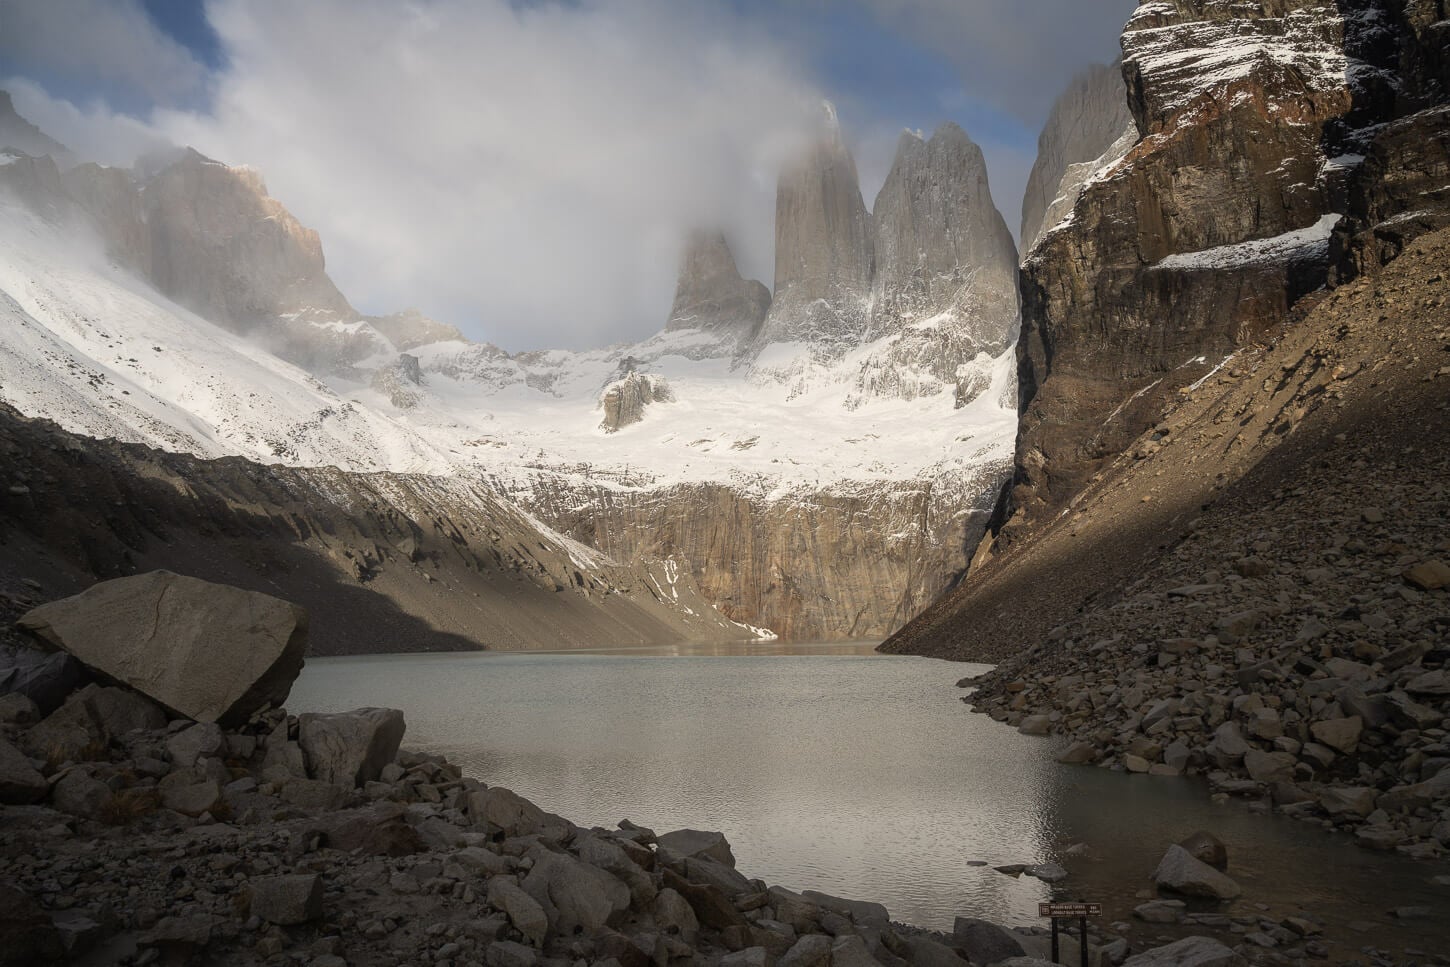
The towers are truly an impressive and spectacular sight. From left to right, D’Agostini, Central, and Monzino.
Table of Contents
About doing the Base Torres Hike for Sunrise…
If you are planning the Base Torres hike for sunrise for the first time, it may come as a surprise to discover that hiking at night is not allowed. And there’s no way around it; the rules of the park are clear, and it does not matter whether you are starting from Central or the Chileno campsite. It is not safe to hike at night in Puma territory, and the last part of the trail is a challenging scramble up a steep moraine that can be subject to landslides or rockfall.
However, even if hiking at night is not allowed, hiking to Mirador Base Torres for Sunrise is a rather popular activity. People leave from Central or Chileno at different hours and make the challenging hike to the Mirador for sunrise when the weather allows it. To give you an idea, there were about 80-100 other visitors at sunrise on an early September morning.
I will not make any assumptions about why this is the situation, but you need to be aware of the risks you are taking for your own safety. And ask yourself if you are prepared or even want to hike up this steep, unstable moraine at night.
The last kilometer of the Base Torres Trail is mostly on the unstable ground of a moraine that can be subject to landslides or rockfalls.
So the bottom line is: not allowed, and you should only attempt it if you are used to hiking at night and familiar with mountain terrain, as well as being able to physically complete such a demanding hike safely, for you and others around you. During the day, the towers are no less spectacular than at sunrise.
Checking the Weather Forecast for the Base Torres Hike
Needless to say, this is a hike you want to do in the best possible weather.
The most used weather forecast site for specific locations in Patagonia is Windguru. If you are not familiar with it, take your time to familiarize yourself with it. However, in short, you can search for each spot by name, i.e. “Base Torres”, and access the wealth of data the forecast provides.
Below is a Windguru widget for the Base Torres forecast you can use to learn its ropes, or come back to check the forecast. It is easier than it looks.
The forecast shows different weather models for the location. When I was there, of the Windguru models, GFS 13 seemed to be the most accurate/reliable. Here it is, and below is a short explanation on how to read this.
On the weather charts: apart from the day, time of the day, and temperature, pay particular attention to cloud cover, wind, and *0° isotherm (m).
Cloud Cover
For each given day/hour, what you want to see is none to very low cloud cover at the “low cloud” range, which means clouds up to 2,000m. The Mirador Base Torres is at about 900m m.a.s.l., so that’s the basic. Ideally, you want as little cloud cover as possible at higher elevations, too. Little to no mid clouds (2,000m – 6,000m), as the peaks are about 2,500m. Also, very little or no high clouds, because they can block the light for sunrise.
Wind
Wind, as little as possible, too. As you probably heard already, the wind in Patagonia can be extremely brutal. With wind speeds above 50km/h, you should think twice about doing the hike. And be aware that the trail will be closed for safety reasons in case of strong winds.
The *0° isotherm (m)
This value tells you at which altitude you will encounter the freezing point. This means it’s the point where you can potentially get snow if rain is forecasted, and ice on the trail.
Last Weather Tip
However, given the unpredictable Patagonia weather, it is always useful to check multiple sources. My recommendation is Windy.app, where you can also check the ECMWF model. This model is often regarded as the most accurate/reliable for Patagonia. I compared it to the GSF13, and both were quite similar in terms of accuracy.
Also, out of curiosity, I asked different AI tools to look at specific forecast models and tell me the best day/window for the hike. Surprisingly, when I checked, the forecast interpretation Gemini provided was quite accurate. ChatGPT’s less so. However, never rely on these tools alone for the forecast.
Overview of the Base Las Torres Hike & Map
First off, it’s best to familiarize yourself with all the rules of the park, which can be found in their official brochure. We already discussed the hiking at night part, but there are more equally important parts. Mainly, it is forbidden to use open fires, and stoves can only be used in designated areas. Then camping outside of designated areas is also strictly forbidden.
Then, you will need to purchase one of the available passes to the Torres del Paine National Park to access the area. You can do so online ahead of time, or you can pay the entrance fee at one of the Park’s gates, which are open from 8:00 AM to 6:30 PM in high season.
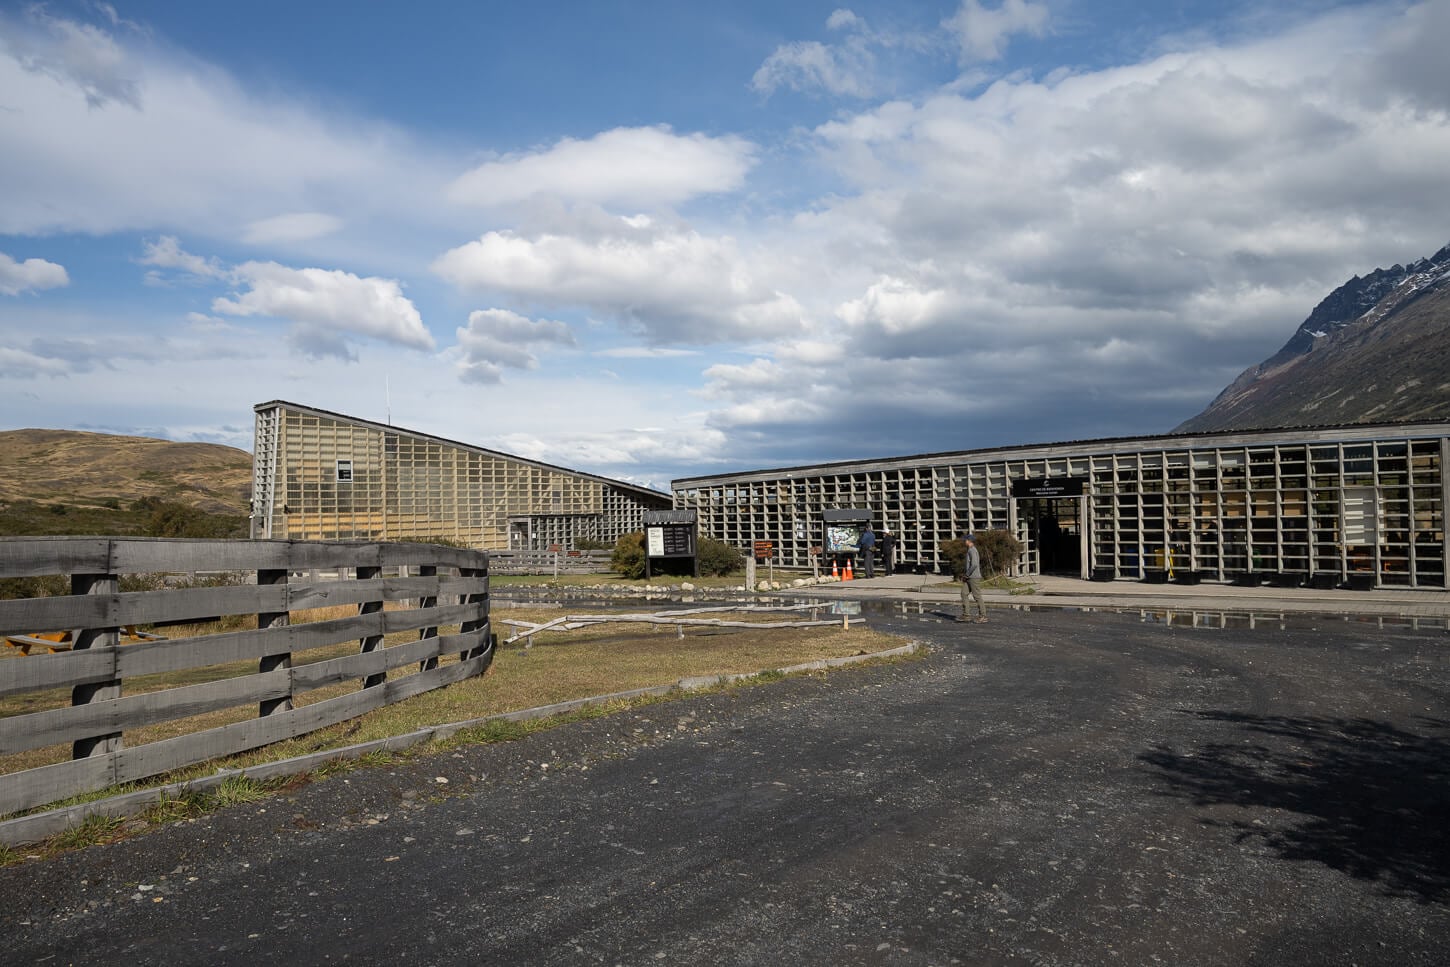
The Visitors Center, Starting point of the Hike.
On the hike itself, the Hike to the Base Las Torres viewpoint is already quite a hard all-day hike in daylight for a couple of reasons. First of all, distance and elevation gain: 22 KM (13.6 miles) and 1,280m of positive elevation gain (4,199 ft.) require a certain fitness already. Second, the last part is a steep climb over loose rocks and potentially unstable terrain.
The hike is usually possible year-round, but in winter, you need a guide, and in the shoulder season, sometimes too. Stretches of bad weather and snow/ice will prompt the rangers to implement a mandatory guide/crampons/hiking poles for hikers.
This can happen all of a sudden, and it was the case when I visited, too, but the guide requirement was lifted the day before I planned to hike to the Mirador Base Torres. If you find yourself in need of a guide, you can find a list of contactable guides here.
If, instead, you are starting from the Chileno Campsite, the Hike to Base Torres is about 5km, one way.
Lastly, the Base Torres trail closes at 4 pm in summer and 2 pm in winter. That means everyone should be off the trail by then.
Now here are the details of the hike from Central:
| Max Altitude | 875m (2,870 ft.) |
|---|---|
| Distance | 22 KM (13.6 miles) |
| Elevation gain | 1,280m ↑ / 1,280m ↓ (4,199 ft.) |
| Hike time | 6-8 hours |
| Hike Difficulty | Hard |
Here is the map of the hike. You can download the GPX file for free from the activity linked below.
How to get to the Base Torres trailhead and Parking
If you are staying in Puerto Natales, the best way to get to the trailhead is by driving. Account for a couple of hours. If you are staying within the Torres Del Paine Park, but not at Central, it can still take about an hour or a little less to get to the trailhead. Places may seem close, but the gravel roads of the park make for slow driving.
- Driving Directions: If you are coming from Puerto Natales or the Laguna Amarga area, take road 9, then road Y-150 and road Y-156. Then follow directions to the Welcome Center/Hotel Las Torres sector. Iyu will enter the park through the Laguna Amarga gate. If you are staying on the Rio Serrano side, take road Y-290 until it merges onto road Y-150. Avoid road Y-290 at night if you are coming from Puerto Natales. It’s much slower going.
- Parking: There is quite a large parking area at the visitors’ center. Parking is free at the time of writing.
- Public Transport: options for transportation are tours that mainly start from Puerto Natales. There are shuttles within the park too. An overview of the transfer options here on the official Torres del Paine Website.
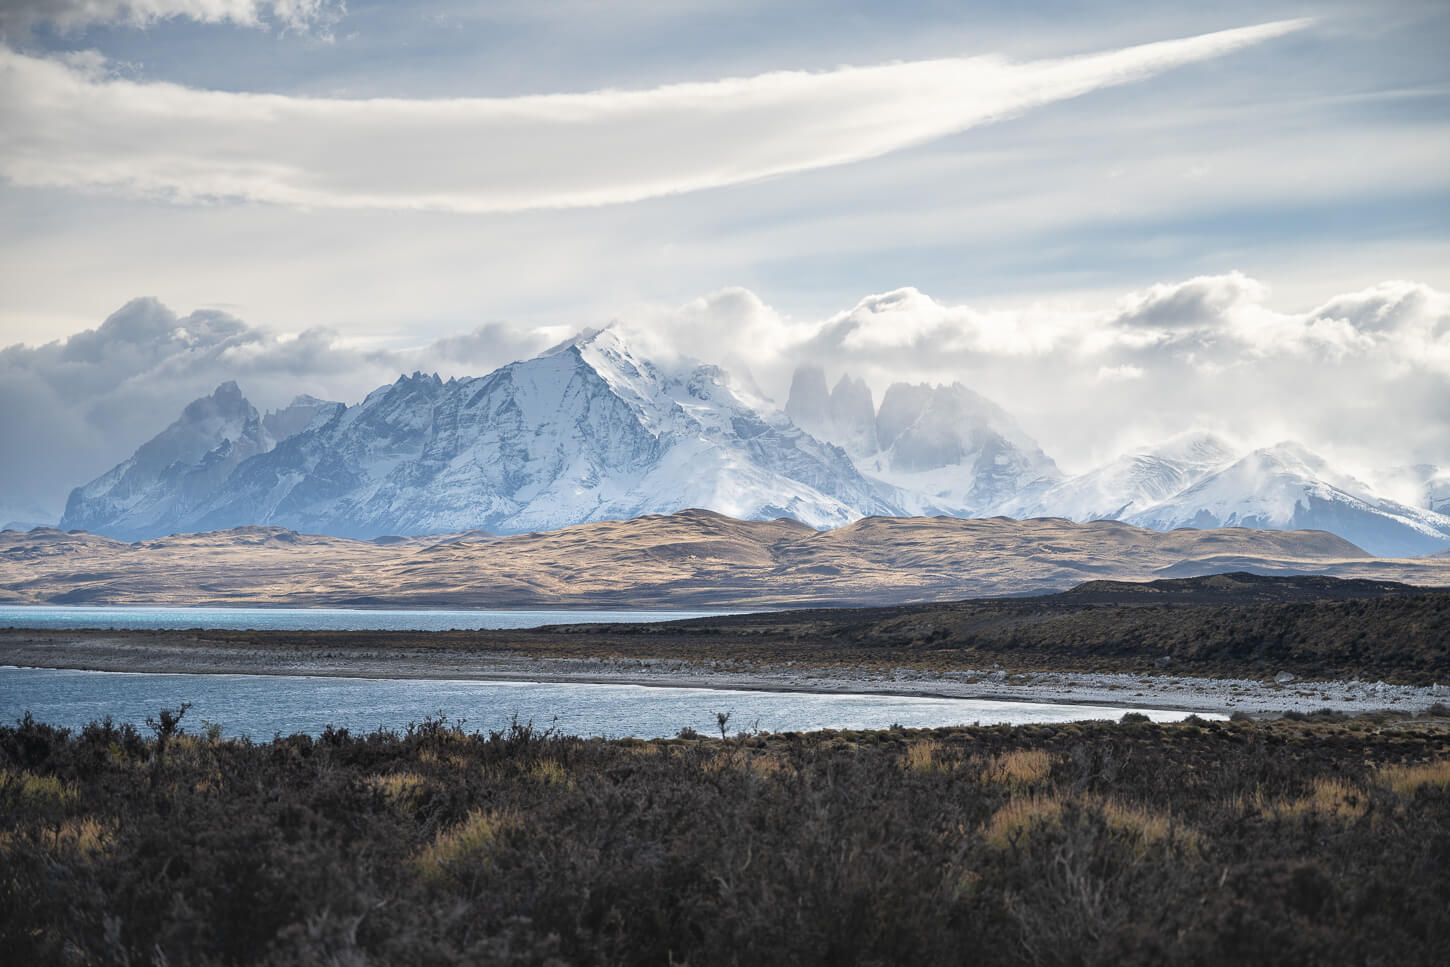
Road 9 offers plenty of scenic views of the Park.
Gear for the Base Torres Sunrise Hike and Clothing Layers Management
First off, you will need a good headlamp. If you are doing it solo, as I did, you would want a backup too. I did have to headlamps with me too, in case one failed. Don’t use your mobile’s flashlight. If it falls and it either breaks on a rock or turns off, you’re in the dark. I would recommend no less than 300+ lumens for 6–8 hours (on medium/high setting). If you find one, get one with a red light too to use once you arrive at the Mirador.
Clothes
Dress in as many layers as you can. You want to start the hike feeling a little chill for the first 1-15 minutes until your body warms up, and you want to be able to layer up or down as needed while hiking up. This is so you can prevent sweating. If you sweat a lot and arrive at the Base Torres with your base layers soaked in sweat, you’ll get very cold while waiting for sunrise.
For the same reason, you’ll want waterproof boots. You’ll likely pass ponds/muddy sections or water trickling down the trail in the last part, if it rained recently. And waterproof gloves.
As an example, this is the gear I was wearing: Fjallraven Keb Hiking trousers, Merino 150 base layer, Merino 150 fleece, Fjallraven Keb fleece jacket, and a Bergans 3L outer shell (jacket and tourers). Then I had a Bergans 750 down jacket in the pack, which I wore only once I got to the viewpoint. Then a neck warmer, and Sealskinz gloves.
On the outer shell: this is a critical piece of gear, and it should be waterproof and windproof. Get a breathable one and one that has zips under the arms, possibly. These allow you to vent the jacket and prevent sweating, while they still keep you dry.
Other Gear, Food, and Water
Bring hiking poles and microspikes, the latter essential to have in shoulder season. All of this and the camera gear were packed in a 44lt backpack, with three liters of water. You could also refill at the Ascencio River and its tributaries. It is generally glacial-melt and drinkable, but it’s best to use a filter (like a Grayl or Sawyer). You never know what’s upstream.
I also had a small 33cl thermos with a warm drink I prepared before I set out. To me, this was worth its weight in gold when I arrived at the Mirador in the cold of the night. And lastly, food/snacks enough to probably survive a day and a half.
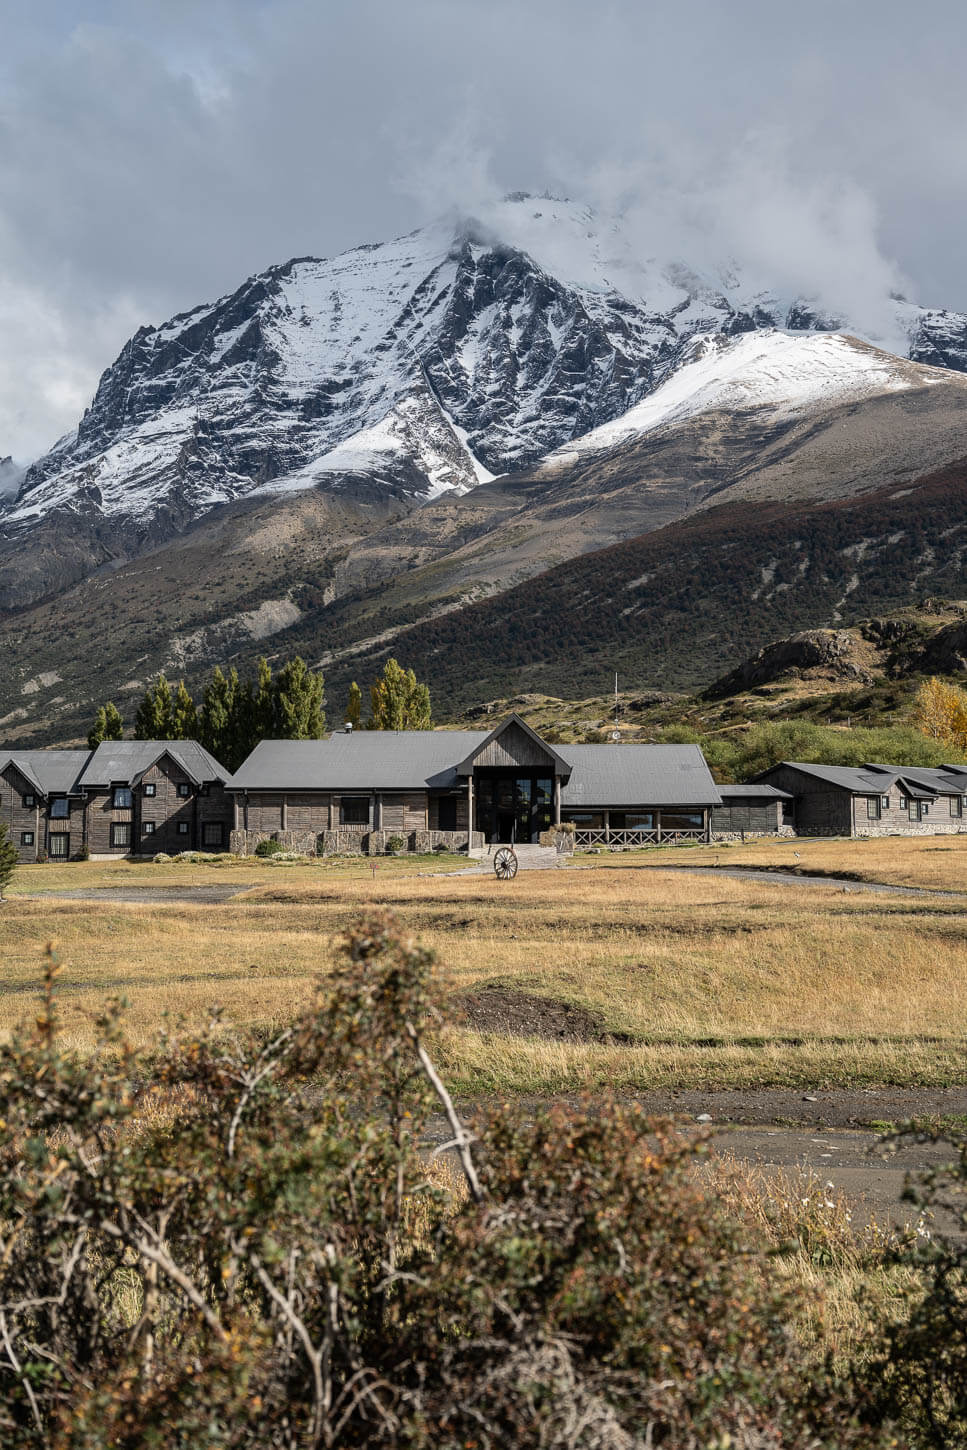
View of Hotel Central, a short walk from the trailhead.
The Base Torres Hiking Trail
I’ll try to describe the trail both as a sunrise hike and as a day hike. If you do it for Sunrise, it will be night when you hike up and day when you hike back down.
First off, I should mention the trail posts have reflective stickers. Well, the first one of these posts, right after the Hotel Las Torres, is broken into two. And with a headlamp in your head, it looks like two eyes looking back at you in the dark. Like a pair of feline eyes. Felines like the pumas live in the park.
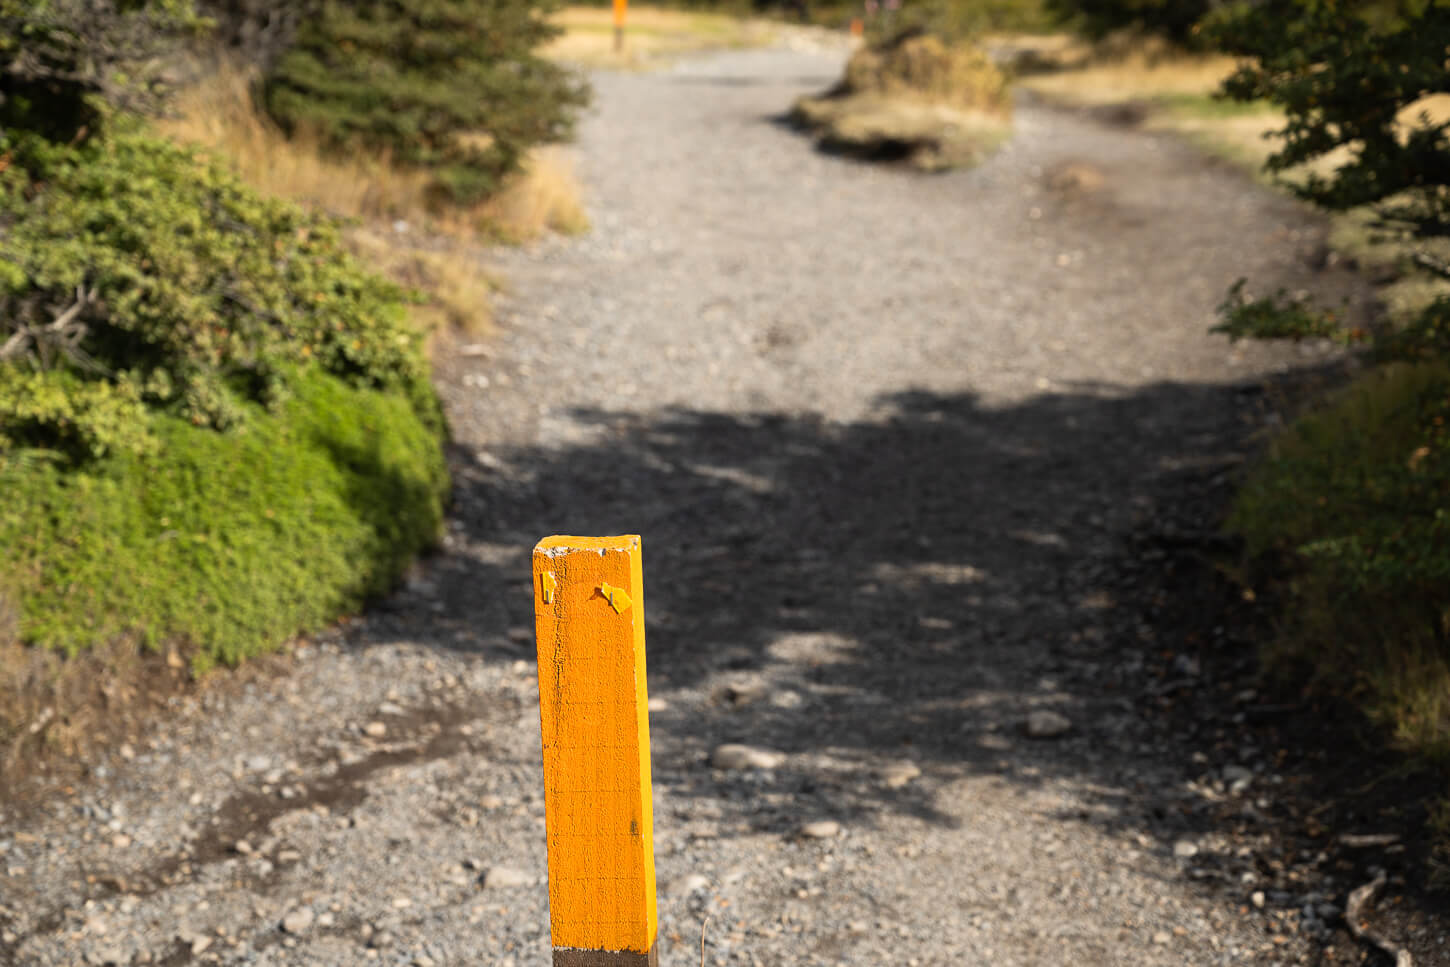
The trail post with the broken reflective sticker – yes, this is the one that tricked me into thinking the reflection was a Puma.
I will not deny it; it tricked me. I spent a good 10 minutes assessing what really was what I thought was a Puma staring at me. After almost 10 minutes of looking at it from afar, I suspected it might not be what I thought it was. It did not bat an eyelid, and no movement at all. I approached it slowly again, and I discovered it was a trail mark with a reflective sticker broken in two.
To say, if you see the same trail mark will likely not try to attack you. But if you do see a puma, keep calm. Do not run. That can trigger its “chasing” instinct. Stand your ground, look large, and maintain eye contact, and back slowly to let the Puma go its own way.
From Central to the Chileno Campsite
From Central onward, if you are hiking for sunrise, you will not see anything apart from whatever your headlamp throws light on, unless the moon is out. You will literally hike in pitch black darkness. You will really only see the headlamps of other hikers here and there, and the lights of Refugio Chileno after crossing Paso del Viento. That’s it.
Perhaps you could spot the headlamp of other hikers ahead of you. This was the case when I did it, pitch-black darkness. However, the landscape in this part of the trail is already quite nice, in both directions.
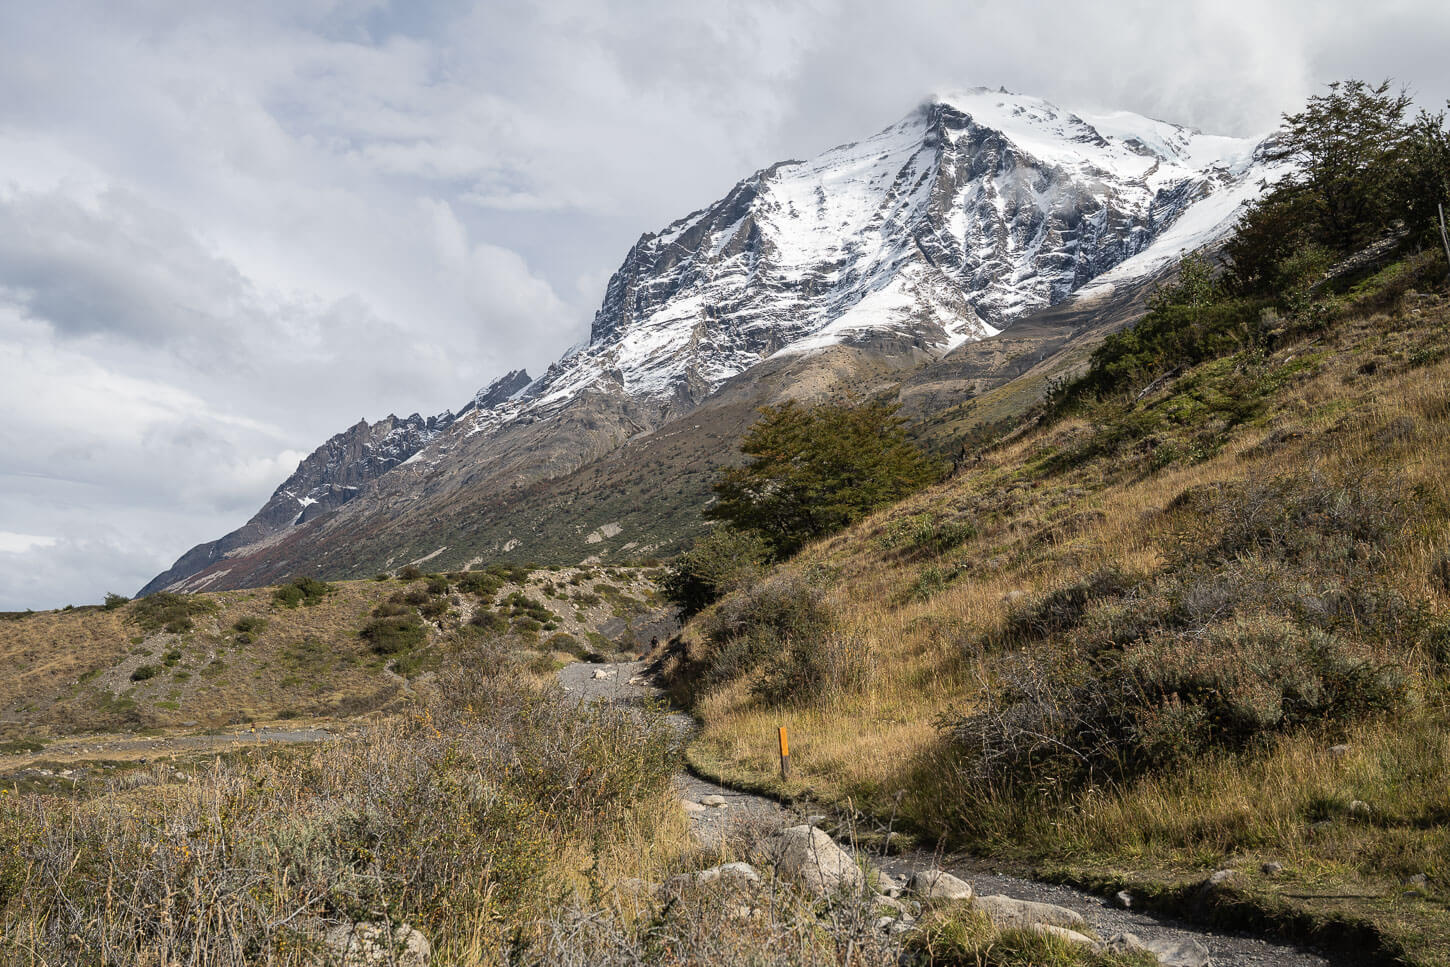
The trail initially is flat, and will gradually gain elevation up to Paso de los Vientos – the Windy Pass.
Some sections before Chileno are relatively steep and rocky too.

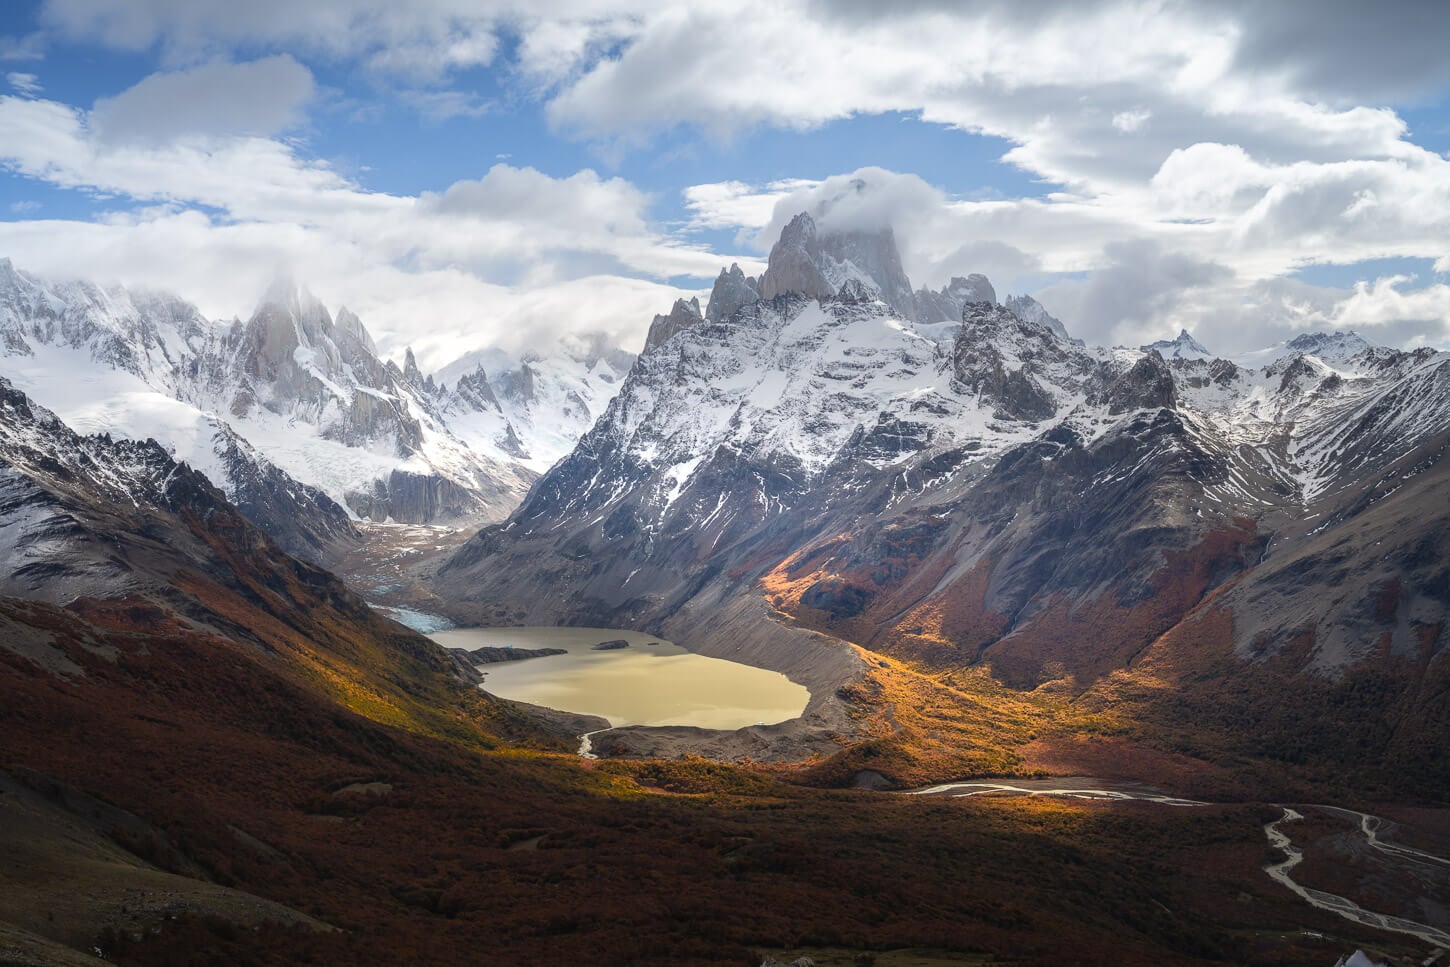
The view will gradually open up as you gain elevation.
In front of you, you will have the view of the valley and the mountains above it. In the opposite direction, the views will open up to the vastness of the landscape and hills south of the park.
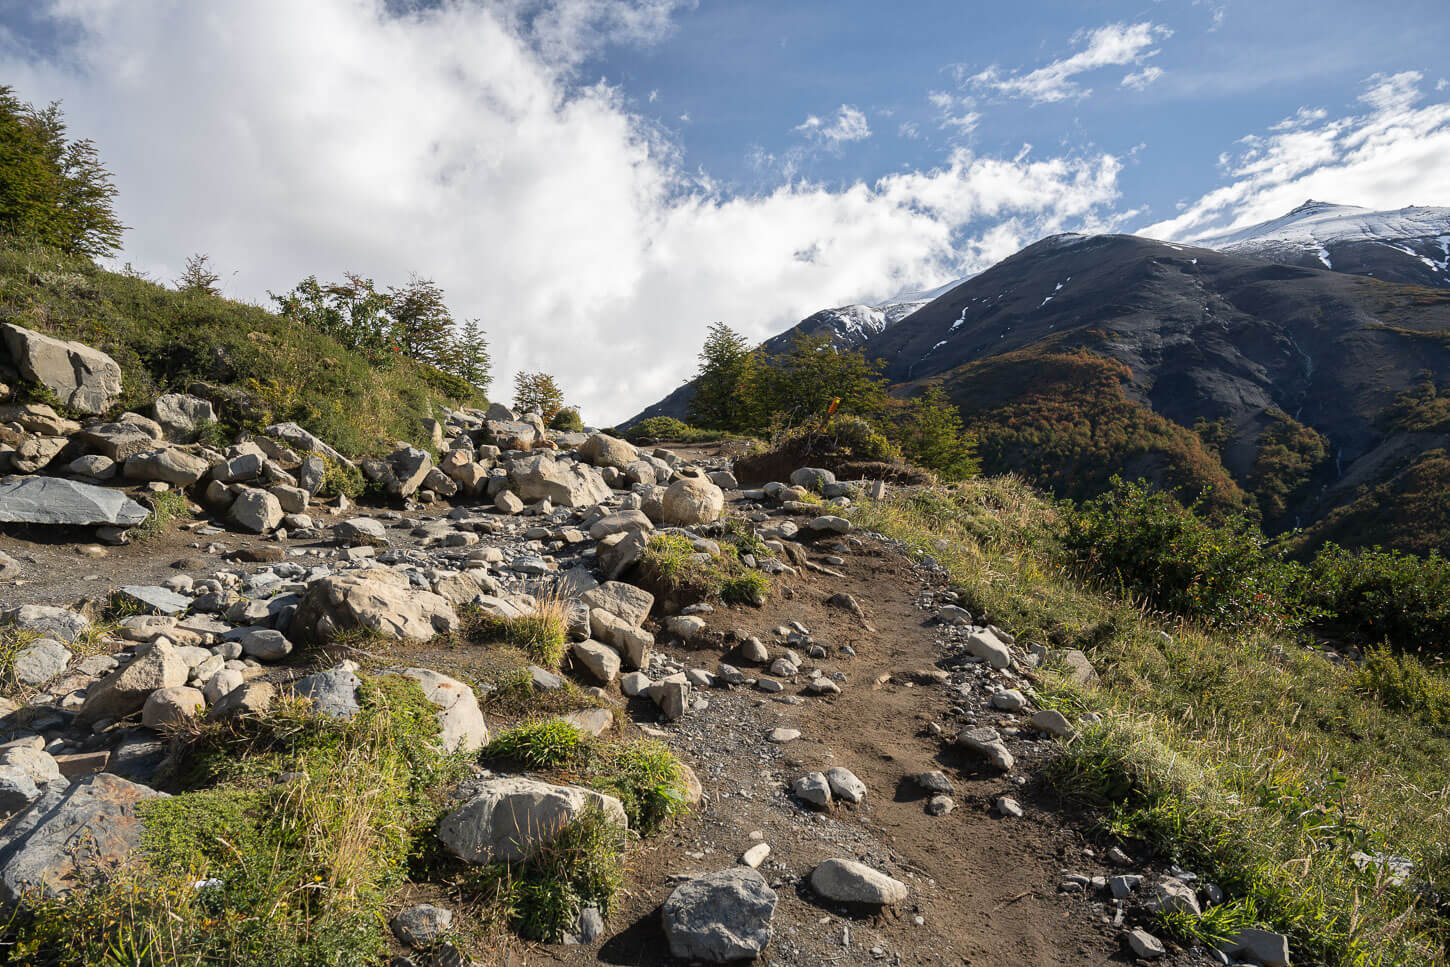
Some sections of the trail have rather large stones, but overall, it isn’t a difficult section. It’s mostly uphill, so take it easy so as not to sweat much.
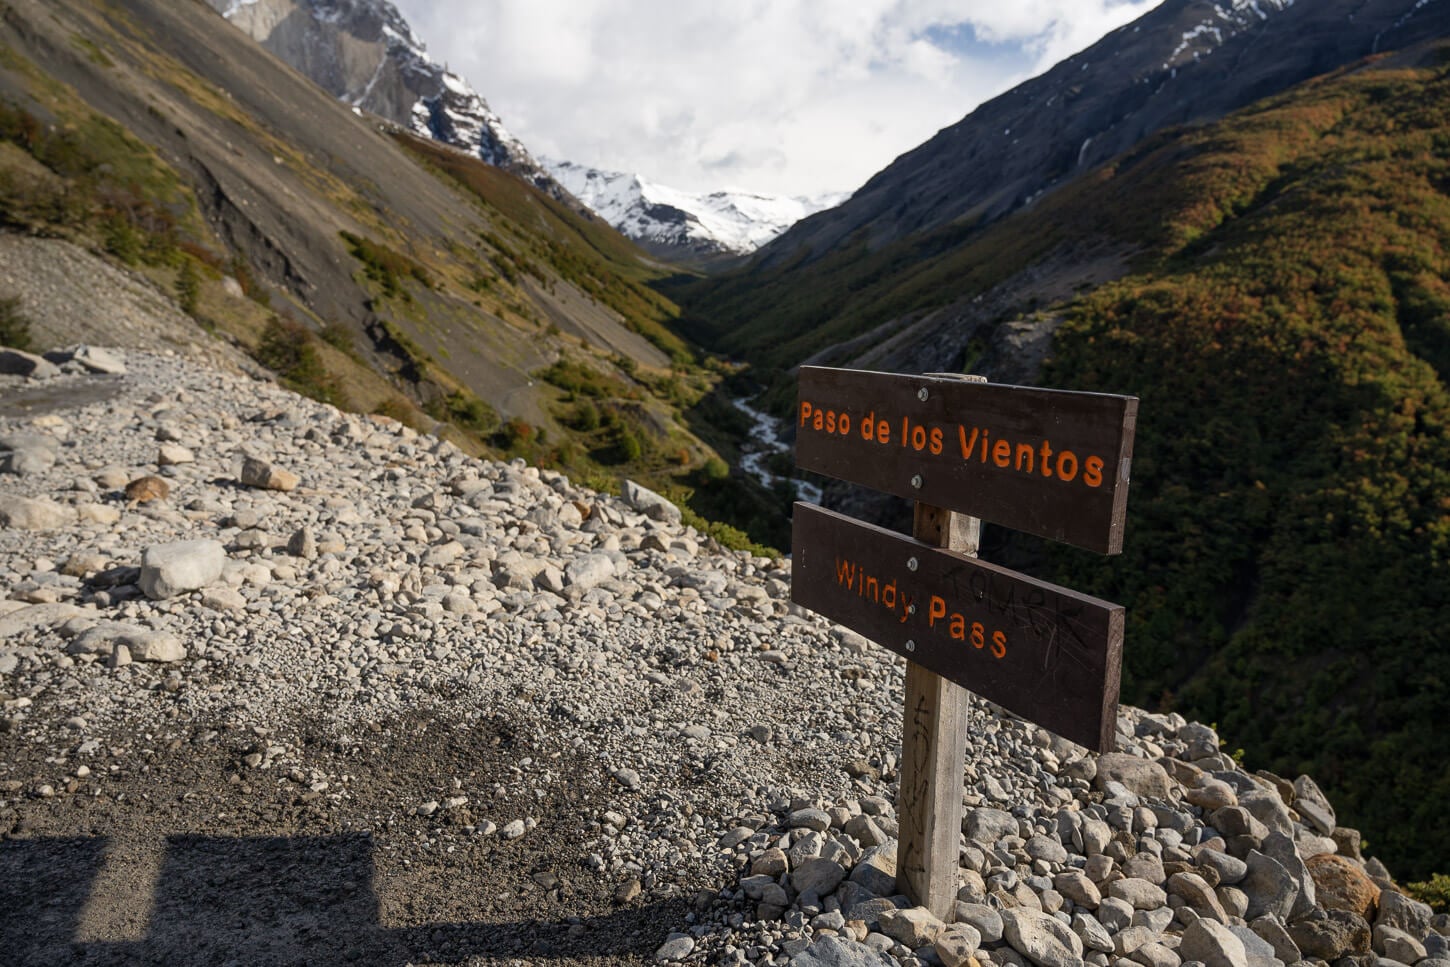
As you reach Paso de los Vientos, the trail will descend toward Refugio Chileno.
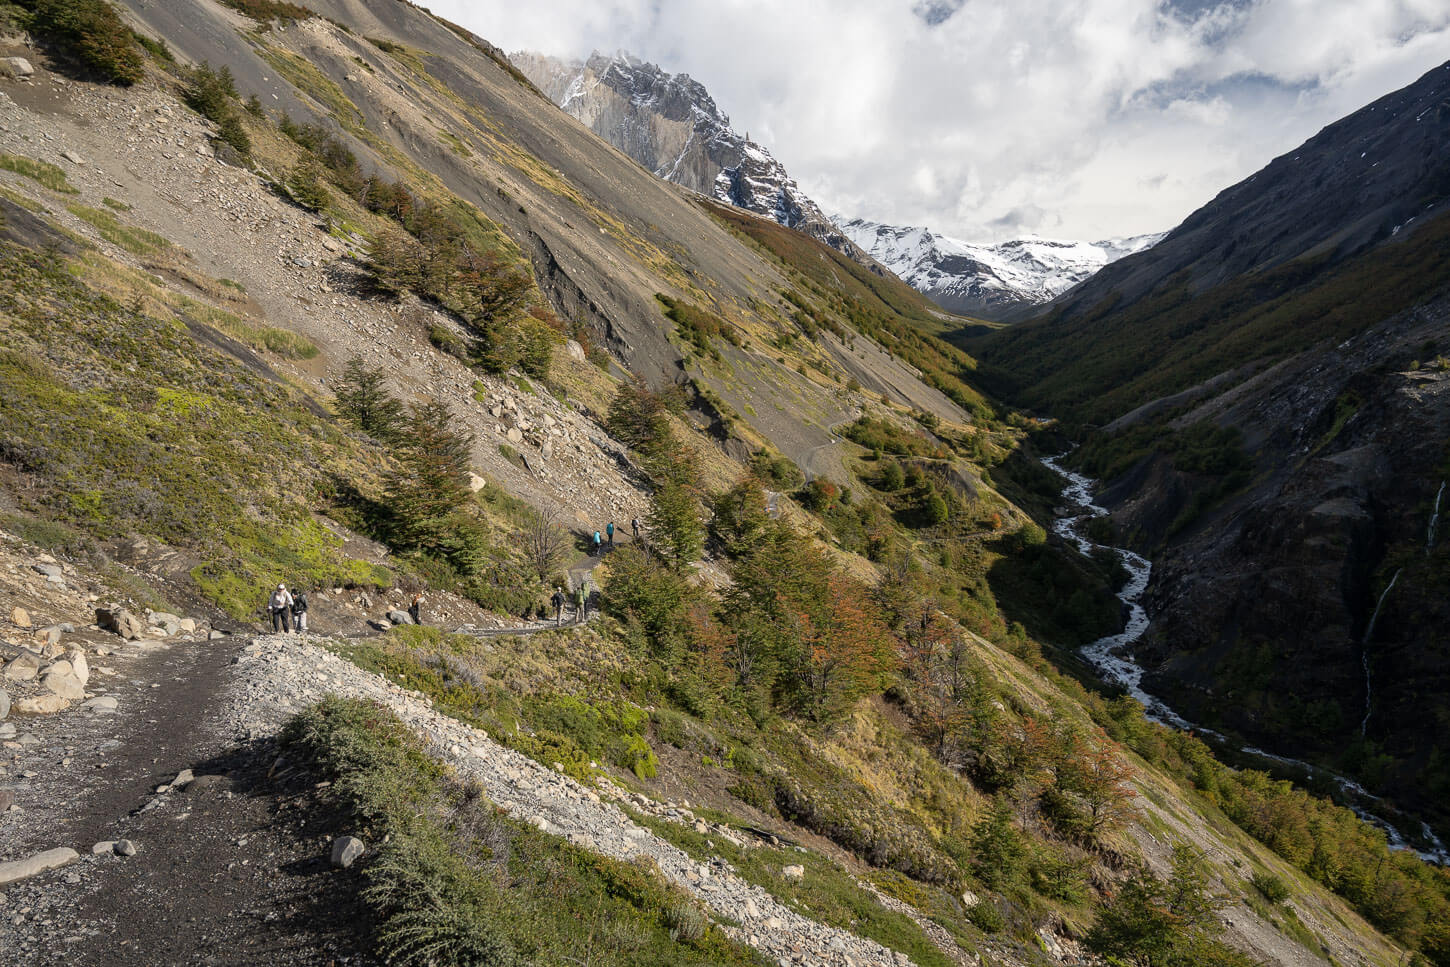
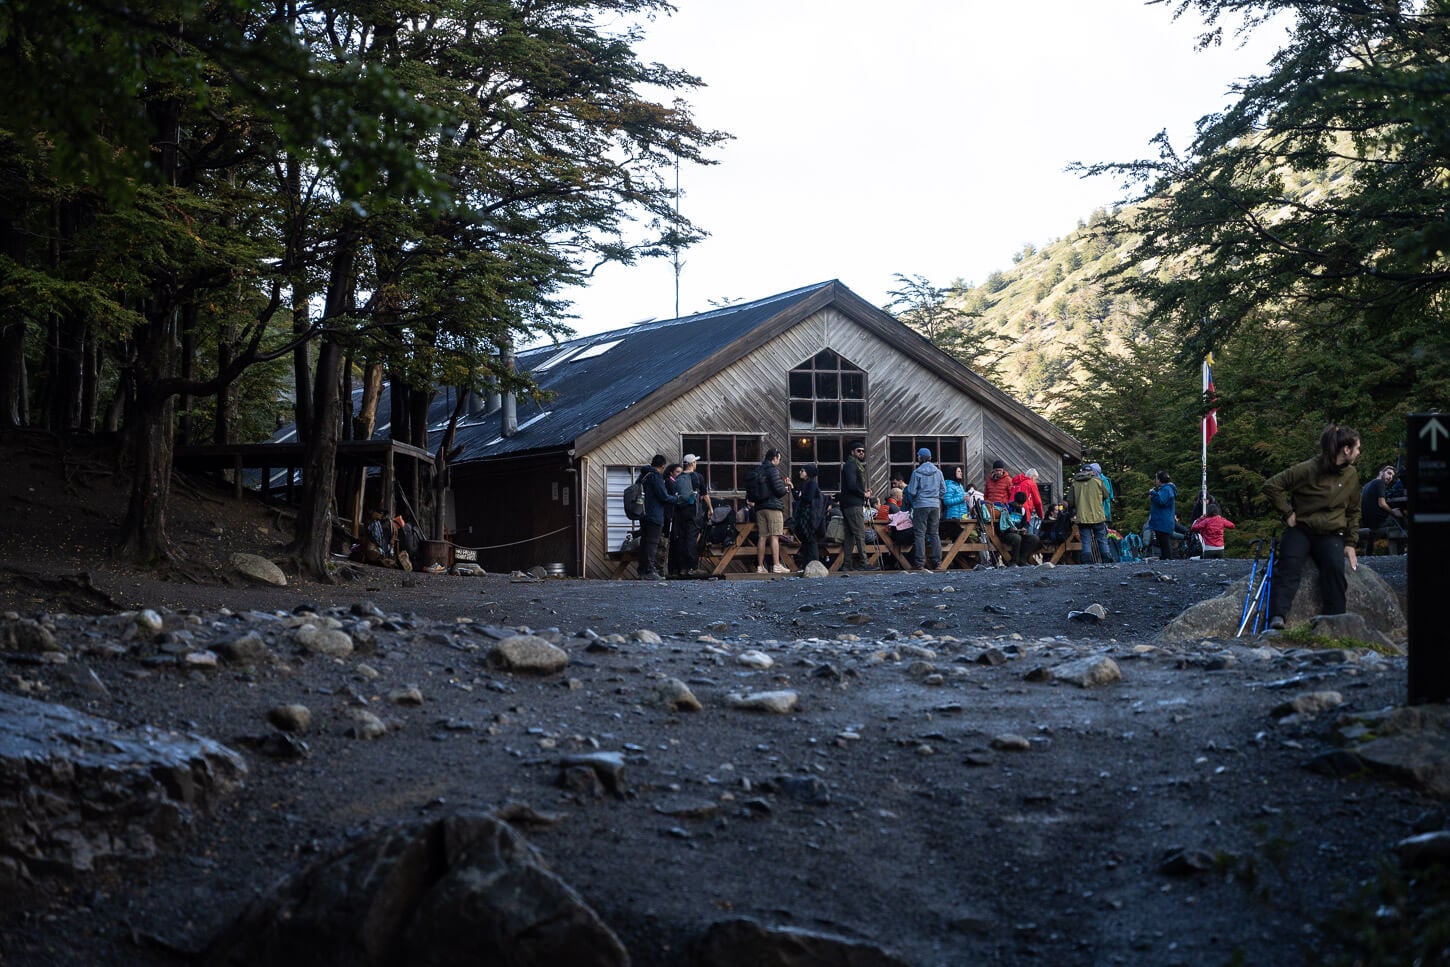
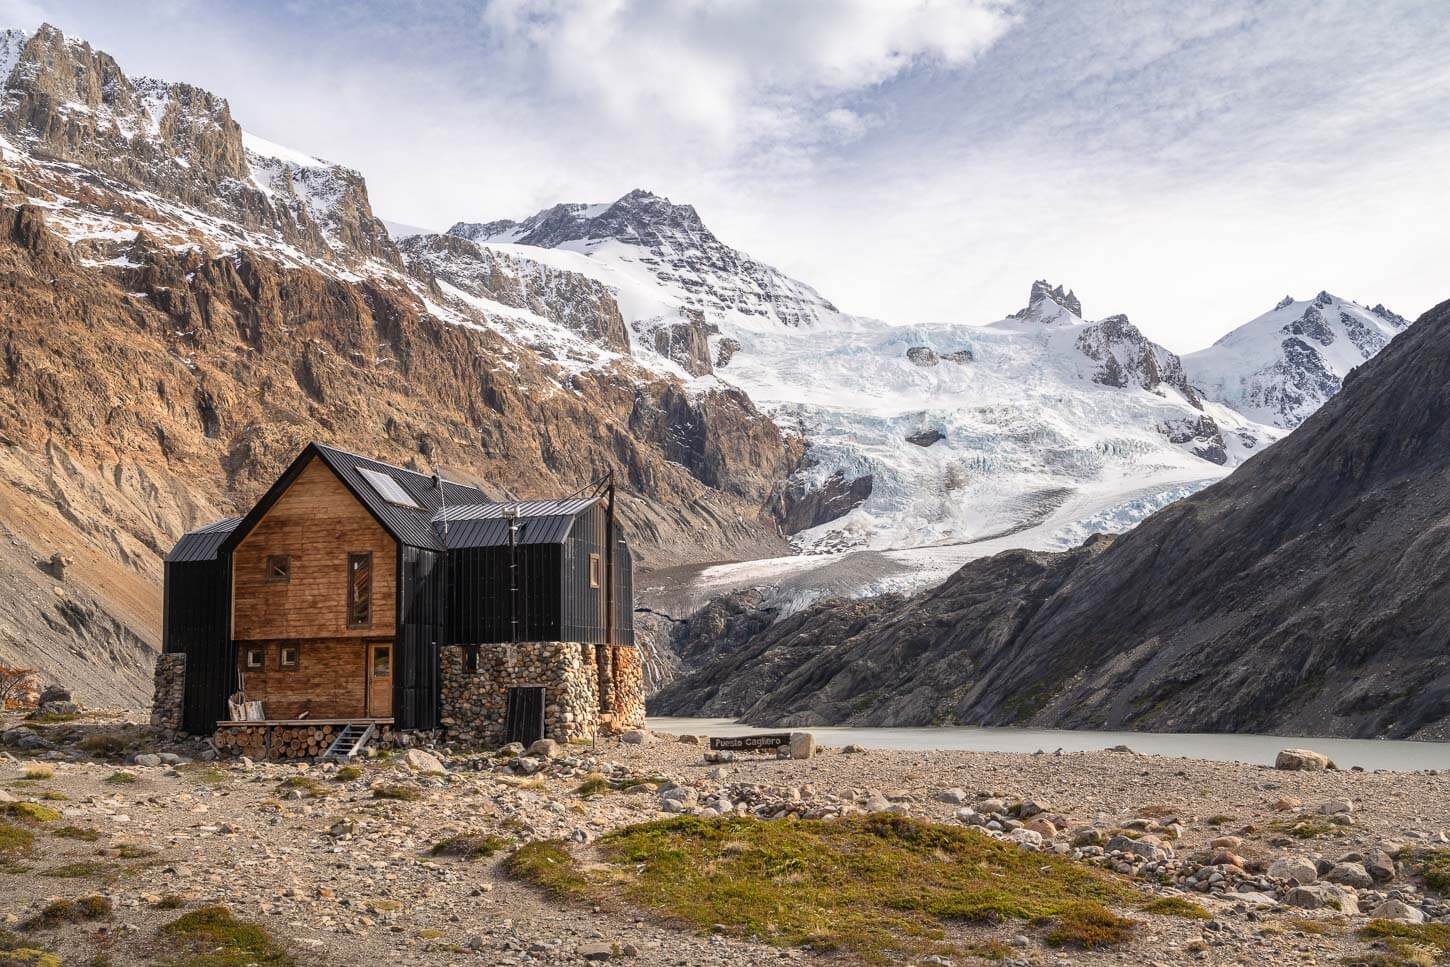
Refugio Chileno, a great place to stop for a warm drink or a bite.
From Chileno to Campamiento Torres and Mirador Base Torres
From the Chileno campsite, the trail continues through the forest for the most part. Initially, it’s fairly easy ground to walk on and, during the day, the views open up here and there to the mountains above the valley where the Ascencio River flows.
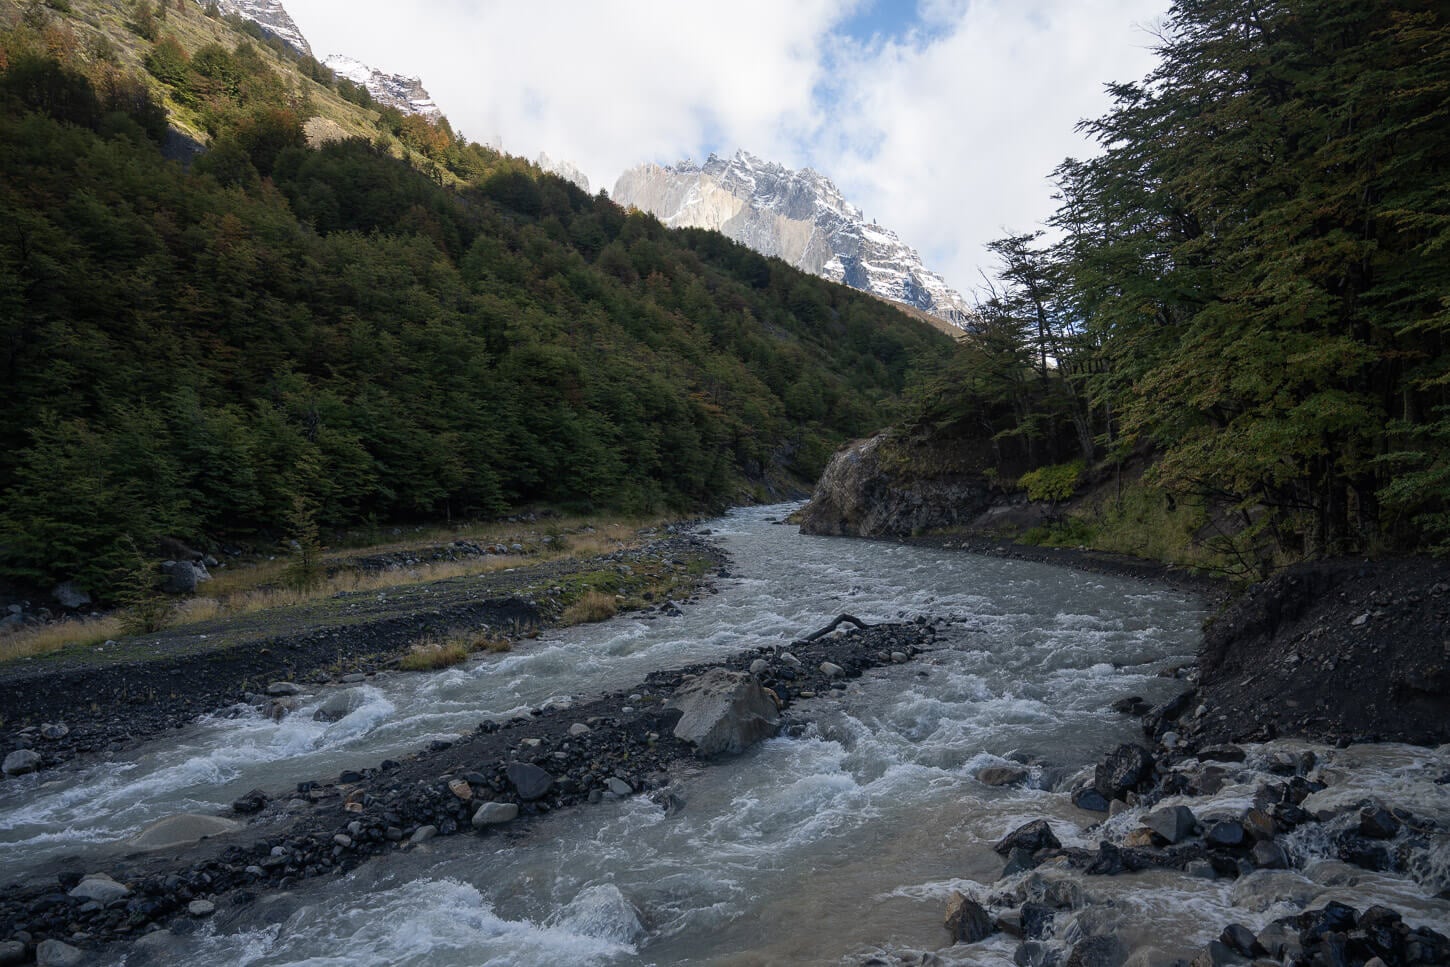
From Refugio Chileno the trail initially follows the Ascencio River, before gaining elevation again.
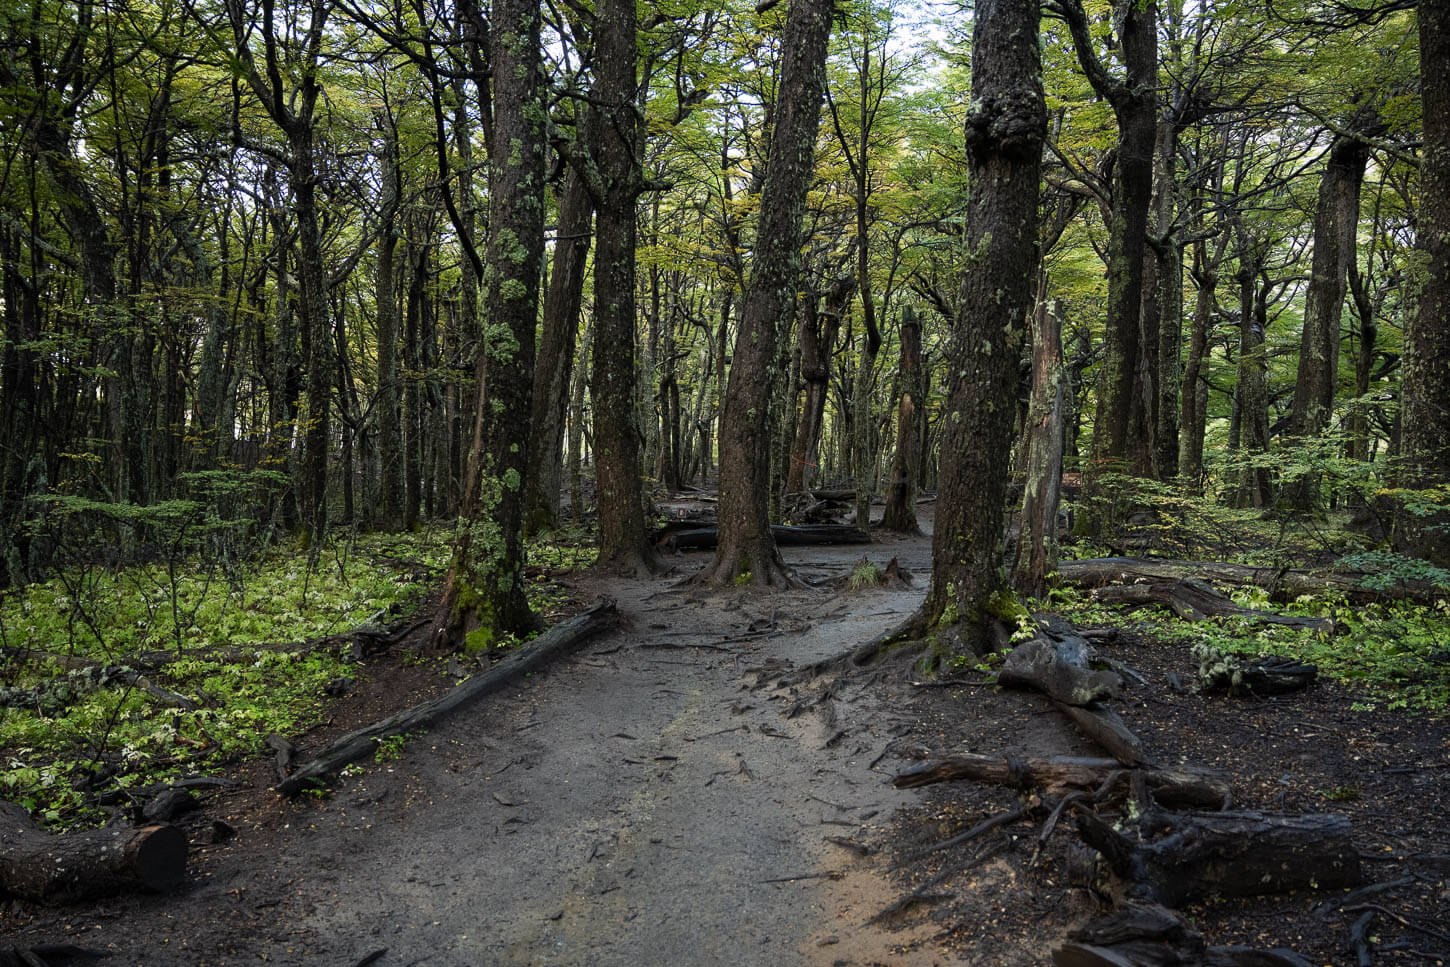
Long stretches pass through a thick forest.
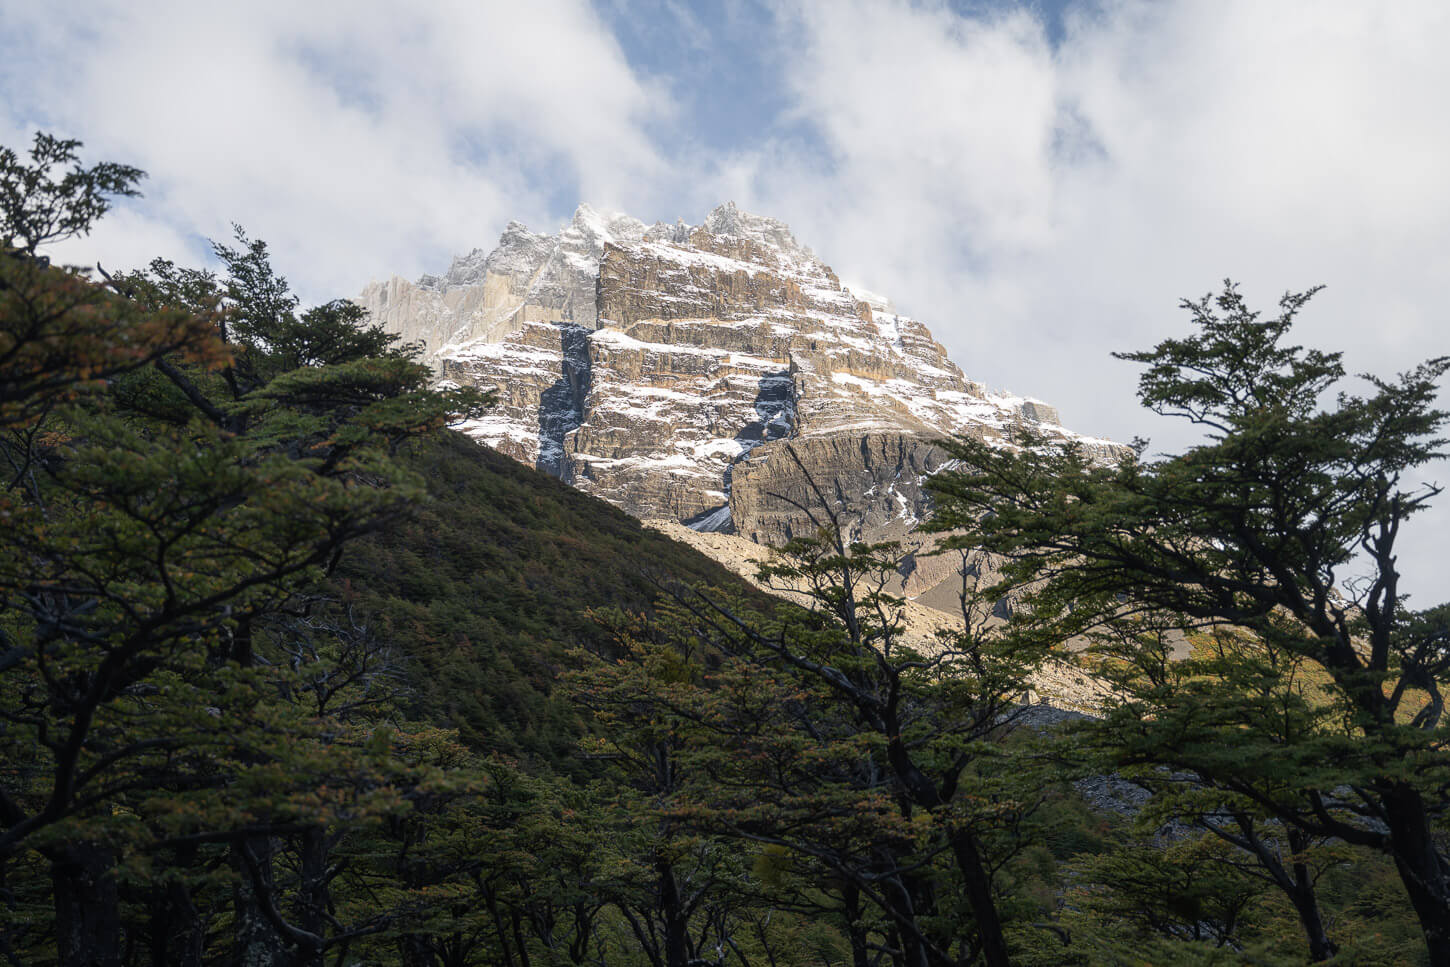
The views will occasionally open up to rhetorical mountains aournd the trail.
There is also a good amount of uphill and downhill sections. Not much, but constantly gaining and losing elevation adds to the overall fatigue.
This until reaching the old Campamiento Torres spot. From here, the situation gets more challenging and messier. To give you an idea, I did this hike in the rain, and large parts of the trail were essentially a small creek flowing down the mountain. On top of that, there are lots of loose rocks, and you’d need to help yourself with your hands here and there.

The trail gradually becomes rockier and rockier. With rain, it can flood. If you look closely, you’ll see water pouring down the trail.
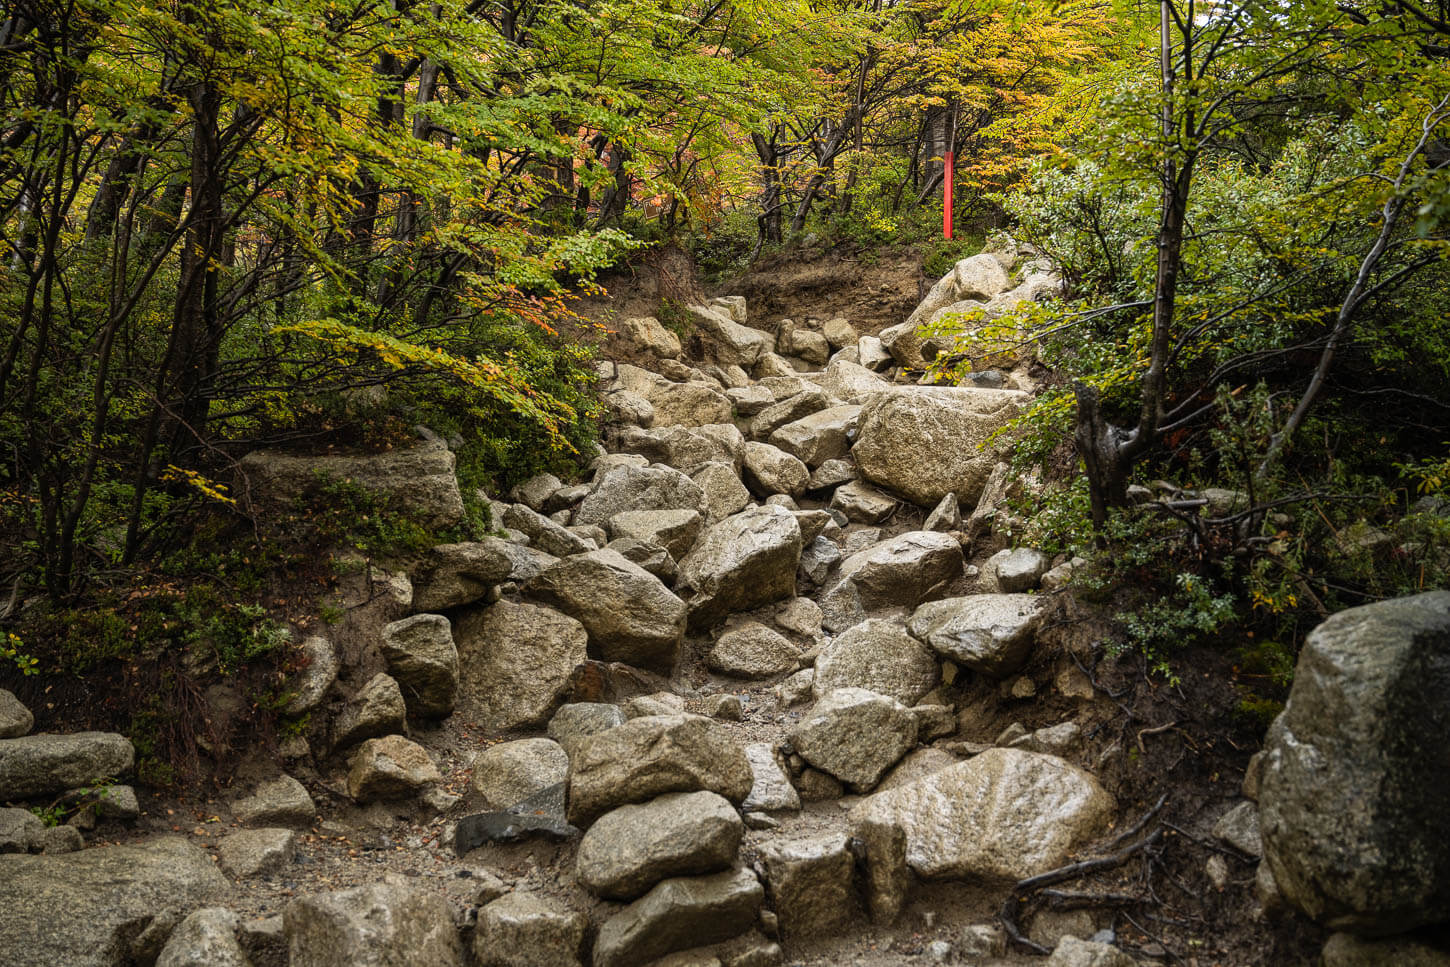
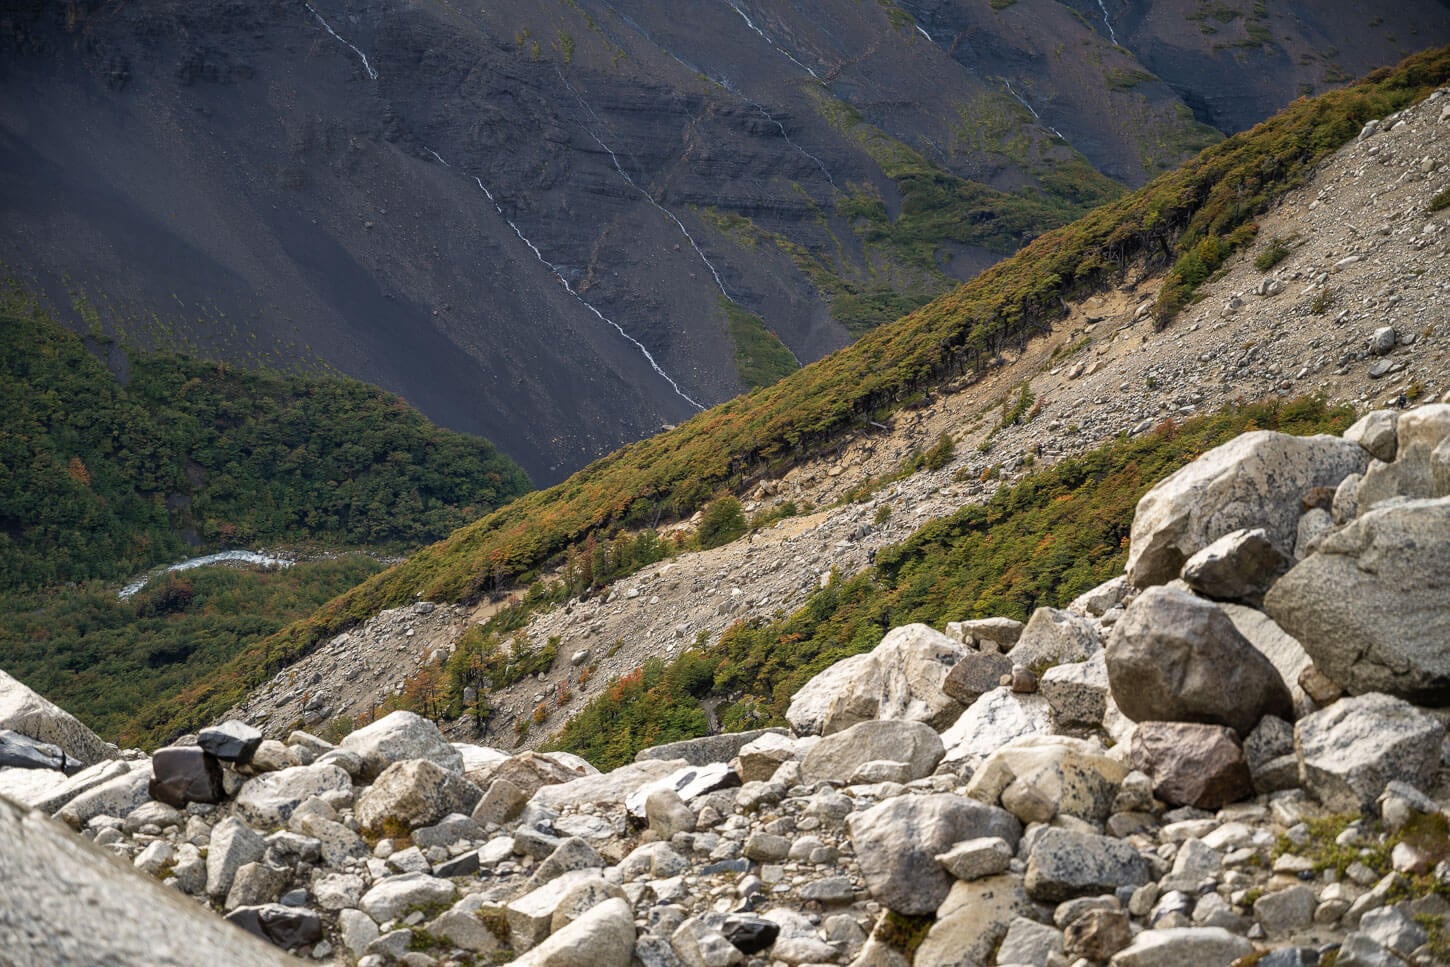
The last section is los going and requires navigating through big boulders.
the last. km of this hike is a slow-going scramble up a steep, unstable morainic deposit.
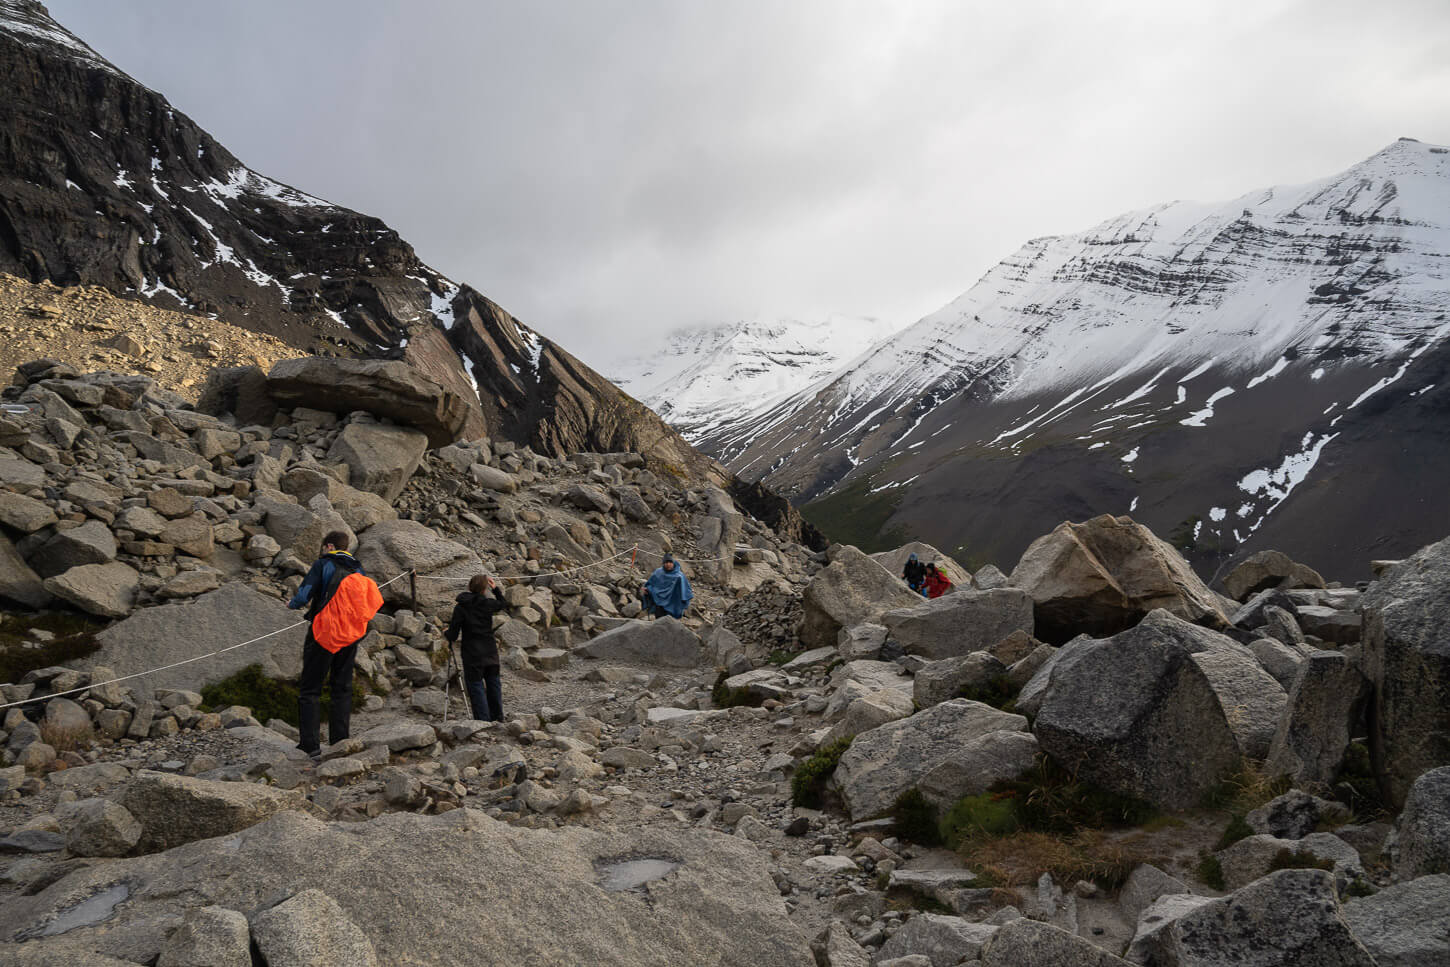
So yes, the last bit to the Mirador is as hard as they say. And, the higher up you go, the softer the ground is/looser the rocks are. So extreme caution is required. Also, be careful for possible back ice spots if the temperature is around freezing.
During the day, you should also be able to spot the Torres’ granite peaks as you approach the Mirador. They will gradually come into view, as you hike your way up, providing an anticipation of what awaits above – and a bit of mental energy for the last push.
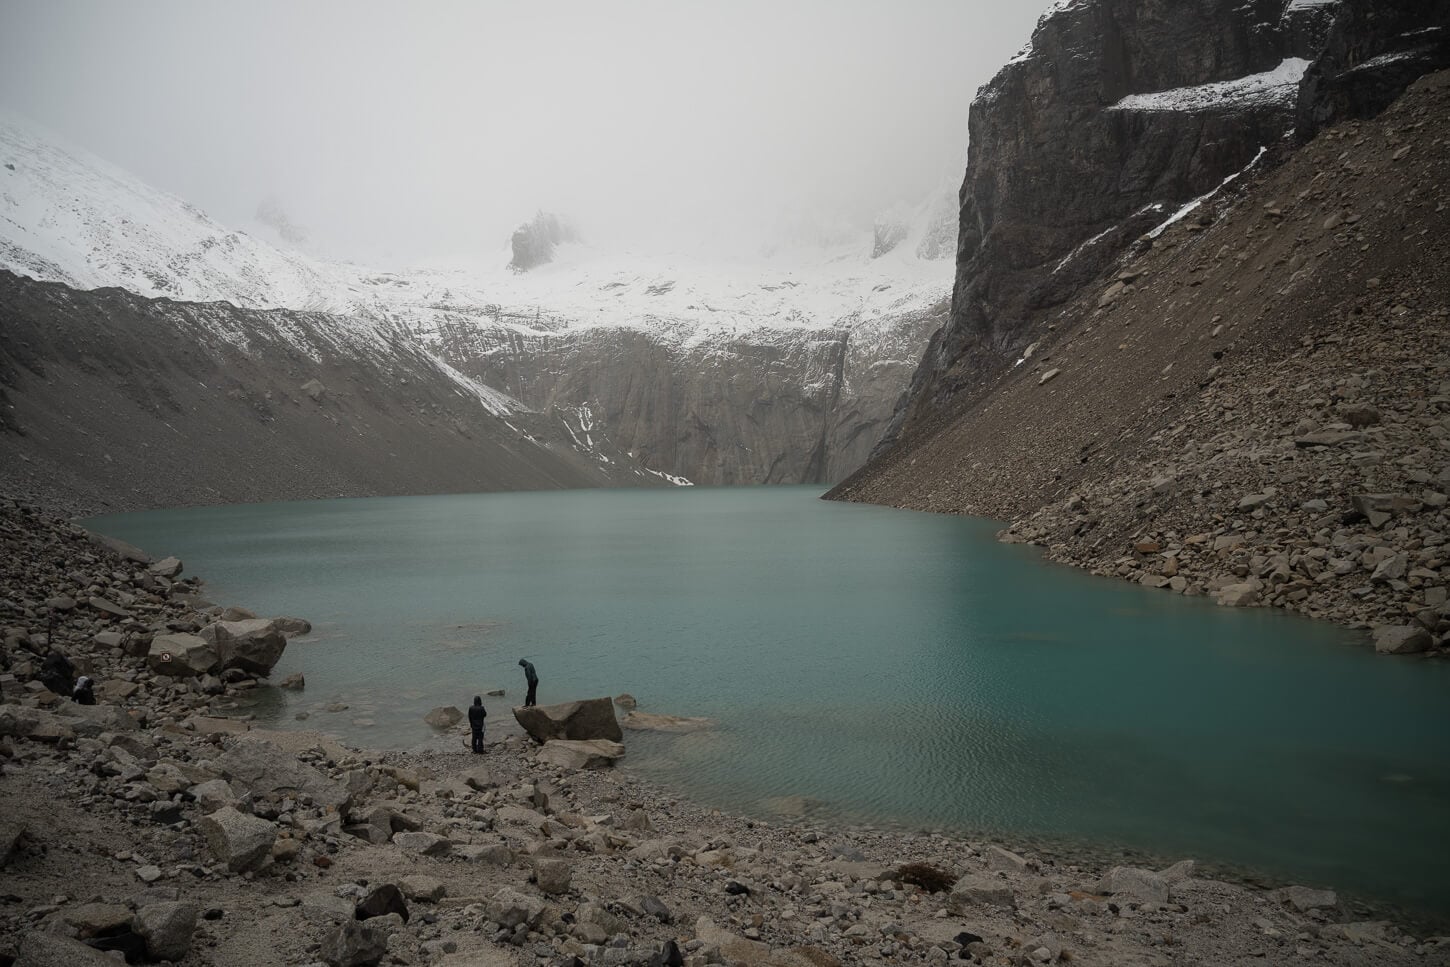
On that last bit: gradually, the terrain will flatten out, and the rocks will get bigger as you approach the top of the morainic deposit where the Mirador is located. From there, it’s a short walk down to the lake and the various viewpoints around it.
At the top, the trail flattens a bit.
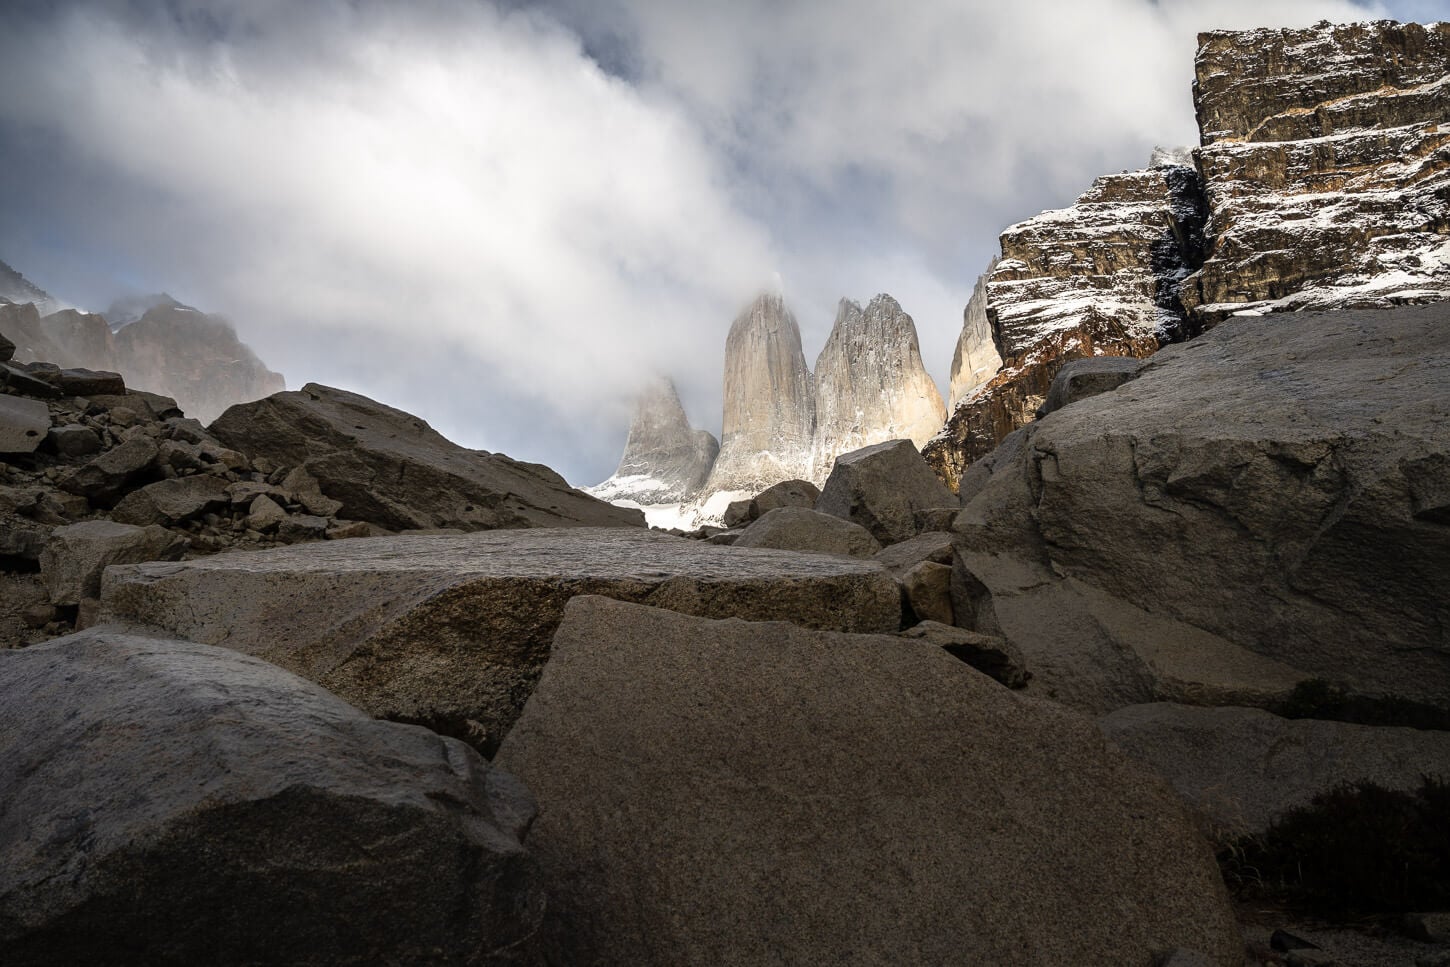
The towers will be visible before reaching the Mirador.
At the top of the morainic deposit, the trail descends toward the lake.
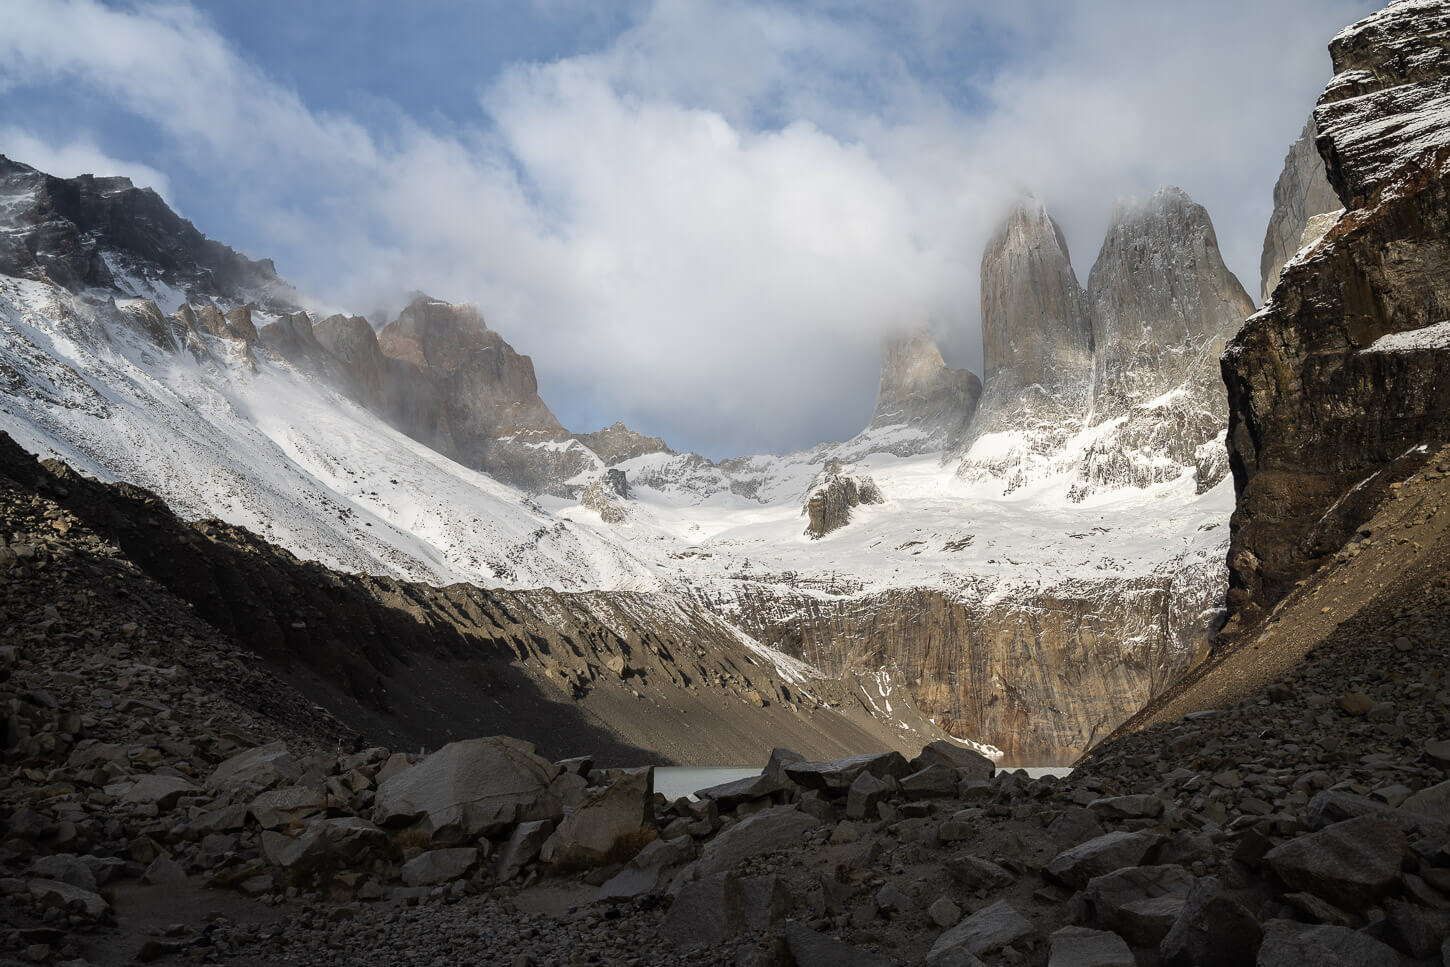
Mirador Base Torres
The view of the “Torres” is absolutely beautiful. It will make you forget all the tiredness from the scramble up the steep moraine when you soak in the views from the Mirador Base Torres.
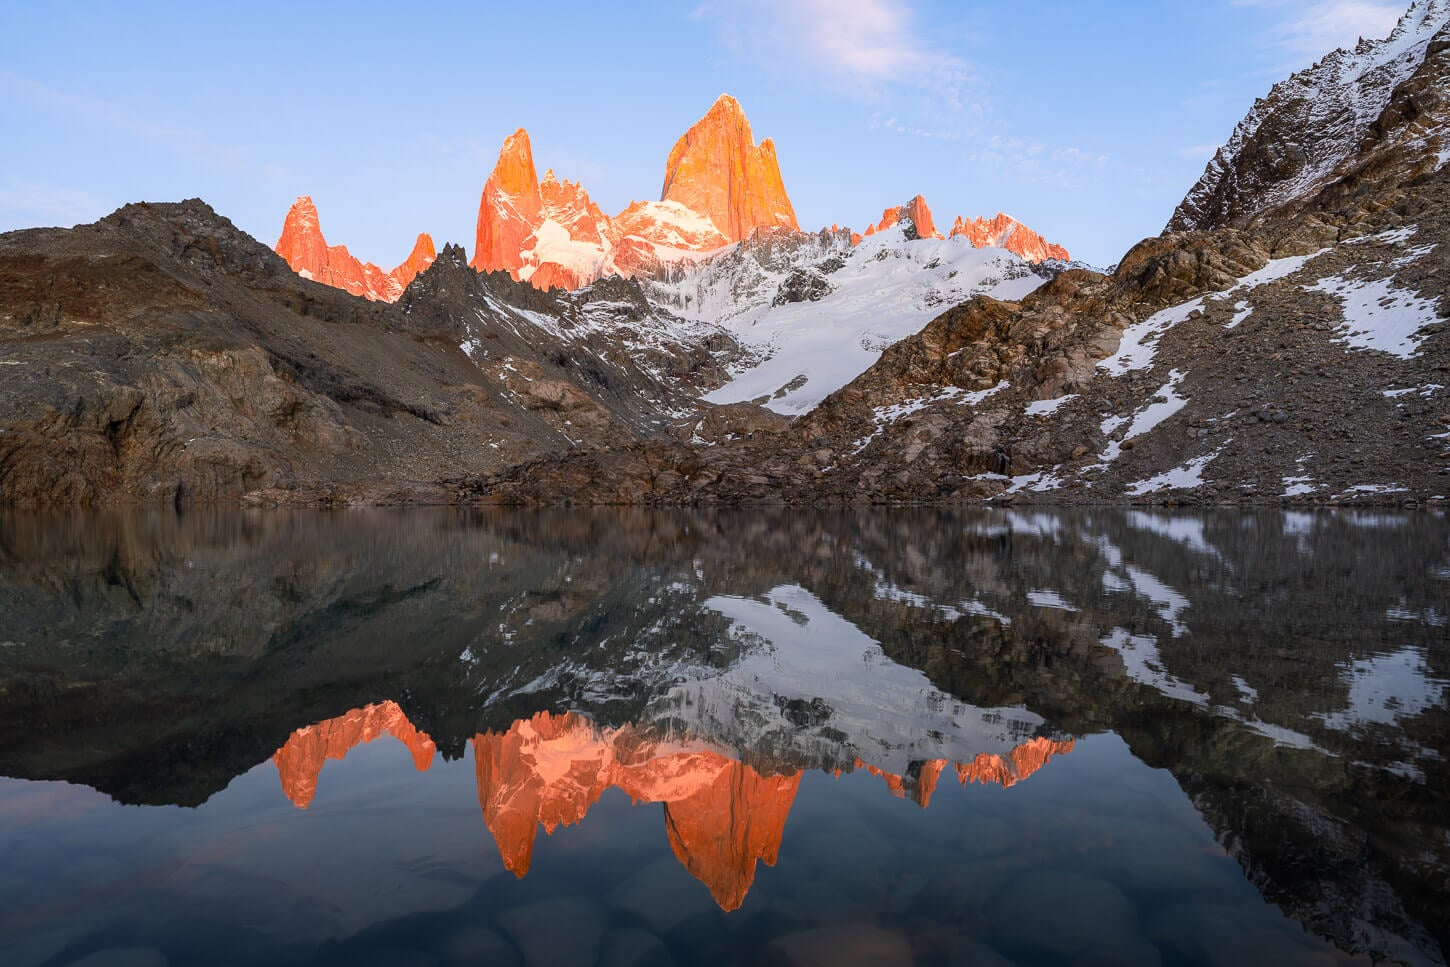
If you are doing the hike for sunrise, you’ll likely wait in the excitement of the anticipation of seeing the light hitting the towers. The Torres will start to be lightly lit and will gradually catch the light as the sun rise.
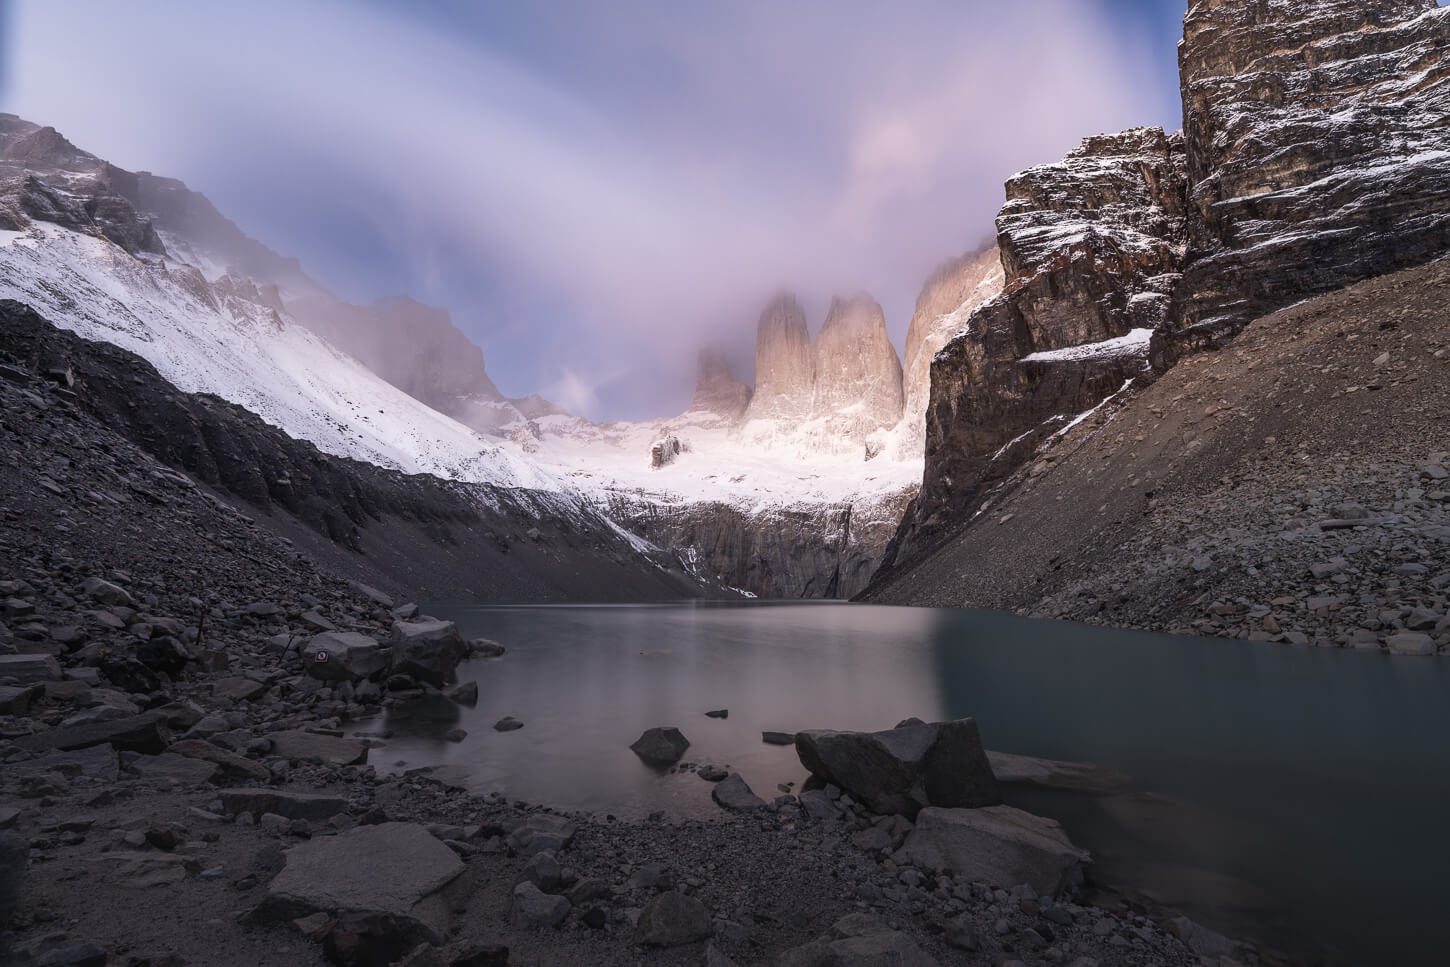
Long exposure of the Base Torres before sunrise.
Mirador Base Torres at Sunrise.
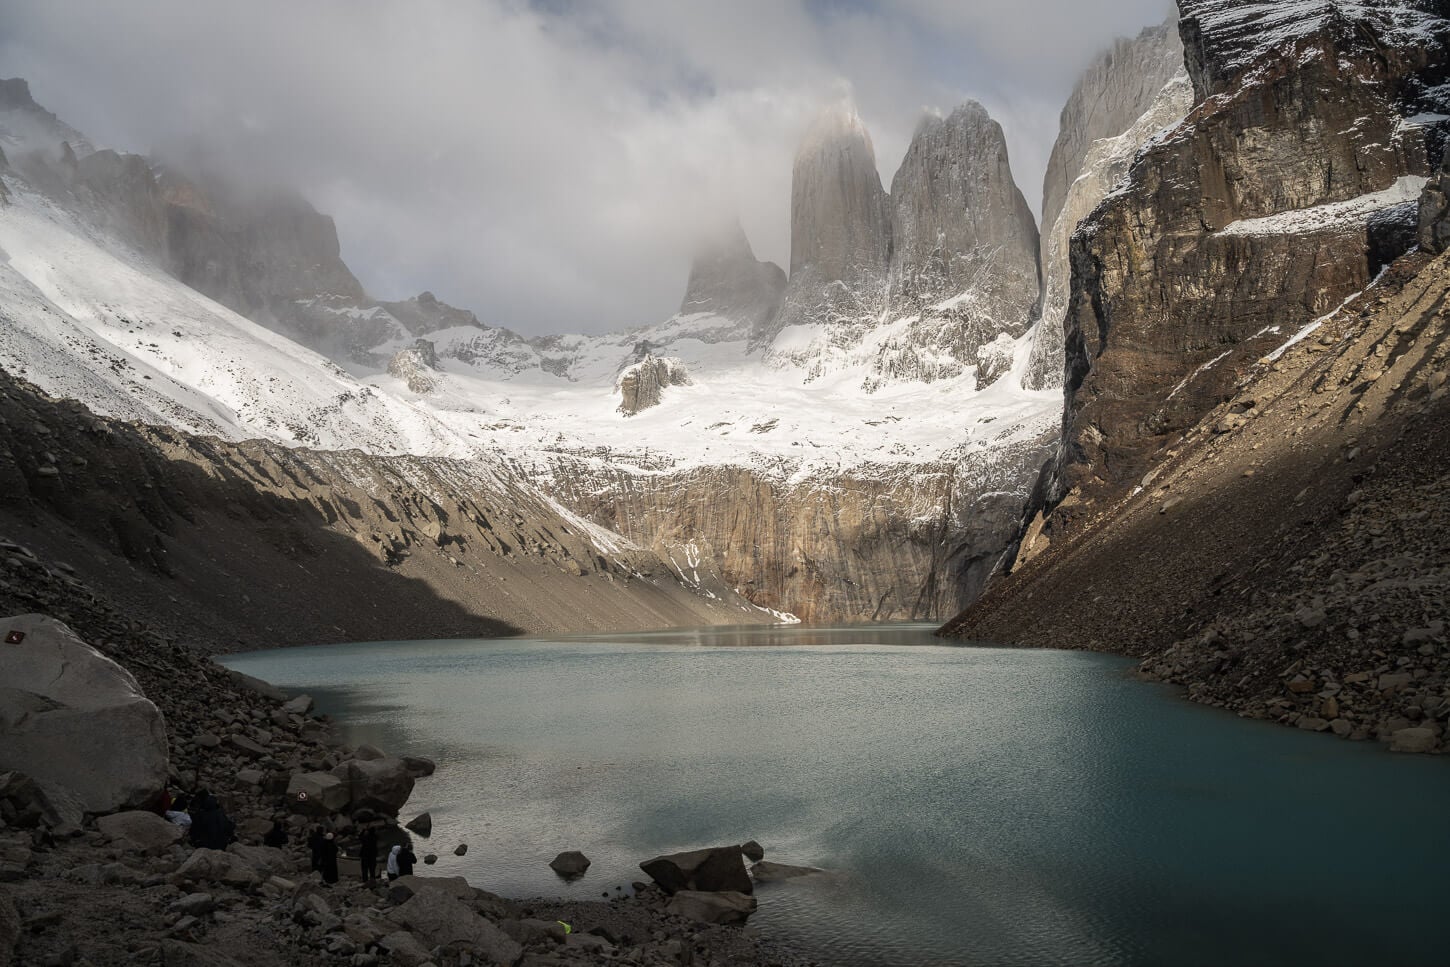
On the Mirador: the whole Mirador area is relatively small, or at least I anticipated it to be bigger. And while there will be some crowds, there’s still plenty of space to find a corner where you can sit and enjoy the view. But first, put on your down jacket or warm layer to stay toasty :)!
View of the Torres, with the Mirador sign at the bottom right.
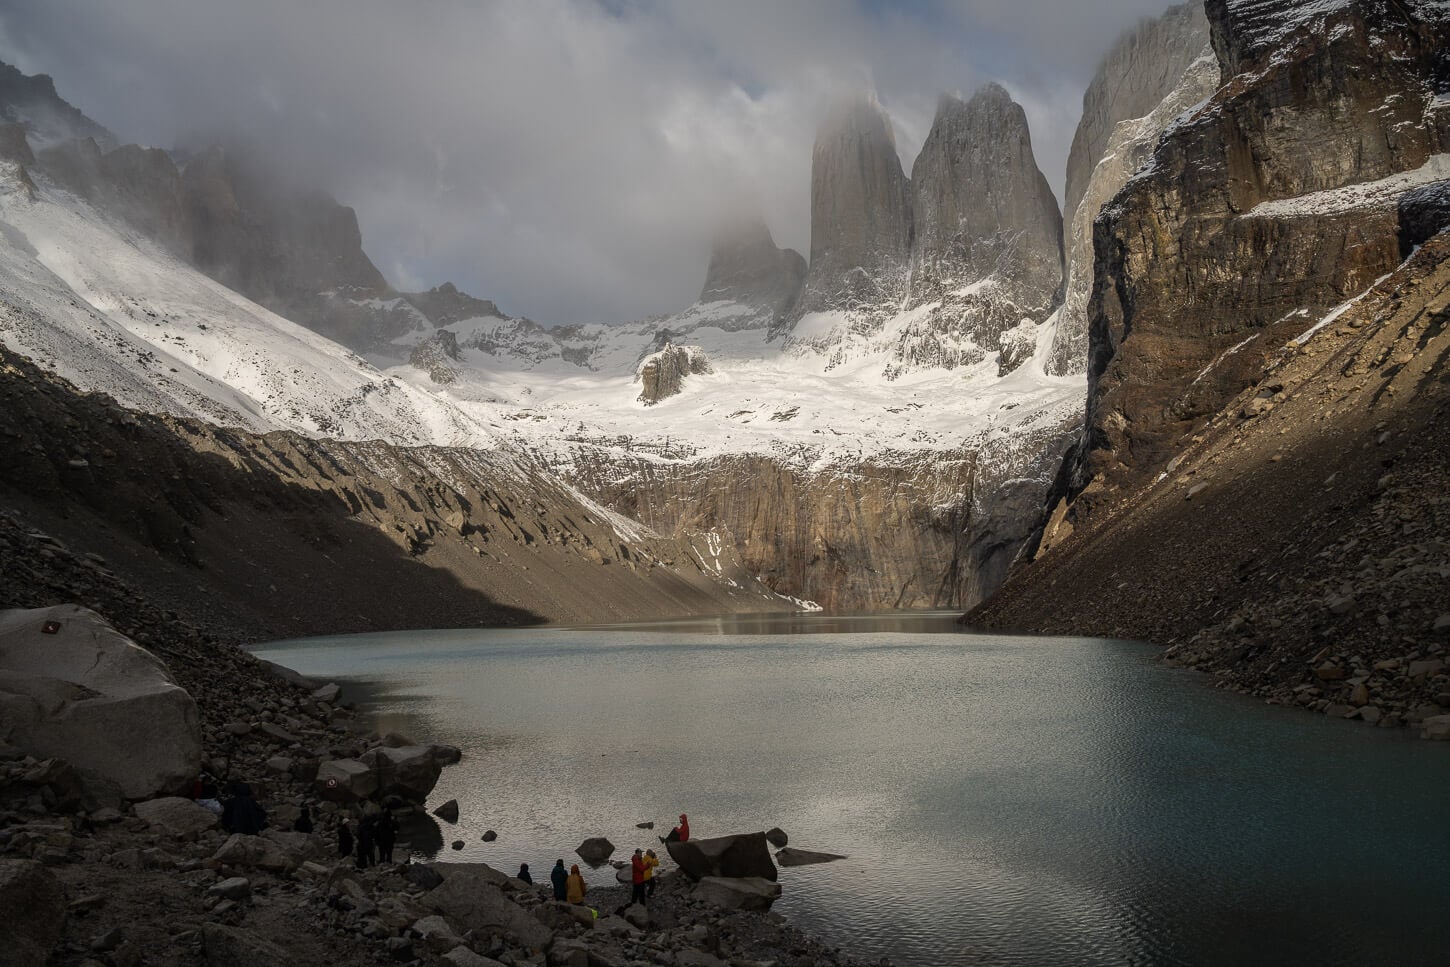
Hikers enjoying the views and the Mirador at the base of the towers.
Like in many of these popular and beautiful spots, there’s a sort of “party” atmosphere in the air. And I get it, everyone is happy; I was too after long months of planning a trip to one of the most remote areas in the world, a long trip and a very long and tough hike, everyone experiences the climax and the high of having finally gotten there.
As someone who likes spending time alone in the mountains, I very much appreciate this atmosphere, too. It’s absolutely great to see so many people being so happy outdoors, just to experience that view. And this makes the whole experience much more special.
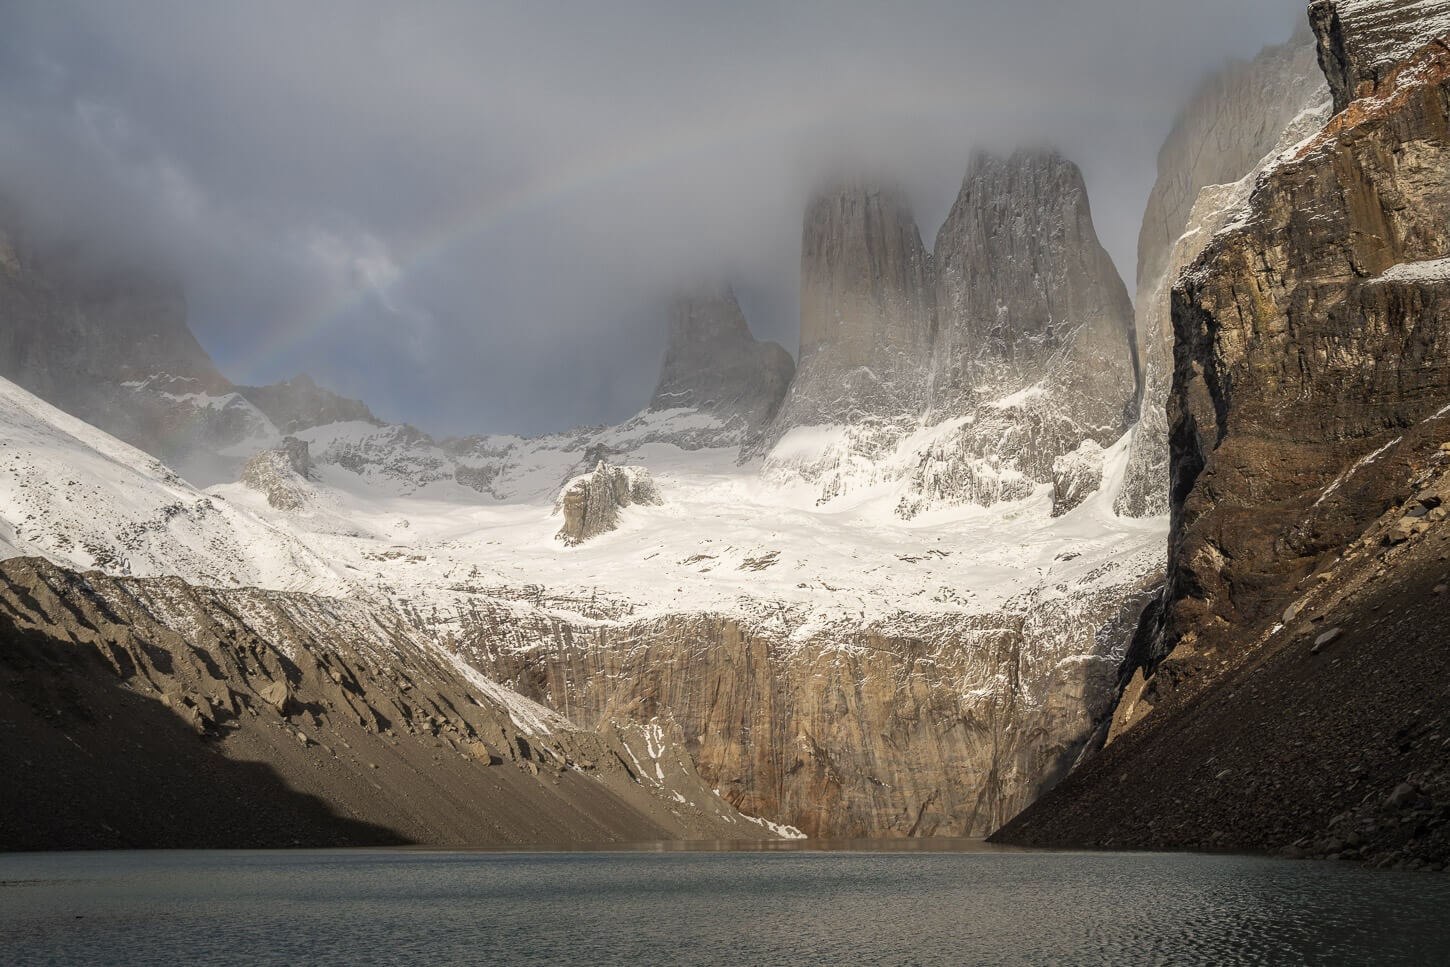
One last tip: if you arrive at sunrise and it’s all cloudy, they often say to wait for a couple of hours, as it often clears two hours after sunrise. That was what I witnessed. It got cloudy at sunrise, and it cleared up a couple of hours later.
The Towers shortly after Sunrise.
Clouds and fog rolled in shortly after.
Again, the skies cleared, revealing the towers a couple of hours after sunrise.
Base Torres Photos and Photography Tips
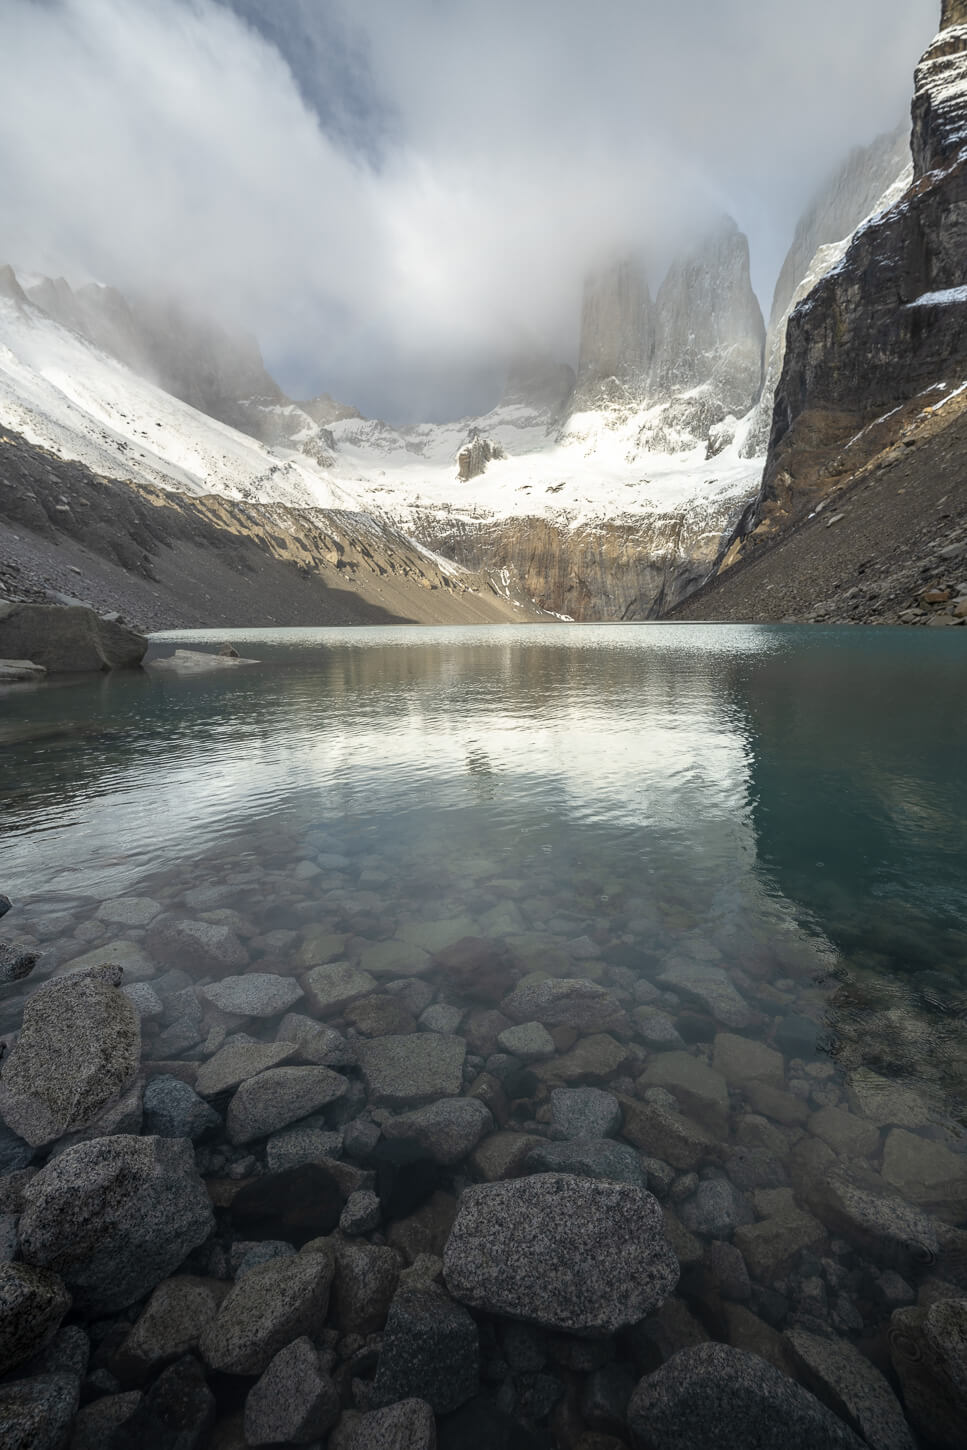
On this particular hike, the camera gear I brought with me was the following: Nikon Z7II, a 24-70mm lens, and the 14-24mm f/2.8 lens. A lightweight tripod, and a set of filters from 6 stops to 10 stops and graduated NDs (0.6, .075 and 0.9). I used the 14-24 the most. If you want to get close to the lake and capture much of it, bring something down to 16mm wide, full frame.
Long exposure frame captured at 16.5mm.
Same spot, at 21mm wide.
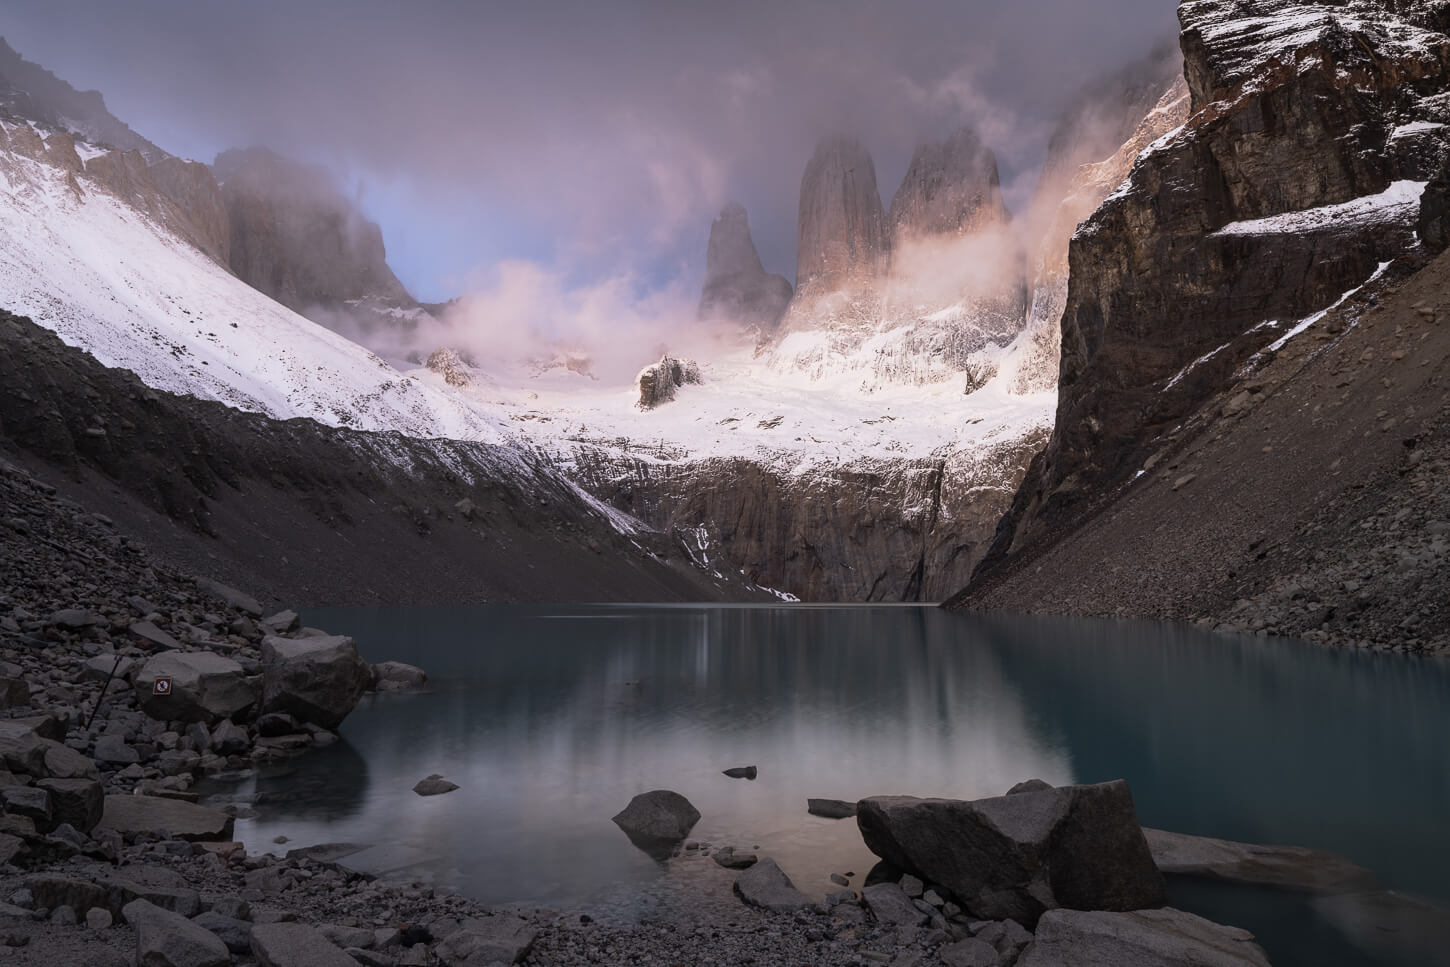
One thing I do not see mentioned enough is: plan to be there way before sunrise, ideally at the beginning of twilight. The “twilight” light will start hitting the Torres before the sunlight does. That creates quite a nice effect already, with the first, soft, warm light hitting the peaks, producing soft hues of different colors.
In such cases, it helps to do a long exposure. What long exposure does in these conditions is help to saturate the colors “naturally” – by naturally I mean without having to crank the saturation slider in post, but let the sensor gather more color from the long exposure. That’s how I got this shot; it’s a 15-second long exposure taken at twilight. For reference, the Towers were barely visible to the naked eye.
I’d recommend moving around a lot and not only sticking to the mirador. There are plenty of great views and compositions around and above the lake. And if you stick around long enough, you can capture the Base Torres views.

Where to stay
If you are not doing one of the treks, either the W or the O trek in Torres del Paine Circuits, overnight accommodation within the park can be expensive to outrageously expensive. However, you can still book the Chileno Hut or campsite, or the Central campsite and the Ecocamp by the Visitors center.
A very popular choice is the Chileno campsite. Reason being, it’s a much shorter “Sunrise Hike” from there to the Base Torres Lookout, only 5km or so.

Tents at the Chileno campsite.
I stayed at Osteria Pehoé as it is located about 30km from the trailhead, which took about an hour to cover in my rental car. The reason I chose it is that it is close to other landmarks too, which makes the overall travel time to and from other locations reasonable. And the views from there are hard to beat.
The nearby Camping Pehoé also offers a similar experience.
Additional Resources
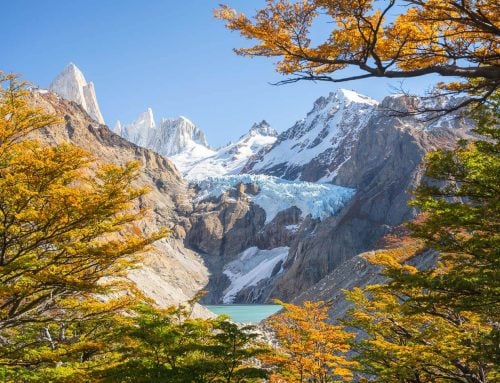
- If you are planning a trip to Patagonia, you may also want to check out my Base Torres Laguna de Los Tres Sunrise hike guide for the other epic sunrise hike in Argentina.
- Here is the official Las Base Torres page on the Torres del Paine website.
- Discover more scenic hikes in scenic locations!


Leave A Comment