Hike the Laki Craters, an Otherworldly, Volcanic Landscape, Iceland
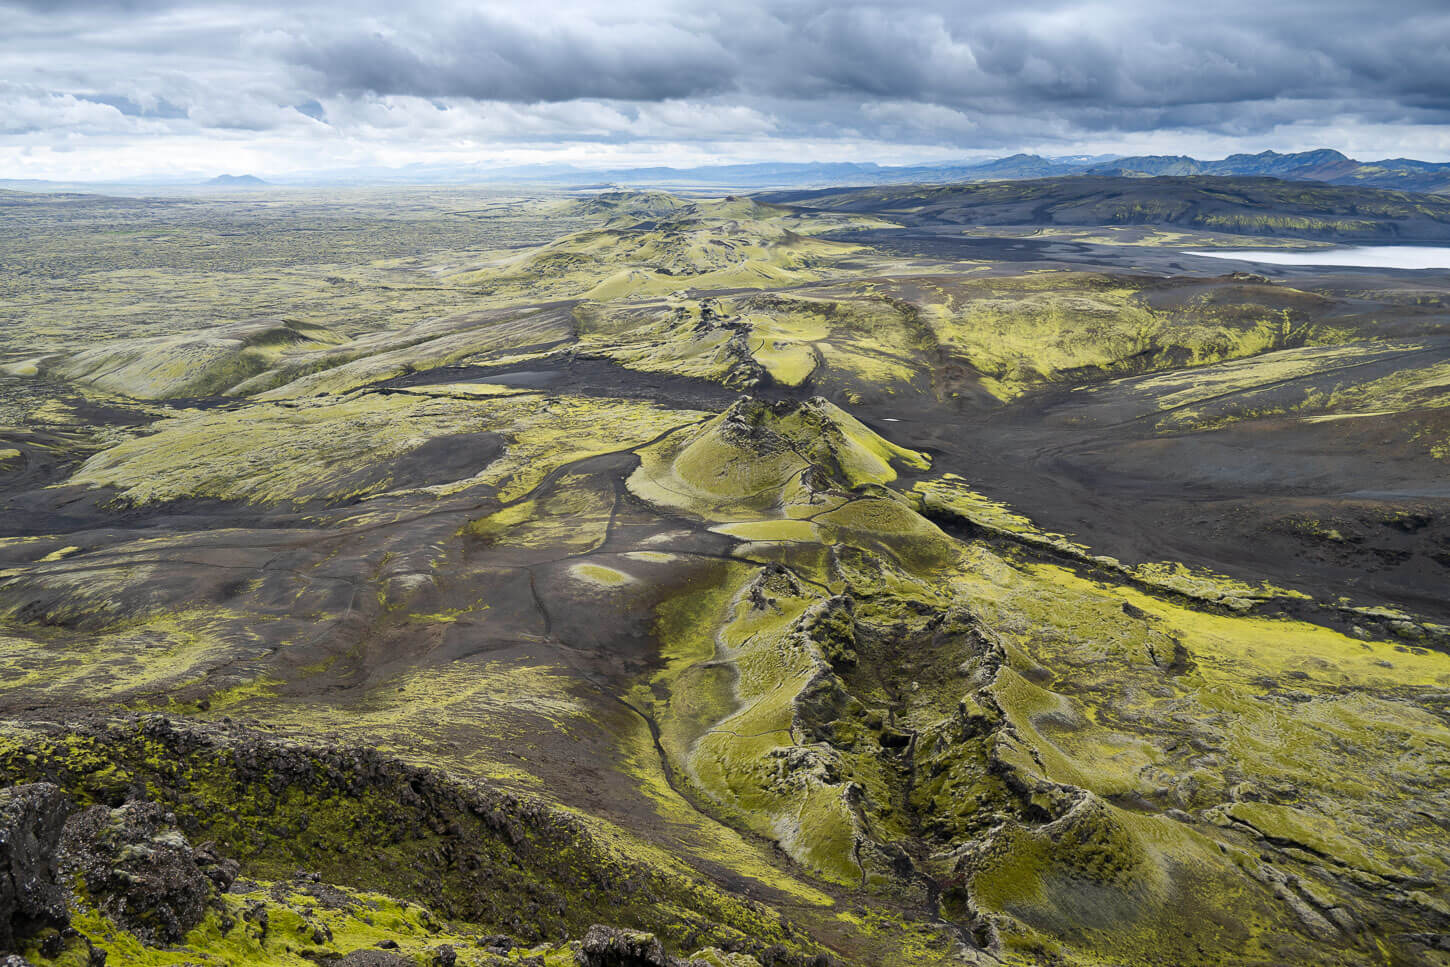
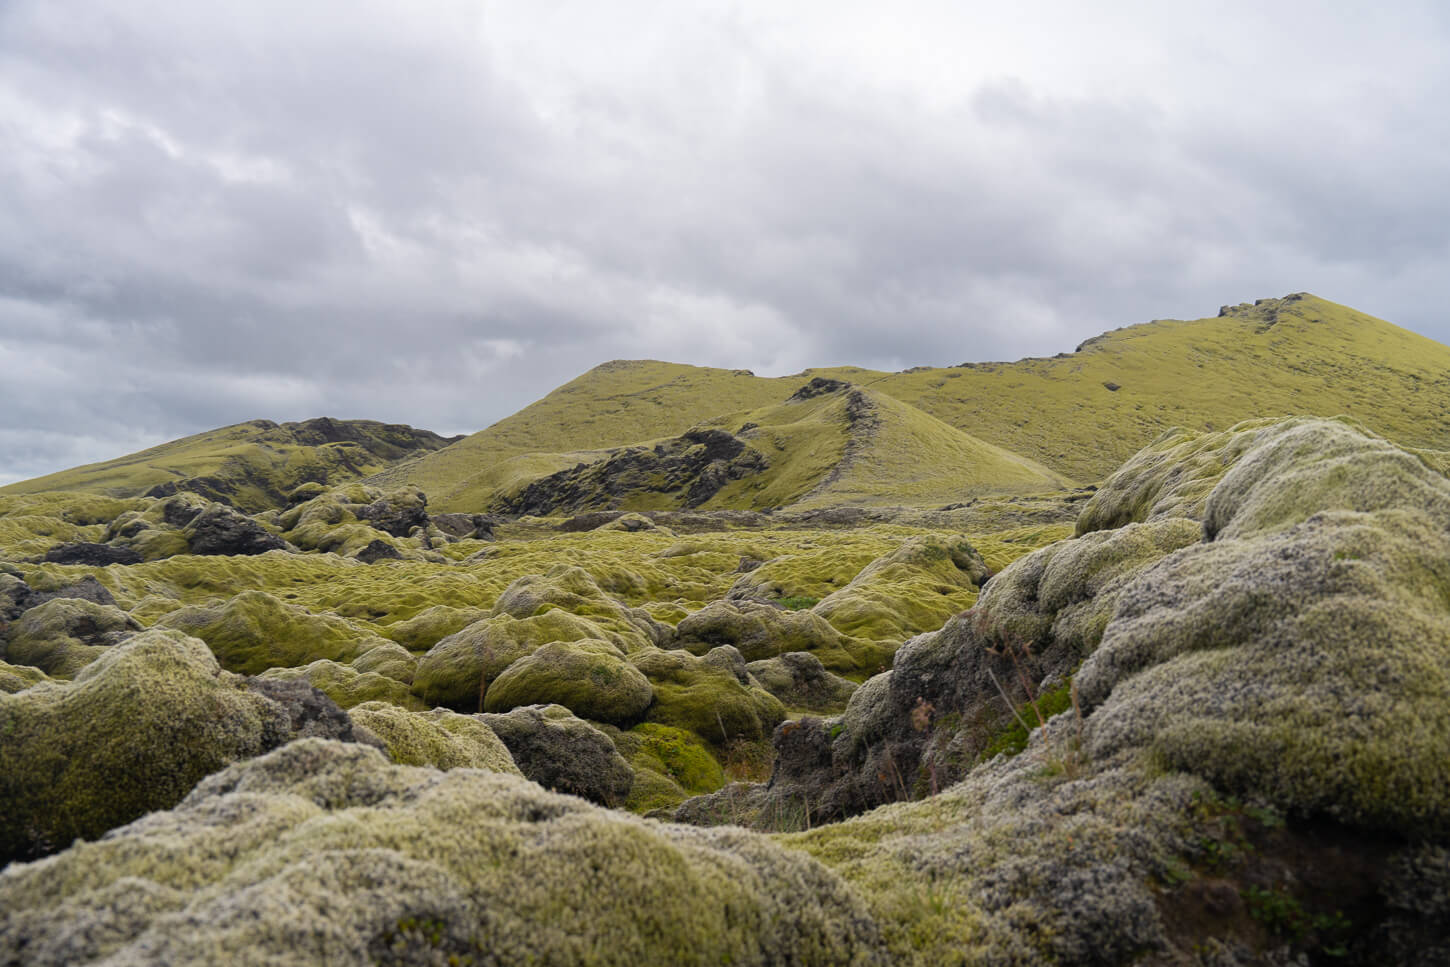
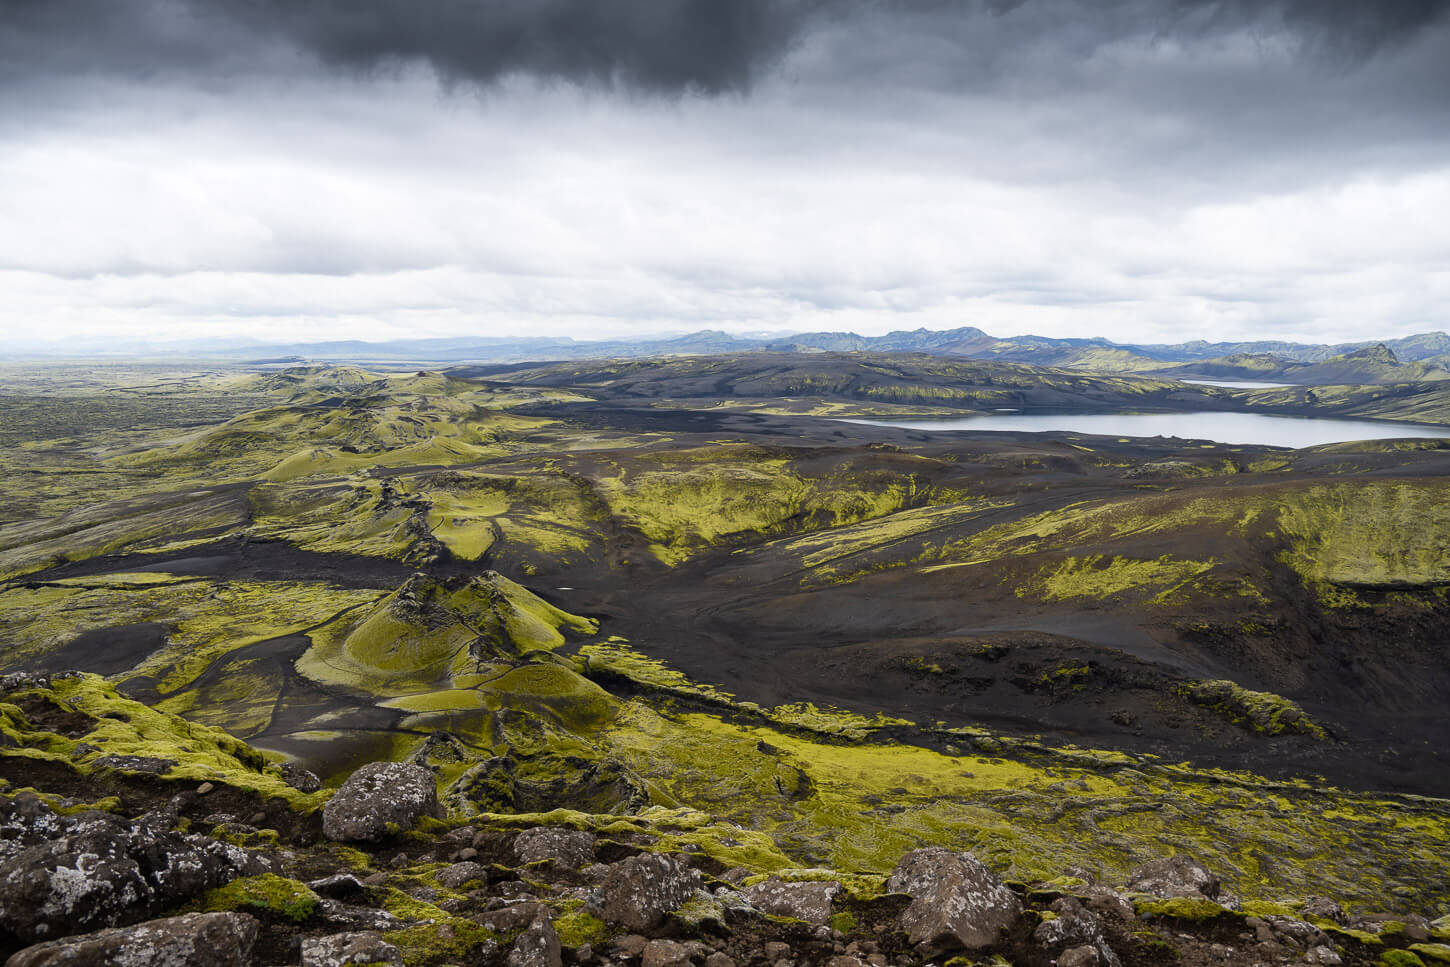
The Laki Craters, or Lakagígar, are the remnants of one of the most violent eruptions in Iceland, and they are best viewed on the short hike leading to the top of Mount Laki. From there, you can enjoy a 360-degree panoramic view of the craters, the vast lava field, and the seemingly endless landscape of the Icelandic Highlands.
Laki Craters.
The hike to the Laki c raters viewpoint is relatively short but steep at times. With a total length of 4.5km (2.7 miles) and 300m of positive elevation gain (985 ft.), it takes about 1.5 hours to complete the Laki trail.
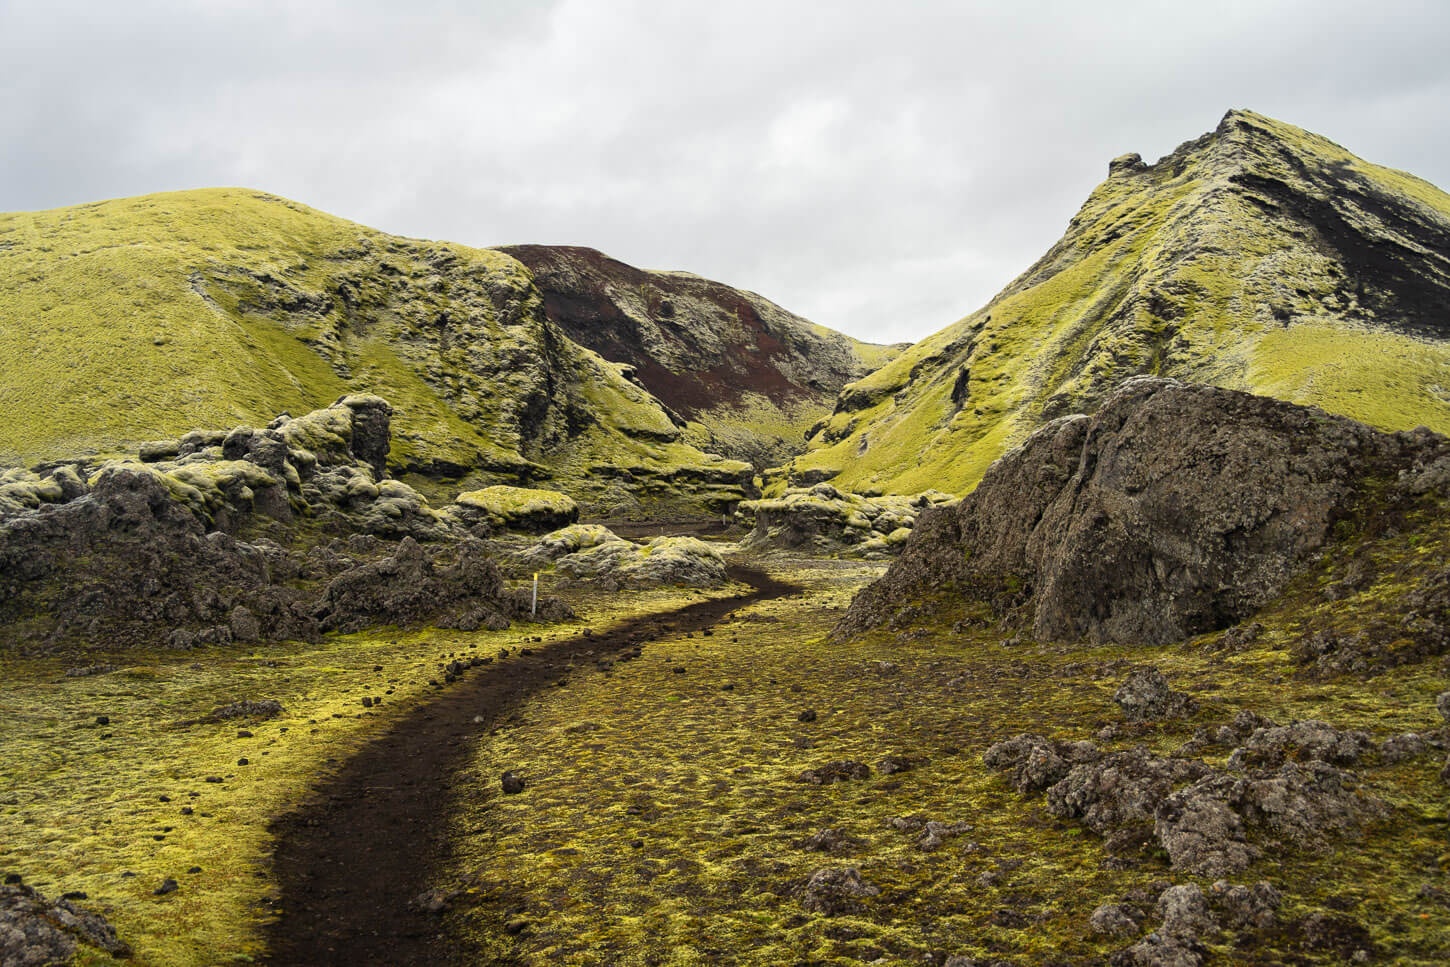
It’s totally worth it if you are prepared for the long drive and have a suitable car. The view of the seemingly endless moss-covered lava field against the backdrop of the volcanic soil is unique. The top of mount Laki truly offer sone of the best panoramic views of the Highlands.
Laki craters to the north of mount Laki.
And if you have time, I’d recommend also the short loop hike of the Tjarnargígur trail, which is a 15-minute drive further down the road from Laki, and also takes about an hour to complete.
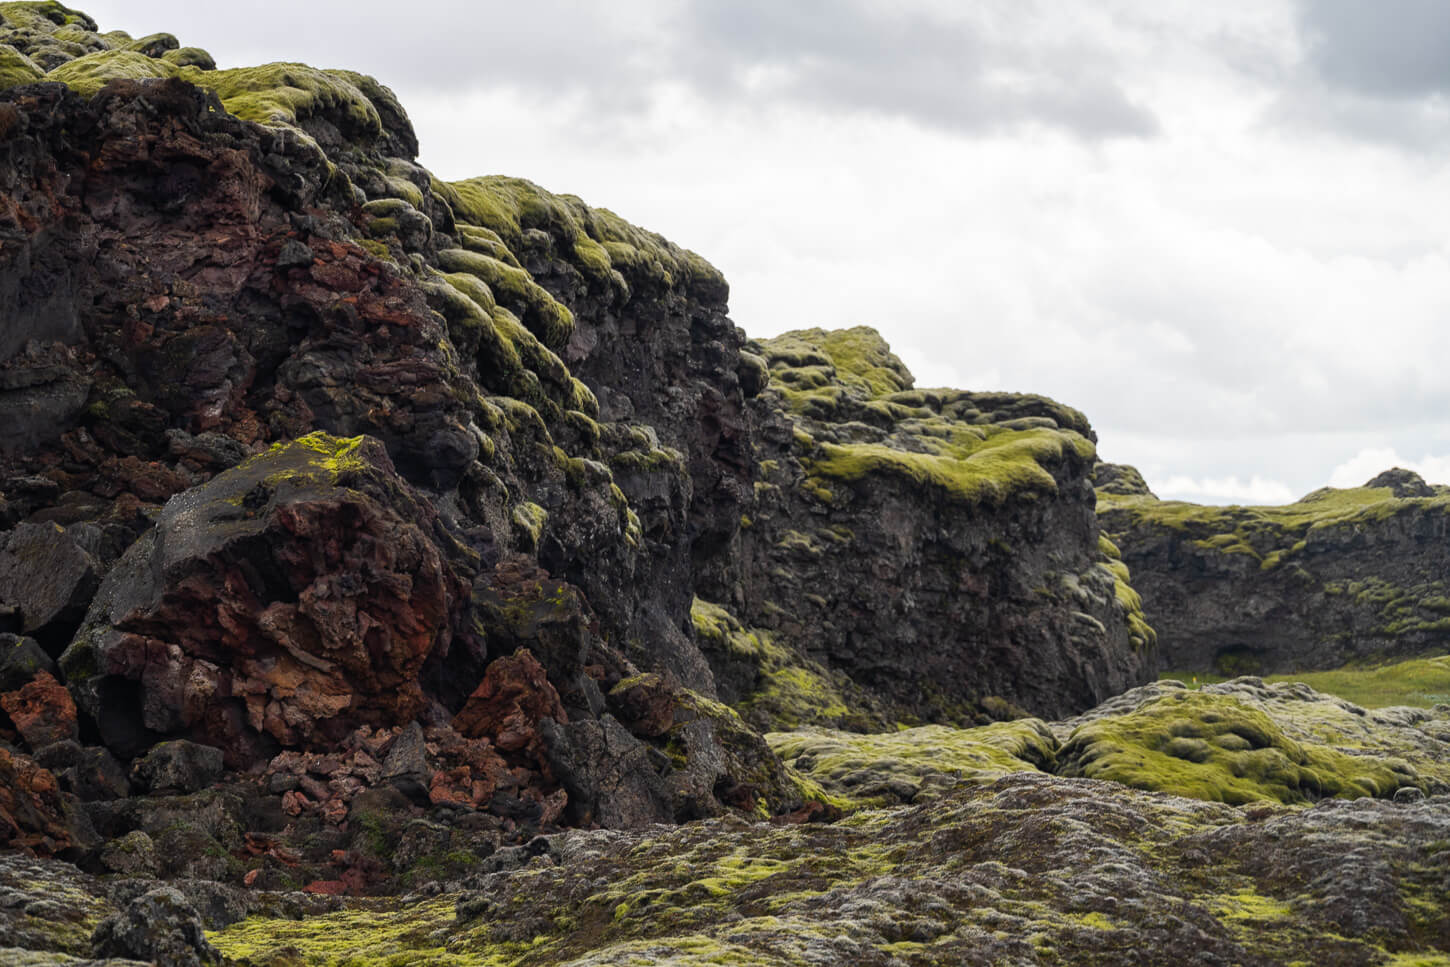
The fissure, of which the Laki craters are part, was created in 1783 as part of an eruption of the Grímsvötn volcanic system. The eruption lasted about eight months, opened a fissure about 27km long and spewed out about and estimated of 14 km3 basaltic lava.
The Tjarnagígur hiking trail also offers a close-up view of some of the Laki craters.
Overview of the Hike & Map
Ideally, this is a hike or a drive you want to do int the best possible weather. Not only for the views, but if it rains or rained recently, the rivers along road F206 may be hard to cross.
Both hikes are quite easy and rather short, so both could be easily combined in a single day. That is what I did and what I’d recommend doing. The hike to Laki, however, is a proper mountain hike even if it’s a short one. By that, I mean it’s relatively steep in places, and the terrain is rocky or soft.
The hike to Tjarnargígur, on the other hand, is pretty much a flat loop, with no challenges at all. There are no jaw-dropping views of the surrounding areas, but the beauty of this trail is in what it lets you experience: the moss-covered lava filed up-close.
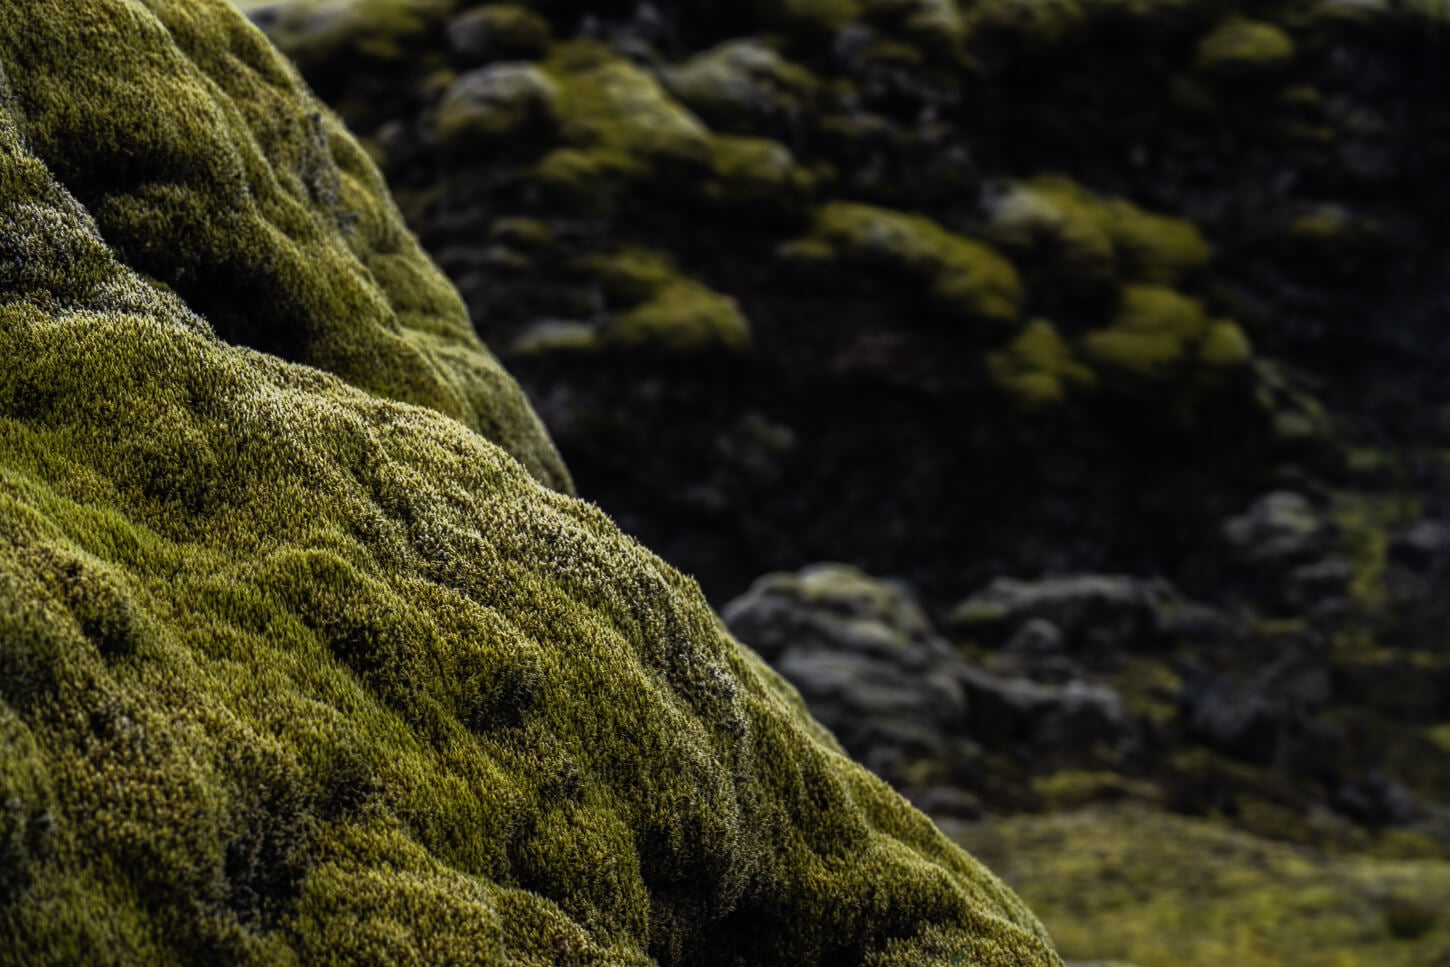
And, a critical note on that: do not step outside of the marked trails or on the moss. It’s a very sensitive environment, as you have probably heard, it takes just one step to damage the delicate roots of the moss.
Here are the numbers of the Laki loop trail:
| Max Altitude | 818m (2683 ft) |
|---|---|
| Distance | 4.5 KM (2.7 miles) |
| Elevation gain | 300m ↑ / 300 m ↓ (985 ft.) |
| Hike time | 1.5-2 Hours |
| Hike Difficulty | Easy/Moderate |
Here is the map of the hike. You can download the GPX file for free from the activity linked below.
Laki Hike Map
| Max Altitude | 573 m (1879 ft) |
|---|---|
| Distance | 4.65 KM (230 miles) |
| Elevation gain | 70 m ↑ / 70 m ↓ (230 ft.) |
| Hike time | 01-1.5 Hours |
| Hike Difficulty | Easy |
Here is the map of the hike. You can download the GPX file for free from the activity linked below.
Tjarnargígur Crater Hike Map
How to get to the Laki and Tjarnargígur Crater trailhead and Parking
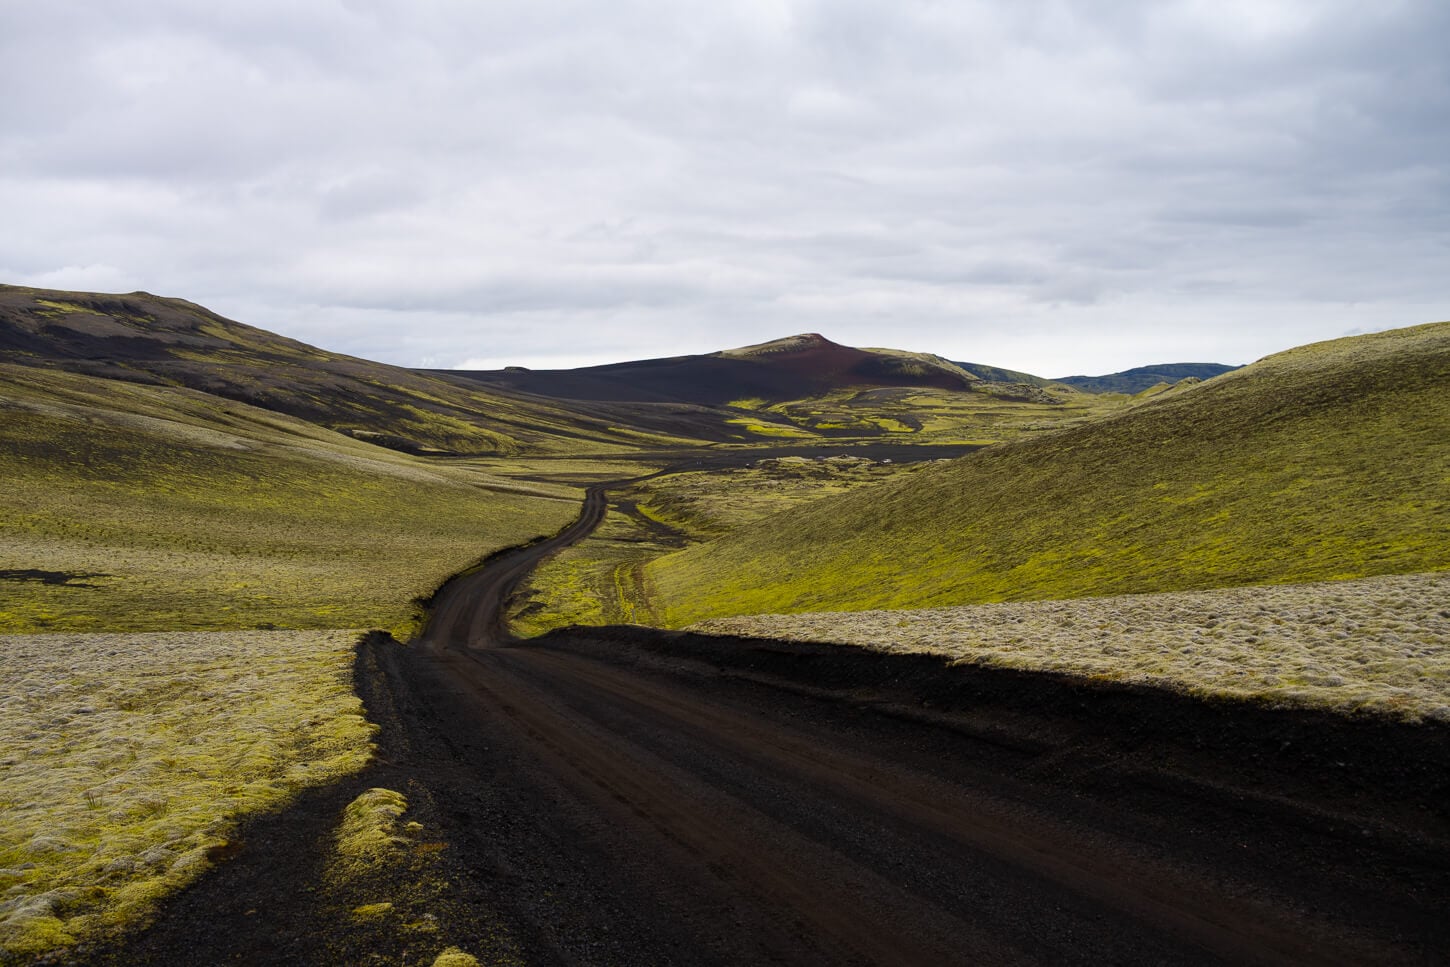
Getting to the Laki craters requires a long and challenging, but scenic drive on F-Road F206, also known as Lakagigavegur. I emphasize a long drive and challenging.
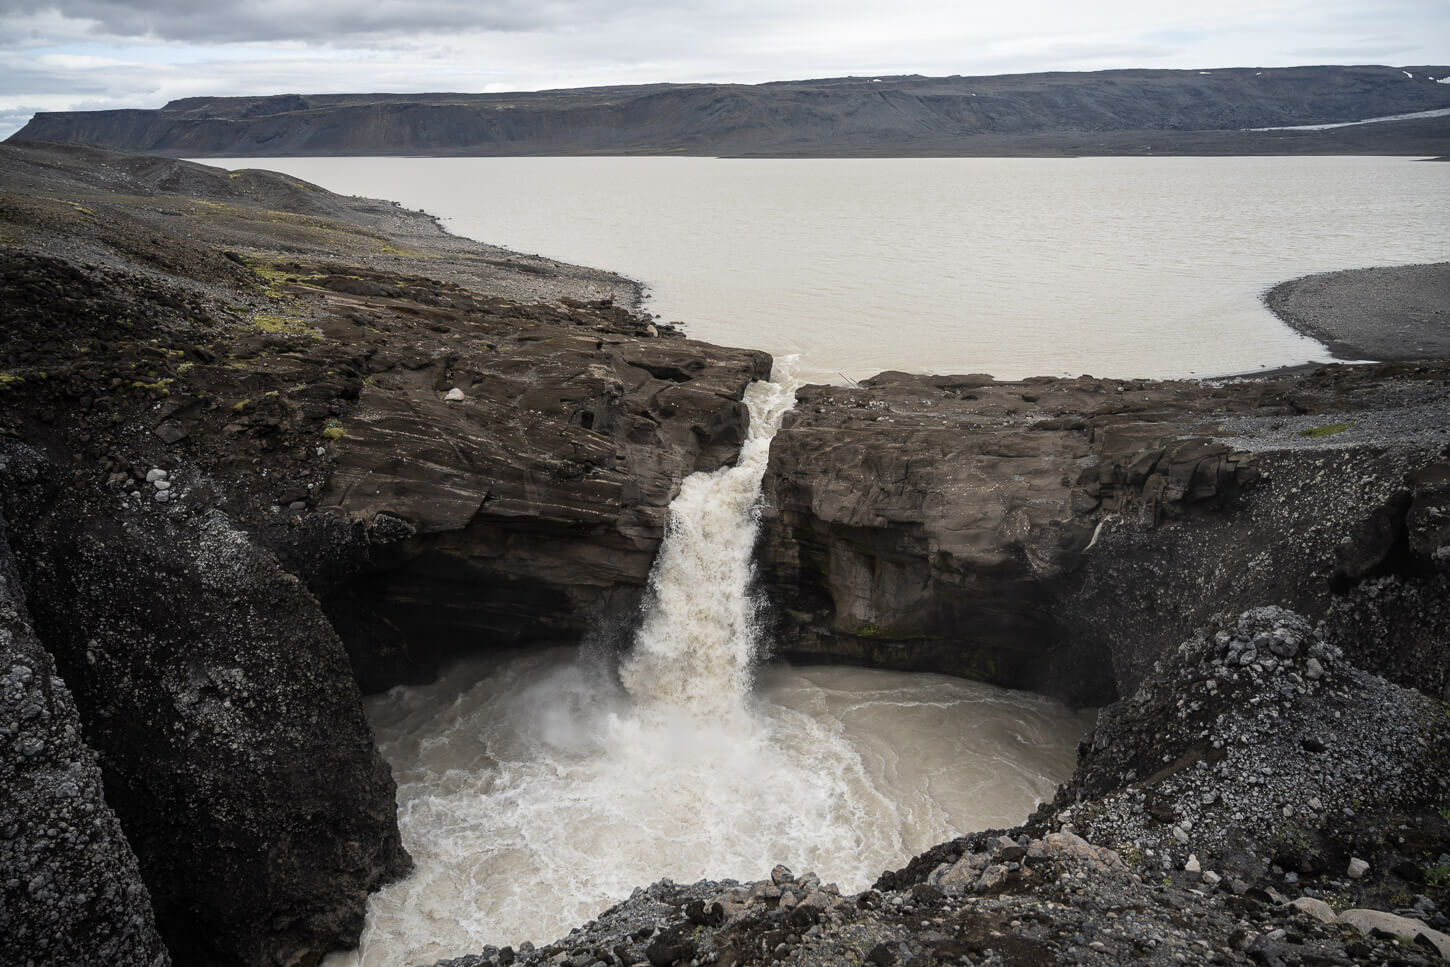
There are several river crossings along the way. Two challenging ones on Road F206 and a third one on Road F207 if you decide to drive the loop. Their values can vary considerably. I’ve seen the rivers varying from above the ankle level to “not a chance I’m crossing this”. The first major river to cross is the Geirlandsá river. which is right before the short detour to Fagrifoss. The second is the Hellisá river, which is even more challenging. Both require the proper vehicle and the proper river crossing technique.
I used an off-roader like a Land Cruiser. It is no substitute for a proper technique when crossing rivers, but it is one of the most capable vehicles.
Anyway, before heading out, I would recommend stopping by the Vatnajökull visitor Center in Kirkjubæjarklaustur, to ask about the water levels of each river crossing. They talk to the rangers in the area, so they usually have the information
Also, if you can make it and have a suitable vehicle, the loop on road f207 is another scenic drive, with another river crossing, the Varmá channel, which is another very challenging river crossing.
Again, ask the rangers about water levels before heading there, as you don’t want to turn all the way back once you are there.
- Driving Directions: The drive from Kirkjubæjarklaustur to Laki is about 50km in total, but it will likely take more than an hour and a half to complete the drive to the Laki trailhead. From the ring road, follow directions to the Fjaðrárgljúfur Canyon, which is located shortly before Kirkjubæjarklaustur when driving from the south, or after when driving from the north. Then take Road F206 to Lakagígar before arriving at the main Fjaðrárgljúfur parking area. From there, the long, bumpy drive starts.
- Parking: wide parking areas are available at each one of the trailheads by the Ranger station. The Laki parking area is here. Here is the Tjarnargígur parking area.
- Public Transport: This is a very remote area, and there is nothing in terms of public transport that gets anywhere near Laki. However, you can usually find guided tours or private transfers to the area.
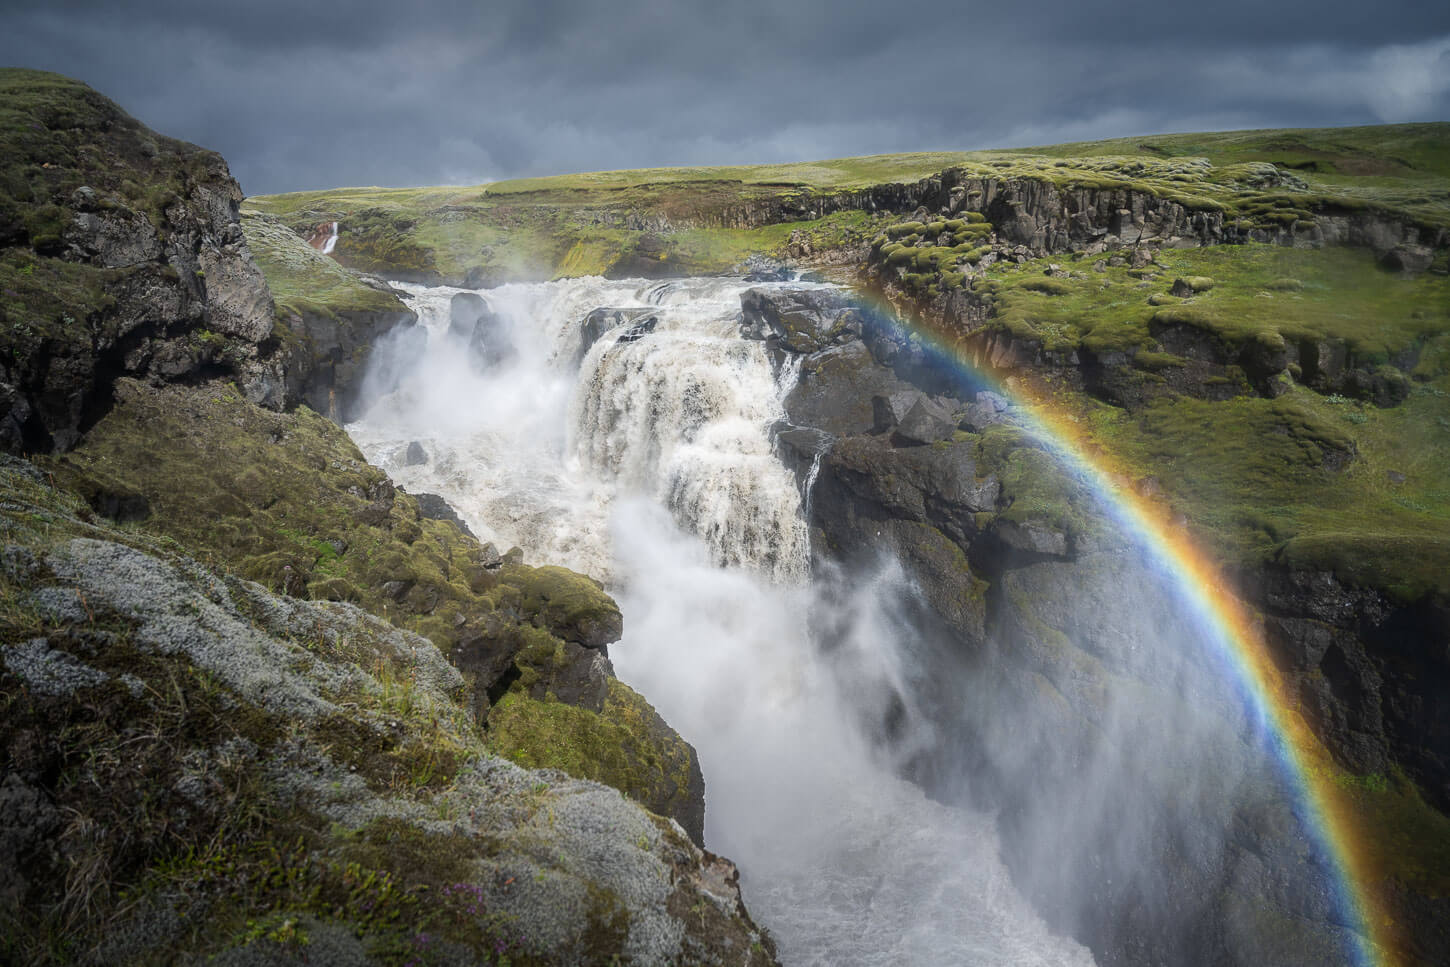
Recommended stops along the way are, of course, Fagrifoss, and, if you have not been there, the Fjaðrárgljúfur Canyon. You can also access it from Road F206, without having to go to the main parking area (details in the linked post).
The Laki Hiking Trail
Of the two, the hike to the top of Mount Laki is the more difficult one. It’s relatively steep in places. No need to scramble, but some areas are crumbling, with loose rocks. I’ll describe this trail counterclockwise, as it is the way I did it.
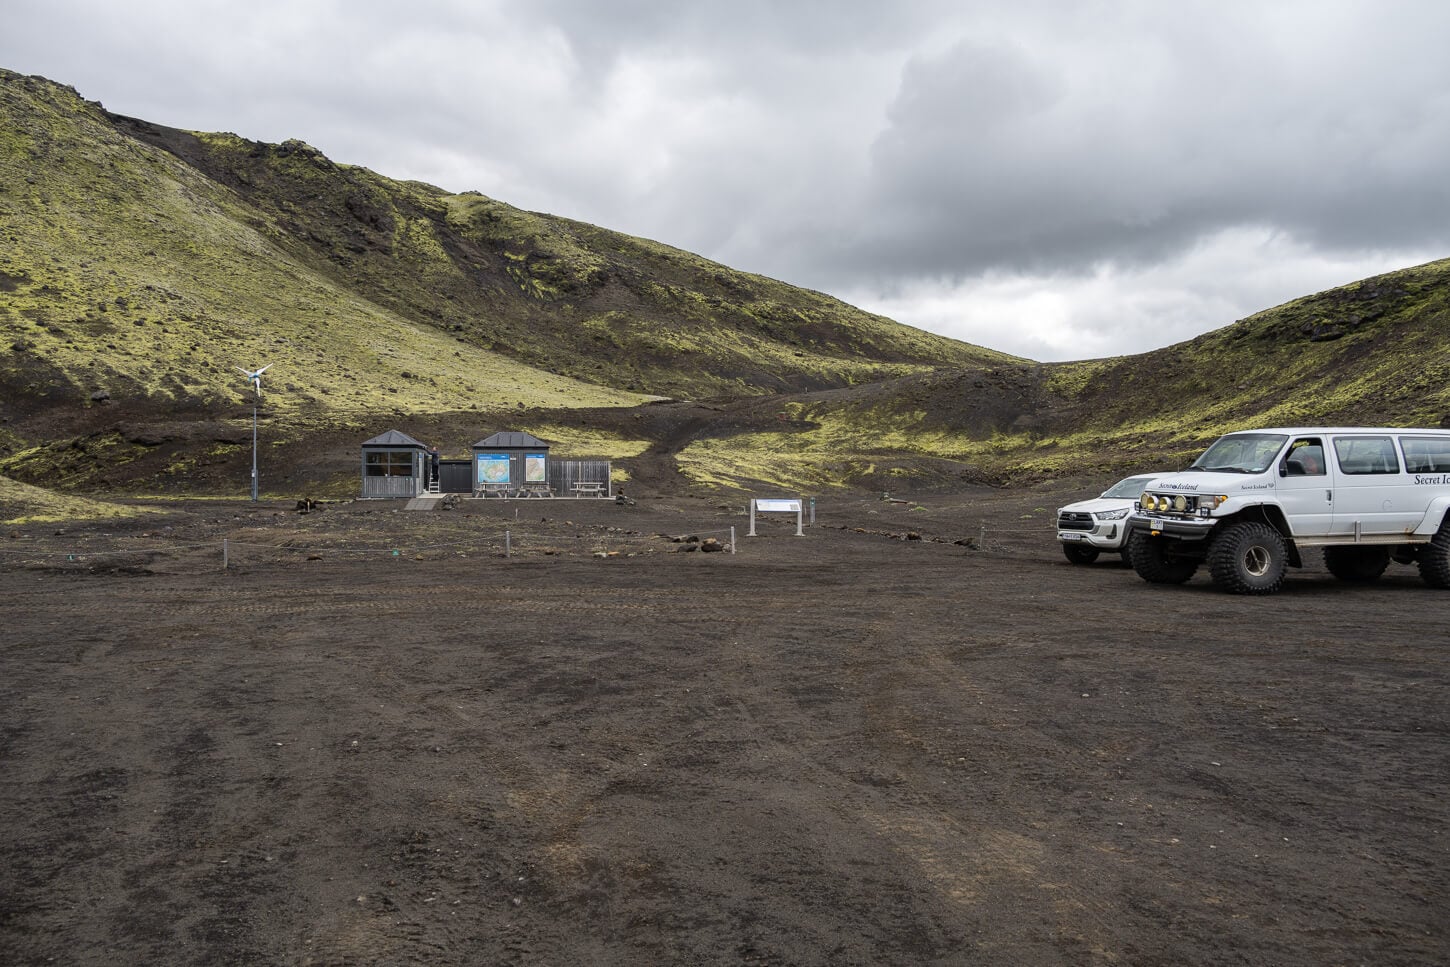
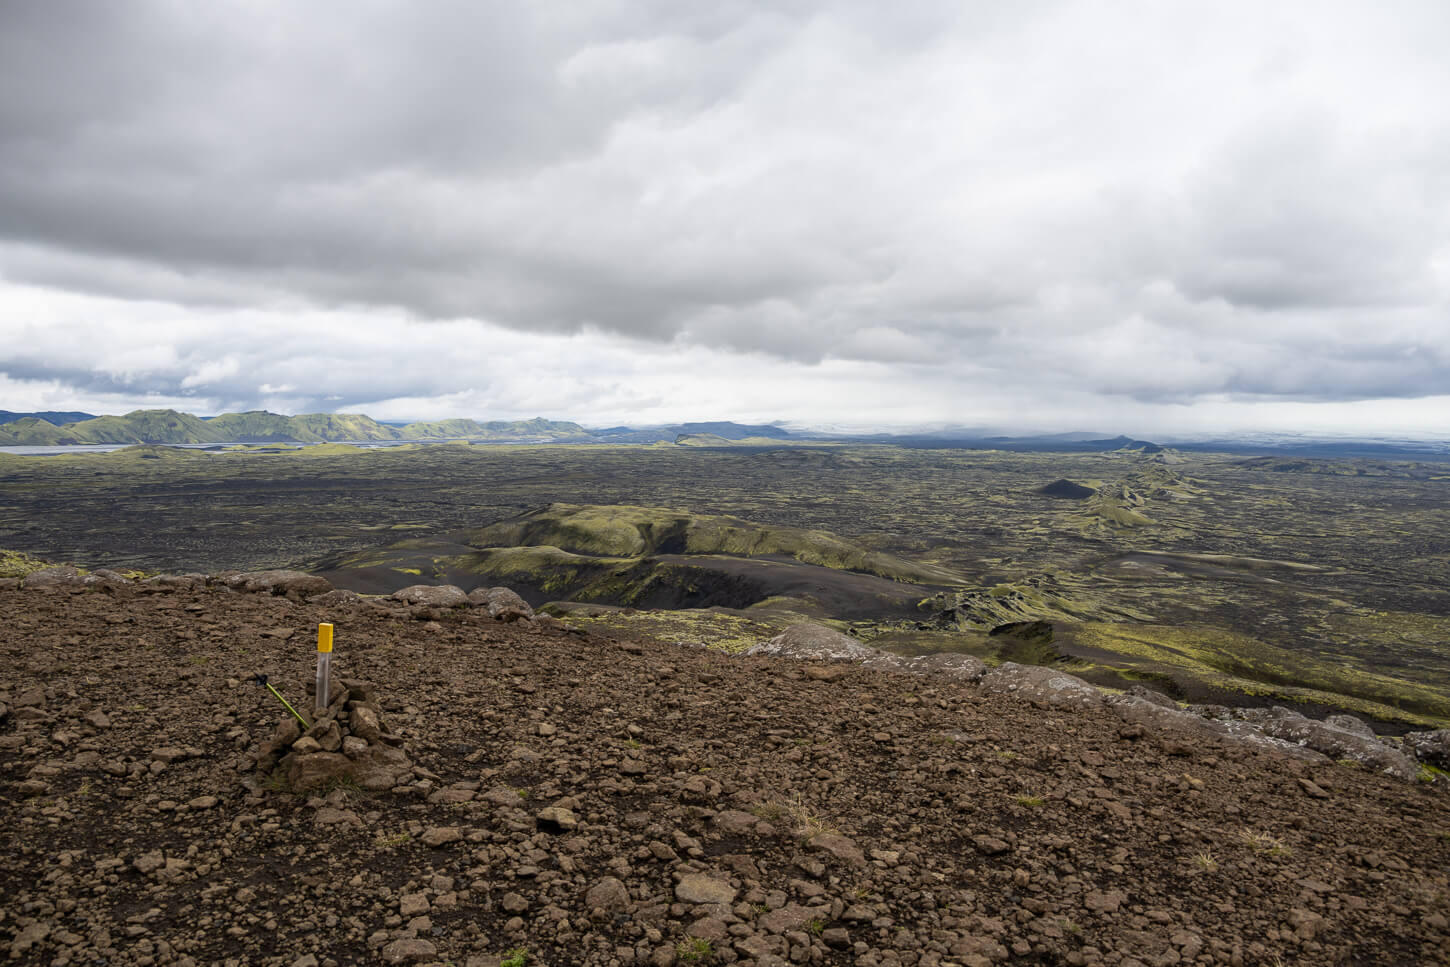
The Laki Parking area and Rangers Station.
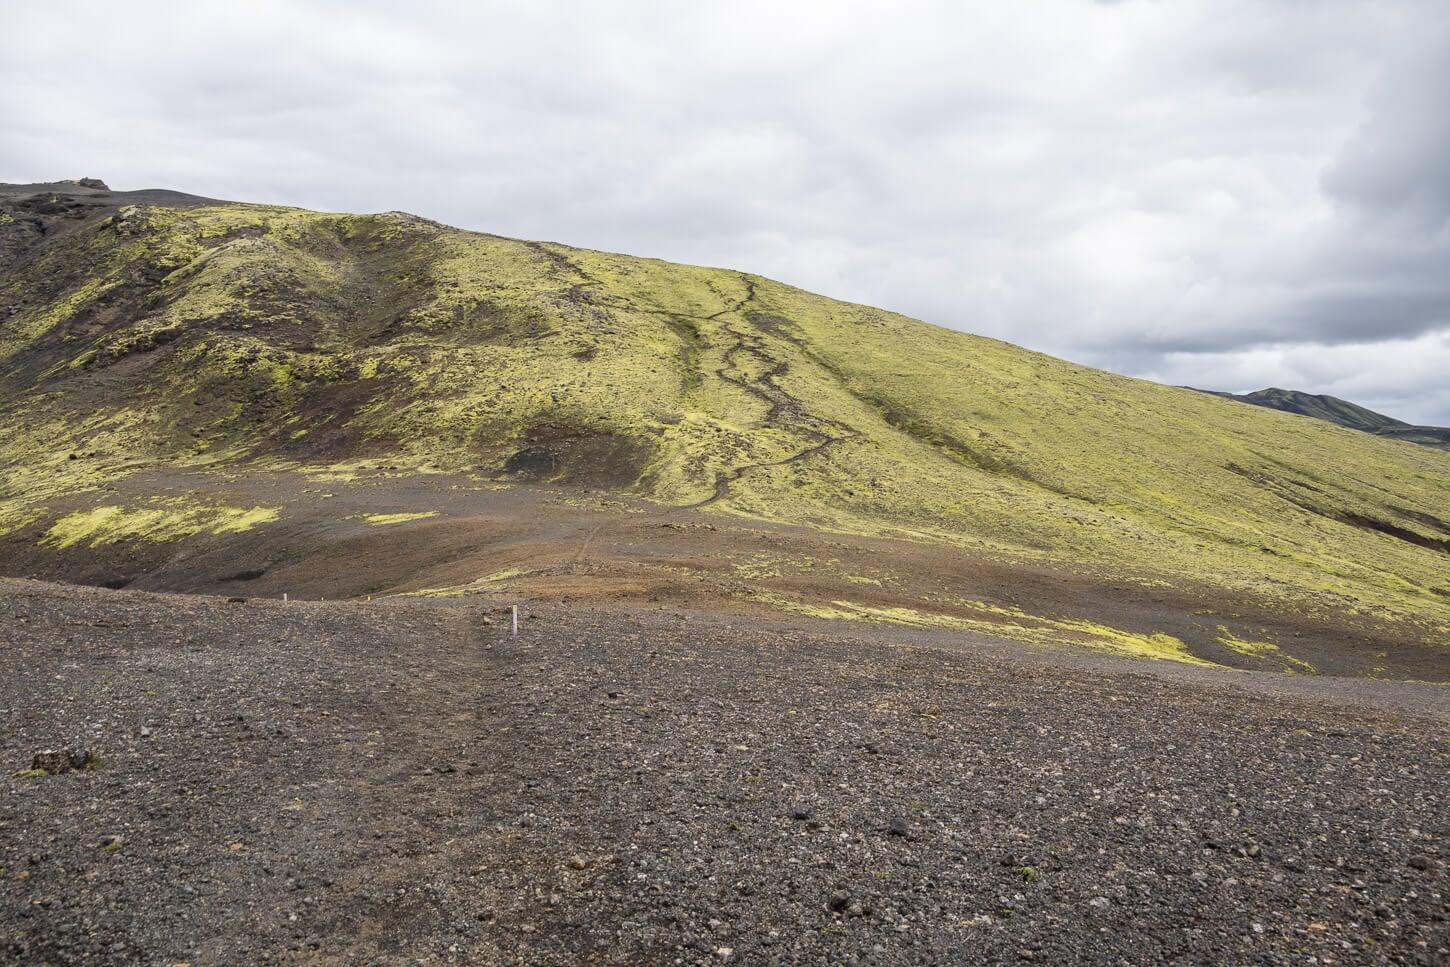
From the trailhead, the trail initially gently climbs up the side of Munt laki.
As you hike up, the views gradually open up to the vastness around mount Laki
Initially, the trail gains elevation gently, on the side of Mount Laki. As you climb up, the view also progressively opens. First, to the east, revealing part of the vast landscape that awaits at the top. The top is actually a rather flat, wide area, and the main lookout here faces the landscape to the north.
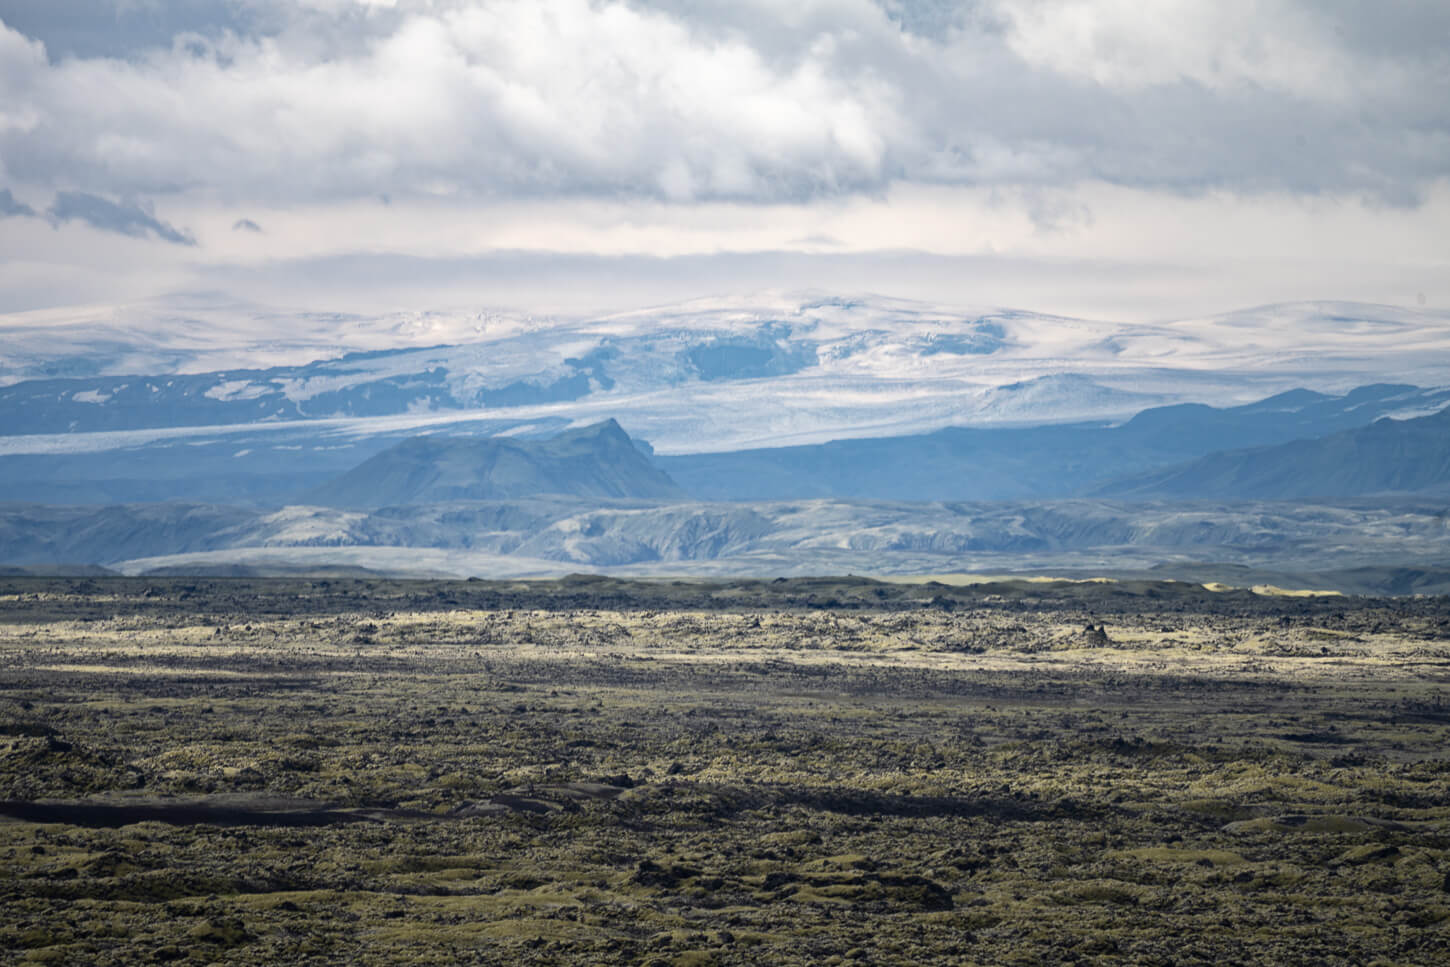
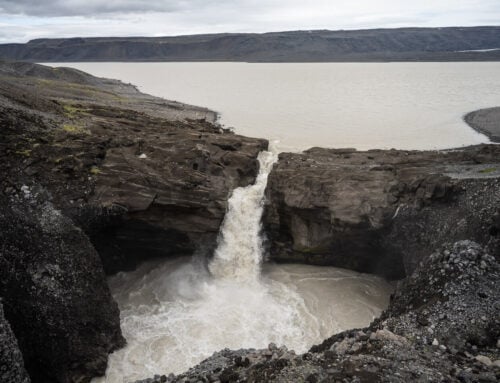
So you have a good view of the Laki Craters to the north, with the Vatnajökull icecap farther north in the distance.
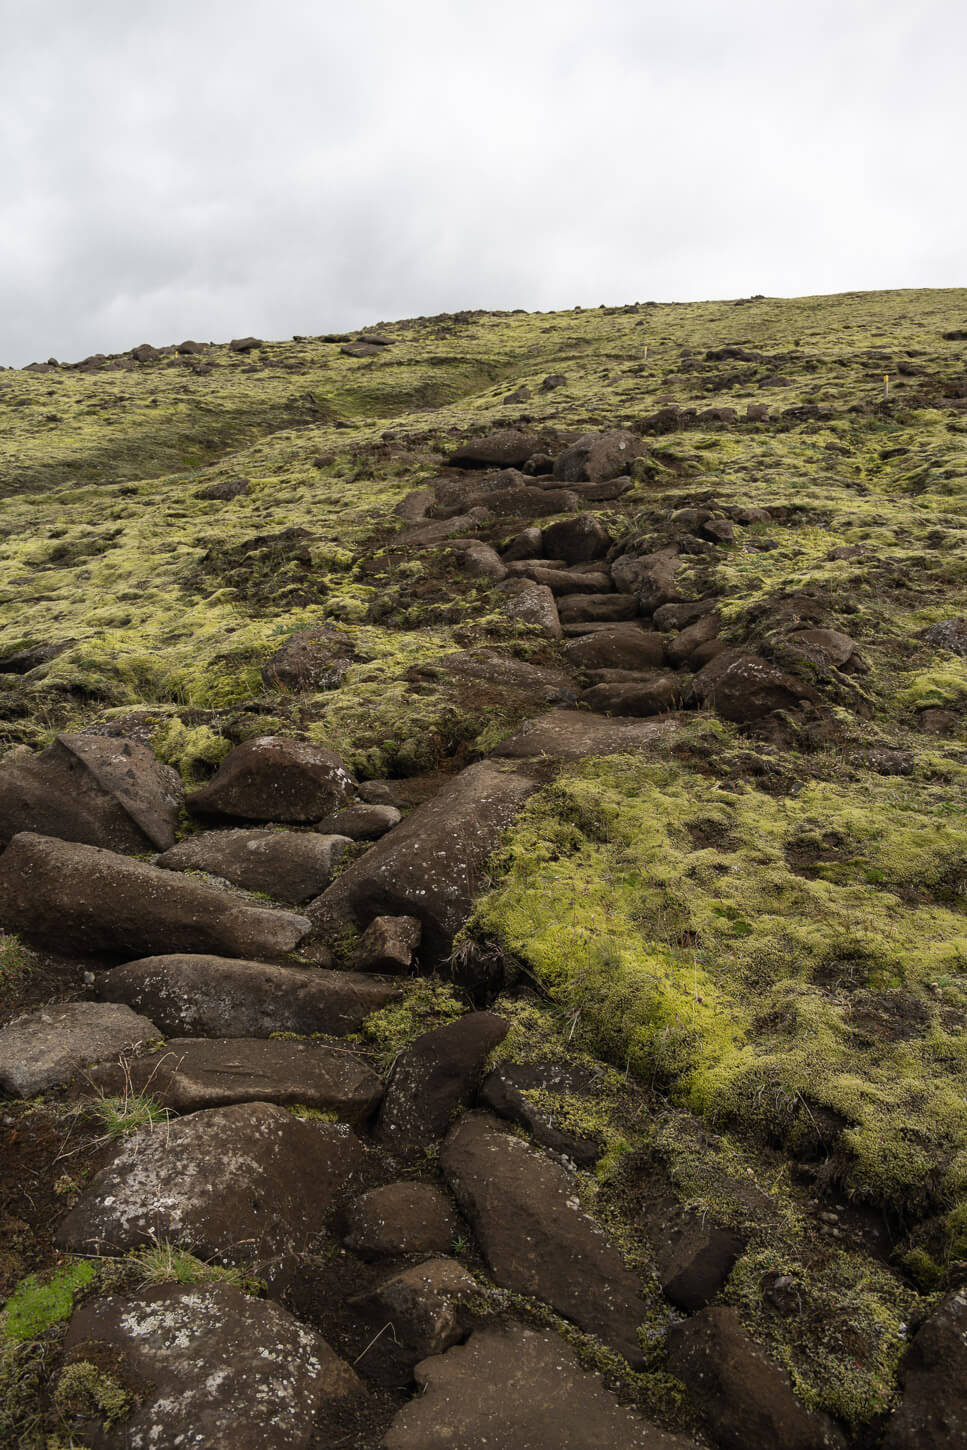
At times the trail is steep an on loose rocks.
After the first section, the trail steadily climbs up the side of the mountain.
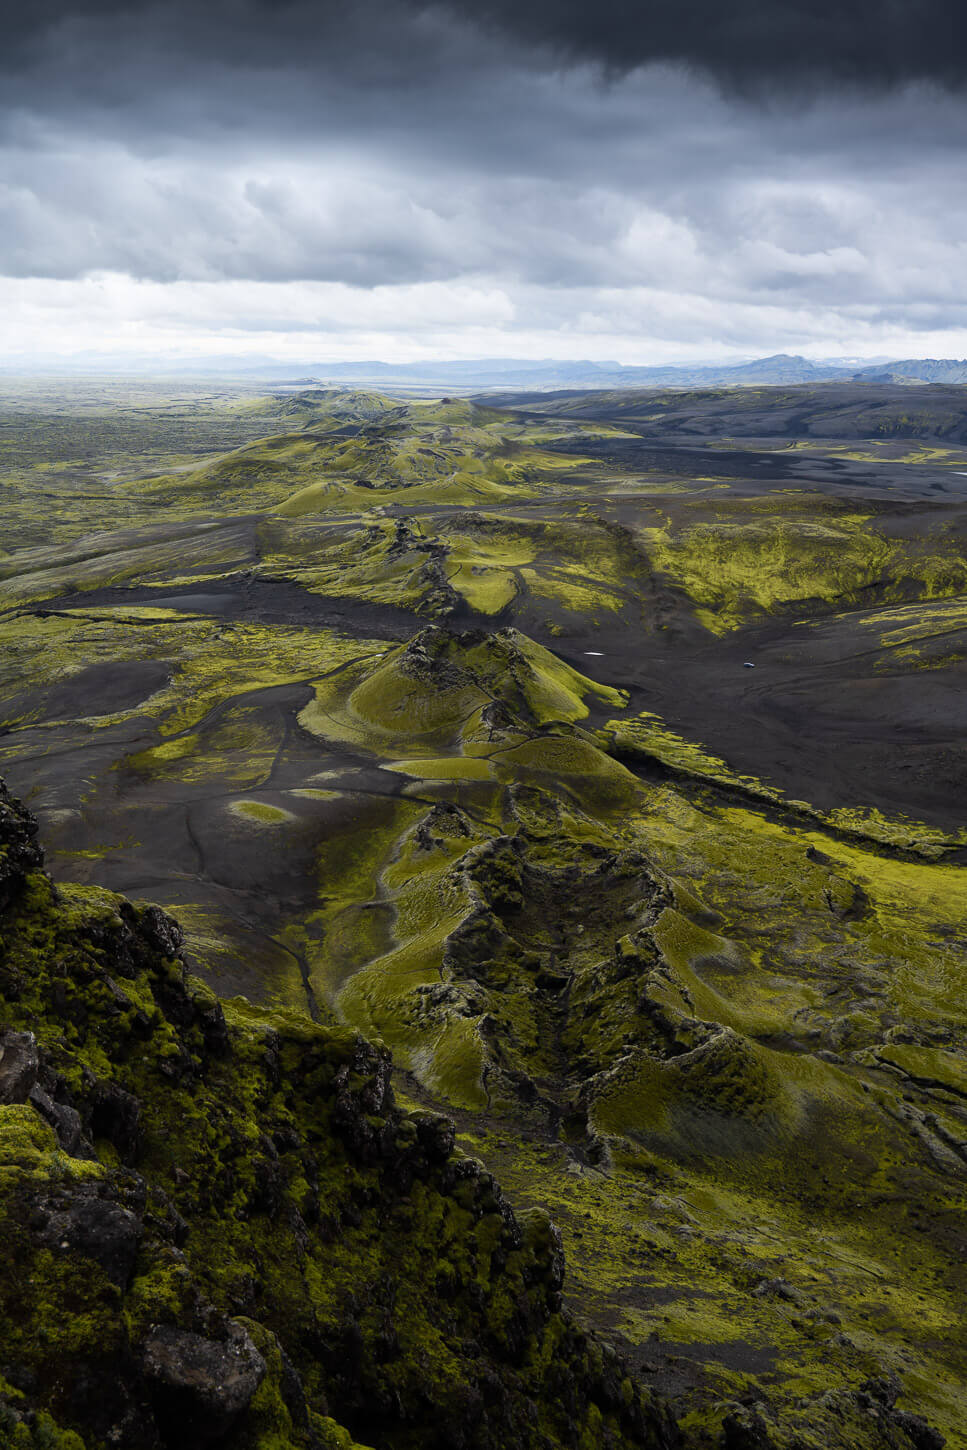
On top of Mount Laki, the views open up to the row of craters to the north.
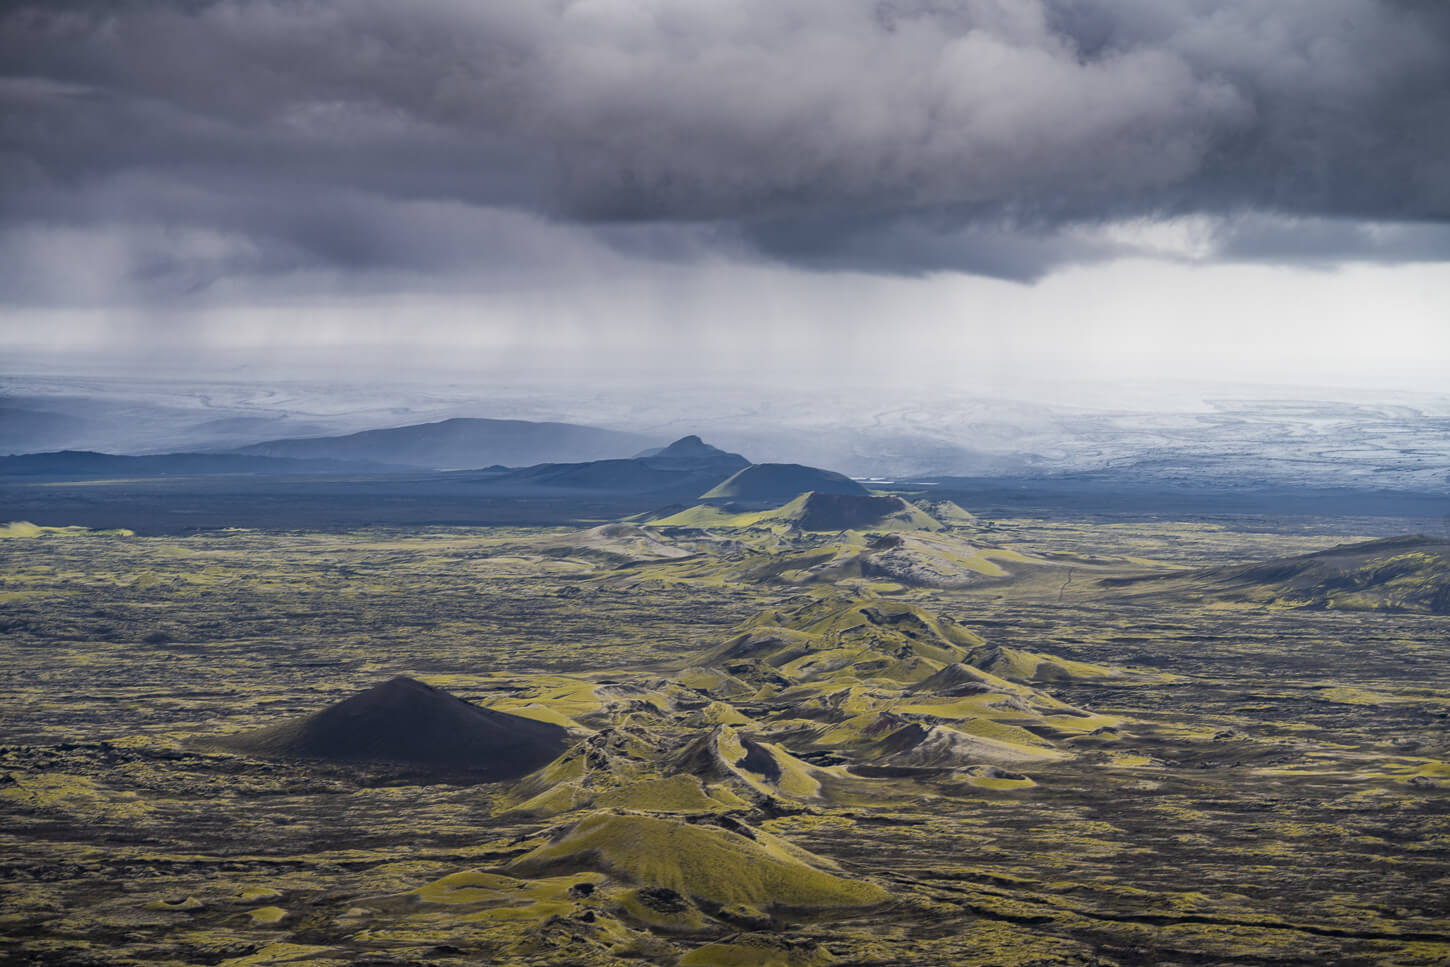
Row of craters to the Nort of Laki, with the Vatnajökull ice cap in the background.
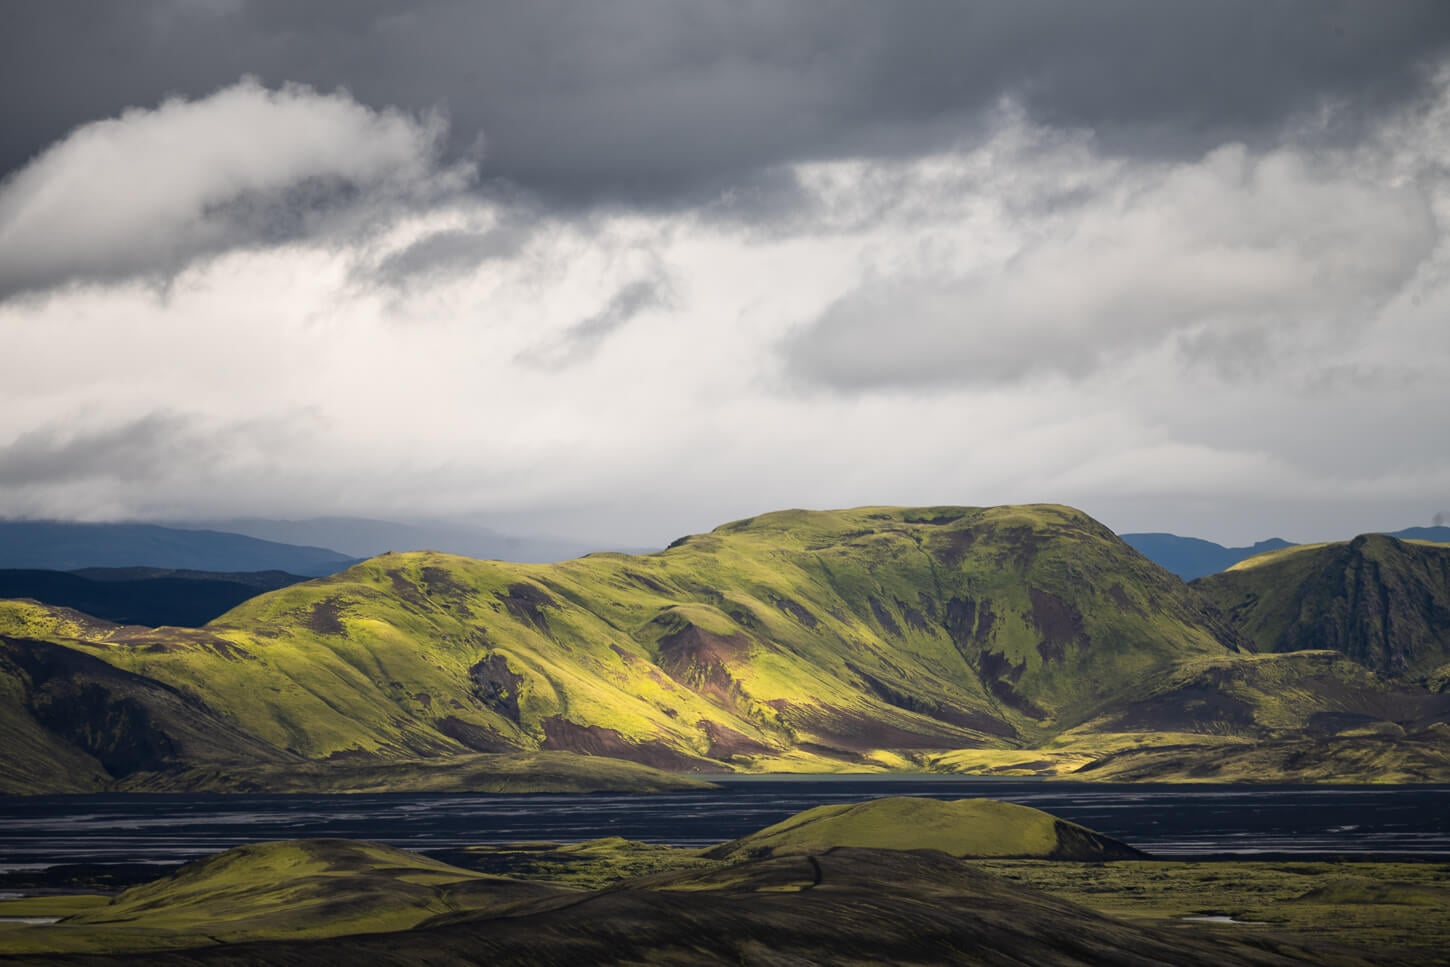
Such wide open views of the highlands are jaw-dropping. On a clear day, you can literally see natural landscapes as far as the eye can see, with almost no trace of human activity, if not for the sporadic tracks in the area.
Even with the row of crater sin front of you, it’s hard to comprehend the forces that crated and shaped this landscape.
It’s hard to reproduce the scale of the landscape.
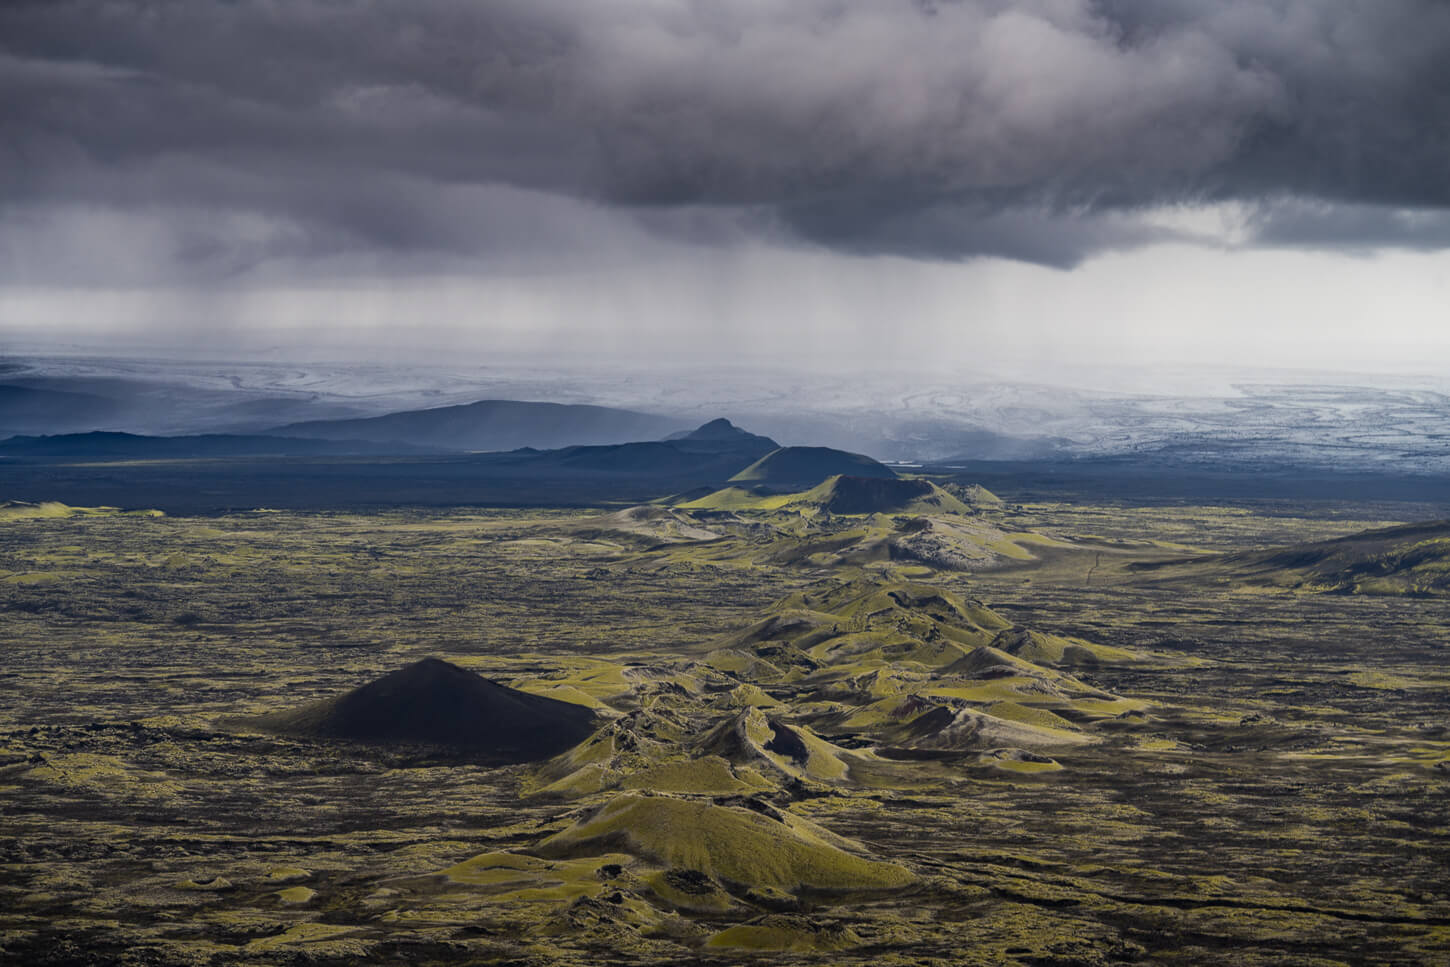
Rain sweeping across the landscape in the distance
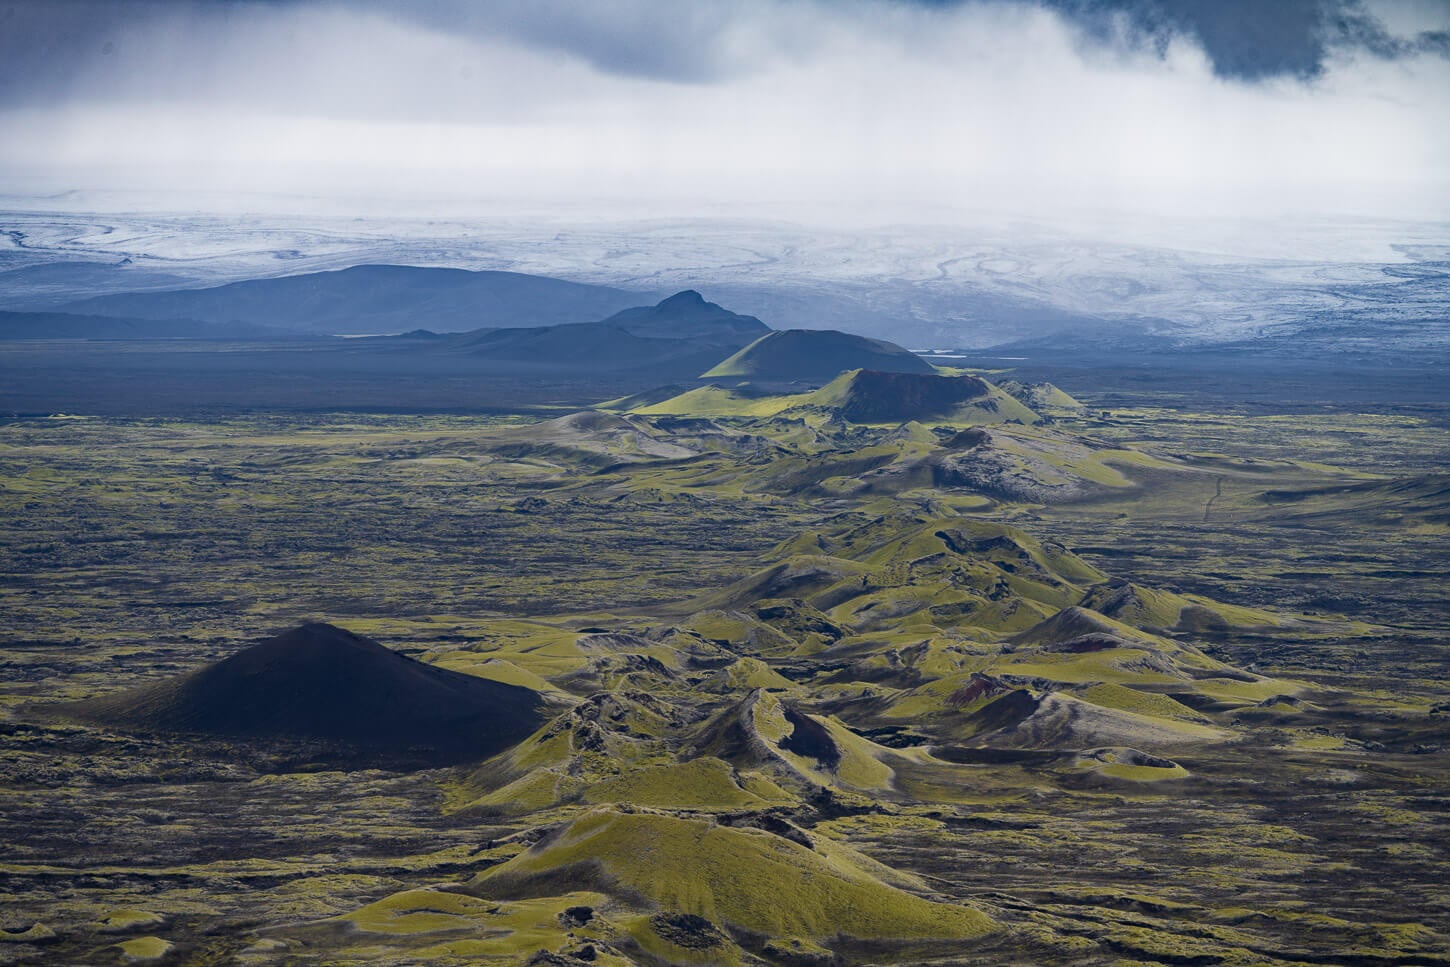
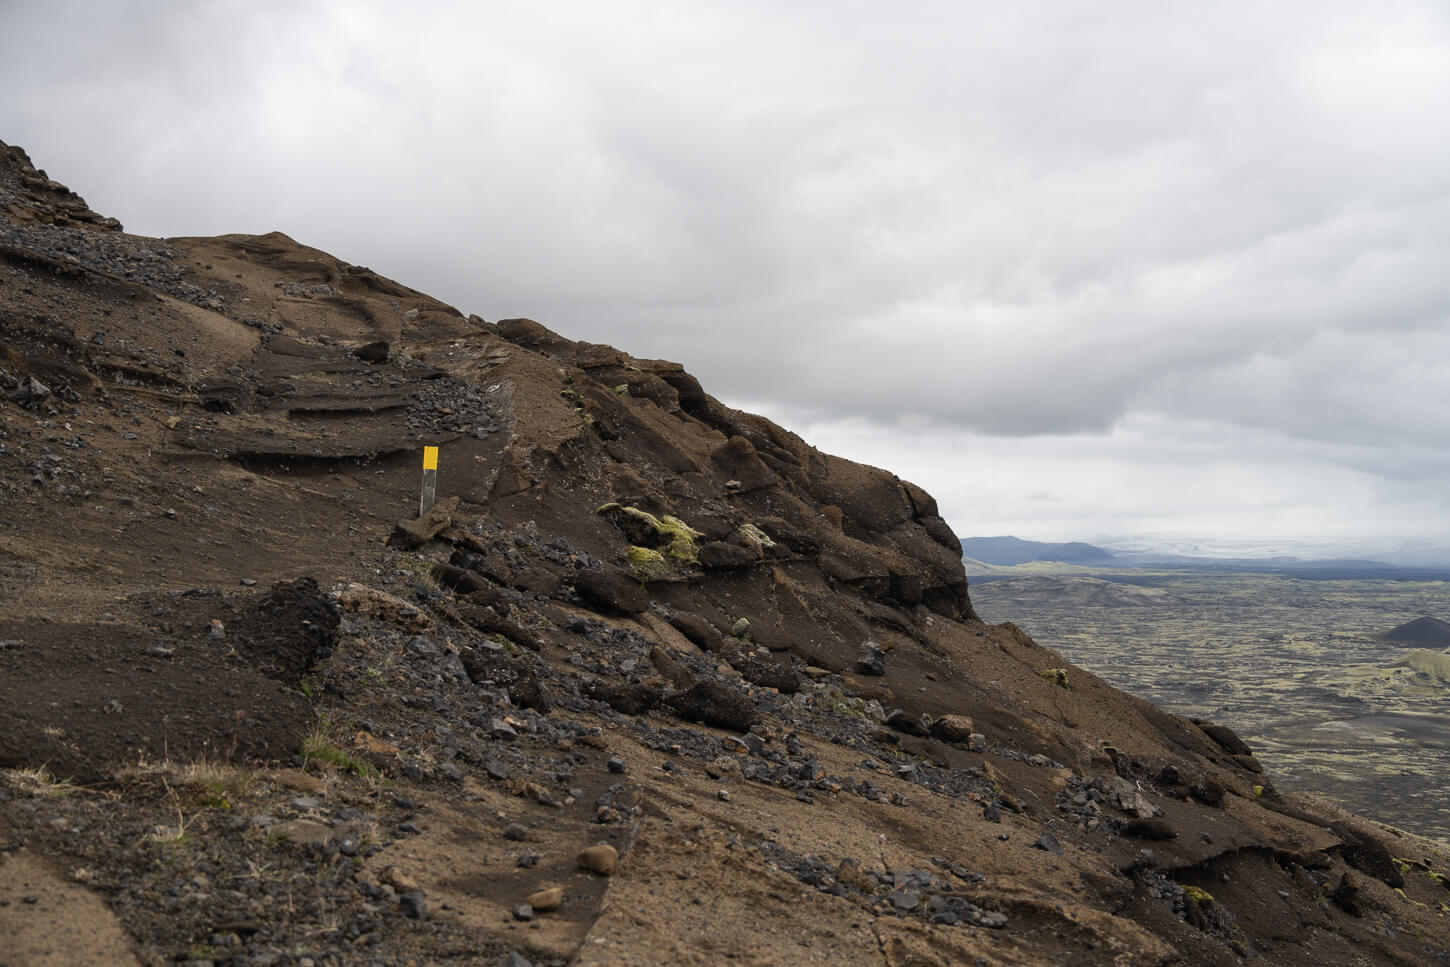
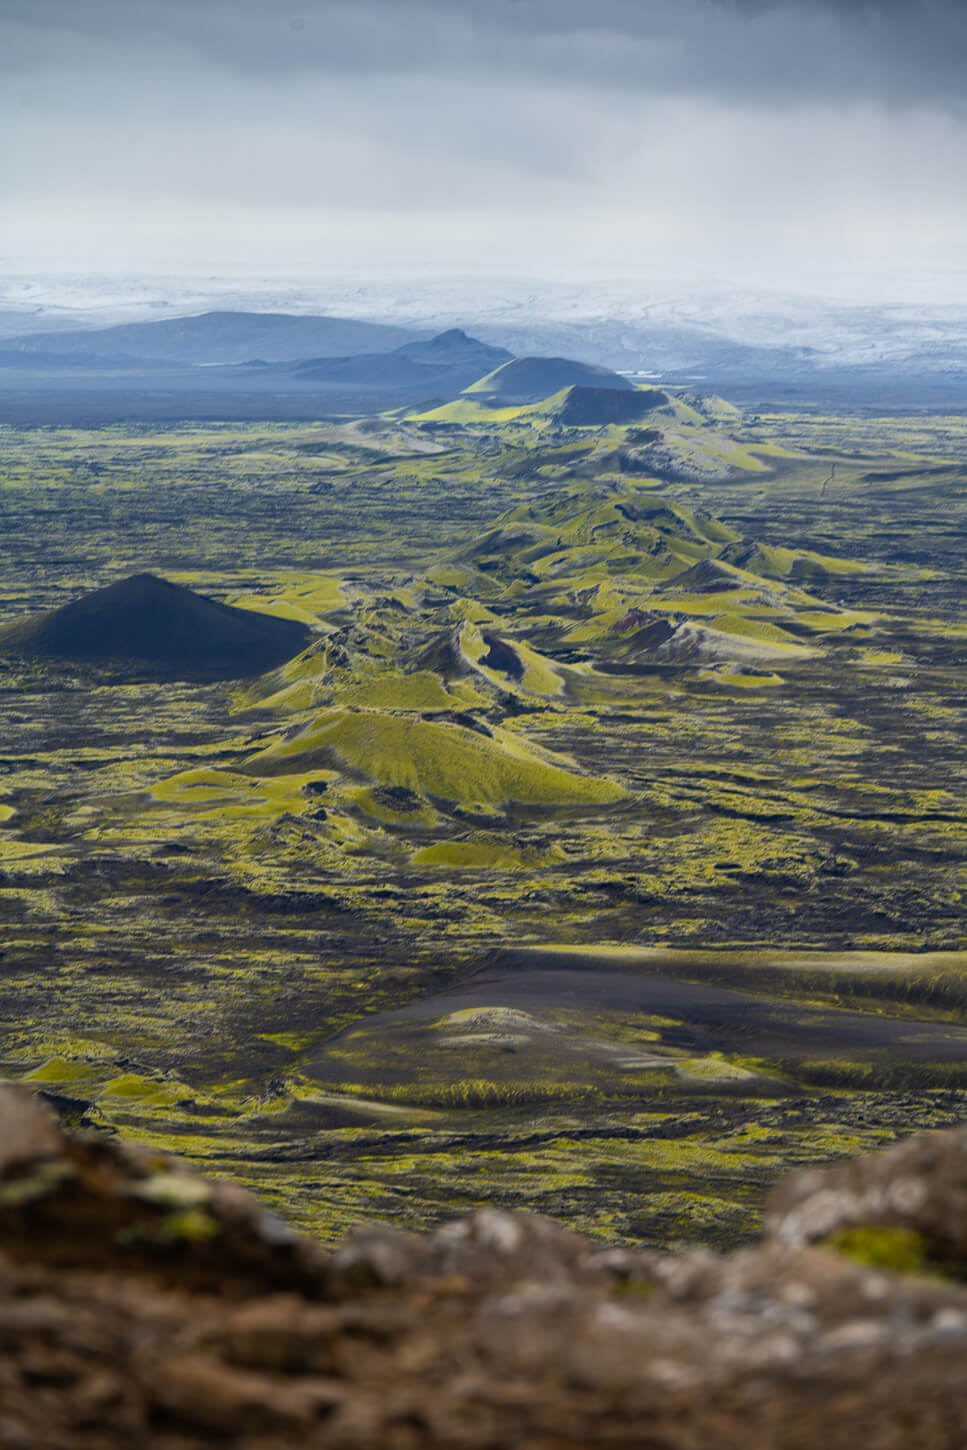
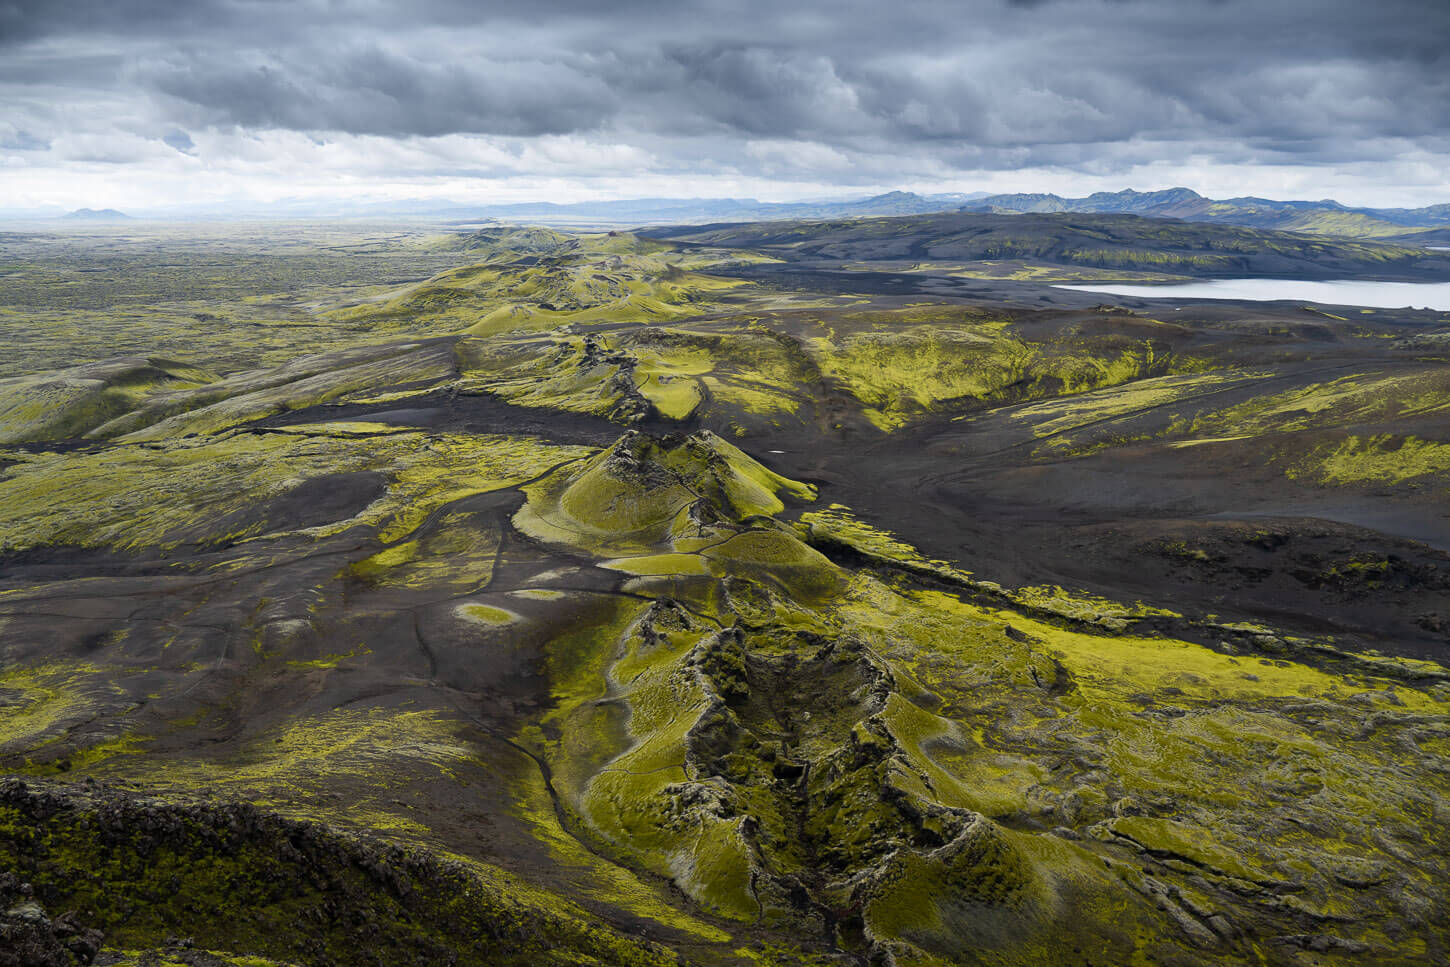
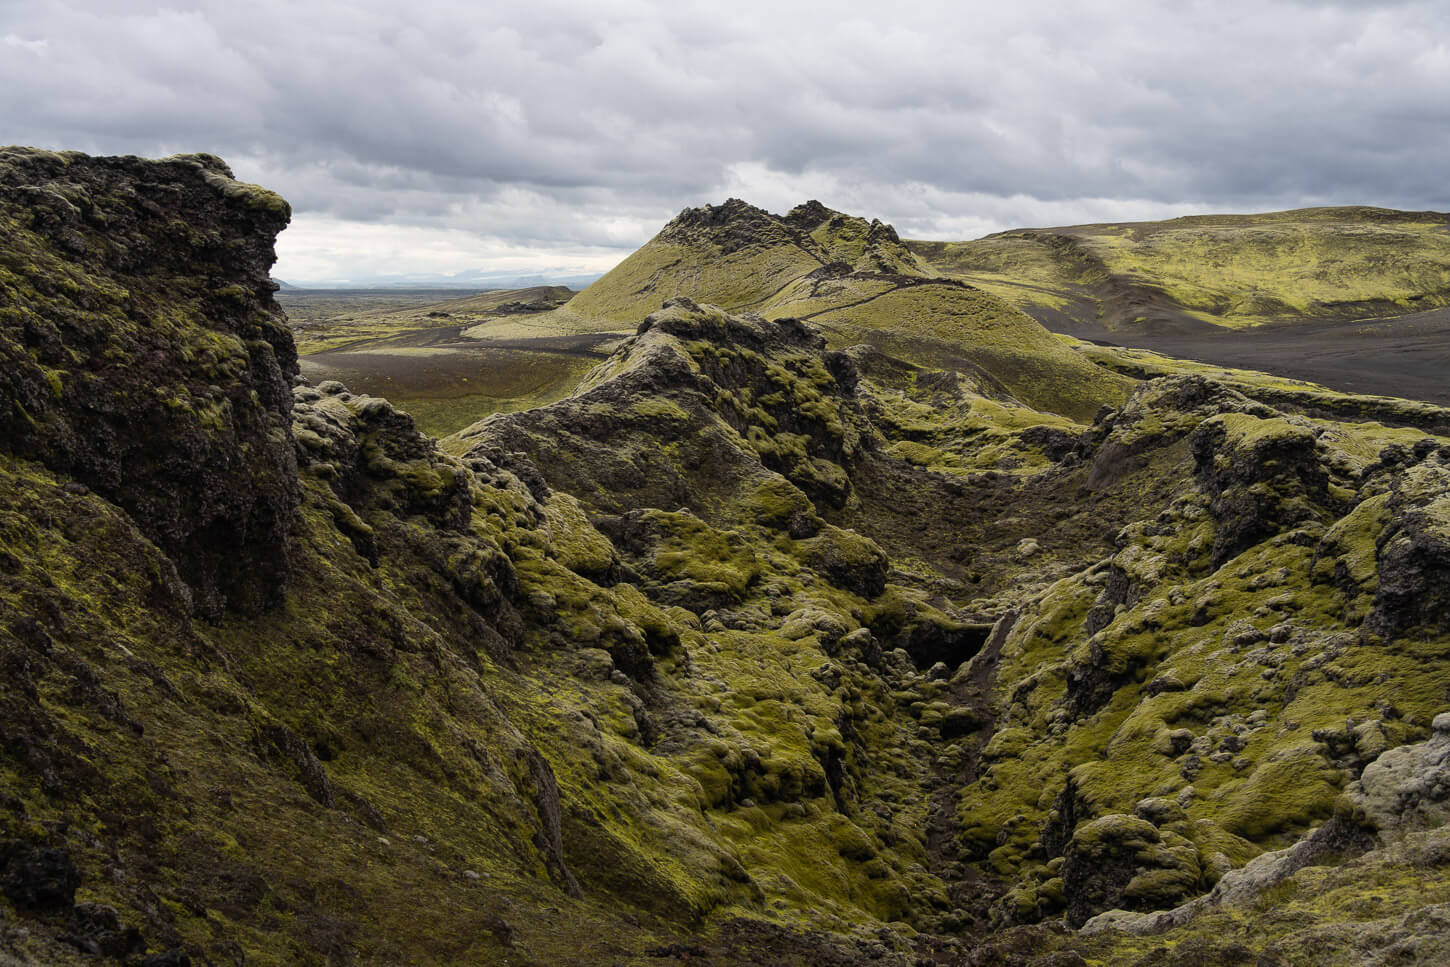
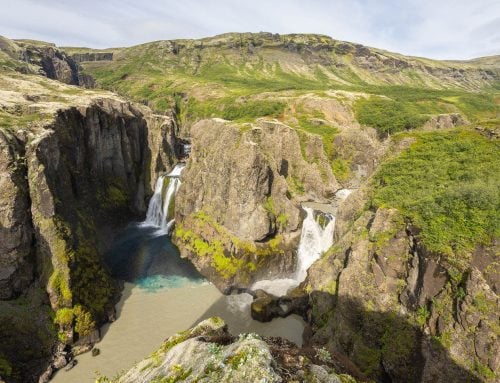
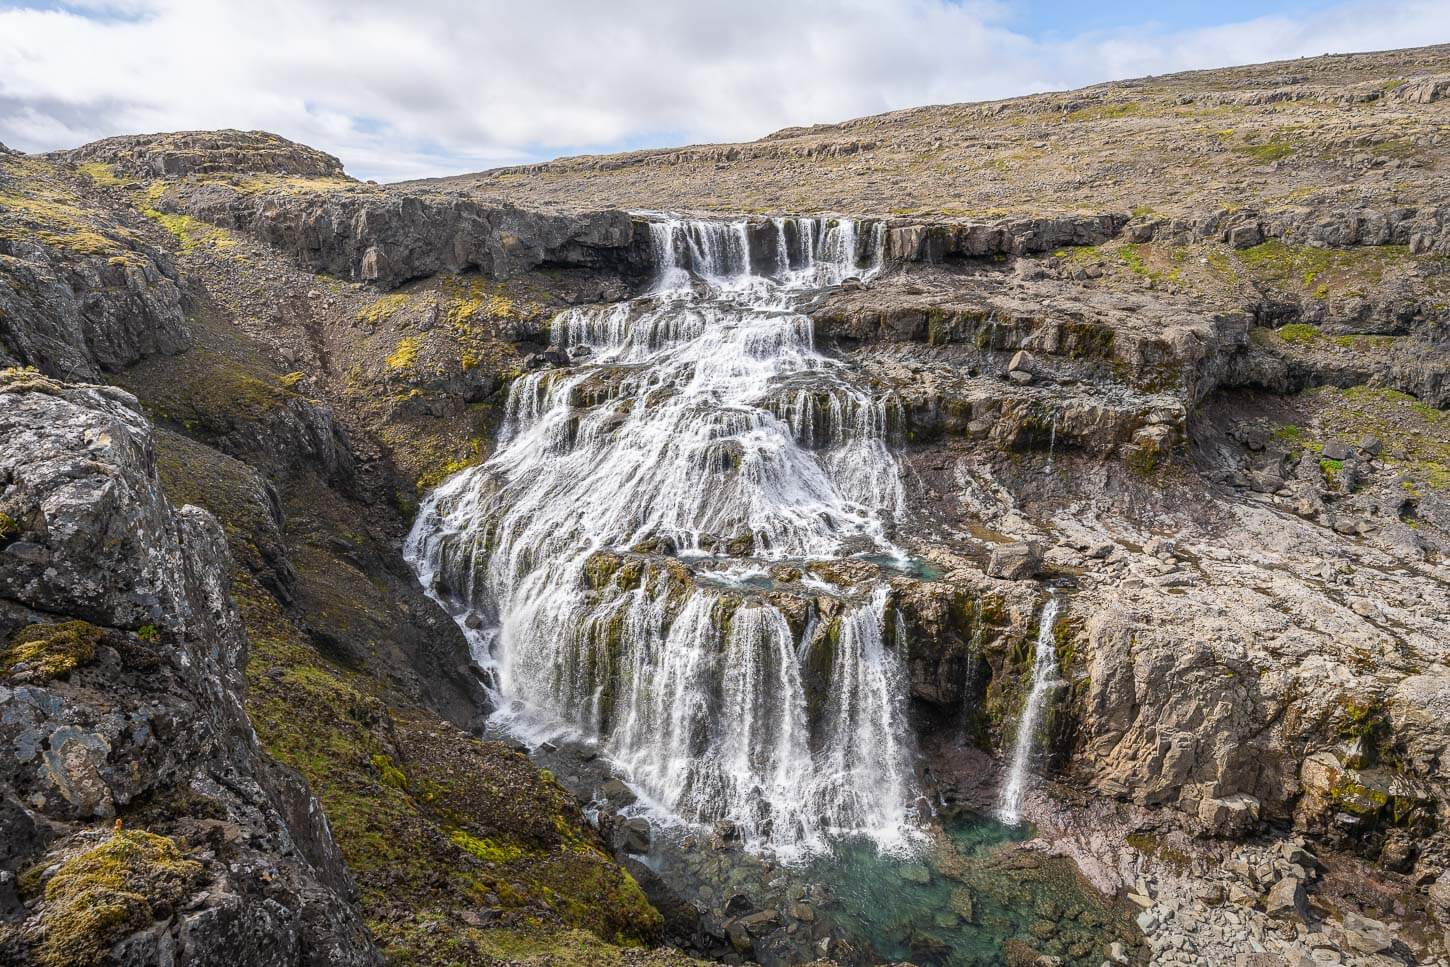
From the top, you can then walk to the opposite side, where the trail starts to descend. Not long after, you’ll come across the short detour to the lookout above the more famous view of the Laki Craters, to the south of Mount Laki.
This viewpoint isn’t as wide as the one at the top. However, you are right above the craters. It’s a beautiful view, with the craters lined up into a vanishing point. And the whole landscape is a hint at the forces that created it.
Classic view of the Laki craters, or Lakagígar, to the south of Mount Laki
Laki Craters. View from the main lookout on the trail.
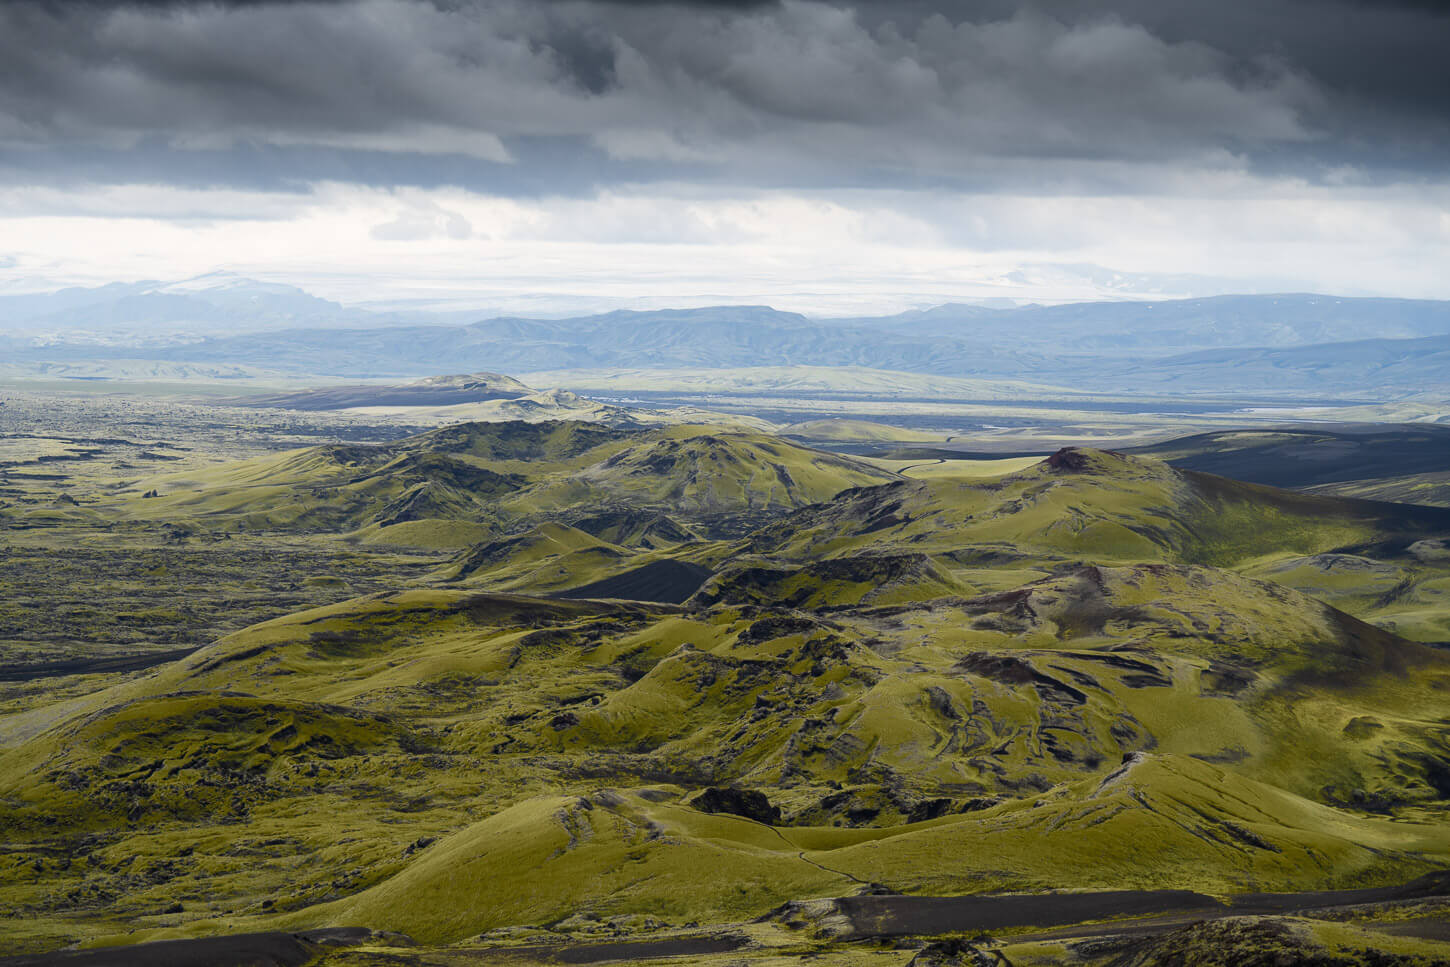
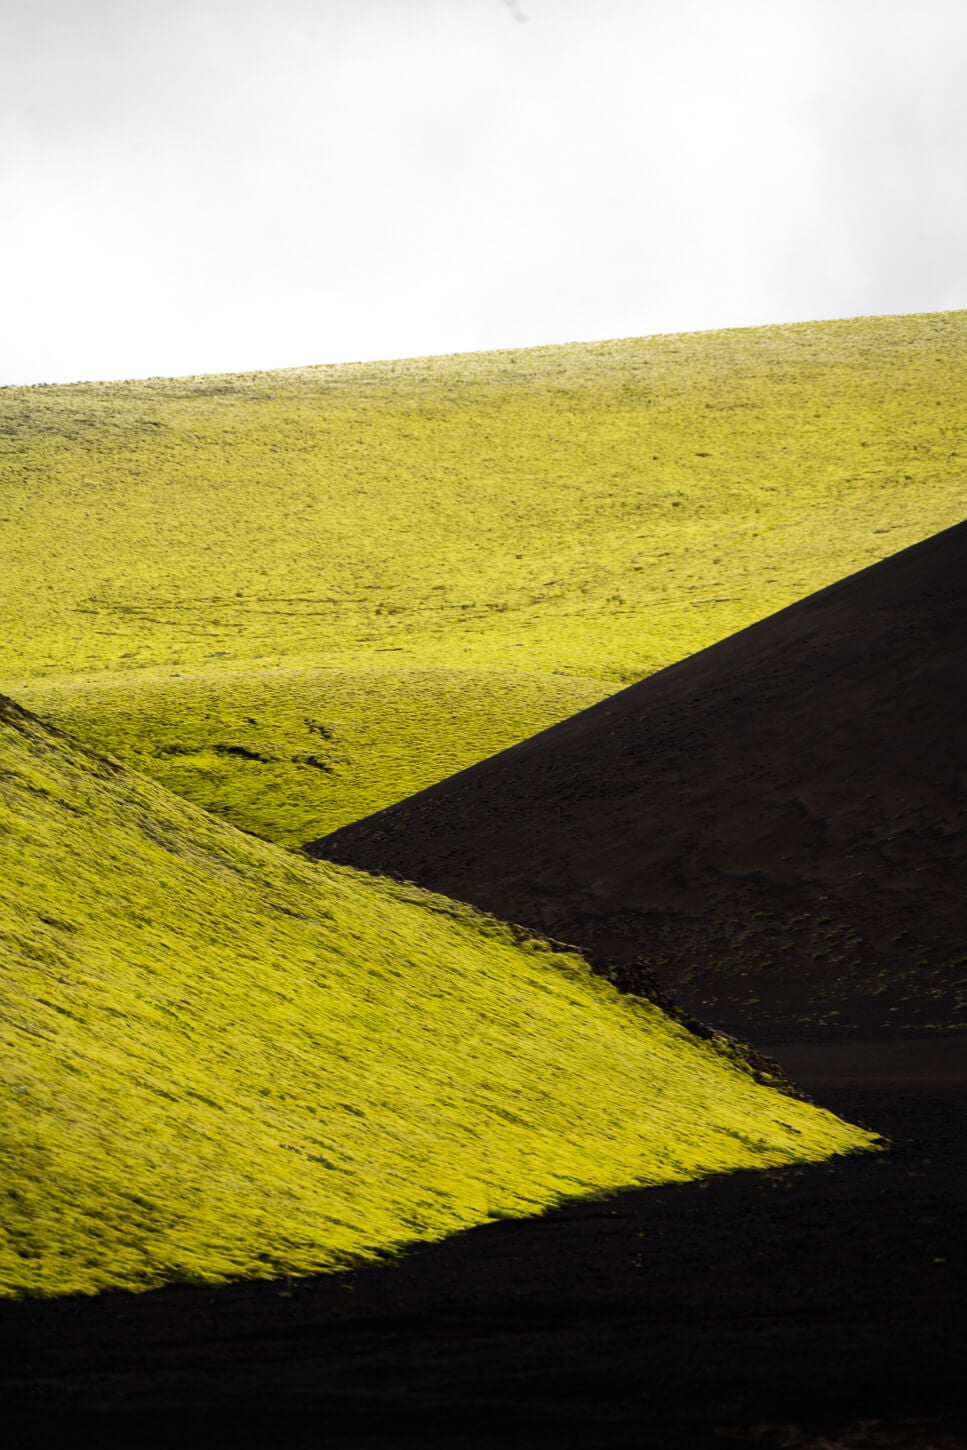
The moss-covered lava fields extends as far as the eye can see.
From this viewpoint, you’d need to get back to the main trail. The last bit is a steep descent back to the parking area. If you have time and if the trail is open, I’d recommend taking the short detour into one of the Laki craters.
I understood from the ranger that sometimes they close one crater and open another, depending on how the moss needs to recover, so follow the trail marks as the same crater i visited may be close at other times.
After the main viewpoint, the trail leads back down to the trailhead.
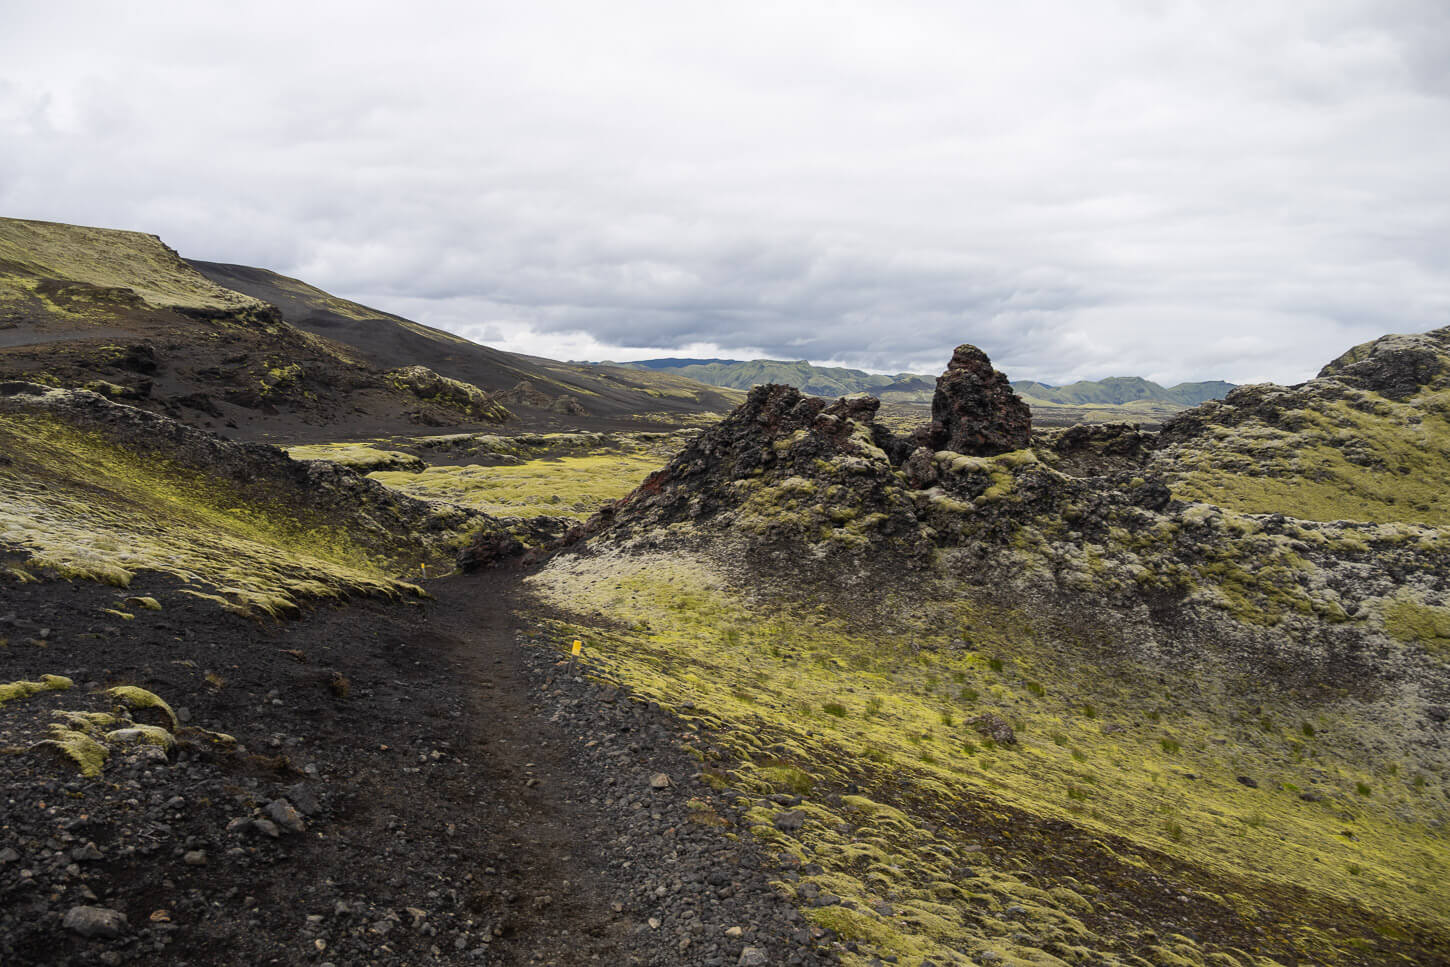
A short detour leads into some of the craters below mount Laki.
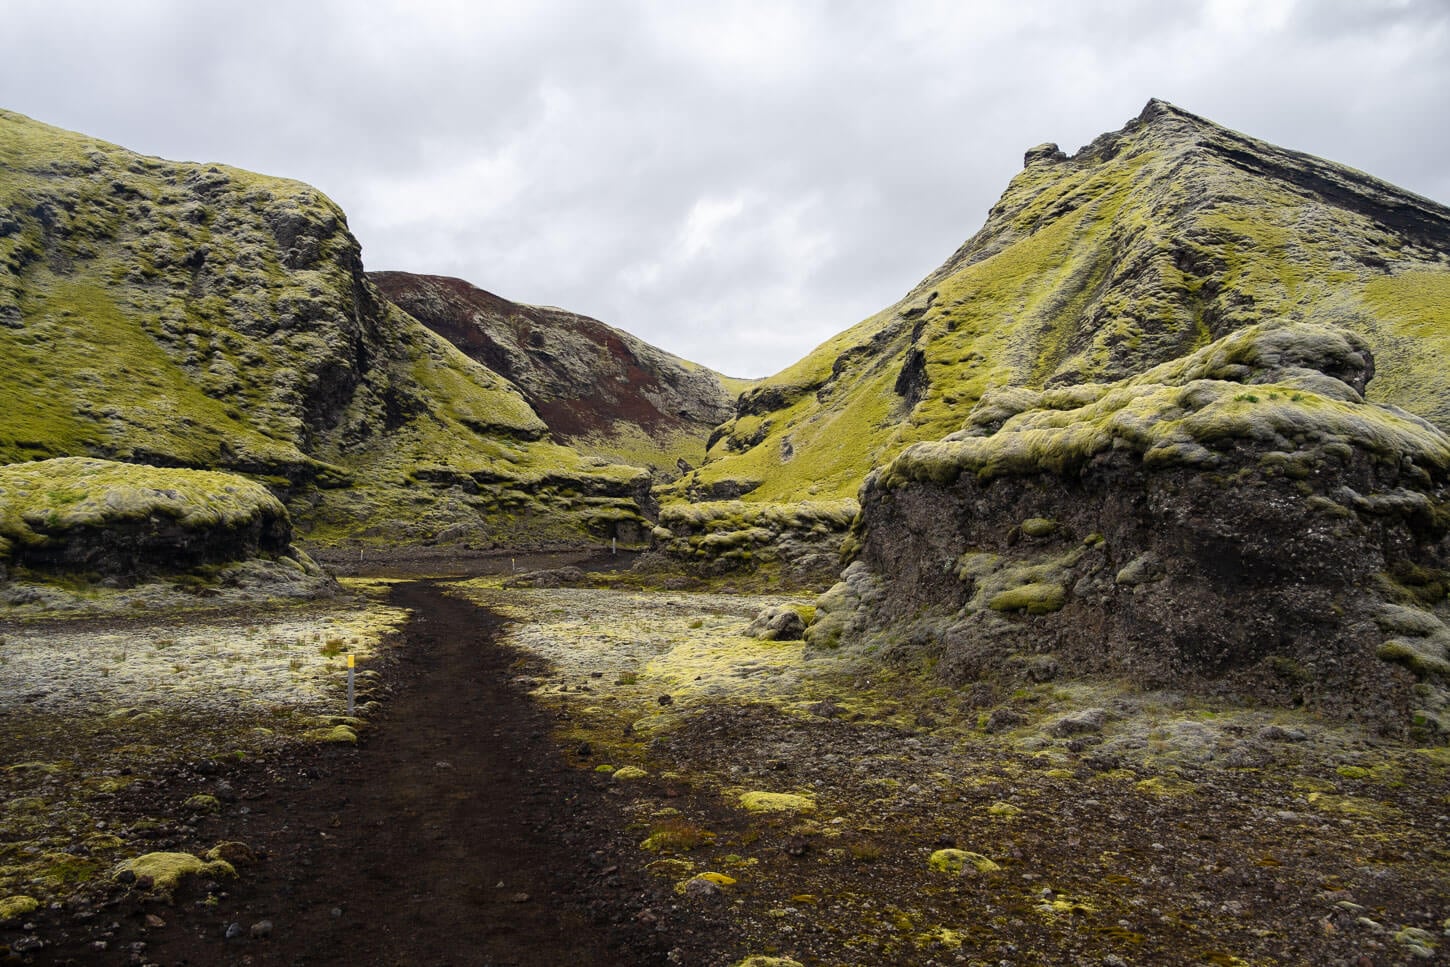
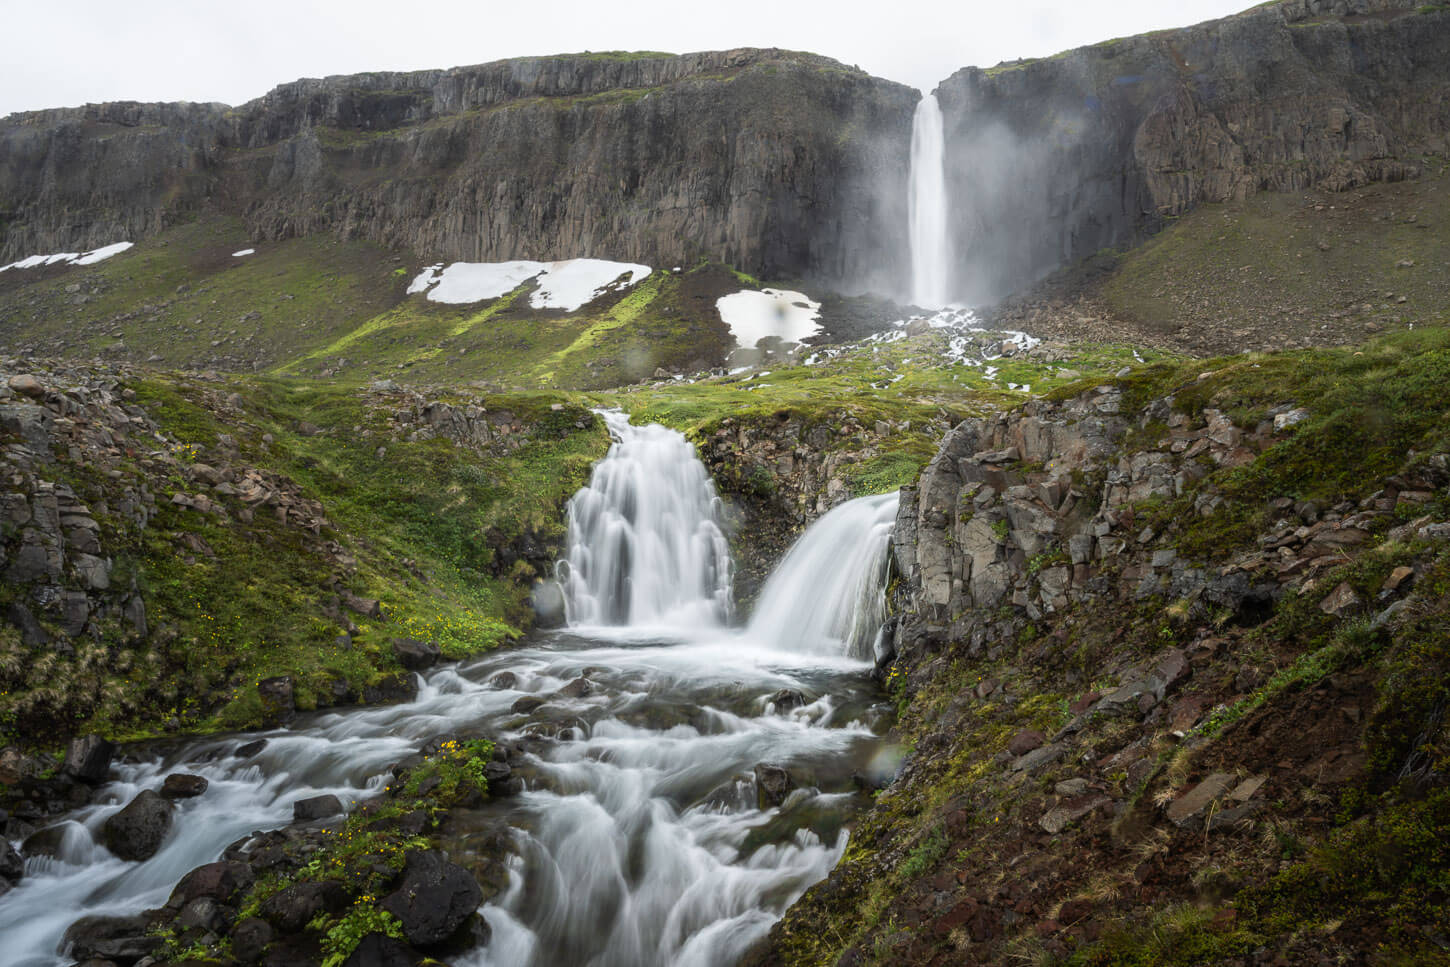
The Tjarnargígur Crater Trail
If Laki offers a bird’s eye view of the mind-boggling, immense lava field and beyond, Tjarnargígur lets you experience it up close. Experience is the right word, I think. Many drivers just stop at the viewing platform above the crater and its lake, but it’s worth completing the whole loop.
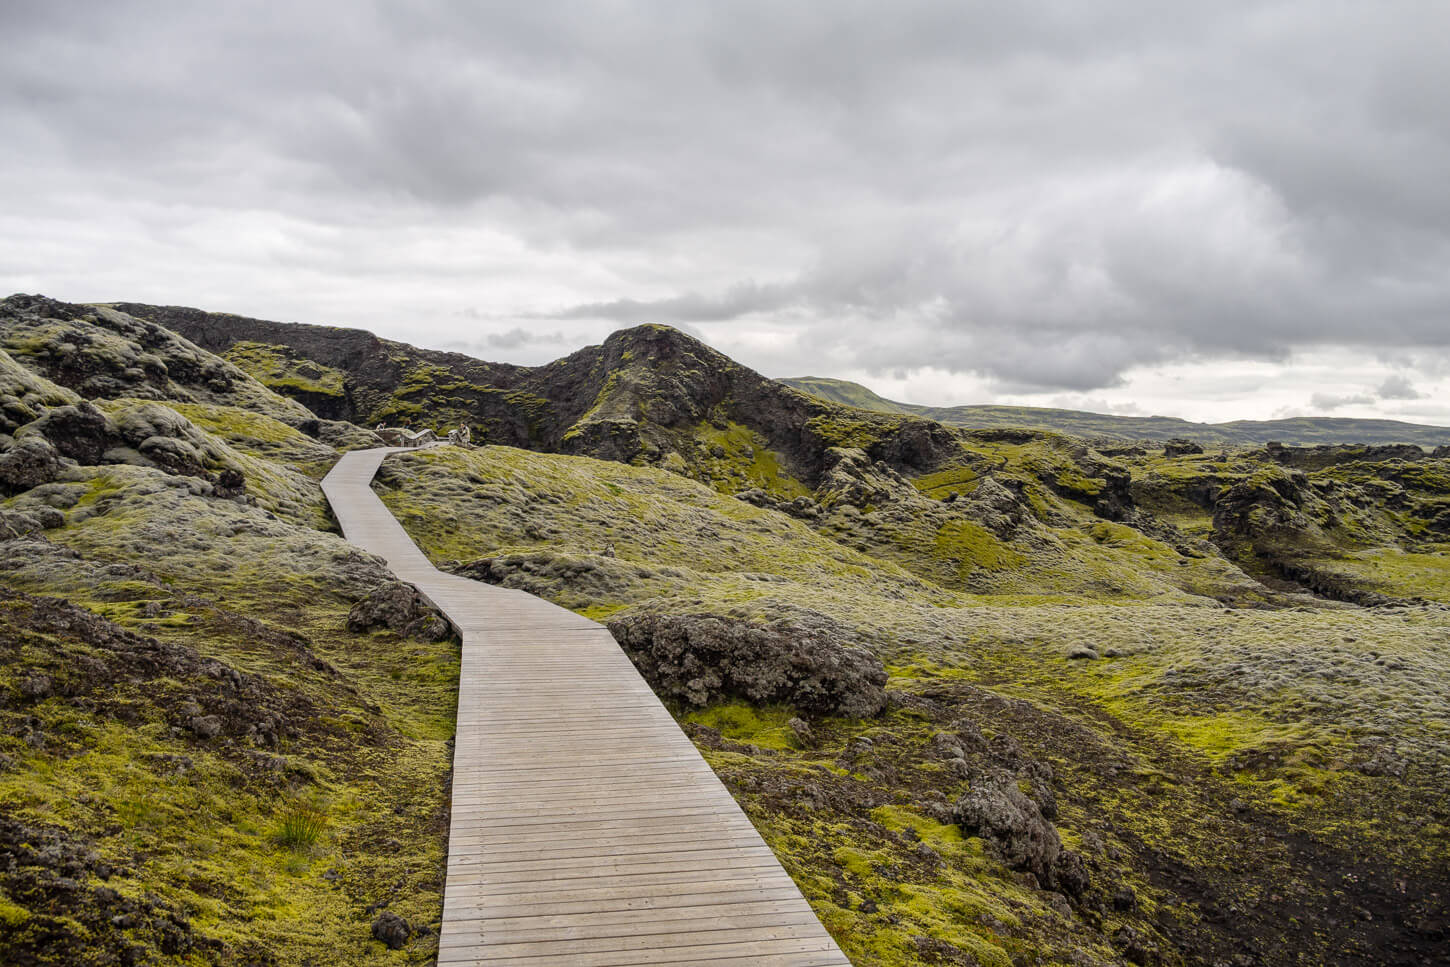
Boardwalk to the Tjarnargígur Crater
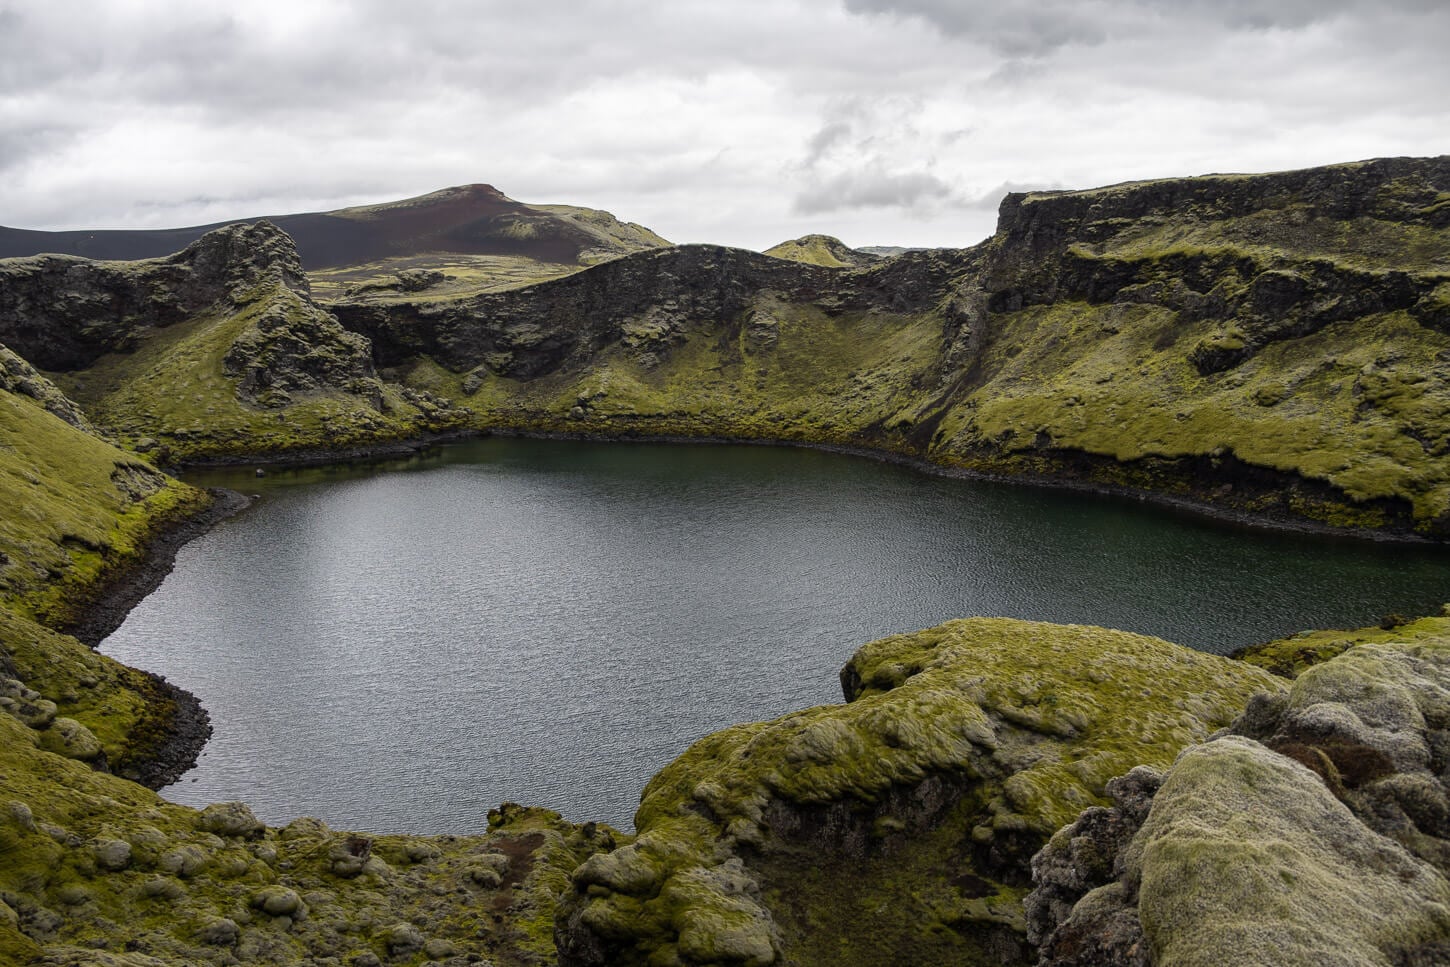
Tjarnargígur Crater, with the small lake inside it.
I can’t describe how it was to walk alone on the trail, in near total silence, with the fresh, crisp air of the Icelandic Highlands, and the smell of the moss and volcanic ground after a light rain. Still, I hope this gives you a “mental image” of what it was like.
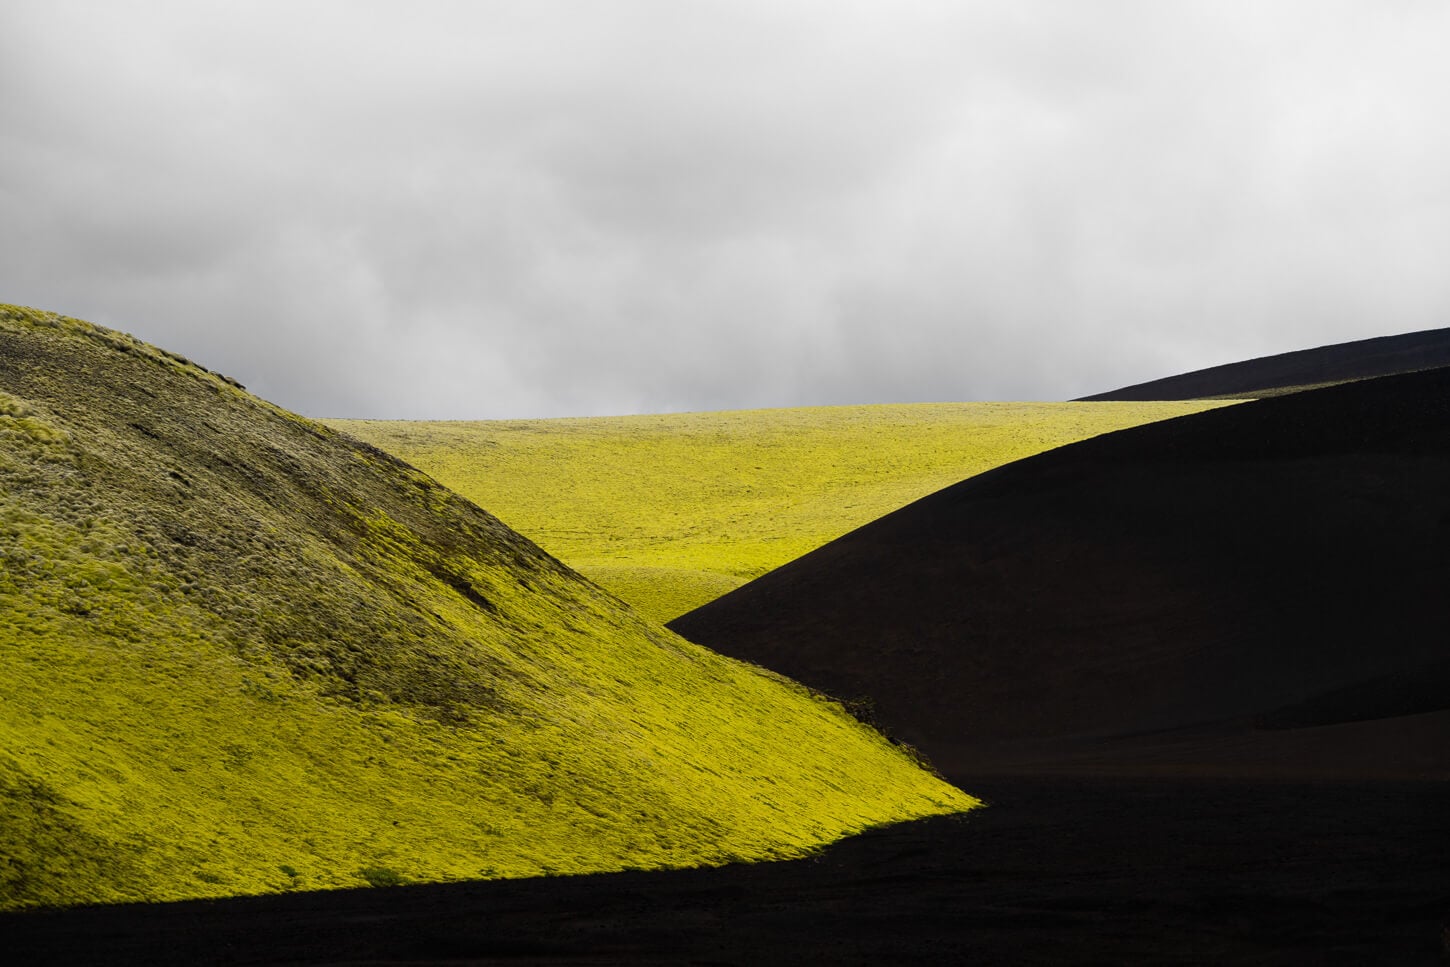
As I mentioned earlier, the trail does not present any challenge of sorts. It’s an easy walk, in an otherworldly landscape. The shapes of the lava field, covered in the ubiquitous moss, hint at the forces that created this landscape. It’s a primordial landscape born of brutal forces. Yet you can feel how delicate it all is.
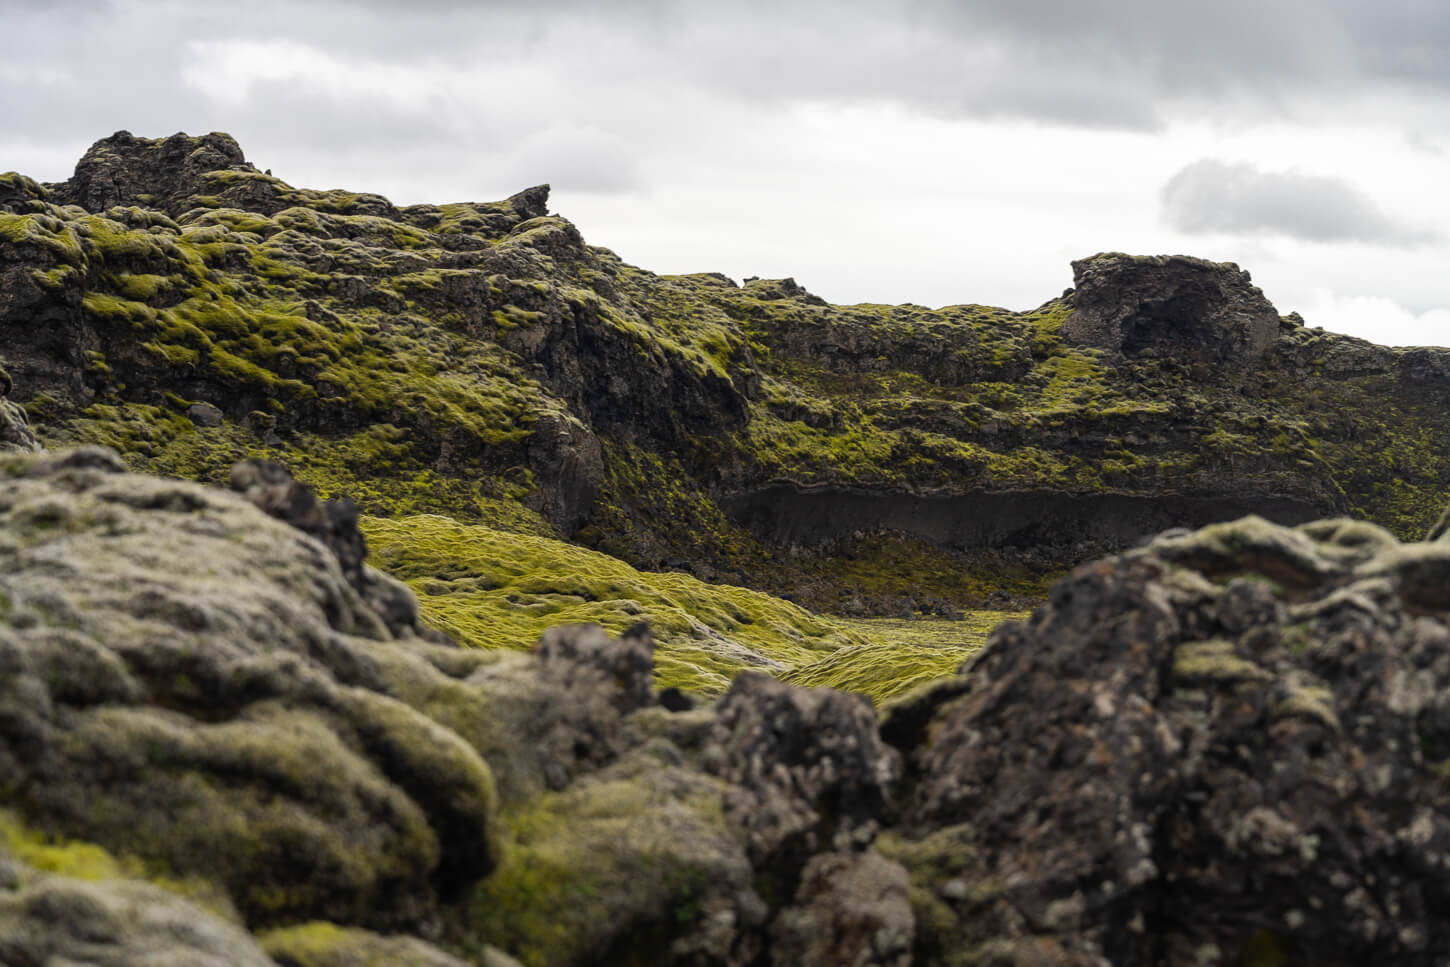
the trail continues across a lava field.
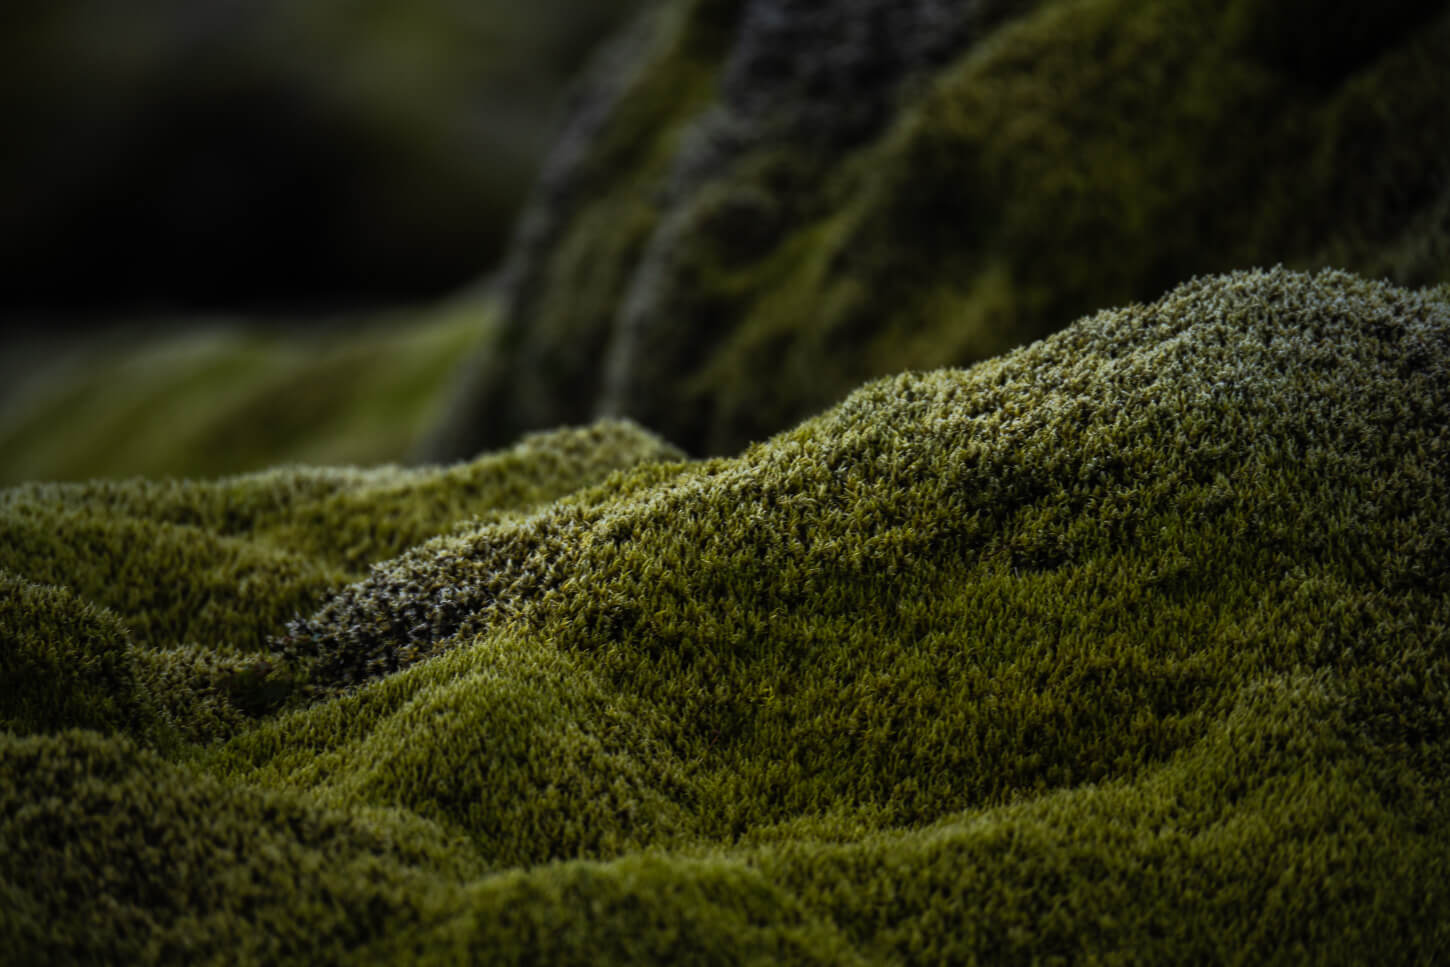
Carpet-like moss covers much of the field.
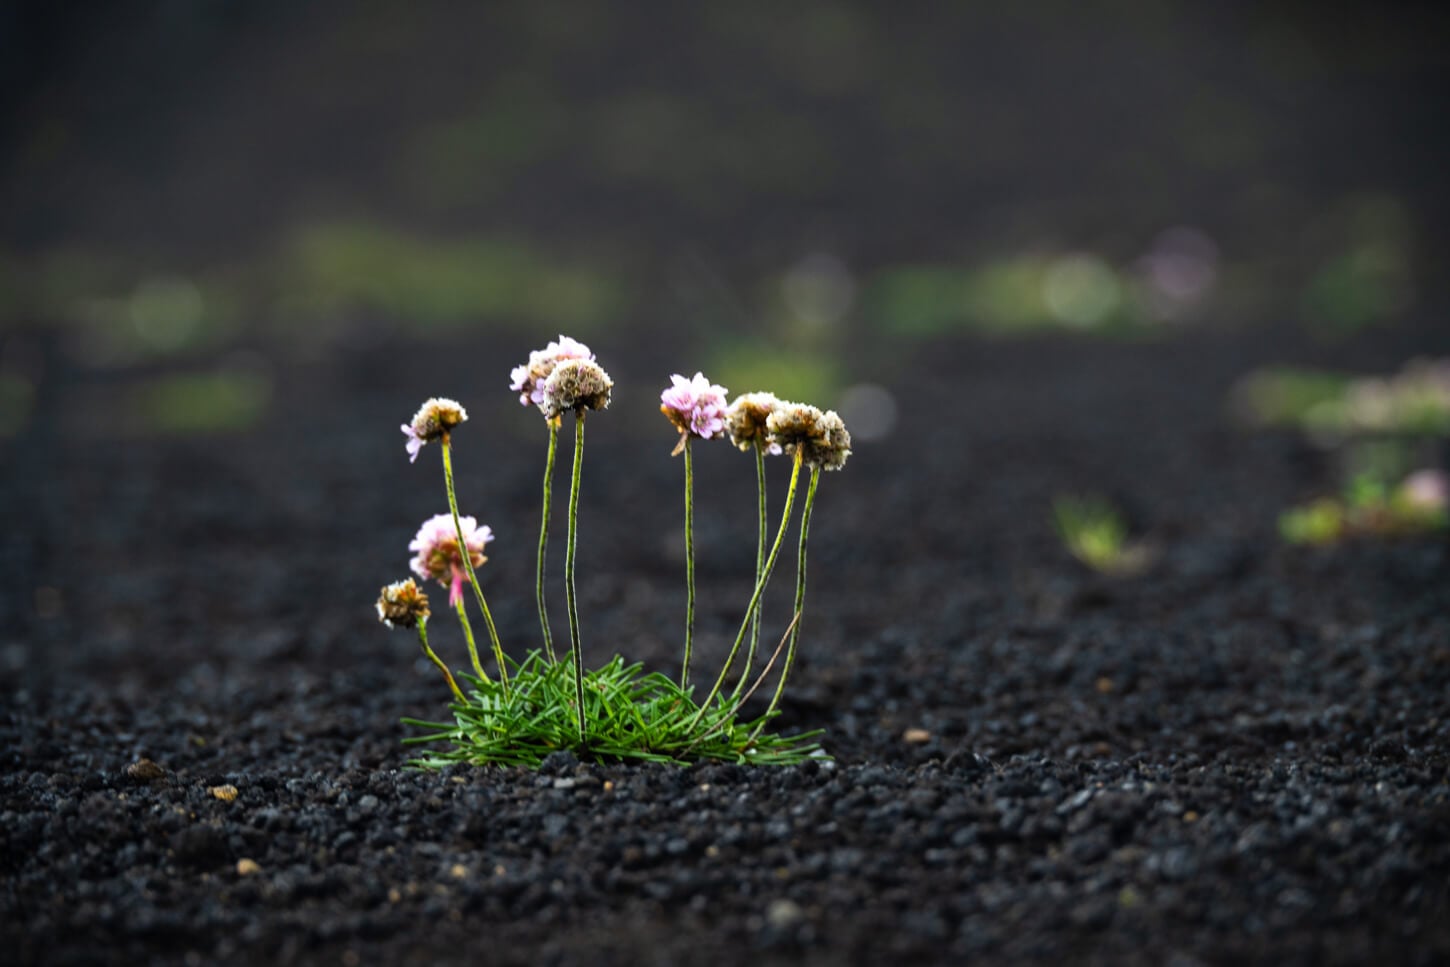
The flowers that sparsely grow on the volcanic soil are also a sort of reminder of how delicate – and unique – life in this environment is. And once you get back on the road, you come across stretches of black sand, the barren land that intertwines with the vegetation, the life emerging from it.
It’s a beautiful environment, more akin to an open-air geological museum of “natural arts” so to speak.
the trail leads into another crater
The trail offer plenty of almost abstract views and landscape features.
the trail loops back to the Tjarnargígur Crater parking area, along a stretch of F-Road F207
Laki and Tjarnargígur Photos and Photography Tips
Specifically for Laki, and for the views to the north of the mountain, I’d highly recommend bringing your longest telephoto lens to the top.
I had a Nikkor Z 28-400mm with me, and it was the lens I used the most while on top of Laki. With such open views, and the ever-changing light of the Icelandic highlands – unless it is a rare blue sky day – there are plenty of opportunities to capture a myriad of scenes and compositions in a short amount of time. I spent almost an hour up there looking at different compositions, and to catch the different weather conditions in the wider landscape.
Detail of the landscape at 400mm, full frame.
Laki craters, photo taken at 24mm
Detials of the Laki craters to the north of Mount Laki.
The classic Laki craters viewpoint. That’s the second lookout I mentioned on the Laki trail, the one looking to the south. There, a lens in the 18-24mm wide range should be more than enough. I took these photos with a 24-70mm lens.
Tjarnargígur, however, offers a very different experience. If on Laki it’s about the grand landscape, Tjarnargígur is about the smaller details more than anything else.
Where to stay
There is one campsite on road F207, the Blágil campsite. That is essentially the only option in the general area around Laki. It’s actually kind of amazing that there is even one in such a remote area.
If you are trying to do this as a day trip, I’d recommend spending the night in the Kirkjubæjarklaustur area, to ger an early start if you are planning to do it in the morning ot to rest for the evening if you are doing this in the afternoon.
Additional Resources
- Discover more Hikes in Iceland here.
- Book with Blue Car Rental through The Photo Hikes and enjoy a 5% discount.
- Here is an interesting map from Wikipedia showing the extent of the lava fields created during the Laki eruption.

Leave A Comment