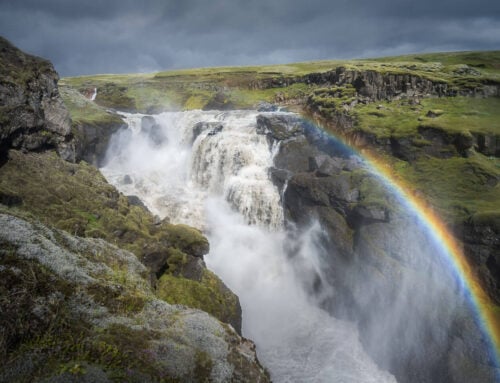
The Múlagljúfur Canyon a hike you don’t want to miss
Seriously, the Múlagljúfur Canyon is a hike you don’t want to miss. It is still a very pristine location and largely untouched by mass tourism. It’s one of those places where you may expect to see trolls or elves popping out from behind a rock, in such a fairy-tale-like location.
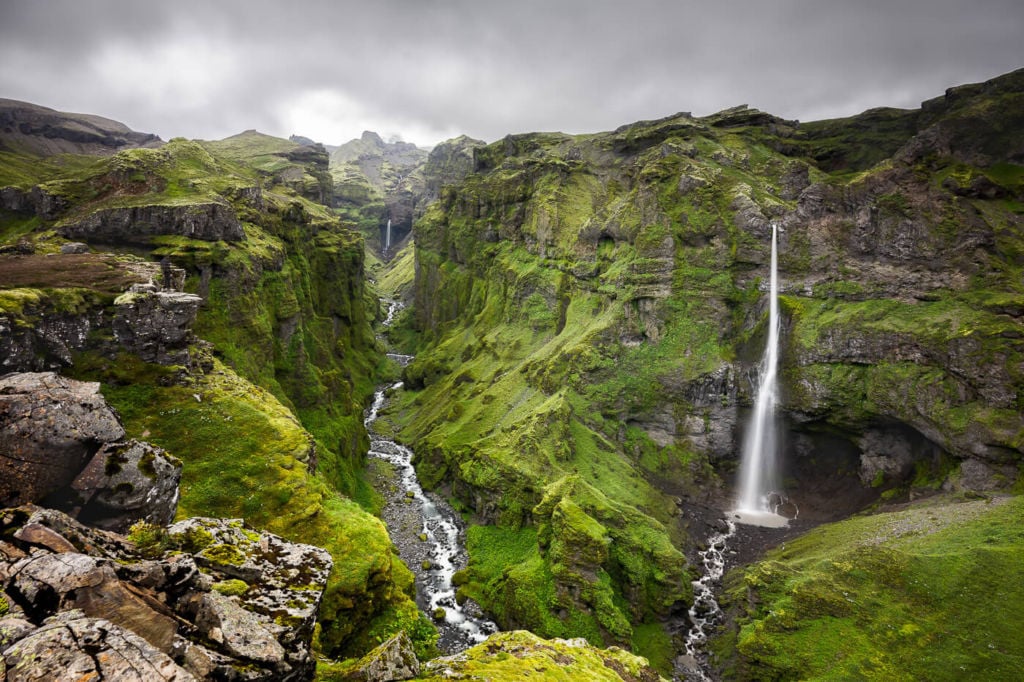
Múlagljúfur canyon hike, view of the canyon from the main viewpoint.
Still, the Múlagljúfur Canyon has enjoyed growing popularity in recent years, and it can now get crowded up there in the middle of the day. A parking area was recently built near the trailhead. The access road was improved too, and it is not easy to see from the road.
However, this does not take anything away from the beauty and “remoteness” feeling this location provides. Whenever I hike there, I like to sit and soak in the views once I’m done with my photos. The magic of the place is still all there.
If you visit, be sure to leave no traces, or do not walk off the already visible paths on the moss. The place itself will inspire some reverence. Moreover, you will feel like entering one of Nature’s temples. Such is its beauty.
Here you have two hiking options. You can hike to the main Múlagljúfur viewpoint, which is about 3.86km (or 2.4 miles) out-and-back, but you can also hike to the top of the Múlagljúfur Canyon, and in this case, the hike is about 5.77km (or 3.6 miles). If you have the time, I’d recommend the longer hike. While the main viewpoint offers the best views, the additional views of the Canyon and the waterfalls are worth the time.
In this post, I will describe both hikes: the shorter and the longer ones. Below, you’ll find the map of each from where you can download the GPX file for free.
The Hangandifoss Waterfall
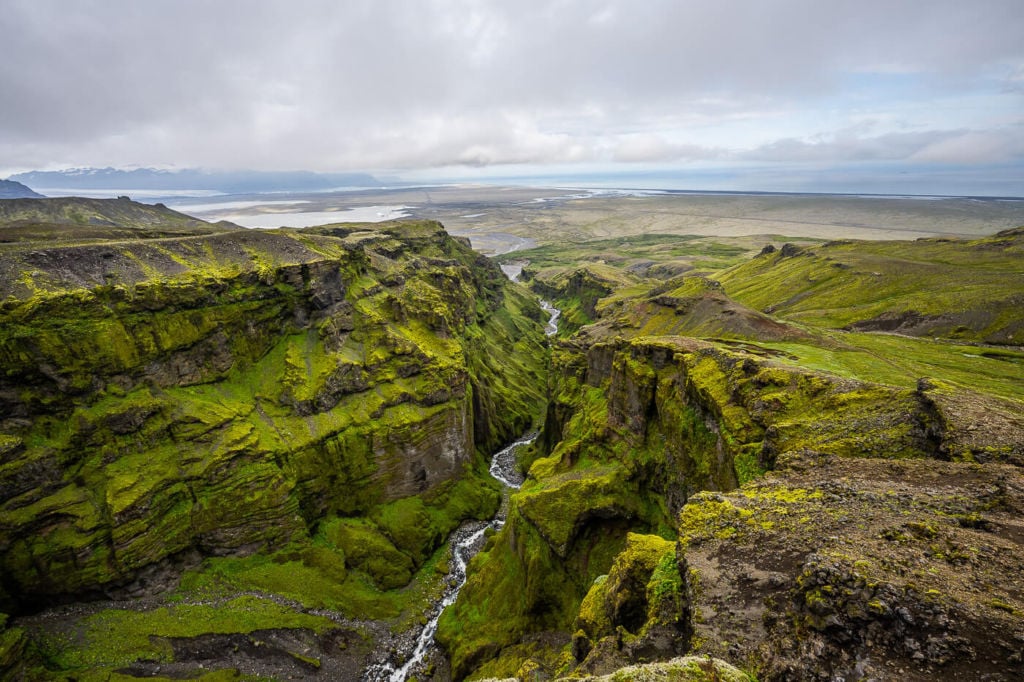
View from the top of the Múlagljúfur Canyon.
How to get to Múlagljúfur, Parking and Tips
- How to get to Múlagljúfur and parking: The parking area can be accessed directly from the Ring Road. You will have to take a gravel road on your left (from the south) or on your right (from the north). After the recent improvement to the parking area, you can easily spot it from afar. You will likely be able to see both the cars parked and the “paid parking” signs with cameras from the ring road. Parking is paid. The fee can be paid with the Parka App, and it’s 1,000 ISK at the time of writing.
- Start of the Hike: The hike starts directly from the parking area. You will see a trail heading up the hill, which you can follow up to the canyon.
- Photography & Scenery value: This place feels like it’s straight out of a fantasy book or movie; the compositions work well from many different vantage points over the canyon. Shooting the two waterfalls (Hangandifoss, the closer one, and Mulafoss, in the background) separately produces excellent results. I’d recommend bringing lenses with a range between 14 and 70-100mm (mm), for the best results.
- Hike Difficulty: Moderate
- Tip: This location does not work well in harsh sunlight for photography. Depending on the sun’s direction, the waterfall or part of the canyon may be in very dark shadow areas. Nonetheless, this is an amazing location to visit at any time of the day.
If you are looking for car rental options, I can recommend Blue Car Rental (with a 5% discount through ThePhotoHikes, read more about it here!).
Map of the Múlagljúfur Canyon Hike
Here are the maps of the shorter and longer hikes from the parking area. If you need a GPS track, you can download the .GPX file from the Komoot activity.
Shorter hike
Longer hike
Overview of the Múlagljúfur Canyon Hiking Trail
As mentioned earlier, I will describe both options to hike the Canyon:
- The first one, shorter, ends at the main viewpoint above the Canyon
- The second, longer, ends at the top of the Canyon, closer to the Mulafoss Waterfall.
The Mulafoss Waterfall at the end of the Múlagljúfur Canyon
Shorter Múlagljúfur Canyon hike
| Distance | Elevation gain | Hike Time (roundtrip) |
|---|---|---|
| 3.86 Km (2.4 miles) | 180m | 1.5 – 2 hours |
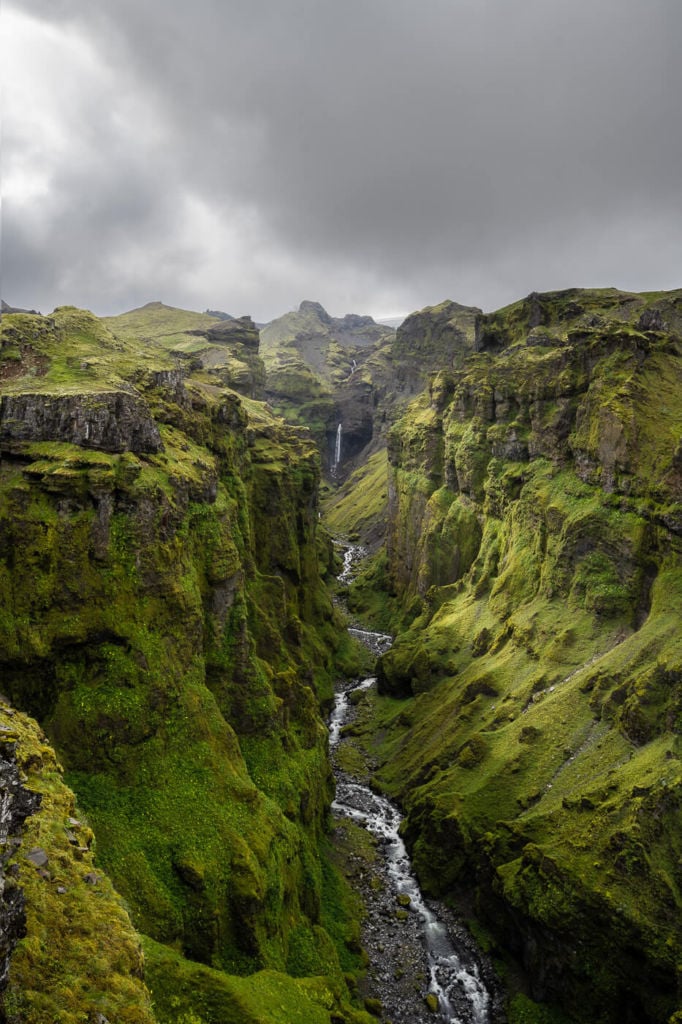
The canyon isn’t visible until you reach the vantage point on the ridge, but you can easily guess where it is by looking at the terrain.
From the Parking area, you can start heading uphill toward the only visible trail. Keep following that trail. It will, however, fork into several different ones. You can follow any of them unless you see stones blocking the path. That means the trail is closed.
After a bit, you will start to see some old trail posts. Follow them as that’s the “real” marked path.
Then, you will first reach the top of a small hill to descend into a gorge where you will have to cross a creek. Depending on water levels, you should be able to jump from rock to rock without getting wet. Carefulness is required if there is frost, snow, or ice.
After crossing the creek, you will need to ascend again on the next hill. You can follow the trail from here, and you will reach the top of the cliff, where the view will finally open up on the magical Canyon below.
Múlagljúfur canyon hike, view of the canyon from the main viewpoint.
Longer Múlagljúfur Canyon hike
Please note this distance includes the first part of the hike too:
| Distance | Elevation Gain | Hike time (round-trip) |
|---|---|---|
| 5.77 km (3.6 mileS) | 410m | 2 – 2.5 Hrs. |
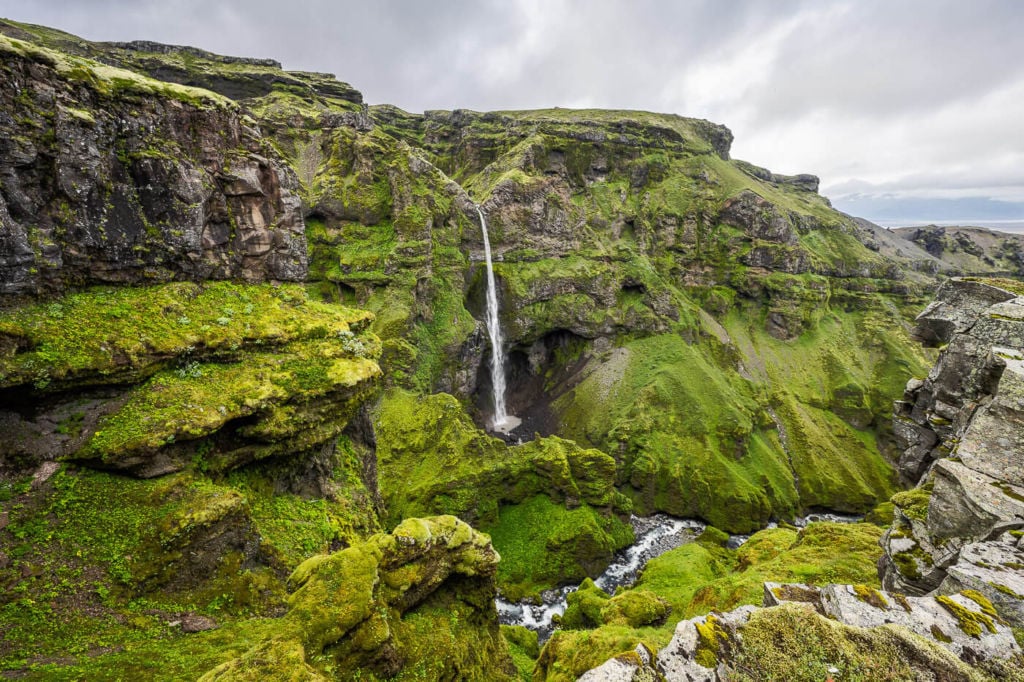
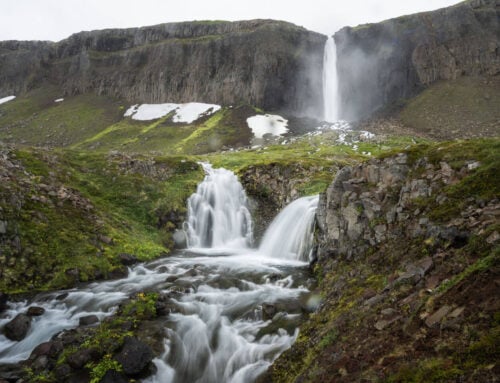
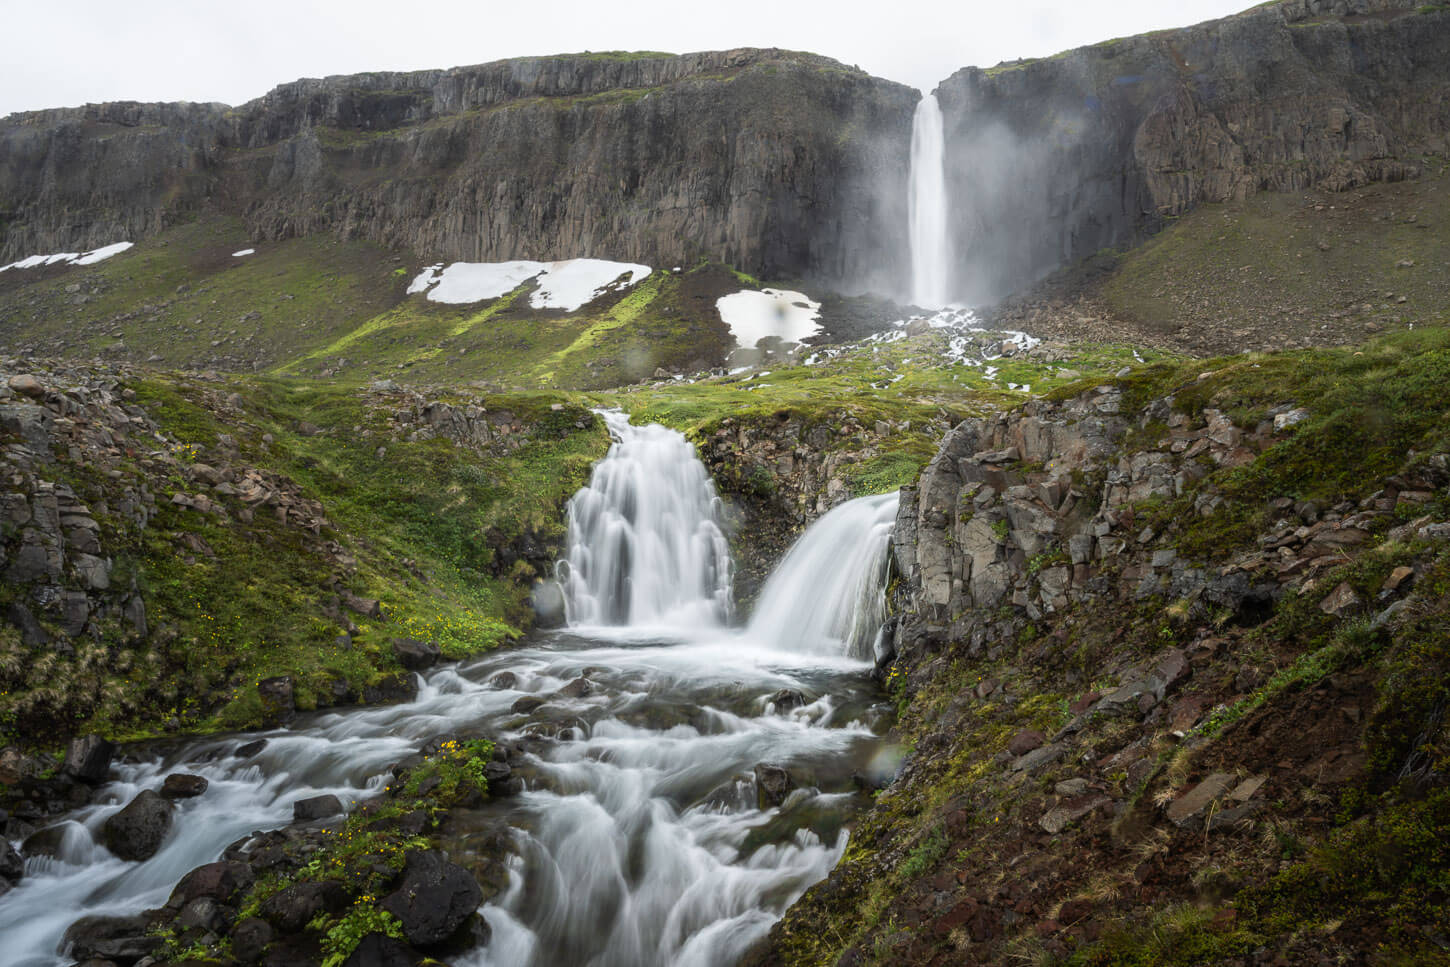
From the ridge, you will see a path leading further up the mountain. Keep following it. As you go past Hangandifoss, you will first reach a fantastic viewpoint over that waterfall. This one deserves a stop. The views over Hangandifoss really put this waterfall in the spotlight.
Hangandifoss waterfall in the Múlagljúfur canyon
After this viewpoint, the trail will become slightly steeper, but the hike is relatively short. Be careful here, as it can be very slippery when wet. Personal experience. Yes, I did fall :).
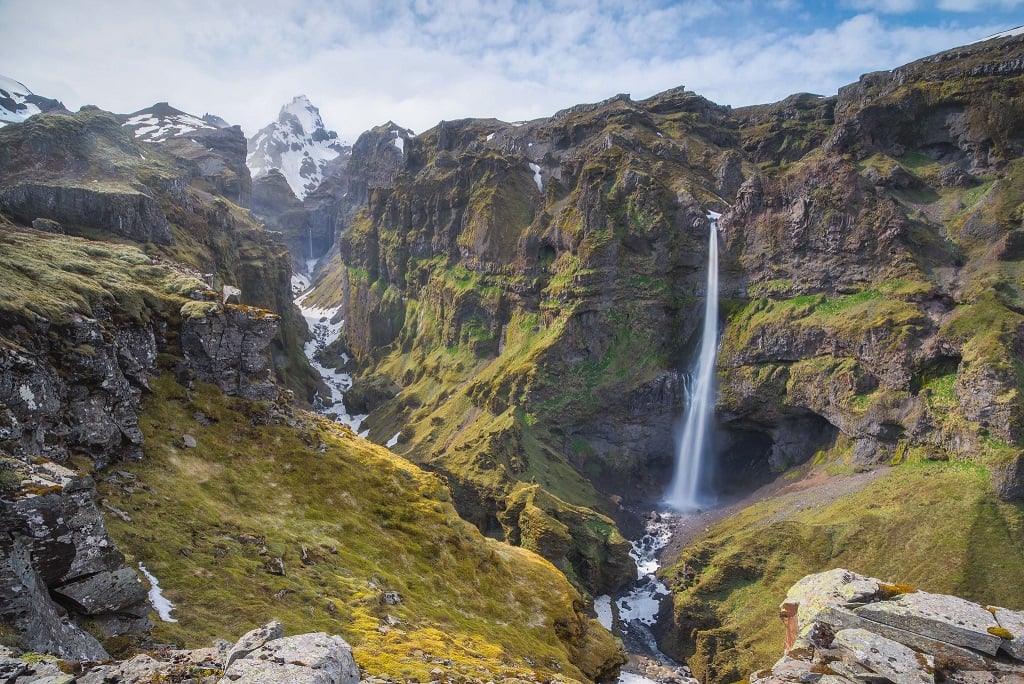
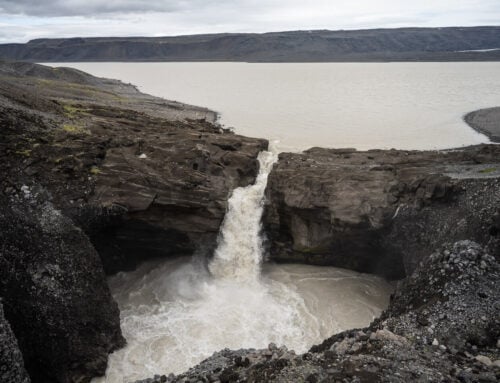
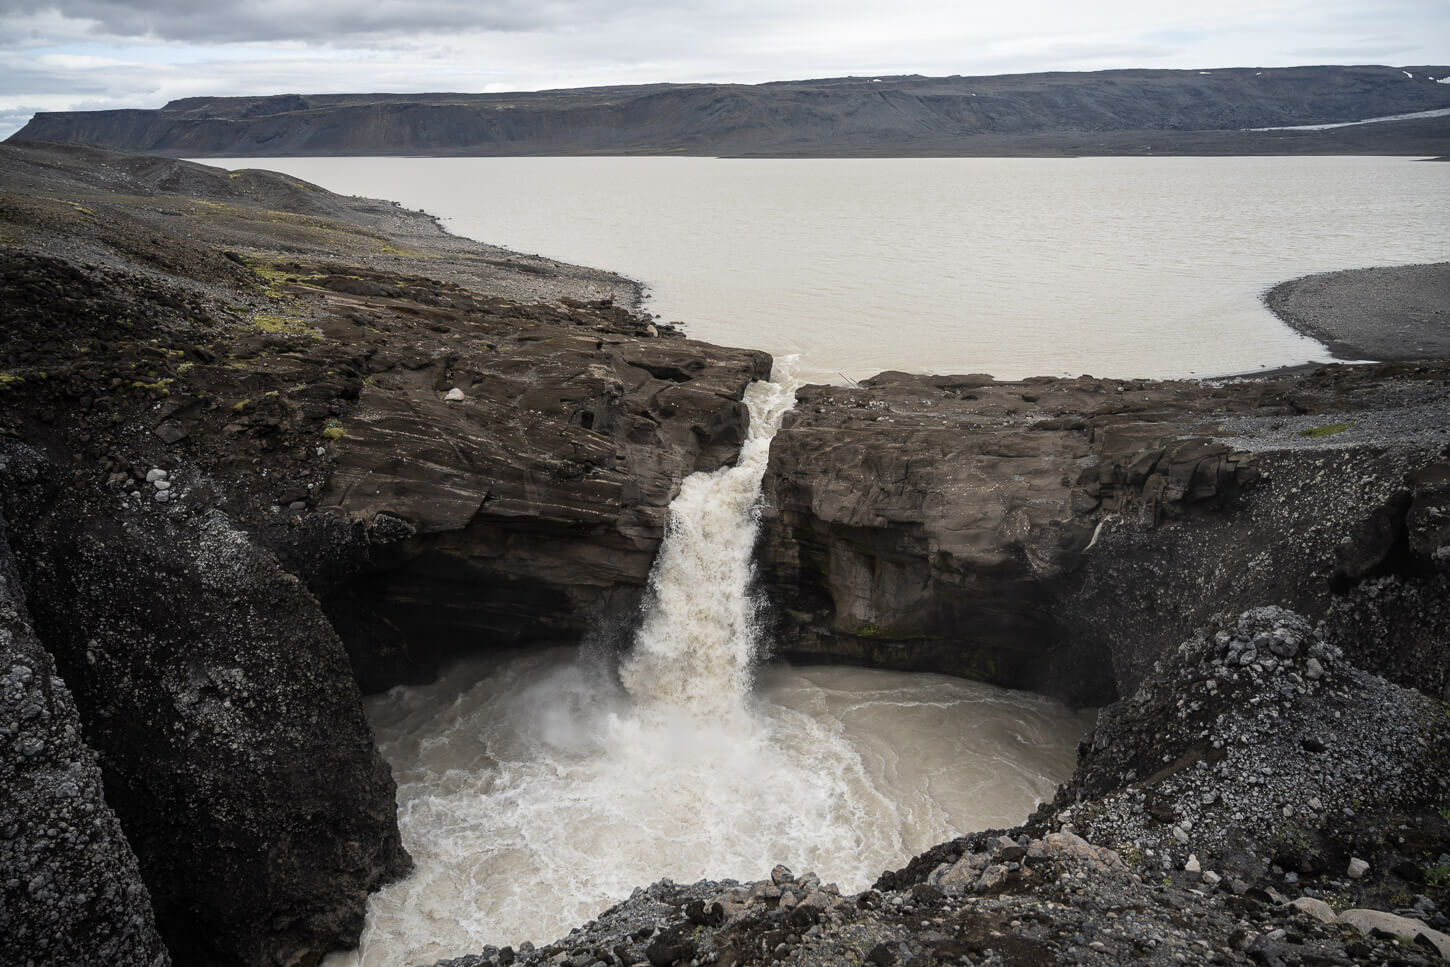
At the top of the canyon, you have better views of the upper part of the Mulafoss waterfall, as well as the glacier above the canyon.

Upper Part of the Mulafoss Waterfall.

The glacier above the Múlagljúfur Canyon.
Photographing the Múlagljúfur Canyon – shorter hike
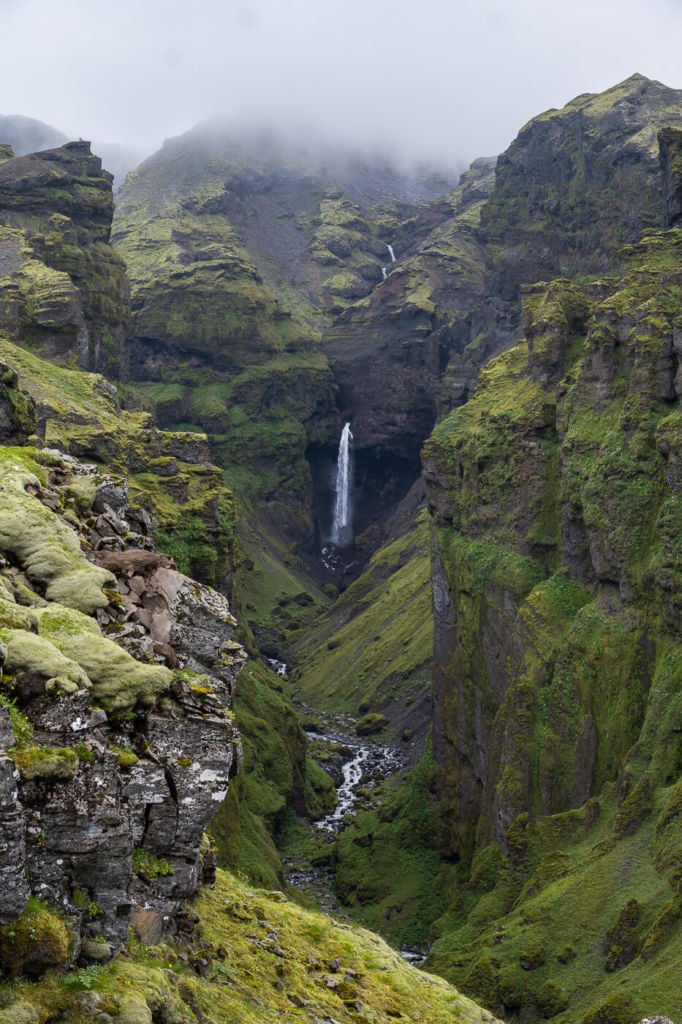
The obvious choice from the main viewpoint is the most classical composition, overlooking the Canyon from the ridge, framing the composition with the closest waterfall on the side and the one at the canyon’s centre in the background.
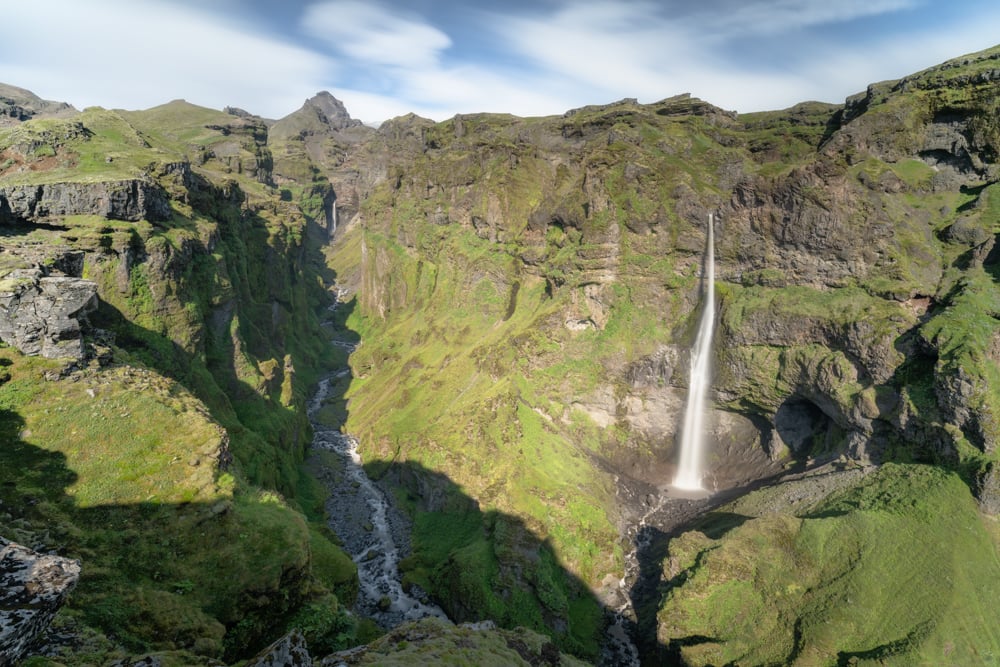
Another view of the canyon
You may want to bring a Neutral Density filter to blur the water and a graduated filter to compensate for the sky if the daylight requires it.
Central part of the Múlagljúfur Canyon
From this viewpoint, however, you also get great views of the central part of the Canyon. This can give great depth to an image, adding to the sense of scale and perspective.

Central part of the Múlagljúfur Canyon
This is where photos of the first part of the hike would stop—next, pictures of the next section of the Hike.
Photographing the Múlagljúfur Canyon – longer hike
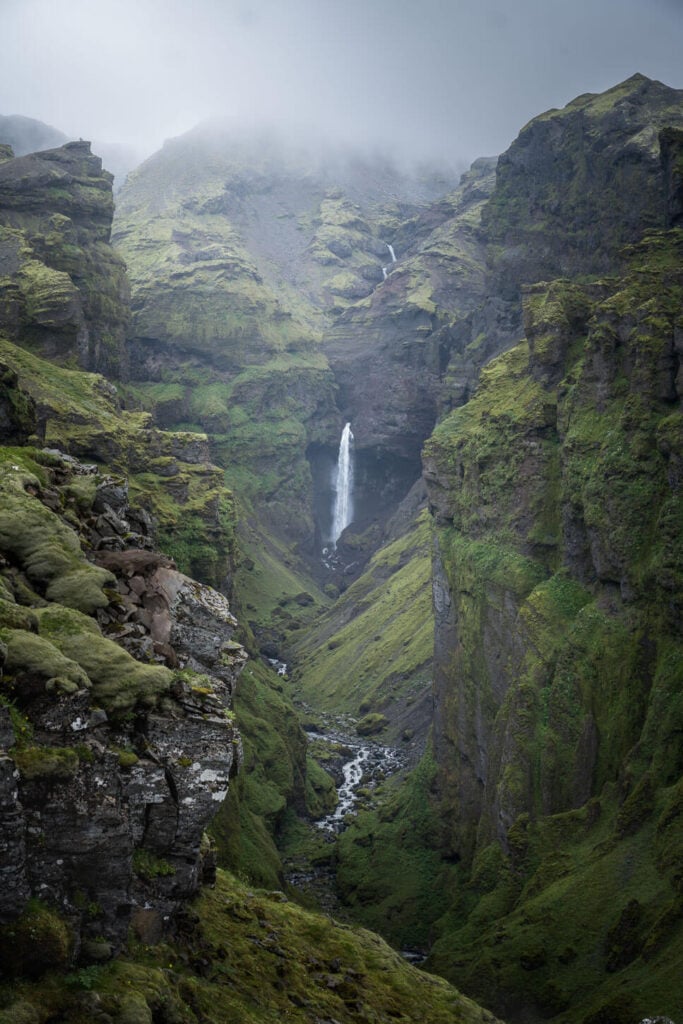
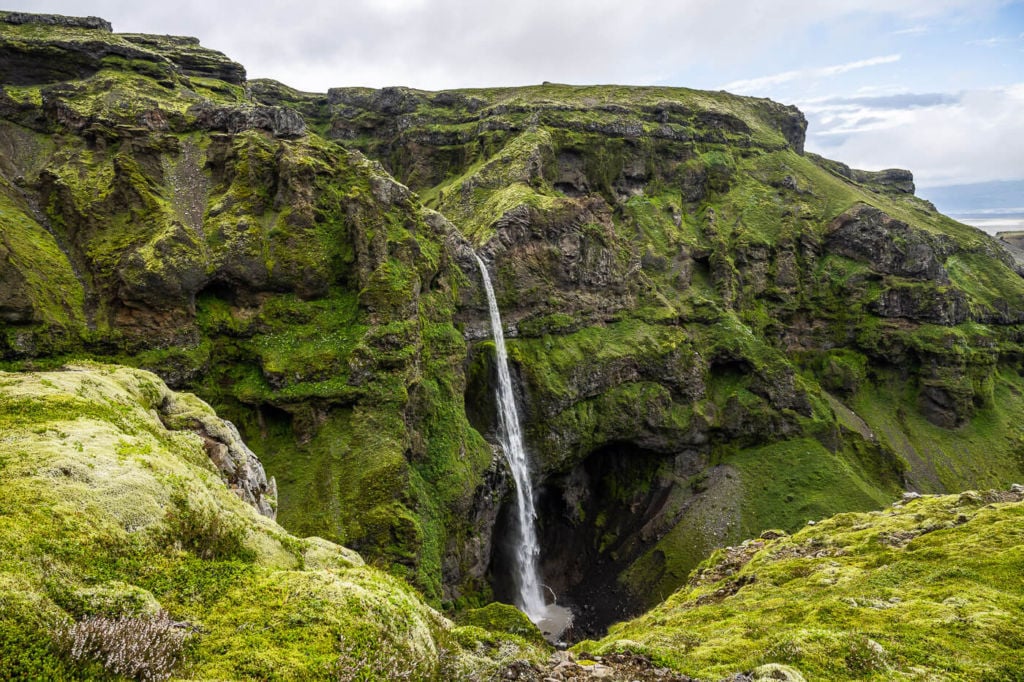
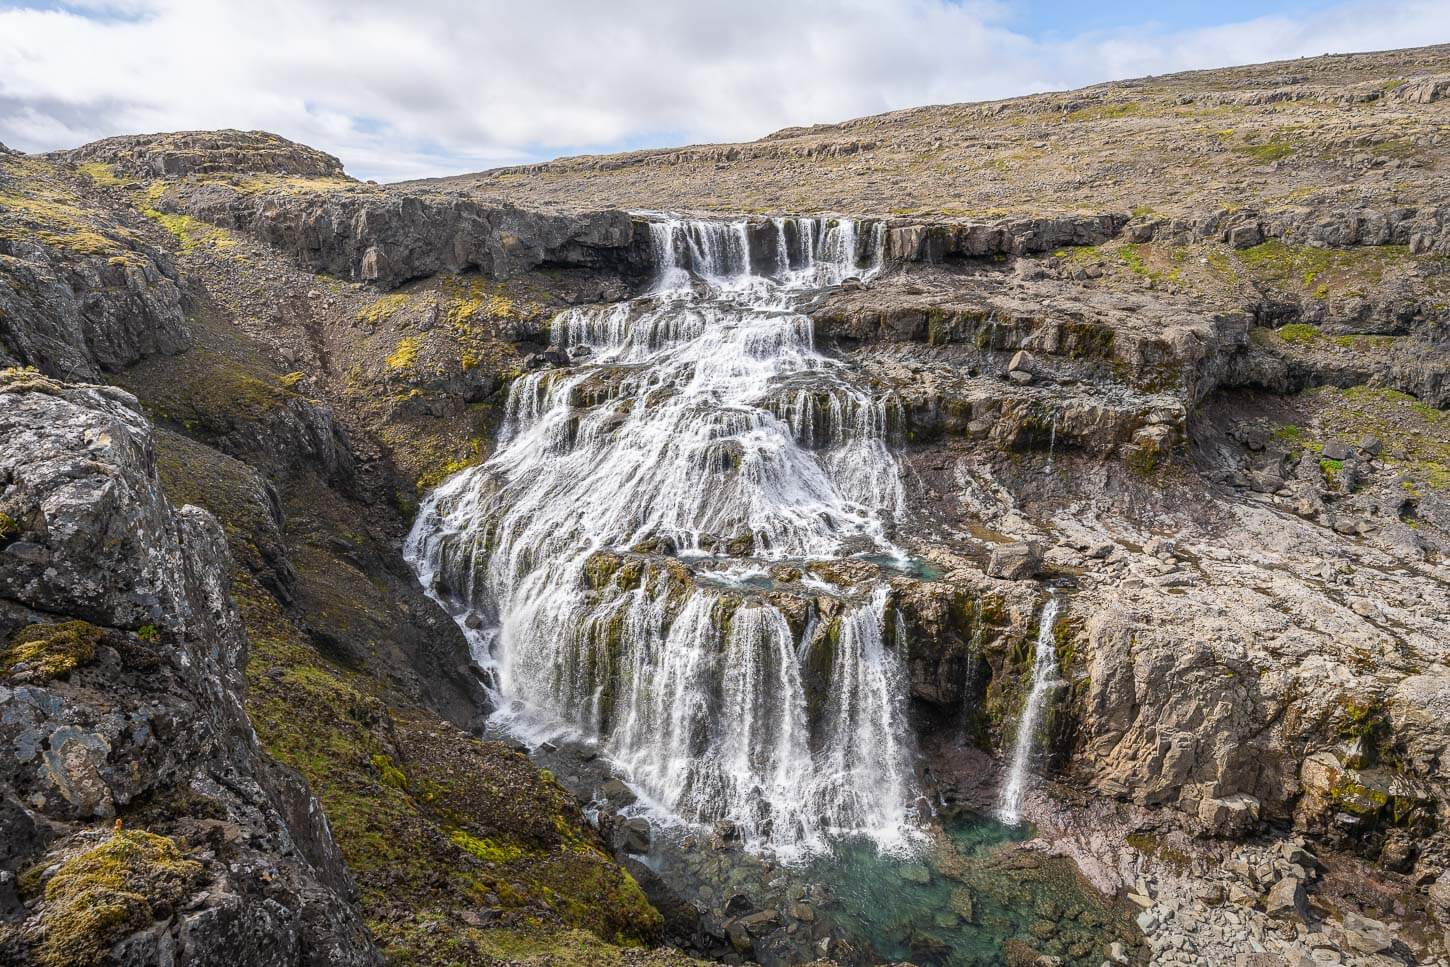
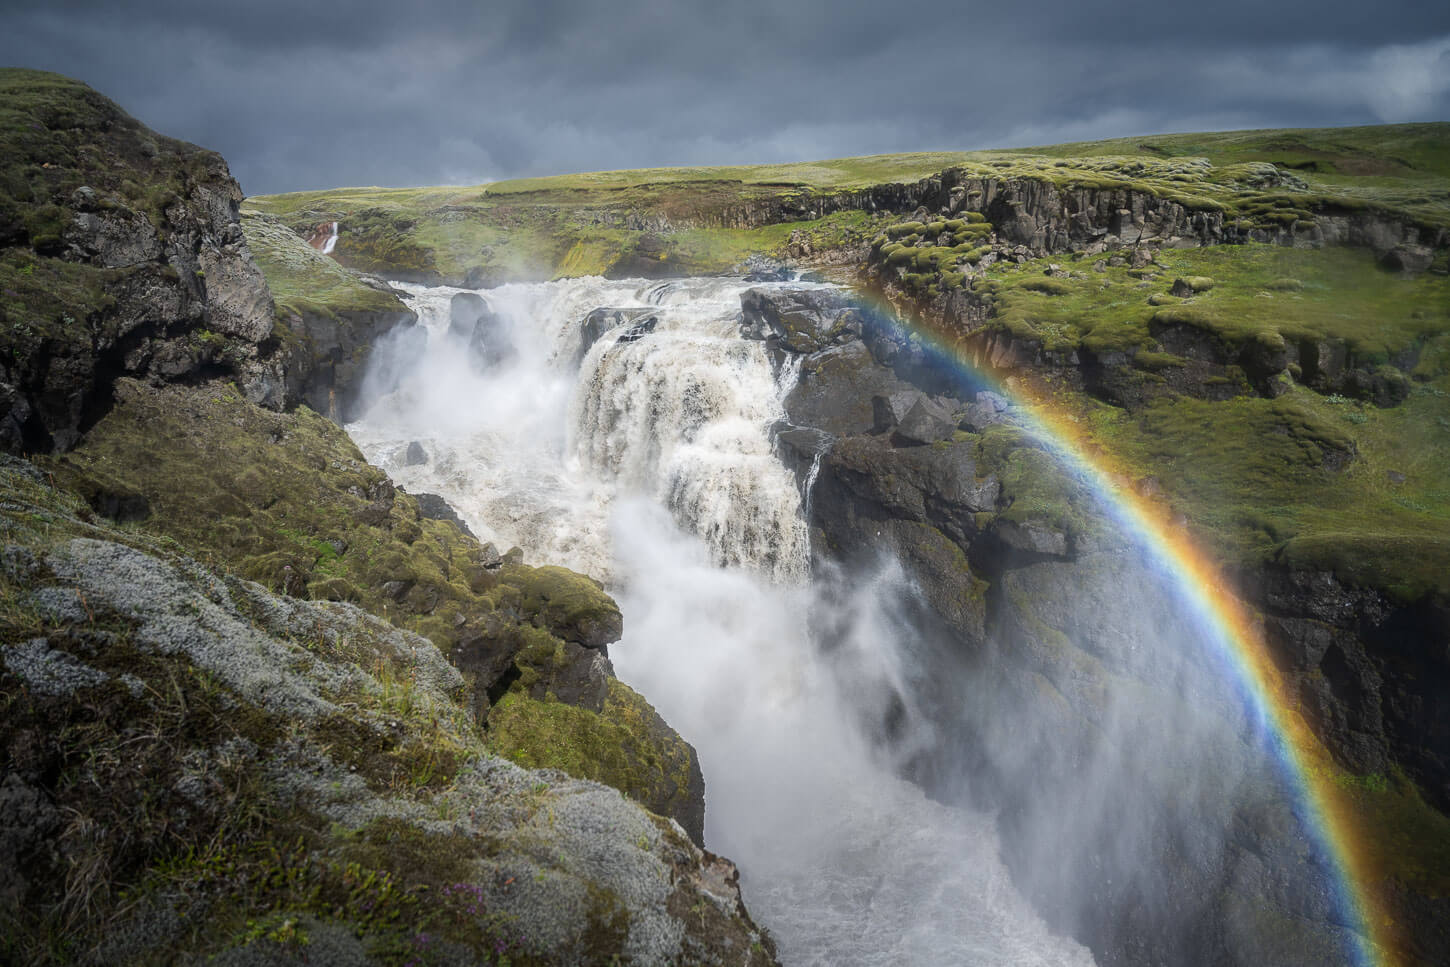
If you keep going all the way to the top of the Canyon, you will be rewarded with the best views of Hangandifoss. This is also a part of the Múlagljúfur Canyon that you don’t want to miss.
I honestly think Hangandifoss alone is an underrated and under-shoot waterfall. Sure, it’s always part of the main composition, but it is also a great attraction as a “stand-alone” waterfall. And a very photogenic one.
The Hangandifoss Waterfall
Another view of Hangandifoss.
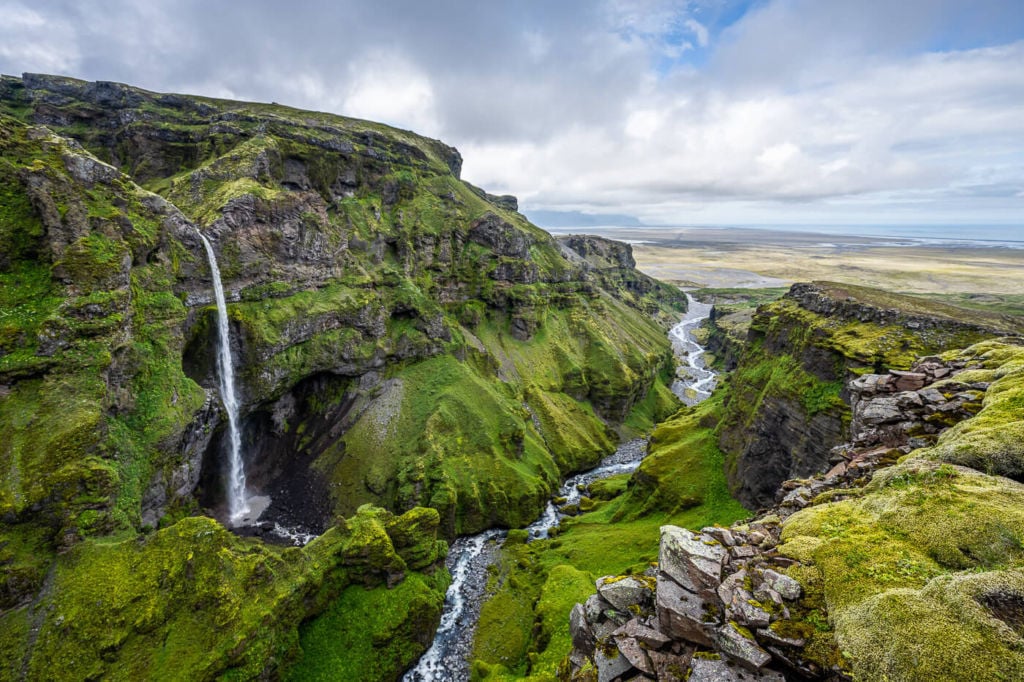
View towards the entrance of the canyon.
At the top, the waterfalls are kind of hidden, but nonetheless, the views are amazing.
View from the top of the Múlagljúfur Canyon
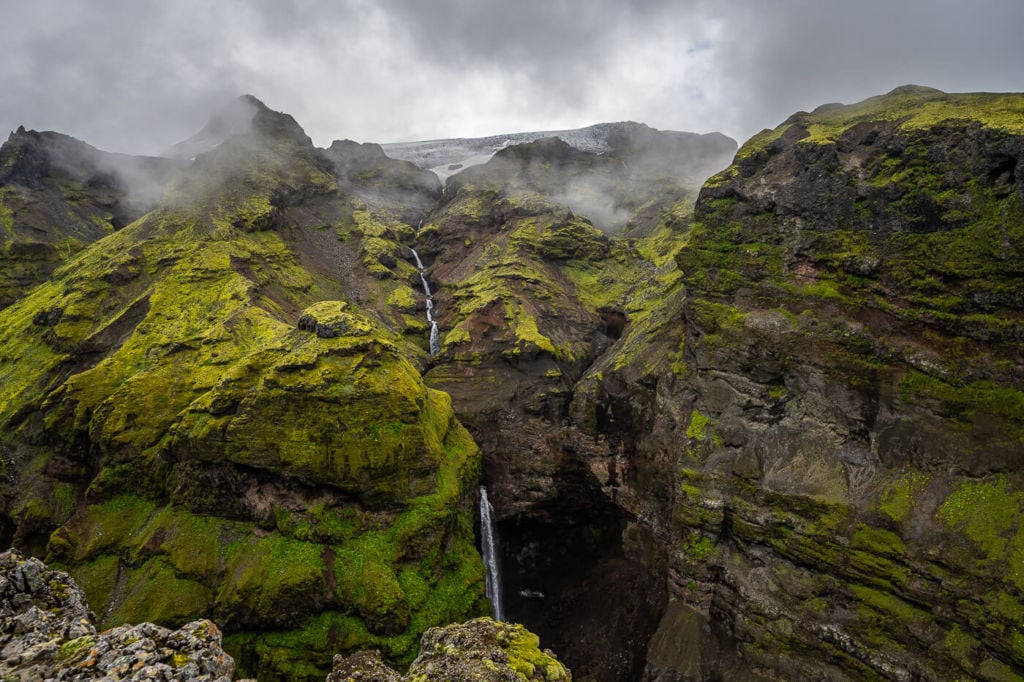
Top of the Múlagljúfur Canyon, view towards Mulafoss.
Monochrome also suits this location. For example, the last time I was there, I experimented with infrared filters and was pretty pleased with the result. But, again, focusing on each subject worked better than the classic wide landscape approach to the composition for this type of shooting.
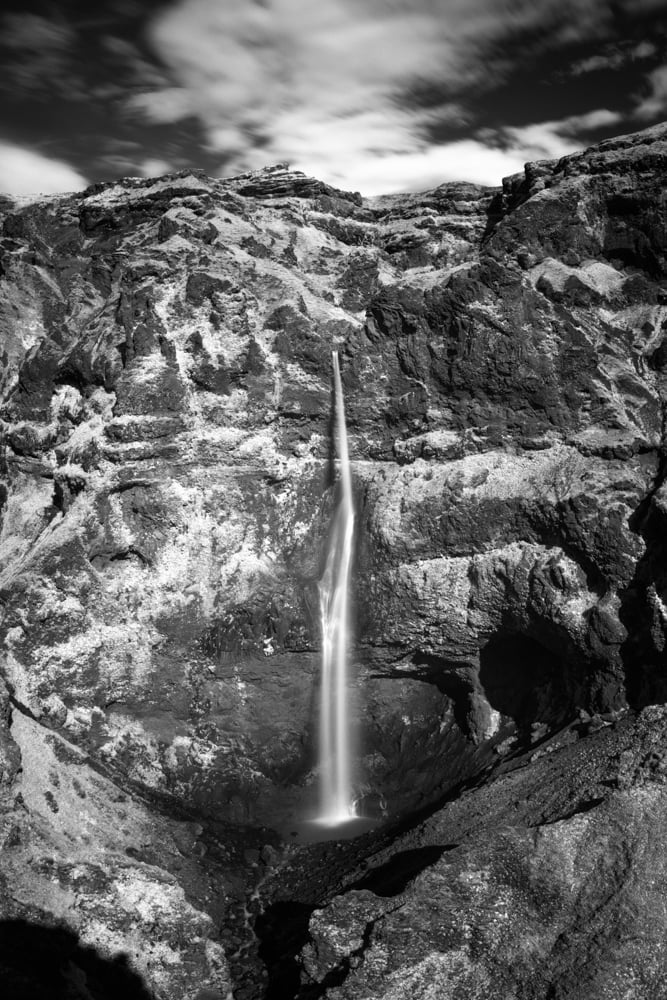
View over the Hangandifoss Waterfall
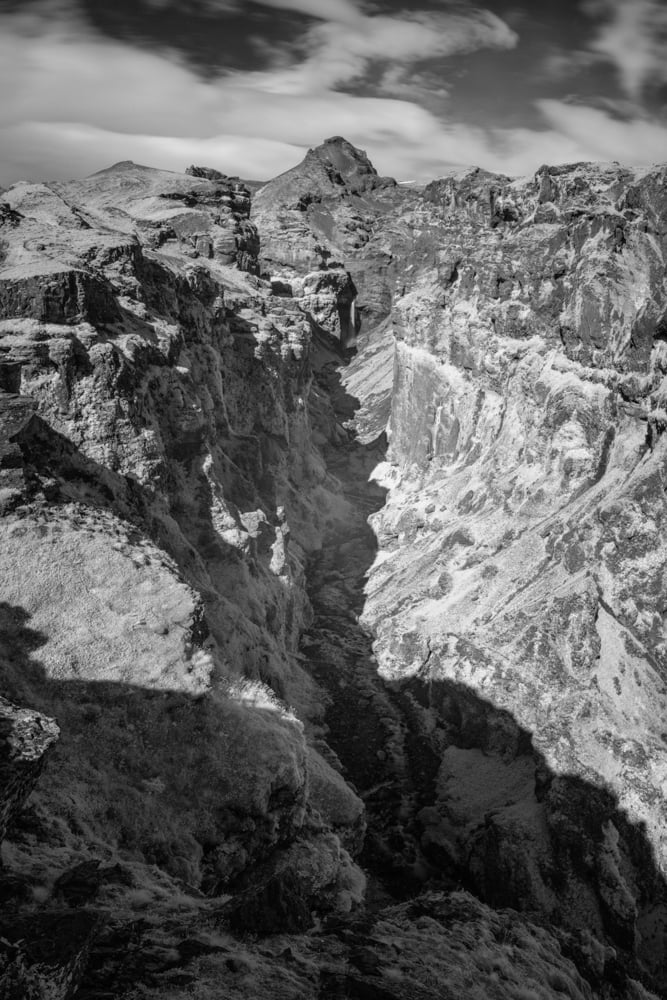
The Canyon with the waterfall Mulafoss in the Background. Infrared Shot.
I recommend you experiment with compositions further and different imaging approaches, as I believe this location still has much potential, photographically speaking.
A note on composition
Lastly, I’d like to spend a couple of additional words on why the classic composition works well and why it is such a pleasant sight.
The two waterfalls fall almost precisely in the two vertical thirds of the image. So as the eye enters the picture from the top left, it will hit the waterfall in the background first, and the canyon will naturally lead the eye down to the second waterfall. From there, it will come back to the first waterfall again.
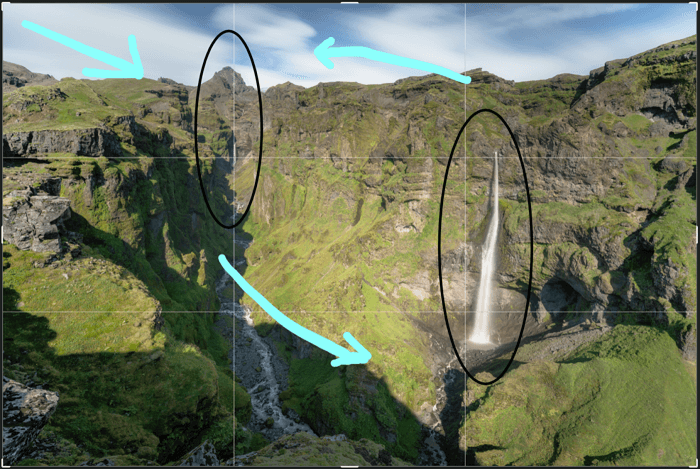
The natural flow of elements within the image
This makes the image an ensemble of elements that is usually difficult to find in nature. But, compositionally speaking, it’s probably as close to perfect as it gets :)!
Still, there are plenty of other amazingly scenic views this canyon offers.
Video of the Hike
Lastly, here is also a short video of this hike all the way to the top of the Canyon.
Where to Stay
The closest option is the Fosshotel Glacier Lagoon. There are several other Hotels and accommodations in the Vatnajokull area.
Alternatively, you can also consider the Skaftafell Park camping. I stayed there several times, and I can recommend it. Good facilities, and there’s a food truck.
Additional Resources
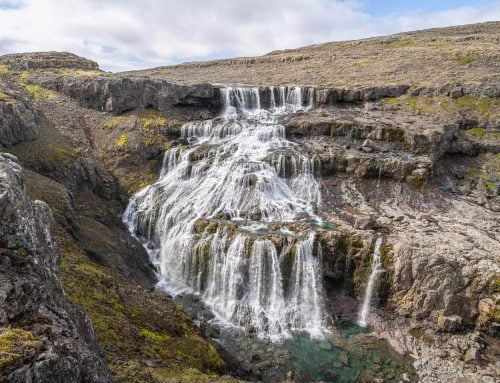
- More awesome waterfall hikes in Iceland? Check these out: Háifoss, Hengifoss, Rauðfoss, Dynjandi, Brúarfoss or the Ófærufoss Hikes
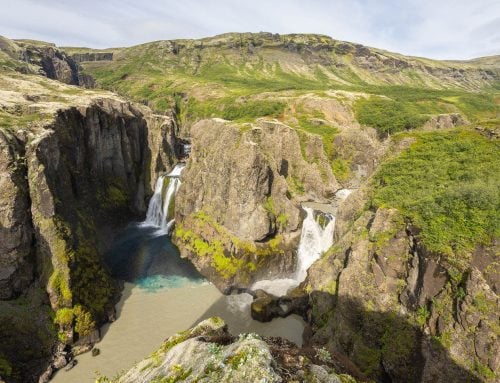
- If you like this location, you may also like these other beautiful hikes: the Fjaðrárgljúfur Canyon, the Sigöldugljúfur Canyon or Kolugljúfur.
- Check out more Photo Hikes in Iceland here.
- Discover the best hiking books and guides on Iceland.

Hi, whats the best time of the Day to go here for some photos? It looks amazing
Hi Linda,
Yes, it is an amazing place. If the sun is out, lighting conditions will change a lot depending on which month you visit, so it is difficult to recommend a specific time of the day.
What I can recommend, though, is visiting anytime the sun is in any position between East and South-west. That will give the best lighting conditions for the waterfalls and the canyon.
If it is overcast, any time of the day will be good for a moody and atmospheric shot.
Hello,
nice website. Do you think it is possible to do the gravel road from the Ring Road to the parking lot in a 7 meter motorhome? or it’s a bit risky. in August.
Hi Toni
I have seen people with trailers down that road. So it should be possible, but there are a couple of places with large holes in the gravel road where you’d need to be careful to not bottom out. Maybe best to try and visit earlier in the morning or later in the afternoon, as the parking by the Mulagljufur trailhead is usually more crowded in the middle of the day. So that would give you more space to reverse or maneuver when you have to get out of there.
請問您自駕需要四輪驅動的車嗎?
A regular 2WD car is fine.
thank you for this great post of the hike you took in Múlagljúfur Canyon , just a question , if I have fear of hights is the short hike is rught for me , does the trail goes near the edge
Thanks Oshri! I do not have a fear of heights, so it may be hard for me to assess this from that point of view. However, for the most part, the trail does not get close to the edge. There is one small ravine to cross halfway through, which is moderately steep but not overly so. All the main viewpoints, though, are rather close to the edge. If you want to visit, I think you can still get a good view of the canyon and the waterfalls without getting close to the edge, because the area behind it is rather wide and relatively flat. So you can probably visit while still keeping far enough from the edge.
Is it 5.77km total or 5.77km out and 5.77km back?
5.77km total
Good information well presented – thank you.
A question about the equipment. I came to your site looking at the 28-400 review and then wandered over to this canyon hike. I assume these images were taken with the 70-200 f2.8? I ask because even at these reduced resolutions, these canyon images retain a certain ‘snap’ or micro-contrast that seems missing in the 28-400 review images. I realize these are entirely different lighting conditions and atmospherics may play a role, but still these canyon images just seem to have more depth.
So my question is, are these canyon images processed any differently or am I really seeing the difference in lens performance (or am I just totally out in left field)?
Thanks
Andrew
HI Andrew, good observation. Most of the photos in this post were taken with the Z 24-70mm f/4, some with the Z 14-24 f/2.8 (and some with the “original” 14-24). While these photos have had additional dodging and burning applied, you are right in saying they have more micro-contrast.
I had the 28-400 on the camera by default when I tested it in Iceland, and that was the lens I used the most. It’s convenient and fun, the image quality is good enough, but both the 24-70 and 70-200 are sharper and produce more contrasty images.
If you were looking at the 70-200 too, it’s a lens that I love – I have a post about it too: https://thephotohikes.com/landscape-with-the-nikkor-z-70-200/