Hverfjall Crater Hike, Iceland
Located in the beautiful north of Iceland, the Hverfjall Crater offers you the opportunity to hike all around its rim and admire the breathtaking views of the surroundings. Walking around the rim of this crater is quite an experience in itself, as it’s a great way to get a sense of its size. The crater was formed in 2500 BC, after an explosive eruption. Its diameter is about 1 km, and one cannot help but wonder about the forces that created it.
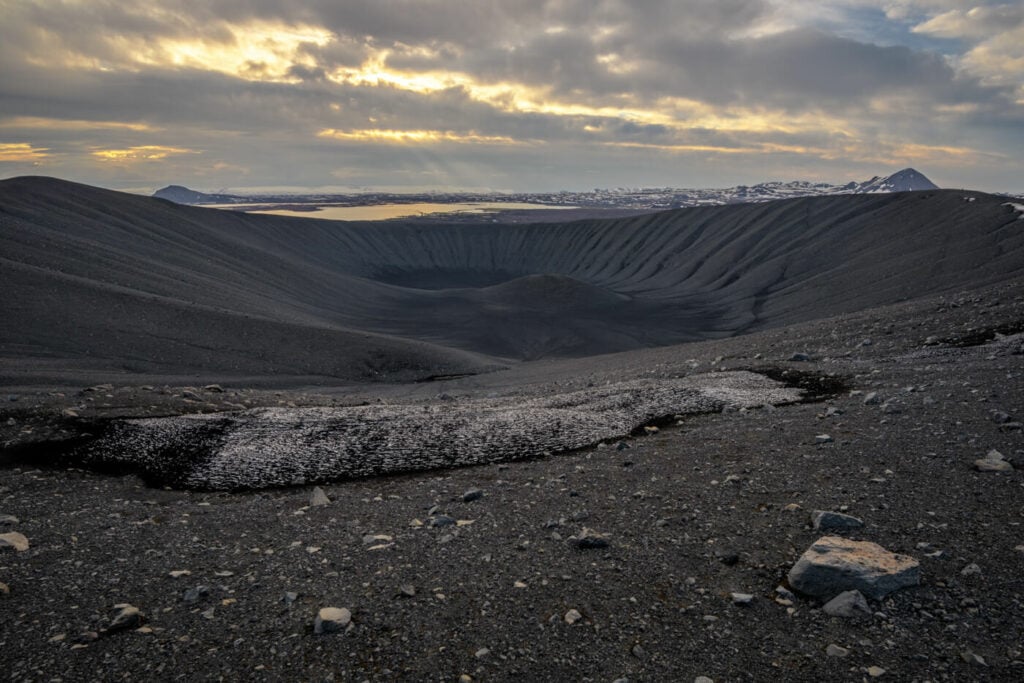
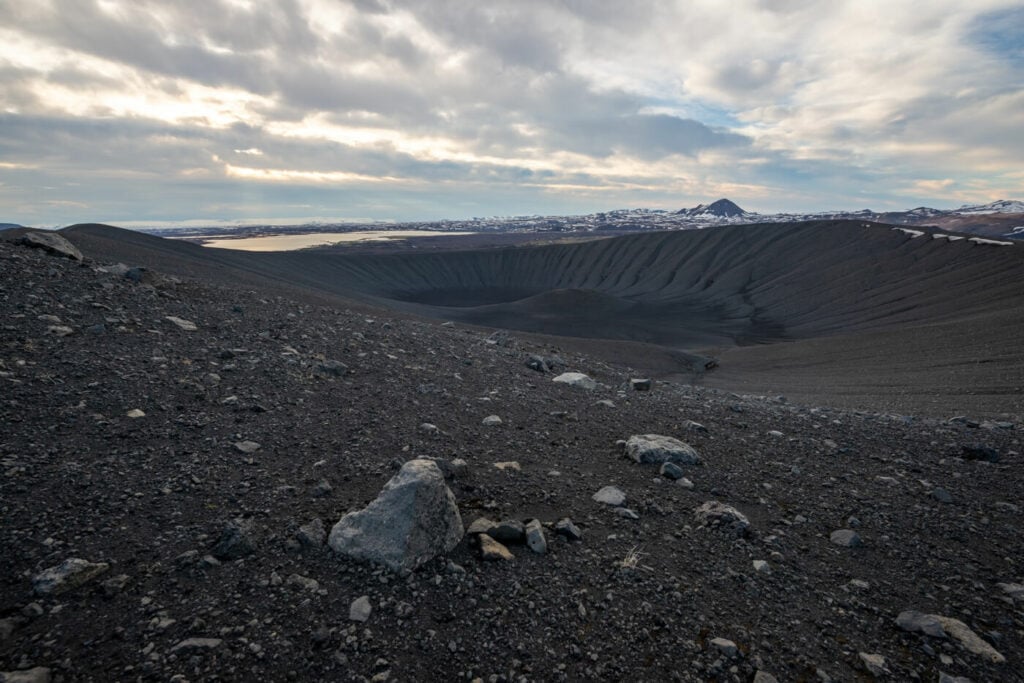
View from the top of the Crater toward Lake Myvatn
The Hverfjall truly is an impressive location and one that demands respect. Walking on the rim of a crater-like this one is a bit like walking on the shoulders of a gentle giant, in a way.
Apart from the experience of hiking the rim of the crater, the views up there are fantastic. You have great views of the Lake Myvatn area, the surrounding lava fields as well as Herðubreið, another beautiful and Iconic Landmark in this area.
There are actually two hiking trails leading up to the volcano, but the one from the main parking area is the easiest and less steep one. I’d recommend doing this, but I’ll describe both.
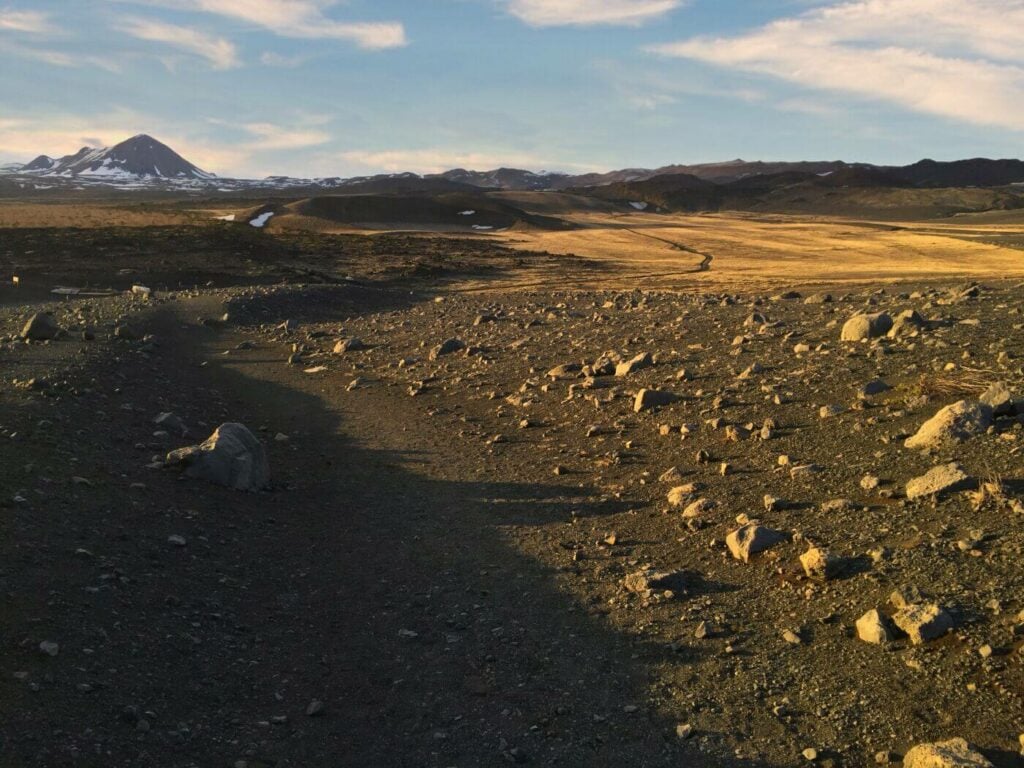
Some warm light on the black sand at the foot of the Hverfjall crater.
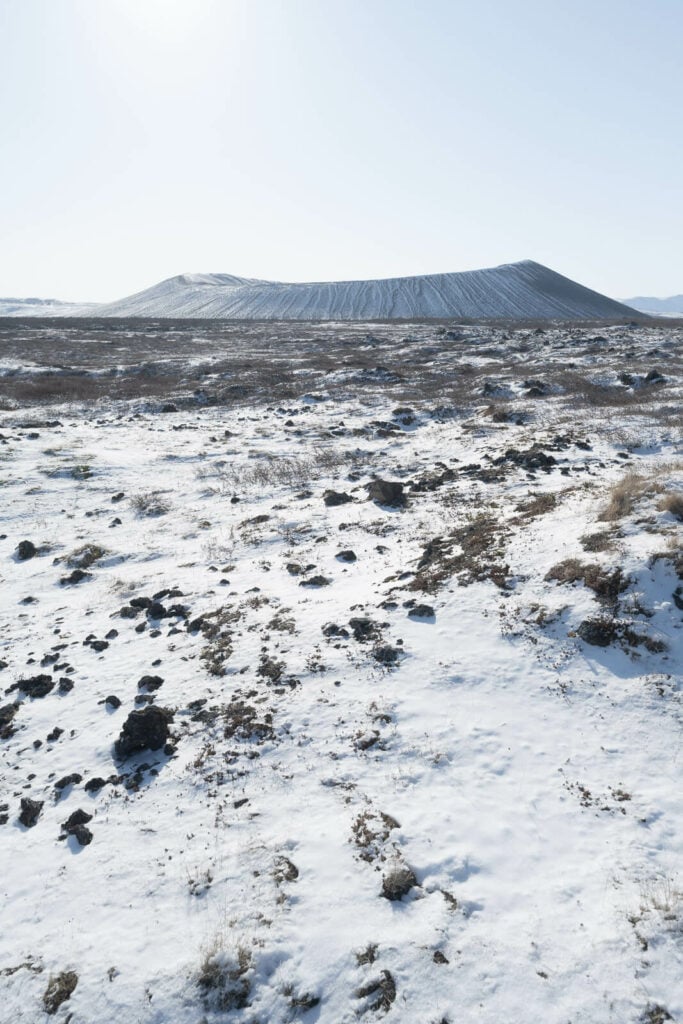
It also is a beautiful location in winter, provided there’s some snow around. The contrast of the ice and snow on top of the black soil and the dust of the giant crater makes it stand out even more.
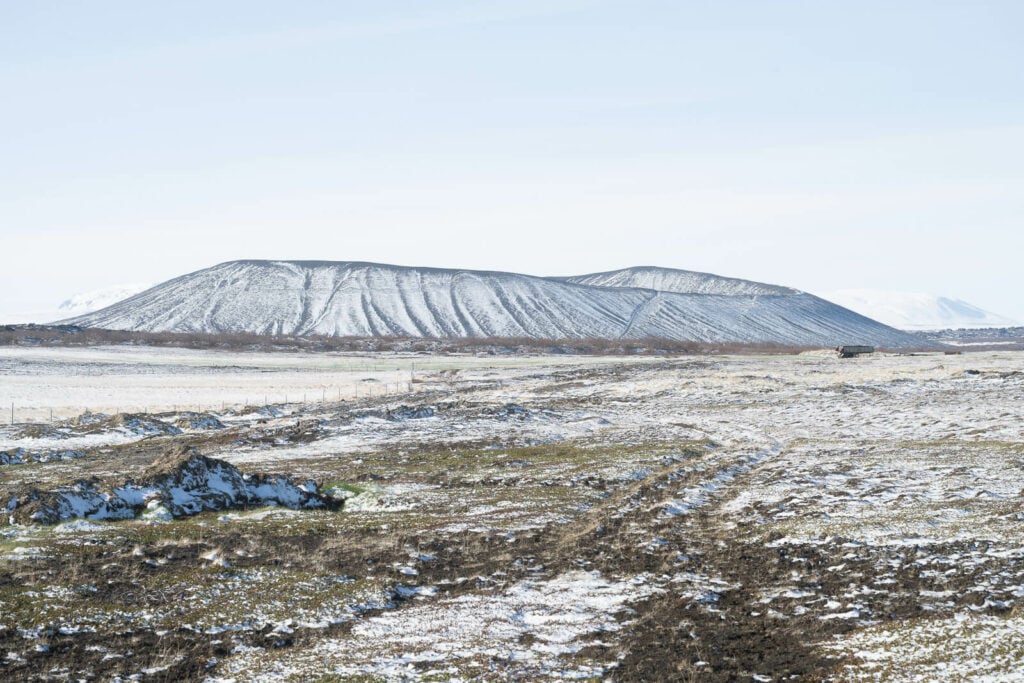
Table of Contents
Overview of the Hverfjall Crater Hike & Map
This is a rather short hike. The trail up to the rim is rather steep, and it will take longer than you’d imagine to go full circle around it.
| Max Altitude | 432m m |
|---|---|
| Distance | 4.33 KM |
| Elevation gain | 280 ↑ / 280↓ |
| Hike time | 01:30/ 01:45 Hours |
| Hike Difficulty | Easy/Moderate |
Here is also a map of this hike:
How to Get the Hverfjall Crater to and Parking
This is an easy to get to the location, being just a short drive away from the Ring Road. Even if you do feel like hiking up the crater, I’d still recommend stopping by to check it out, it’s an impressive sight.
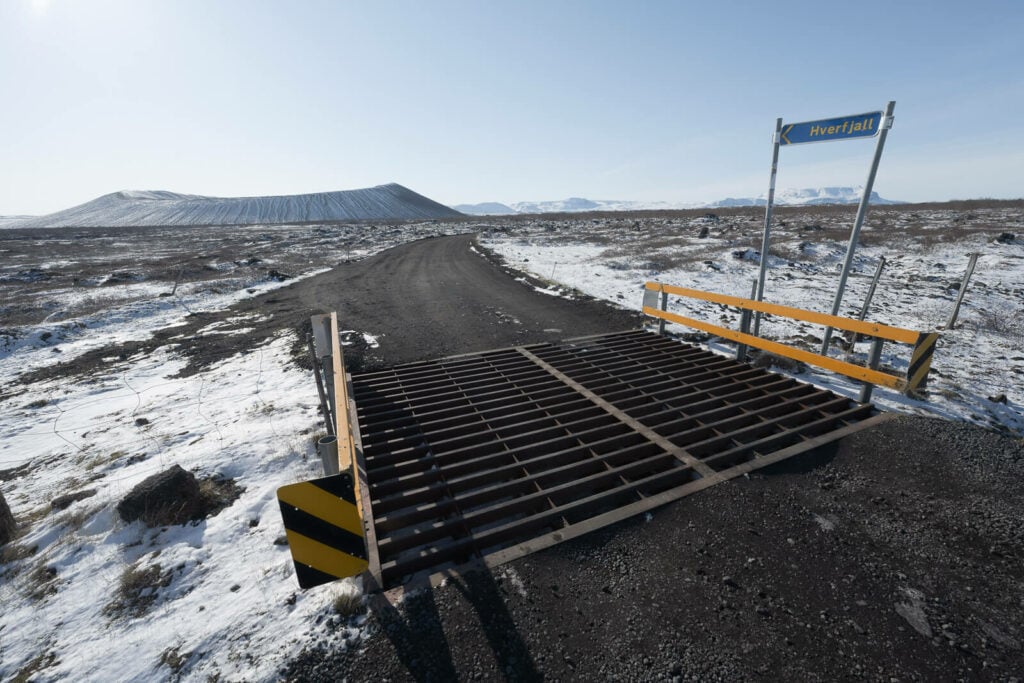
- Driving Directions: Whether you are coming from the Ring Road East or West, once you reach Myvatn you will have to turn into Road 848 (Myvatnsvegur). Keep following road 848. You’ll see the crater from afar, so you can’t miss it. From road 848 you would have to turn onto a dirt road next to the crater. Keep following it to get to the parking areas.
- Parking: There are two parking areas at the foot of the Crater and two trails leading up to the rim. The main, bigger parking area to the north of the crater is here. This is also where the easier of the two trails starts. The smaller parking area to the southwest of the crater is here. This leads to a harder, steeper trail.
- Public Transport: Bus 56 which runs between Akureyri/Egilsstaðir stops in Myvatn, but from there you would have to walk or find some alternative transportation method. Here you can find the Bus 56 timetable.
Tip: beware there may be plenty of midges in the area in early summer, be prepared for that. Regardless, I’d highly recommend stopping at the Mývatn Nature Baths for a relaxing dip!
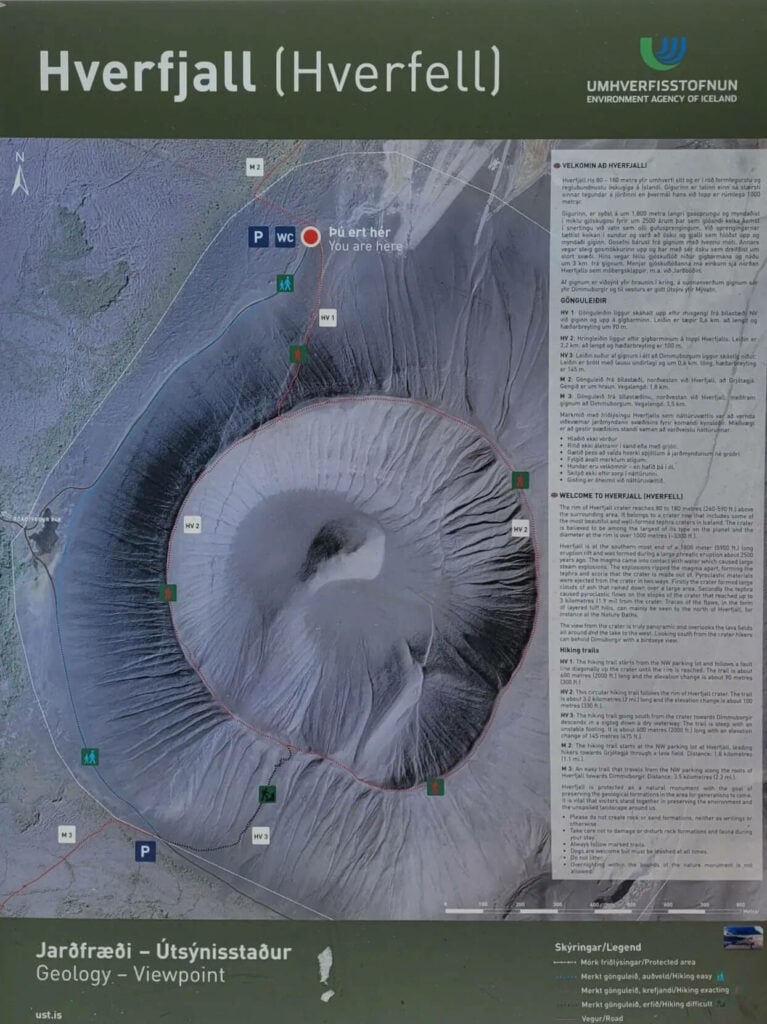
Map of the Hverfjall Hiking trails
The Hverfjall Volcano Hiking Trail
Wherever your hike starts from, the hike up the crater is a steep one. So be prepared for that, for it’s going to be a good cardio exercise. This applies to either one of the two trails, although the main one, north of the crater, is also easier and less steep toward the end.
Apart from the hike up the side of the crater, the trail around the rim is pretty much flat. However, It will take longer than expected to complete the whole circle around the crater. It’s actually kind of deceiving when you are up there. Seeing the whole thing makes you think it won’t take long to complete the trail, but you will soon realize how wrong that impression is.
As you walk around the crater and you realize how big the crater is or what kind of powerful forces created it, you may start to feel like an ant on top of a giant. This was my favorite thing about this hike.
Lastly, make sure not to step outside of the trail; while the crater is a powerful sight in itself, the soft volcanic ground is fragile and will take a very long time to recover from any damage.
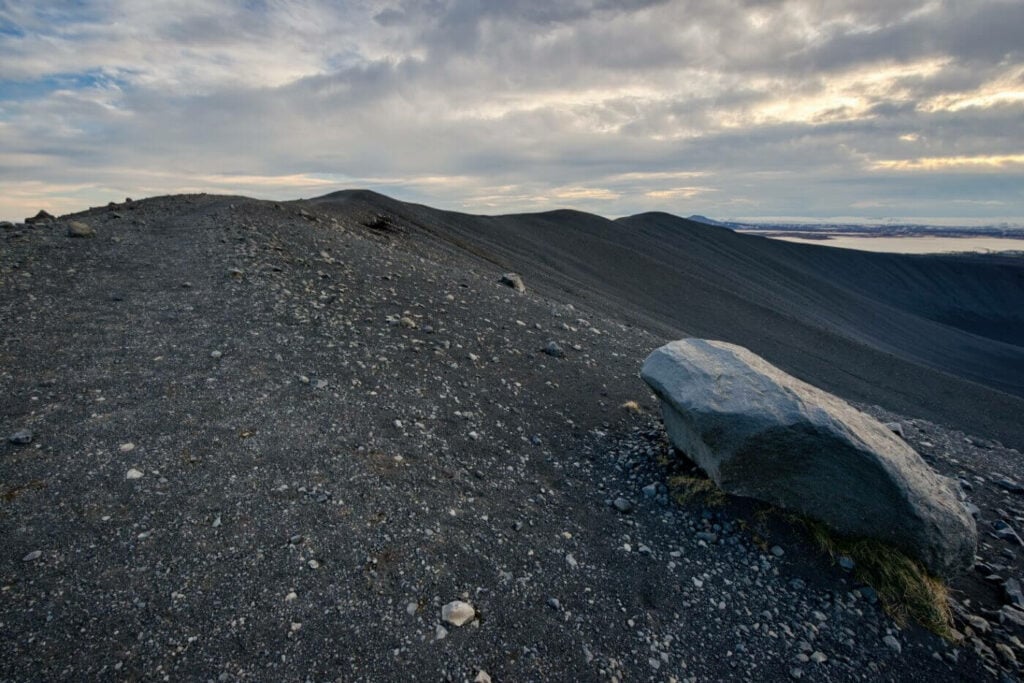
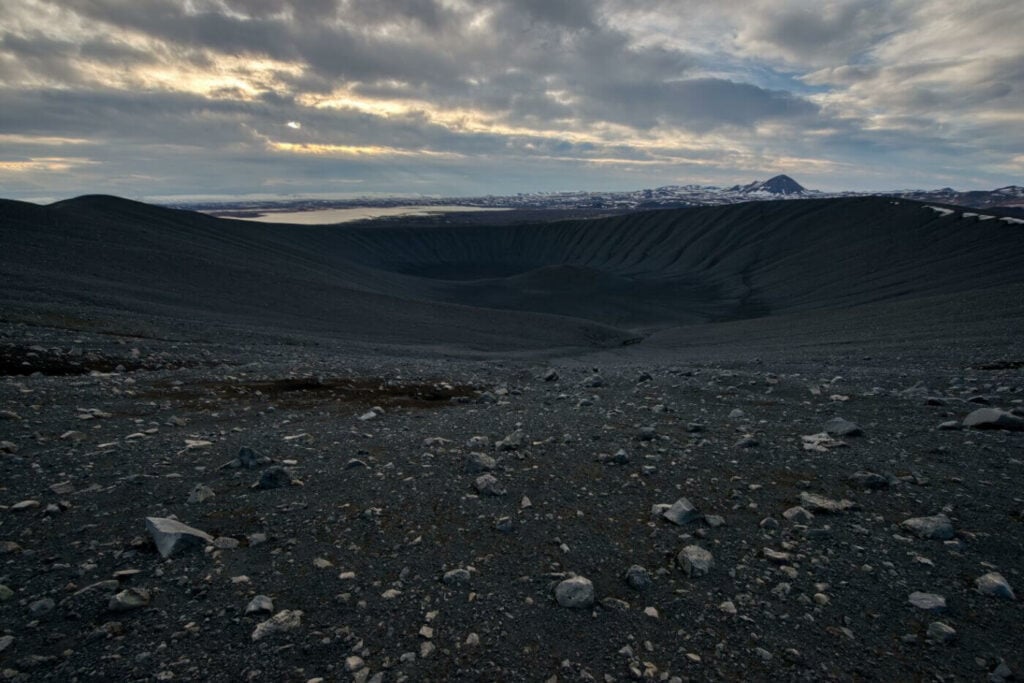
Section of the trail around the crater.
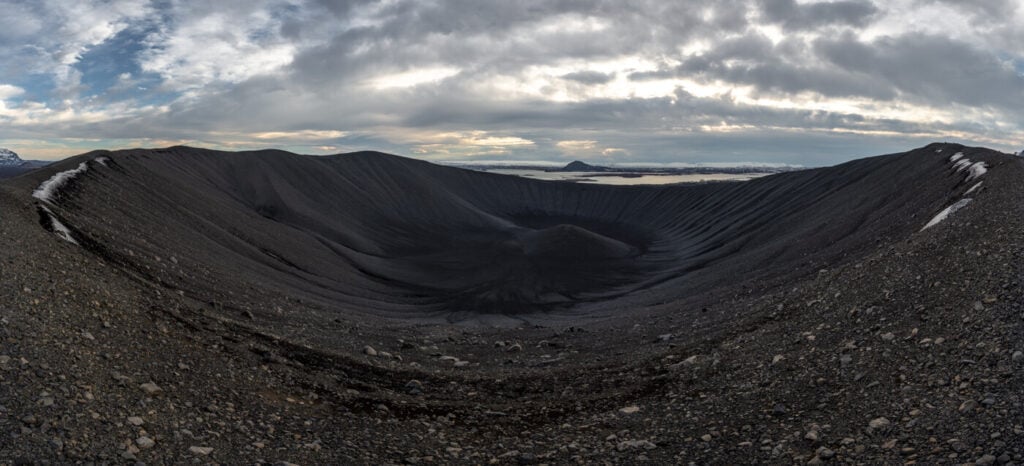
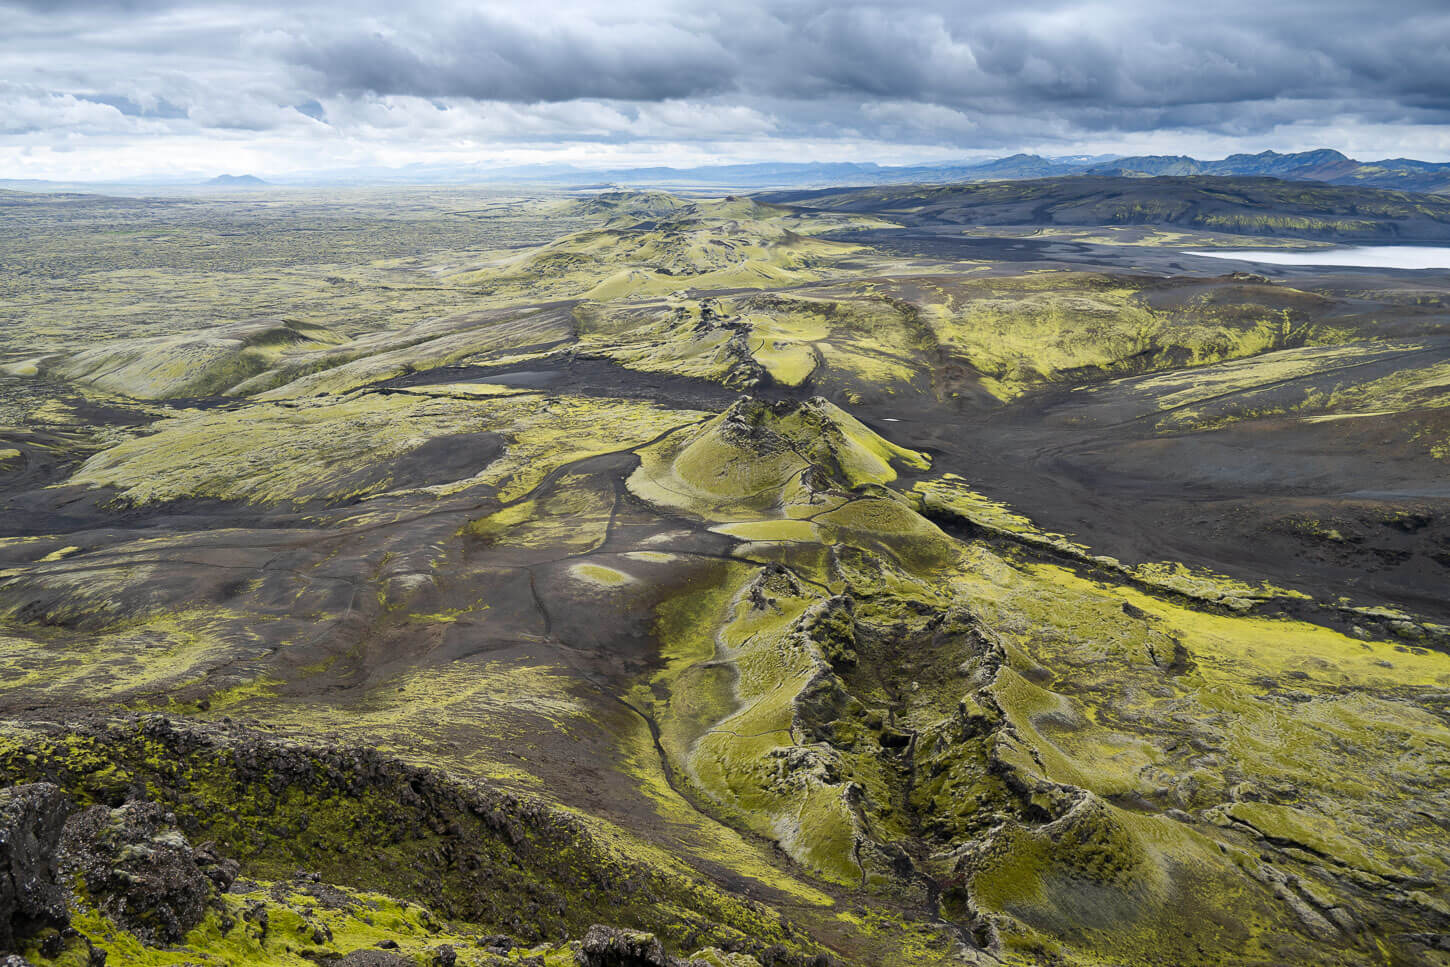
Panoramic image of the crater.
Hverfjall Crater Hike Photos and Photography Tips
This is one of those locations where you should go as wide as you possibly can. To include the whole crater and its rim in one image, I had to make a panorama of 6 vertical images at 14mm, full frame. It’s a great location to be at for the golden hour (an hour before sunset or the hour before sunrise or sunset in summer.
I’ve found the best spots to be on the side opposite Lake Myvatn, as you are at one of the highest points of the crater with a great view of it and beyond. This helps with the sense of scale as well as giving depth to the image.
The landscape around the crater is also beautiful, but all the other landmarks around the crater seem a little too far away for a telephoto lens, at least for my 70-200. If you have a longer tell in the 200-600 range, you may have more luck isolating the farther-away features of the landscape.
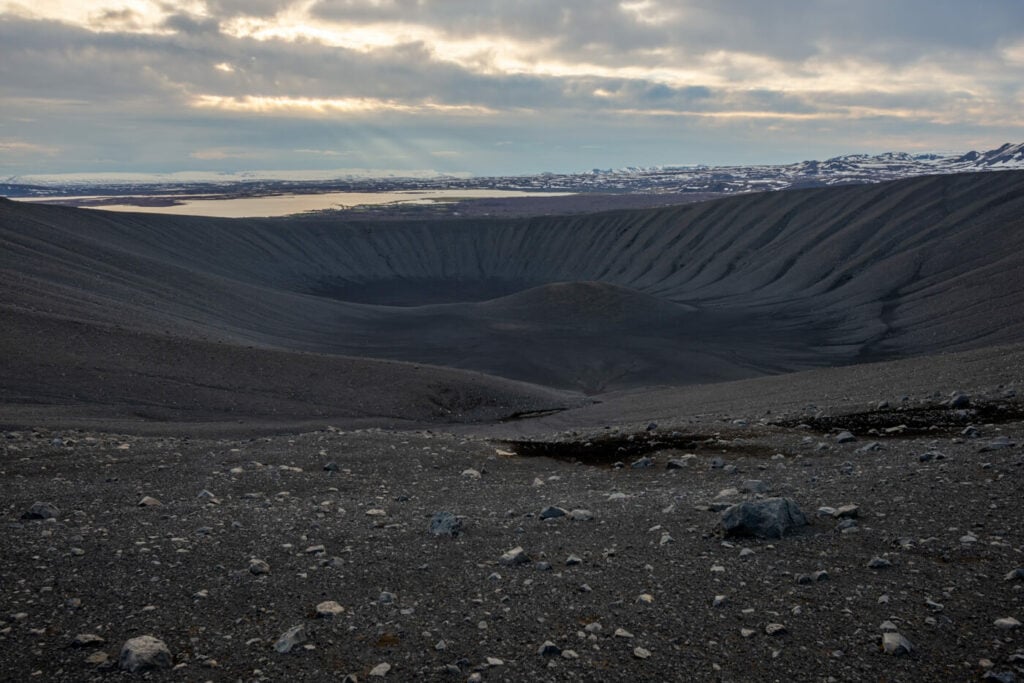
View from the rim, opposite Lake Myvatn

As mentioned earlier, this is a great subject for some landscape photography in the Icelandic winter, or whenever there’s snow on the ground. Even a thin layer of snow makes this crater stand out even more, and it brings out all the texture of its slopes. This makes it a great subject form afar too, although the main problem will be finding a good foreground.
Lastly, flying drones in the Lake Mývatn area requires permission from the local authorities or park rangers. Get in touch with them first, if you are planning to fly a drone here.
Where to stay
There are plenty of accommodations to choose from around Lake Mývatn. However, this hike can be done as a relatively quick stop and if you are driving further to the west, you may want to consider overnighting in Akureyri, which is a very beautiful town.
Btw, if you want a relaxing end to this hike, make sure you visit the Mývatn Nature Baths after your hike! They are a very short drive away.
Additional Resources
- Check out more Hikes in Iceland here.
- Discover the best hiking books and guides on Iceland.
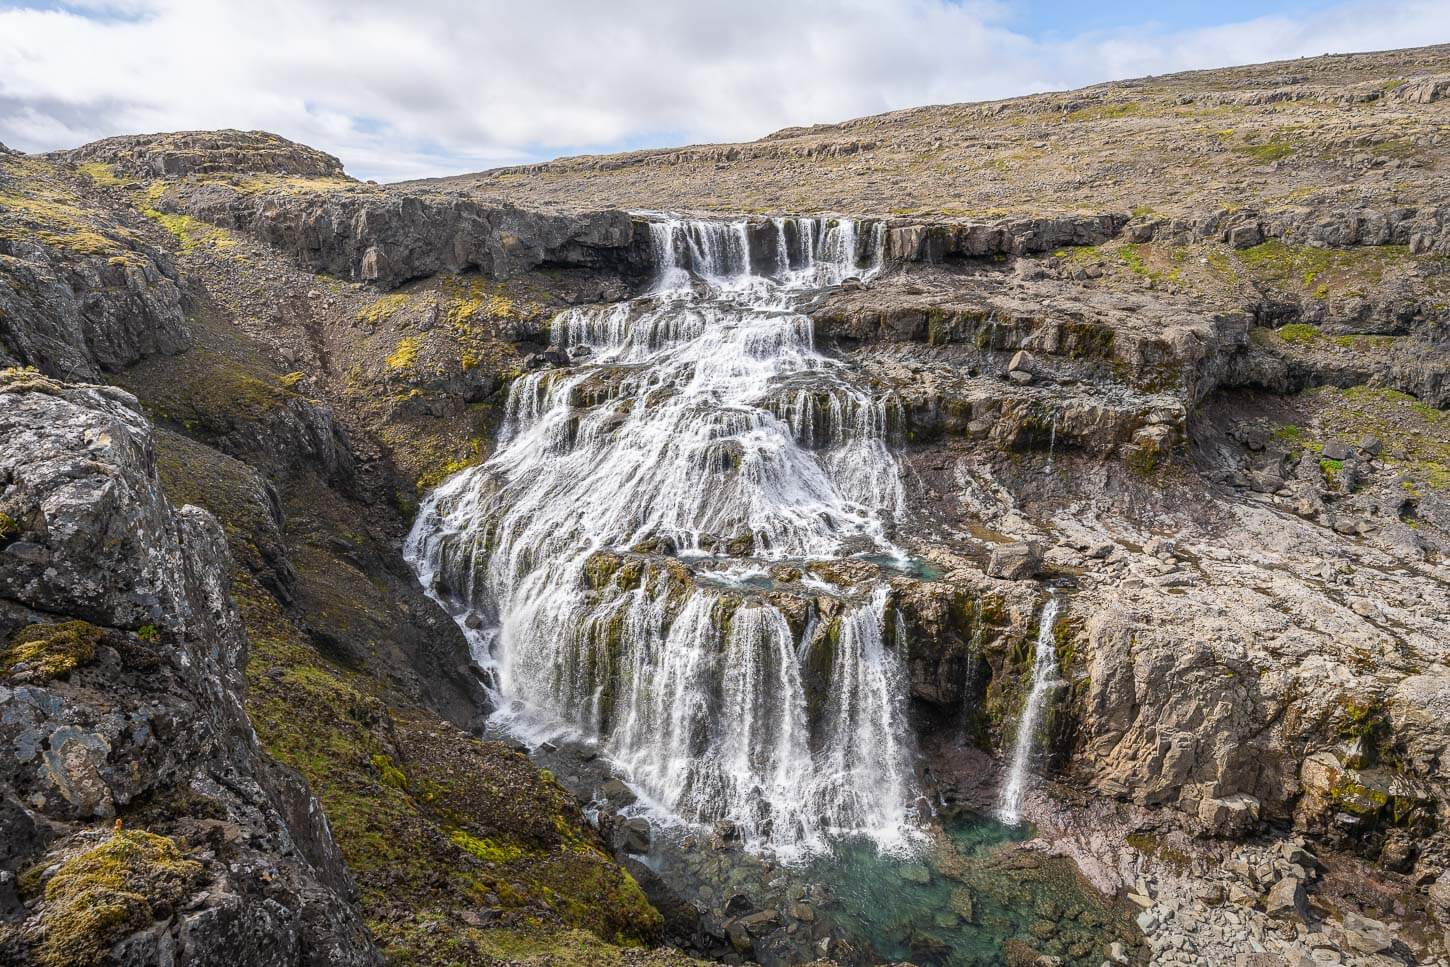
- If you are in Northern Iceland, make sure you stop at this beautiful waterfall, Reykjafoss.
Car or Camper Van Rentals
I can definitely recommend two companies here:
- Cars: Blue Car Rental, (5% discount when booking through The Photo Hikes!) which is the largest Car rental company in Iceland, and for good reasons. Free Cancellation, Unlimited mileage, 24-hour breakdown assistance, SCDW, CDW, TP, and GP insurance are included in the price. Blue Car Rental is also located within walking distance of the Keflavik Airport, so you can be on your way to explore Iceland right away. I’ve always been happy with my rentals there, which is why I’m happy to recommend their services here on my blog.
- Camper Vans: CampEasy.With CampEasy, you can rent 2WD or 4×4 campers alike. With a raised Chassis, larger tires, and extra insurance with reduced liability for river crossing, their 4X4 campers are the best choice for your trip into the Highlands. Their Website also provides extensive information about roads you can take and instructions on river crossings. Perfect choice for a hiking holiday in the highlands!
These are my two favourite companies in each respective rental area, which I why I am happy to recommend both here. If you also like this blog, booking through them is a great way to support it. I’ll get a small commission fee at no additional cost, so you can essentially support the running costs of this blog for free too.


Leave A Comment