The Gullfoss Hike East and West Sides, Iceland
Gullfoss is without a doubt one of the most majestic, beautiful, and popular waterfalls in Iceland; It’s technically accessible from both the West and East side, though the latter requires a short hike. This is a sight to be seen.
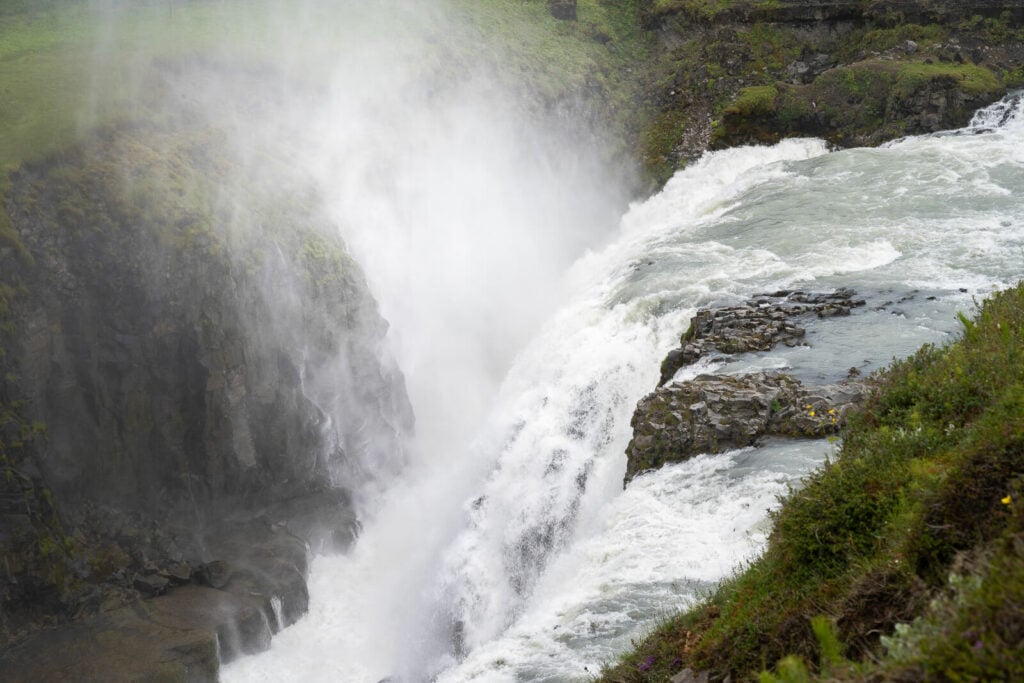
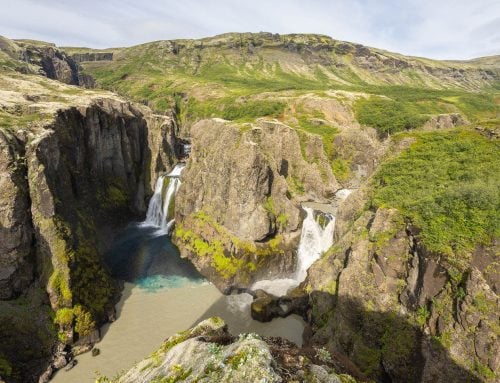
Gullfoss, meaning Golden Fall, plunges for 32 meters (11 on the first step and 31 on the second) into a narrow canyon, up to 70 meters deep. While it is not the most powerful waterfall in Iceland, the volume of water is still beyond impressive.
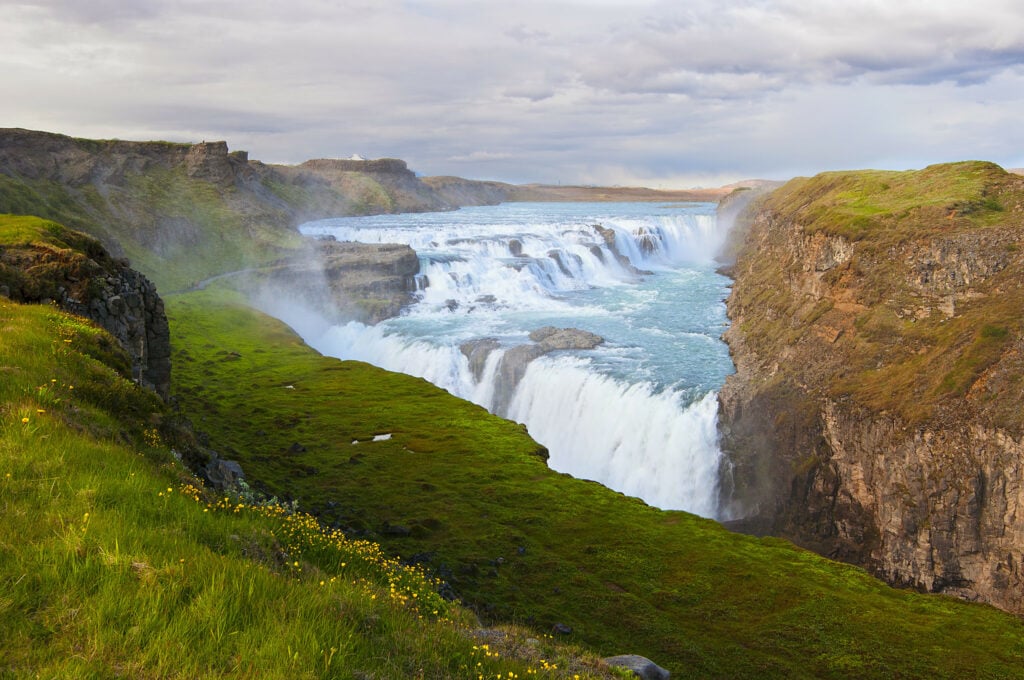
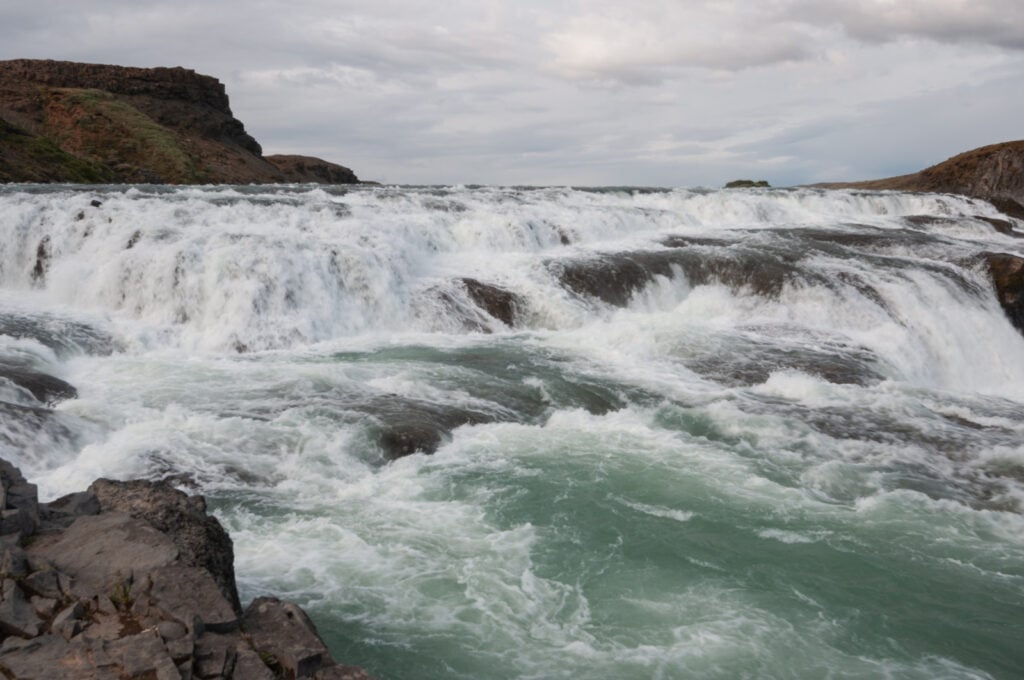
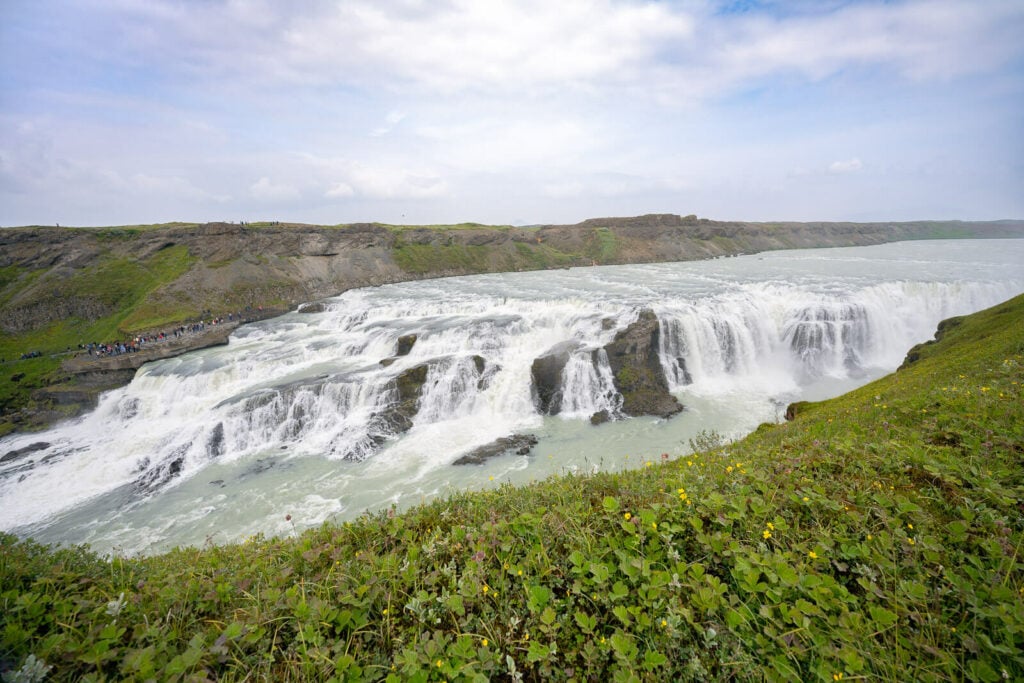
Gullfoss, June 2012. One of the many viewpoints on the west side.
Of the two sides, the west side is the main one. that’s where you can find a large parking area, a visitor’s center, and well-maintained walking paths. On the other hand, the east side is rarely visited, is harder to get to, and has essentially no infrastructure. You’ll likely be alone there.
But which side is better at Gullfoss the West or the east side? For me, the Westside is the one that offers the best views. Still, the East side offers a more relaxed and “natural experience”. Also, a better view of the upper falls. However, you do need a vehicle suitable for F-roads to get there.
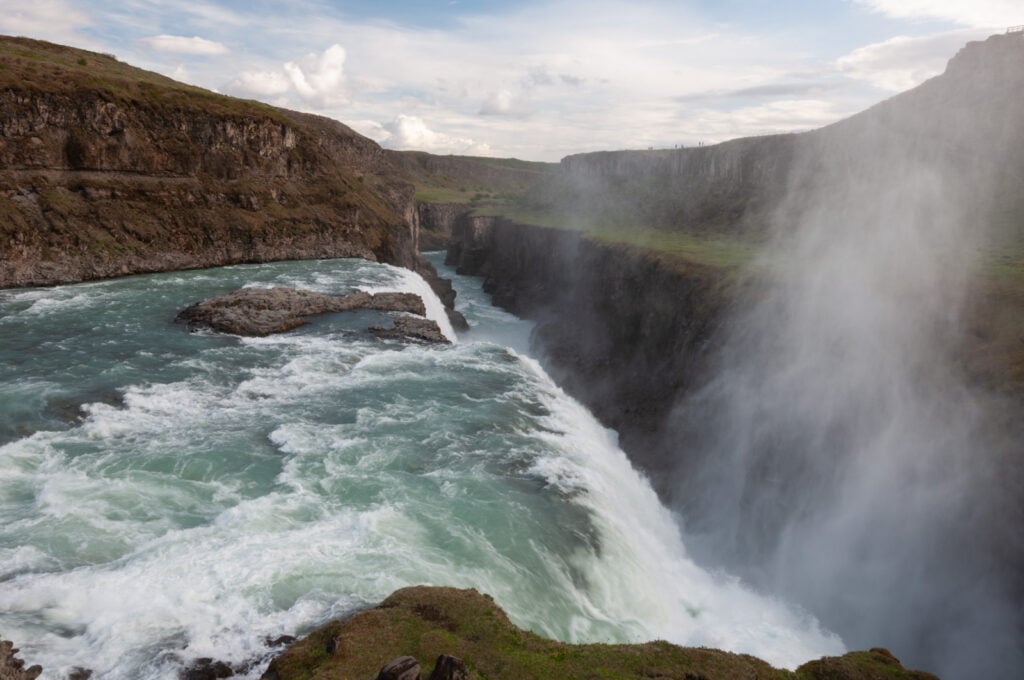
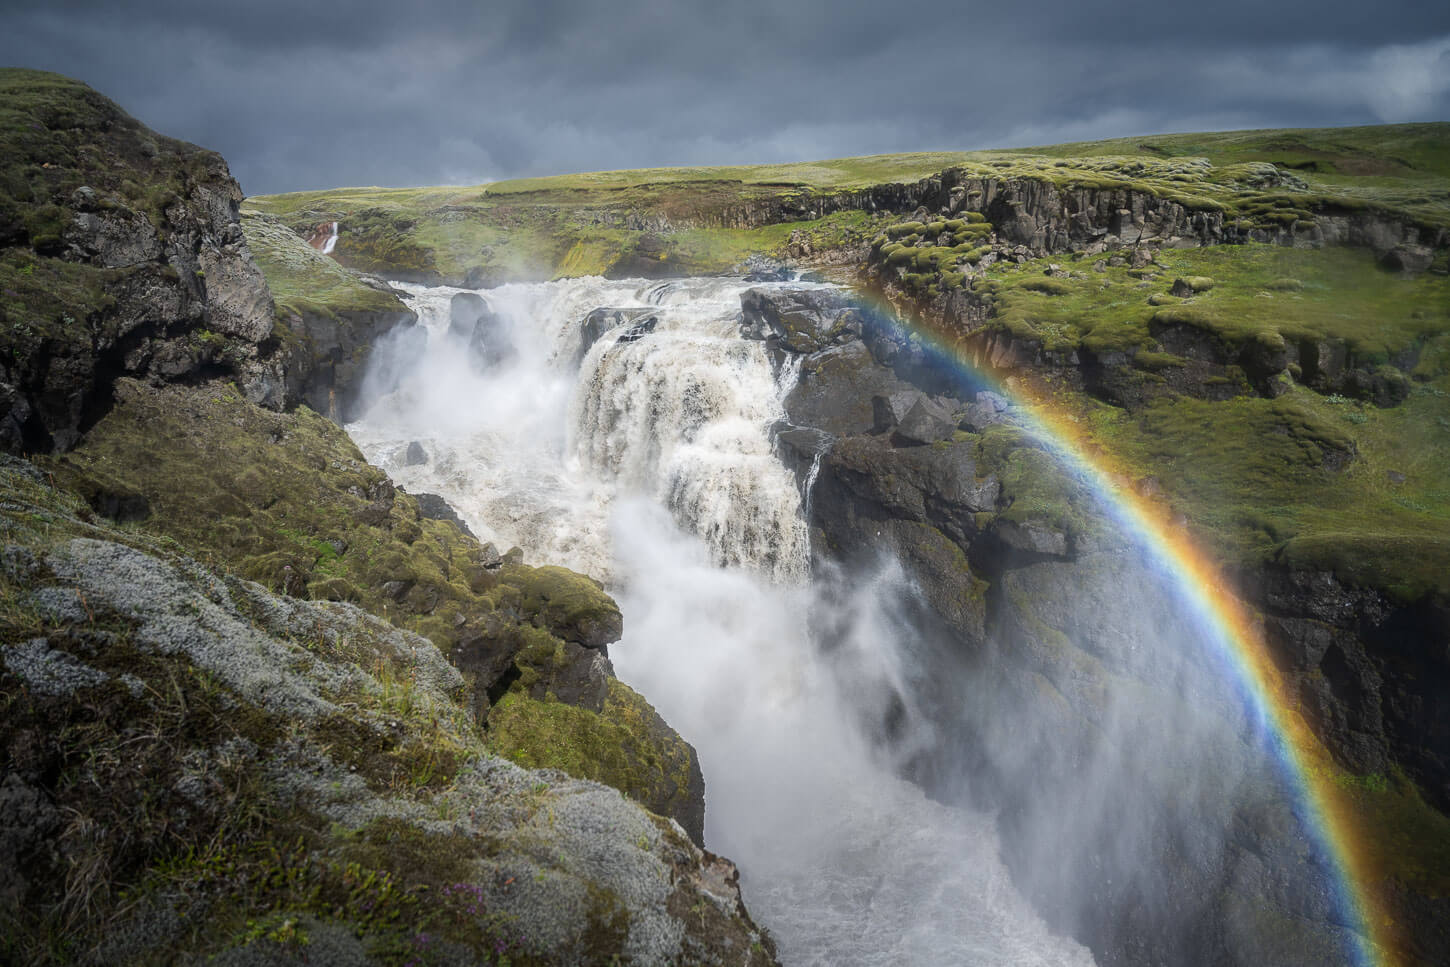
Gullfoss East Side View.
Going to Iceland? Get a Car Rental Discount!
As a reader of The Photo Hikes, you get a 5% discount on your car rental when booking with Blue Car Rental through this website. The discount will be automatically applied to the booking through the following link:
Table of Contents
Overview of the Gullfoss Hike East and West Sides & Map
Here is an overview of the hikes on both sides. As you can see the West side is essentially just a short walk, while the east side is a proper hike, although a rather short one too.
| Max Altitude | 200m |
|---|---|
| Distance | 1.5 KM (East) – 2.6 KM (West) |
| Elevation gain | 20m ↑ / 20m ↓ (East) – 50m ↑ / 50m ↓ (West) |
| Hike time | 00:30/ 00:45 Hours (East) – 01:00/ 01:15 Hours (West) |
| Hike Difficulty | Easy |
Here is the map of both.
East Side:
West Side:
How to get to Gullfoss East and West Sides and Parking
Gullfoss borders the highlands of Iceland so it is a relatively remote Location. still, it is just a couple of hours’ drive from Reykjavik. Most commonly, Gullfoss is visited as part of the so-called “Golden Circle”. the East Side is seldom visited and does not see much traffic. Still, you can get to the East Side trailhead in a little less than an hour from the West Side. Do note that you need a vehicle suitable for F-roads to get there.
- Driving Directions: From Reykjavik, you can get to the main West Side lookout via the Thingvellir National Park or Via Road One South, then turn onto Road 35 in Selfoss. Keep following it until you reach the visitor’s center. You should also be able to visit in winter, assuming road 35 is open, but the drive will take longer. If you are coming from the north (i.e. Akureyri), you can drive down via road 35, a rough gravel road. Technically road 35 no longer is an F-road, but I’d still recommend having a vehicle with a bit of clearance i.e. a Duster, Rav4, or Suzuki Jimny. To reach the East Side, you would first need to drive back on Road 35 and turn onto Road 30 before the Skjol Camping. Keep following the road until you cross the Brúarhlöð Bridge. A few hundred meters later, turn left onto road 349 and keep following the road until you see a sign pointing to “Hrunamannaafréttur”. Turn there. Again, follow the road until you see the sign pointing to Gullfoss. The trailhead is just a short drive away.
- Parking: Access to Gullfoss is free and so is the parking. The main, bigger, parking area is located right next to the visitor’s center. The smaller parking area can be accessed before the Center, by a small road on your right. Parking on the East Side is also free, and there’s space for a few cars. Parking is here, but you won’t get any directions from Google or other apps.
- Public Transport: From Reykjavik, you can only take busses up to either Flúðir or Reykholt, which are still quite a way from Gullfoss. Even in that case, you can only get to the West Side. Best to join one of the many guided tours leaving from Reykjavik, as it can easily be done as a day tour or a part of the Golden Circle Tour.
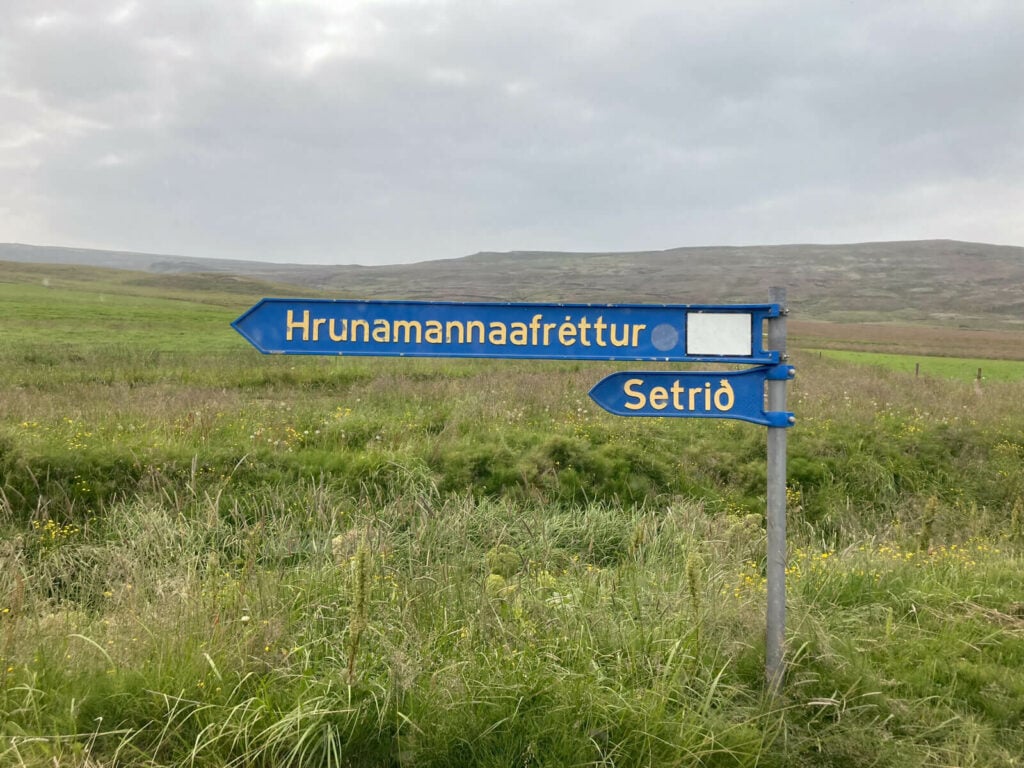
to reach the East side, first follow the sign “Hrunamannaafréttur” from road 349.
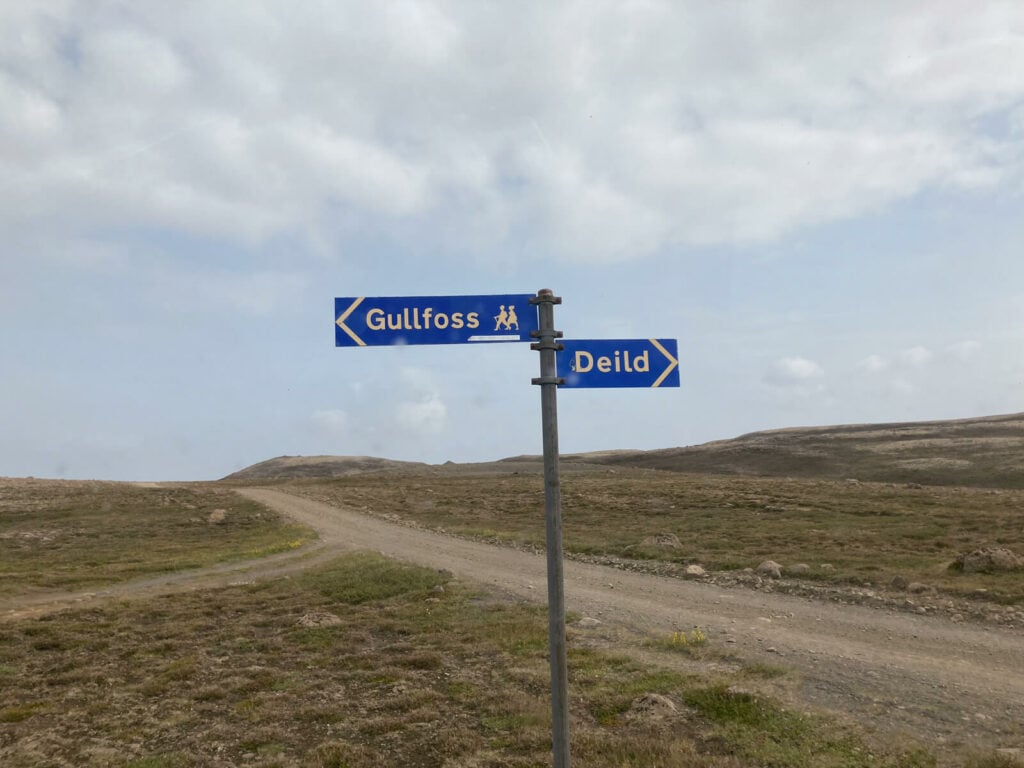
Then, turn when you see the sign for the Gullfoss hiking trail.
The Gullfoss Hike East and West Hiking Trails
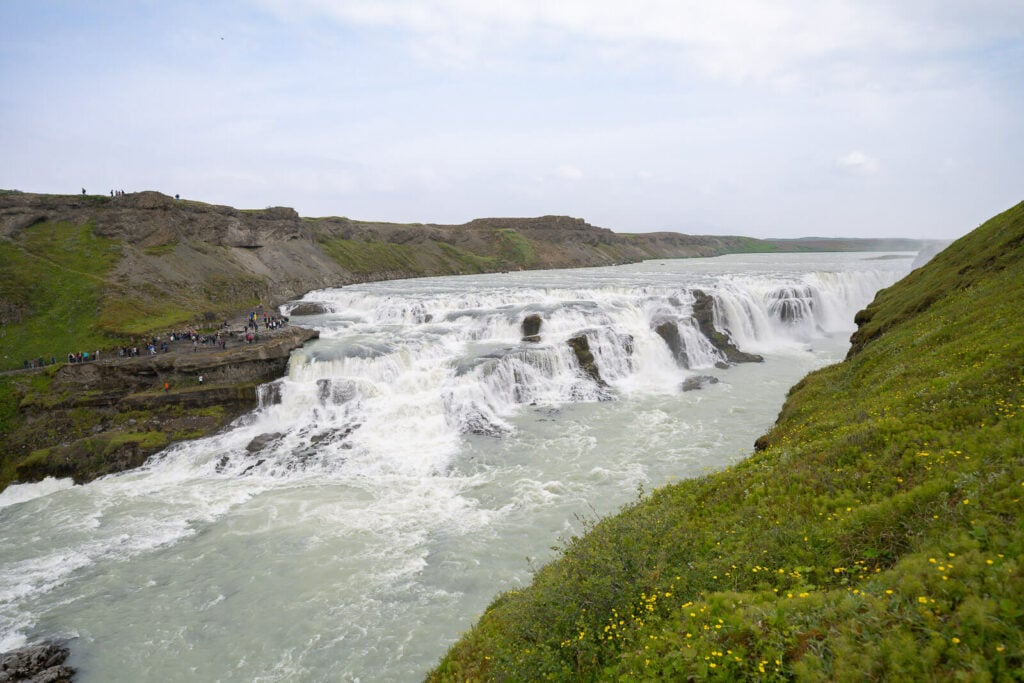
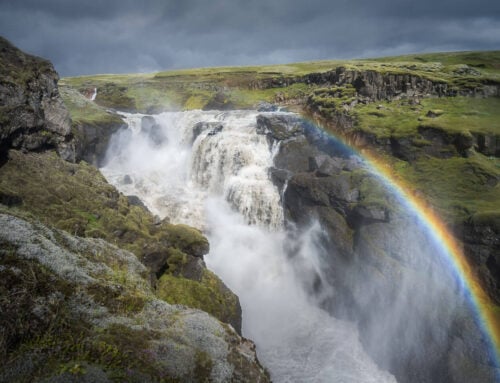
Let’s start with the West side which is the most popular. Here the walk is short, from the parking lot or the visitor’s center, it will just take a few minutes to get a view of the falls.
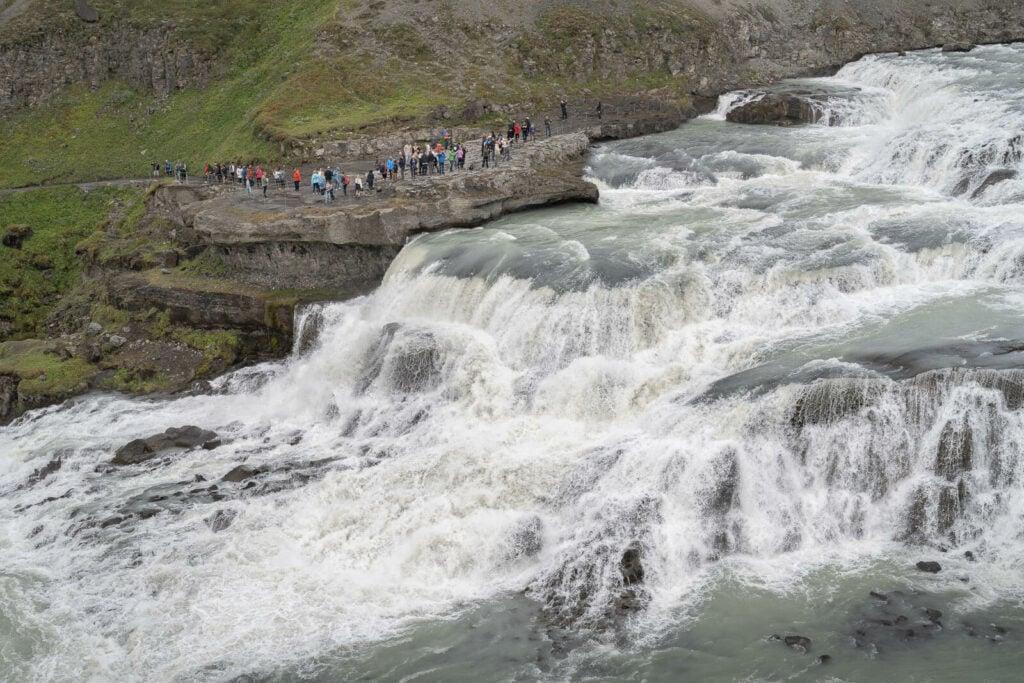
There are a few paths around the west side you can walk to and it’s also the side where you can get close to the roaring waters of the falls.
Gullfoss, from one of the main viewpoints on the west side.
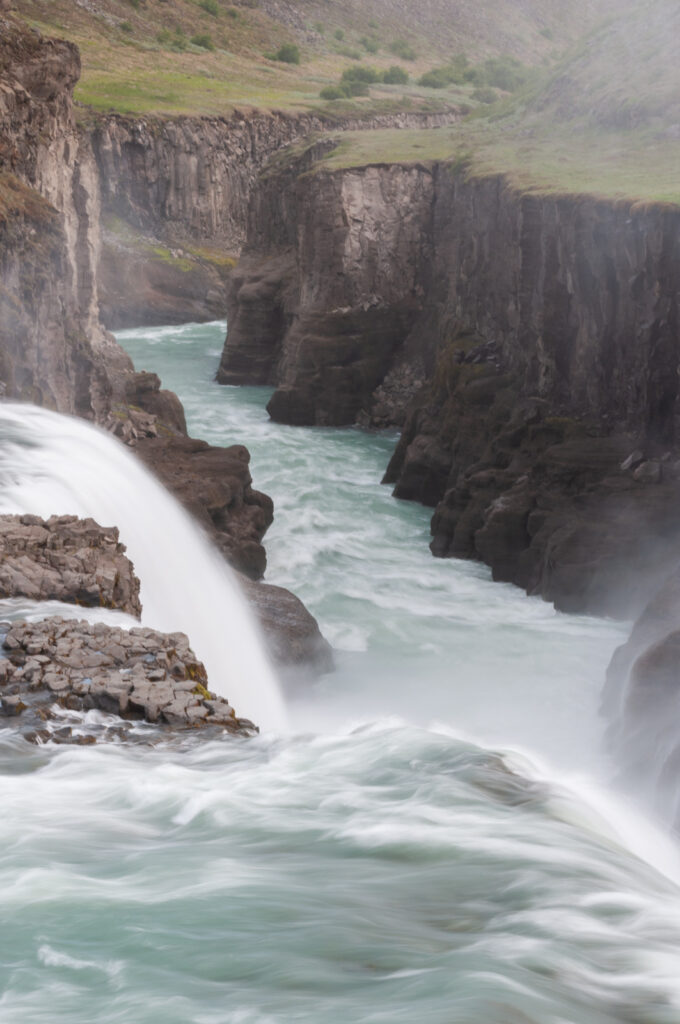
View of the upper falls from the lower observation deck
From there there are a few sets of stairs you can take to walk down to the observation point next to the falls. This is where you can feel how powerful Gullfoss is.
While there aren’t many paths, you can still easily spend up to an hour walking around the waterfall to all the different viewpoints – which I recommend you do.
Now to the East Side. it’s an out-and-back, 20-minute hike to get to the Gullfoss East Side Viewpoint. First, You’ll need to cross the small ladder above the fence.
From there, no more signs are pointing to the waterfall, but the trail is well-worn and you can’t miss all the water vapor from the waterfall right ahead of you.
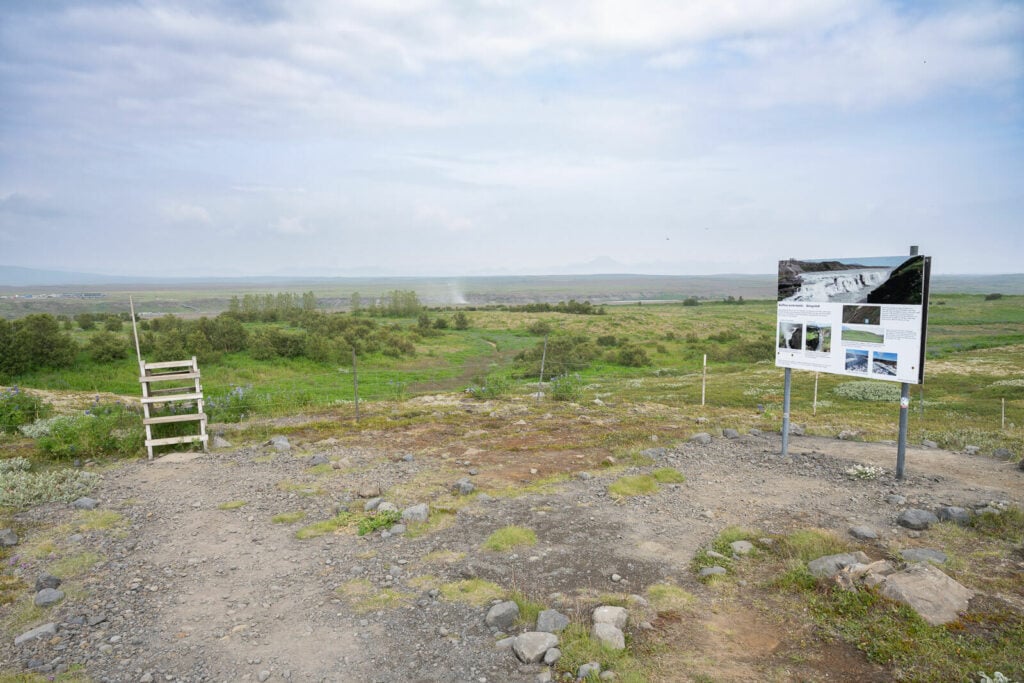
Gullfoss East Trailhead. Note the vapor from the waterfall in the background.
Trail isn;t marked but well worn and easy to follow

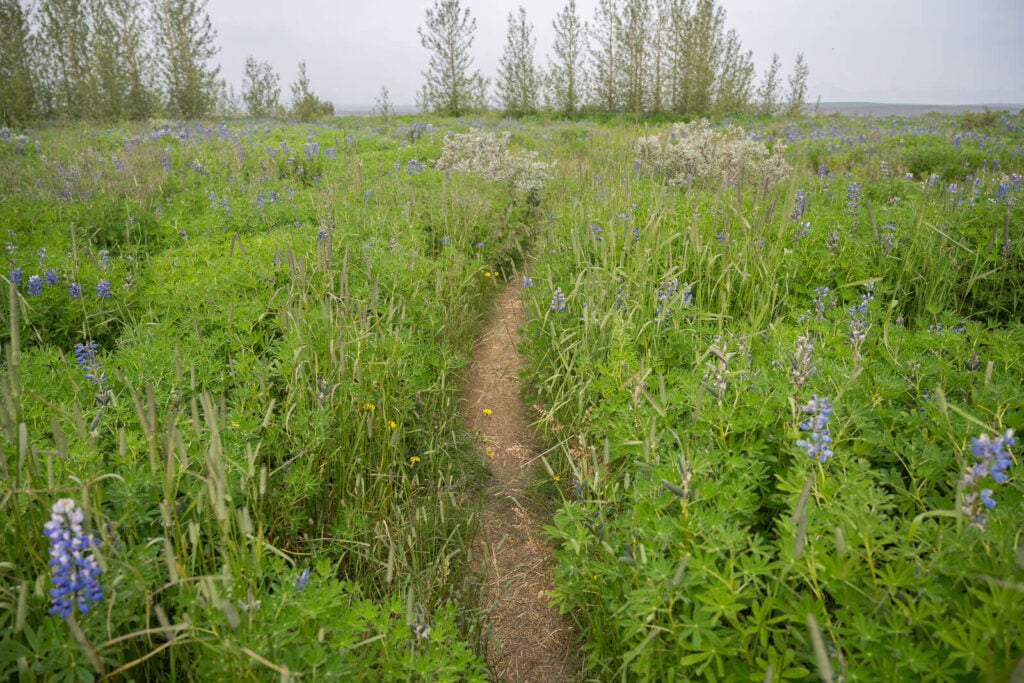
In early summer, the trail will be full of lupines
The walk takes about 20 minutes across lupine-infested fields that can be up to your waist. The vegetation clears closer to the waterfall until you reach the ridge that offers an amazing view of the upper part of Gullfoss. You can walk a bit up and downstream to a few different lookouts. However, in that sense, there is more to walk on the opposite side.
Be careful on the West Side; it’s completely exposed to the river and there are no barriers or protections.
View at the end of the hiking trail.
The Gullfoss East and West Sides Photos and Photography Tips
There are plenty of great viewpoints on the East side. It is the most popular side for a reason. For me, the best viewpoints, in terms of landscape photography, are on the ridges up above the waterfall. That’s where you get the best views of Gullfoss and its surroundings.
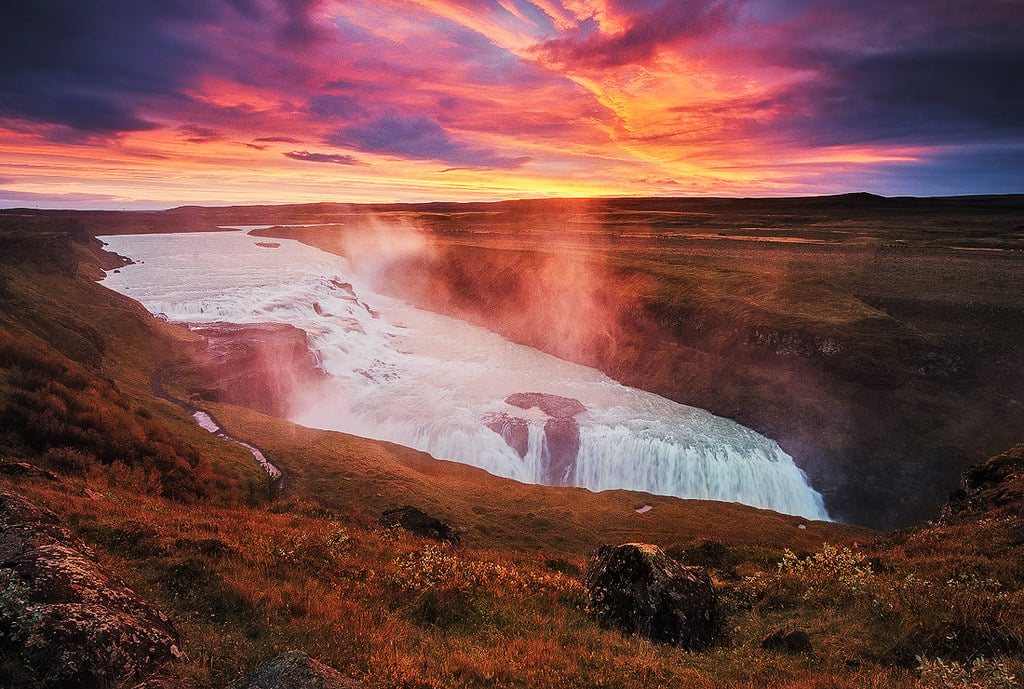
Sunrise at Gullfoss, September 2014.
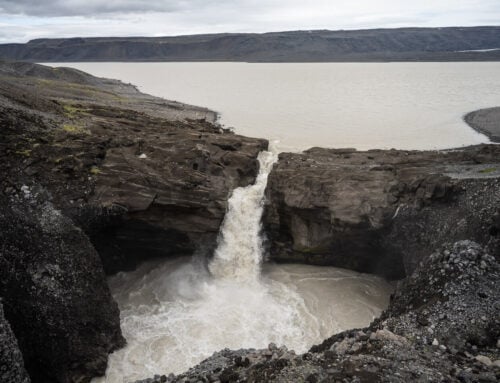
From the lower viewpoints, you still get good views and it’s better to feel how powerful (and the water spray) the waterfall is, but in most cases, it’s too close to it. Except, for the view inside the canyon.
The best part of the east side, apart from better views of the upper step of the waterfall, is the sense of scale. Since the opposite side is rather crowded, there is no shortage of options to capture the scale of Gullfoss including the human element in the photos. This is much harder to do on the west side.
The east side can give a better sense of the scale of the waterfall.
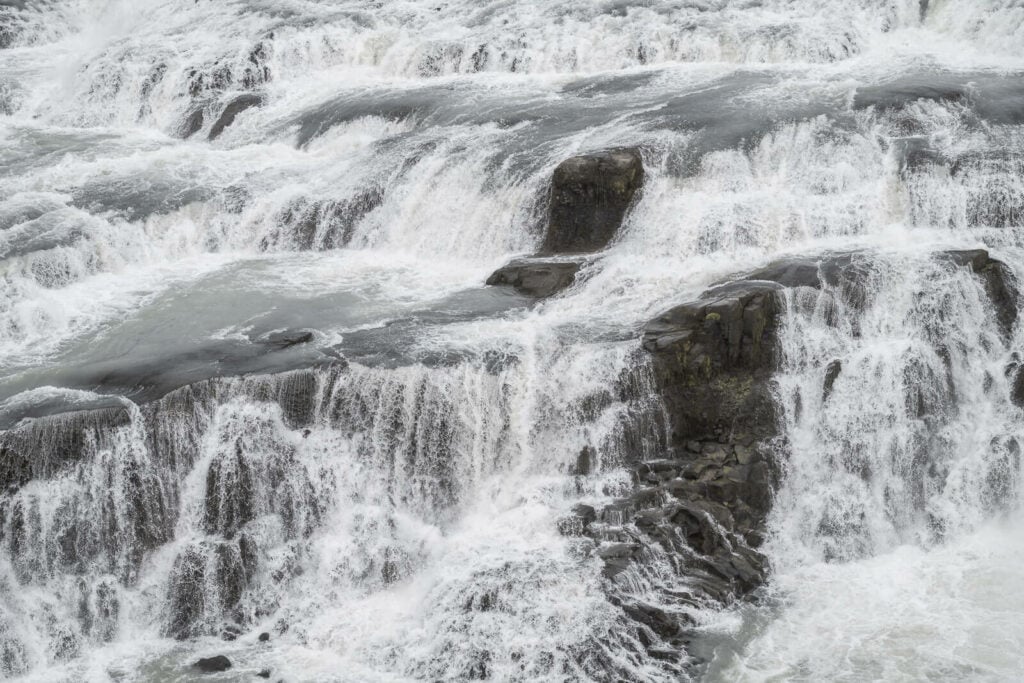
The first (11m) step of the waterfall.
The second step (31m) of the waterfall.
On both sides, you may need a wide angle and a mid-range zoom. The wide angle will be useful close to the waterfall, obviously, but you may also want to have a mid-range zoom or a lens up to 35/50mm full frame for shooting from the upper viewpoints along the ridges above the waterfall.
Also, The east side is a great location to catch sunrise, while the west side would be better for sunset. Also good to catch some warm sidelight in the afternoon golden hours.
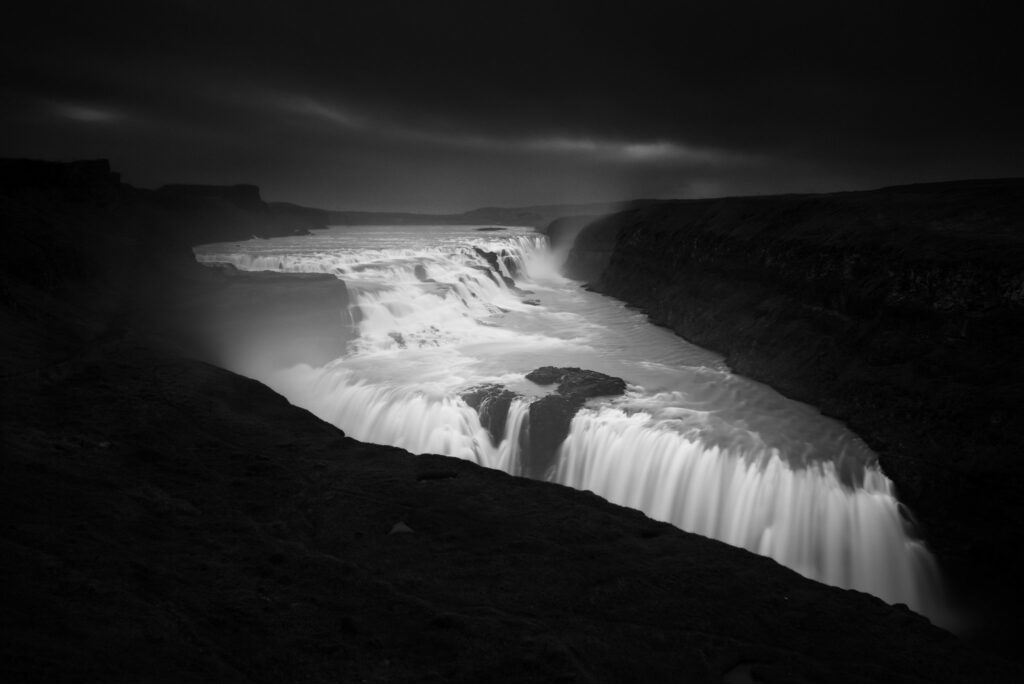
Lastly, I think this Gullfoss is a great location for some black-and-white landscape photography.

Where to stay
There are several hotels, guesthouses, and campsites in the area. While the Visitor’s Centre does not have a hotel or guesthouse, the Hotel Gullfoss is just a short drive away – and the closest one to the Falls. This is a particularly good location if you want to catch sunrise or sunset at the waterfall. Still, best to book well in advance, especially in the high season (July/August).
Skjól Camping is the closest campsite, less than 10 minutes down the road.
Additional Resources
- Here is the official site of the Gullfoss Visitors Center
- Check out more Hikes in Iceland here.
Car or Camper Van Rentals
I can definitely recommend two companies here:
- Cars: Blue Car Rental, (5% discount booking through The Photo Hikes) which is the largest Car rental company in Iceland, and for good reasons. Free Cancellation, Unlimited mileage, 24-hour breakdown assistance, SCDW, CDW, TP, and GP insurance are included in the price. Blue Car Rental is also located within walking distance of the Keflavik Airport, so you can be on your way to explore Iceland right away. I’ve always been happy with my rentals there, which is why I’m happy to recommend their services here on my blog.
- Camper Vans: CampEasy. With CampEasy, you can rent 2WD or 4×4 campers alike. With a raised Chassis, larger tires, and extra insurance with reduced liability for river crossing, their 4X4 campers are the best choice for your trip into the Highlands. Their Website also provides extensive information about roads you can take and instructions on river crossings. Perfect choice for a hiking holiday in the highlands!
These are my two favorite companies in each respective rental area, which I why I am happy to recommend both here. If you also like this blog, booking through them is a great way to support it. I’ll get a small commission fee at no additional cost, so you can essentially support the running costs of this blog for free too.


Leave A Comment