Drones and Drone Photography for Hikers
Drones quickly revolutionized the photography field, allowing hikers and photographers alike to access new perspectives and new ways to take photos and videos. Let’s take a look at Drones and Drone Photography for Hikers.
Drone photography opens up endless possibilities. This is true regarding what you can photograph and the composition you can choose from.
You could, for example, shoot a landscape from off the shore. Or you could shoot hikers on a mountain peak, including the surrounding landscape and a wide view of the mountain.
Heck, a drone can be positioned anywhere in the sky, within the limits of local regulations.
This means drones allow you to choose from a virtually endless number of compositions for the same subject.
They are also very packable, which makes them great photographic tools to bring on a hike.
Besides, they are fun to fly!
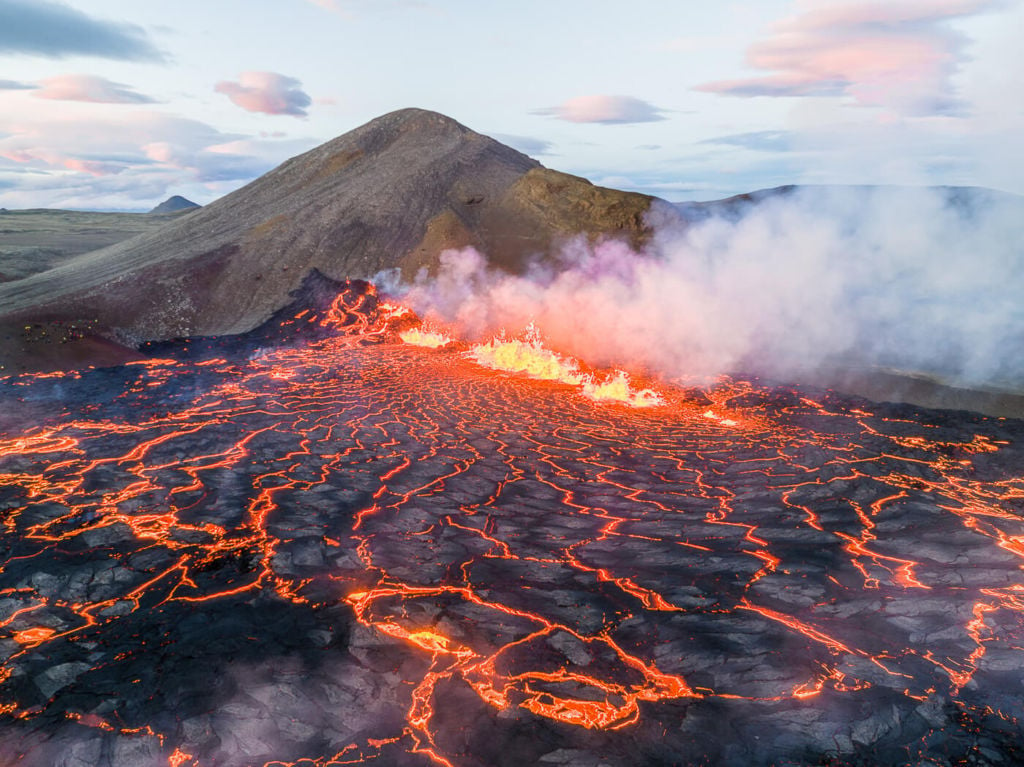
Drone view of the Fagradalsfjall Eruption in Meradalir, Iceland. Really glad I had a drone with me on this occasion!
Please note that as an Amazon Associate, I earn from qualifying purchases. If you find any of these recommendations helpful and decide to purchase a product I recommend, I will receive a small commission. This commission will help me keep the site running, and it will not cost you anything extra. This also means you will effectively support this site for free if you make a purchase through my site.
What to be aware of when purchasing a Drone for the first time
If you are looking to get into drone photography, you should be aware of the learning curve. For your first few flights, practicing is recommended even if you are not taking photos.
After all, you don’t want to crash your new drone in a tree or drop it in a body of water because. Mixing up the controller’s commands is a real danger, especially the first few times you fly it.
Find an isolated place where you can fly undisturbed. Try different maneuvers, and play around with the video and photography settings. Of course, you want to make sure you master these controls before going out in the field, so you can focus on shooting photos or videos.
Essentially, mastering and “automating” the controls in your brain is critical. It will take some time to master that. Nonetheless, flying is always great fun, so you will have mastered flying even before realizing it!
Whenever you fly, make sure you adhere to the basic rules and common sense use:
- Always fly by local regulations.
- Avoid disturbing people and wildlife.
- Leave no traces
If you stick to these simple rules, you will have less to worry about when flying your drone, and you will enjoy it more.
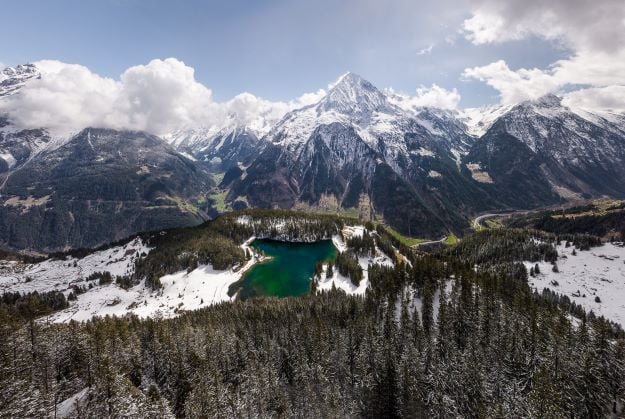
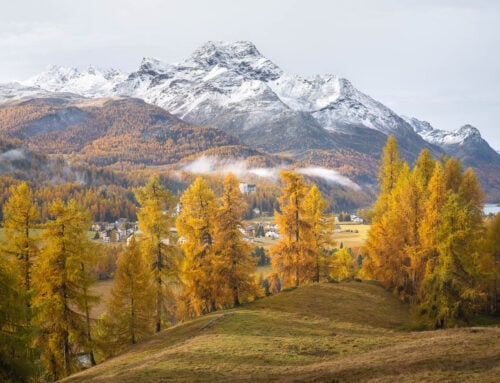
Måtind, Norway
The three key factors to consider when purchasing a Drone for Drone Photography and Hiking
When purchasing a drone to bring with you on your hikes, there are three main factors apart from the price. In no particular order as the priority of one factor over the other will depend on your intended use:
- Image Quality
- Weight
- Battery Duration
For beginners, it’s probably better to start with the more accessible entry-level models. I followed this path too, with the original Mavic Air.
For instance, something like the DJI Mino 4 Pro or Autel Nano Plus will allow you to understand whether flying drones is something you like and intend to do and keep doing long-term. At the same time, you’ll have plenty of fun doing so
These entry models may not have as good image quality as more expensive ones, but they should be enough in most cases. This is an example of an image taken with the first Mavic Air. With its 1/2.3” CMOS, 12 MP sensor, the image quality is decent enough:

Sunset over Vik beach in the Lofoten Islands, Norway. Panorama taken with a Mavic Air.
Remember that entry-level drones available today also have a much better quality than the original Mavic Air. For instance, the original Mavic Air did not shoot raw, while the Mavic Mini starting from the Mini 2 does. Raw files are a big deal if you are serious about photography, as they allow much more flexibility in post-processing.
In addition, the battery life is also quite good; for example, The DJI Mini 4 Pro is rated at 34/45 minutes. In my experience, that type of battery life is more than enough for a single-day hike. Unless you plan to record extensive video footage, the battery should last you for several short flights.
Additionally, the best advantages of drones in this category are their weight and extreme packability. Drones in this category typically weigh less than 250 grams, so you also have more freedom in terms of where you can fly them.
If you are hiking ultra-light or don’t need large photo prints, drones in this category are your best choice.
Next in line, we have medium-level drones.
They offer a great balance between price, features, and image quality. This is the category of the DJI Air 3, or the older DJI Air 2s, and the like. They are heavier and more expensive than the entry-level models, and in terms of battery life, they rate about the same.
A drone like the DJI Air 3 has two main advantages. First, a longer fly time, rated at about 46 minutes. Second, while the sensor size is the same as the DJI Mini 4 Pro (1/1.3 sensor), it offers two of them with fixed focal lengths of 24mm and 70mm. Both at fixed aperture, at 1,7 and 2.8, respectively.
Still, the older DJI Air 2s has a 1” sensor, which is a big deal for some. This also translates into more post-processing latitude. So if you like to play around with post-processing and edit raw files, this is also something you should consider. To be fair though, the Air 2s has a much shorter flying time, about half.
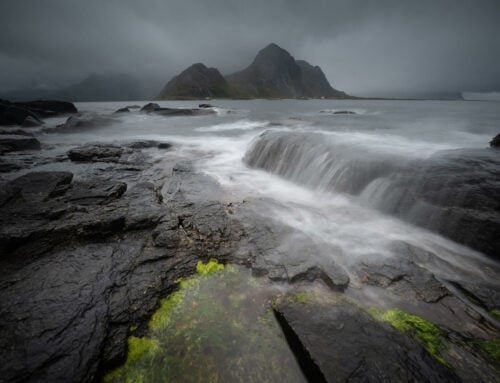
Here is an example of a shot taken with a Mavic Air 2, a blend of 5 raw shots.
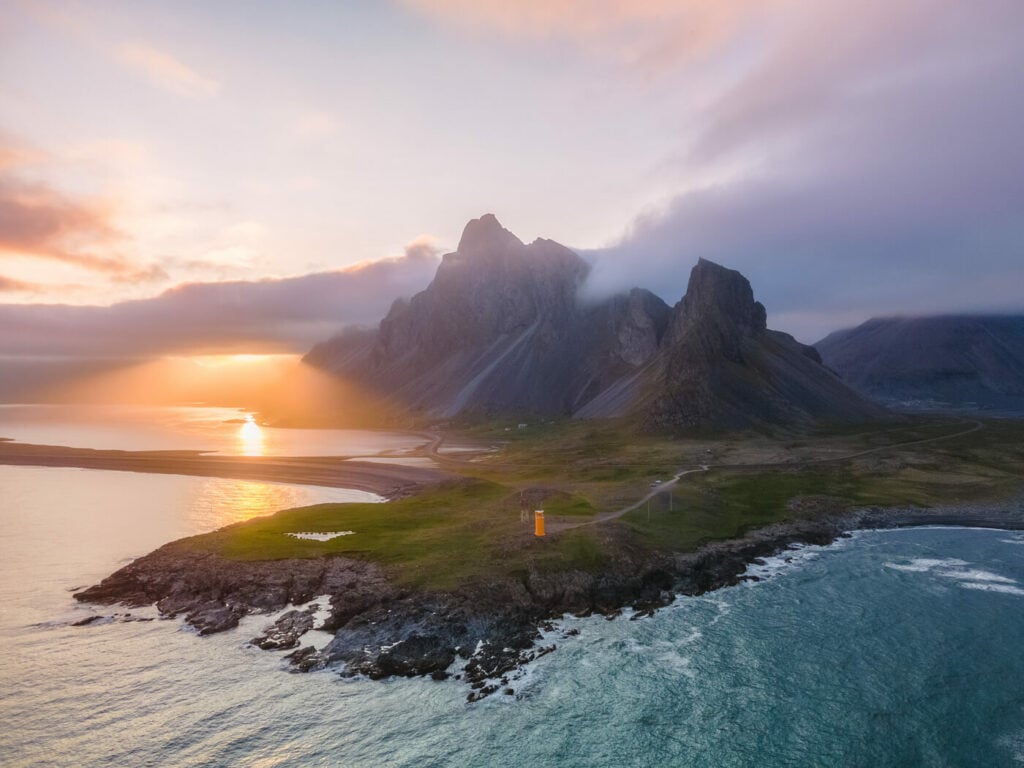
Eystrahorn, Iceland
On the flip side, drones in this category are heavier to hike around with, although not by that much. Depending on how many batteries you are planning to bring with you, you may be looking at a few hundred grams to 500+ grams extra.
Prosumer level drones
The most expensive models like the Mavic 3 Pro, the Mavic 3, or Mavic 3 Classic have the best image quality but are quite heavy to bring on long hikes. Their bonuses are image quality, the variable aperture, and flight time; the latter is true only for the Mavic 3. The weight may still be acceptable for day hikes or hikes with overnight stays. Compromises may be required, for example, leaving one telelens or a wide-angle at home in favor of the drone.
Panoramic image taken with a Mavic 3.
Also, The Mavic 3 line offers models with different focal lengths and sensors. The Mavic 3 Pro offers three at 24mm, 70mm, and 166mm. The Mavic 3 offers two 24mm, 70mm. The Mavic 3 Classic one, at 24mm. All of the 24mm cameras offer 4/3 sensor, which is the biggest of all the drones on this list. The telephoto lenses have smaller sensors instead, from 1/1.3 to 1/2.
The downside? They are the heaviest on this list, at almost one kg each (with battery, of course).
My Personal Considerations
I went through almost all models presented here (Mavic Air, Mavic Air 2 and Mavic 3). I enjoyed each of these models; the Mavic Air for nearly two years, the Mavic Air 2 for one year, and the Mavic 3 is the one I currently have. What drove my decision was the image quality combined with its relative portability. As I mostly use the drone for photography, one battery is more than enough. So for a day hike, I will only bring the installed battery, which saves the weight of an additional battery.
When it comes to drones and drone photography for Hikers, you should consider what takes priority between weight, image quality, and price before purchasing or upgrading. How often you are going to use it is also something to consider. If you use the drone 4/5 times a year, you probably should not invest in one of the more expensive models. But hey, if you can afford it, why not?
Drones and Drone Photography for Hikers – Choosing a model
With so many drones on the market and manufacturers rolling out new models all the time, choosing one can be quite a demanding effort.
If I were on the market for a drone today, being the avid hiker and photographer that I am, I would consider the following models:

Pros: Price, weight, and battery life. This offer is hard to beat!
Cons: hard to find and cons for this price and features. I’d probably say it does not hold as well in higher winds as in bigger models, but this is really nitpicking.
Ideal for: ultra-light hiking
Best alternative: definitely consider a DJI Mini 3 or DJI Mini 3 Pro. They are cheaper, equally light, and still offer great image quality.

Pros: The best combination of image quality, price, and features.
Cons: the smaller sensor is a bit of a letdown for some.
Ideal for: those looking for the best combination of image quality and price
Best Alternative: Mavic Air 2s. Yes, another older but cheaper model. Still, the Mavic Air 2s has a 1-inch sensor, so bigger than the current Mavic Air 3.
- DJI Mavic 3 (Check Price on Amazon)
- DJI Mavic 3 Classic (Check Price on Amazon)
- DJI Mavic 3 Pro (Check Price on Amazon)
The Mavic 3 and the Mavic 3 Classic are essentially the same drone, with one difference. The Mavic 3 has an additional Tele-lens that the Mavic 3 Classic does not have. On the other hand, the Mavic 3 Classic is considerably cheaper. I personally own a Mavic 3, originally purchased when it was released. While I am happy with the tele lens, I would have probably purchased the Mavic 3 classic and saved the difference, had it been available at that time. Still, both are great choices, and I am definitely happy with my drone.

Pros: Image quality and variable aperture
Cons: Weight and Price
Ideal for: those who just want the best image quality and have no problems with its weight.
Drones and Drone Photography for Hikers – Conclusions:
I am not going to tell you which drone is best here. There are no “winners”, only the drone that serves best your purpose is going to be the best one for you. So here is again a summary of the key factors you should consider when purchasing one:
- It’s advisable to start with an entry-level model. The image quality is great already, and no need to invest too much. Plus, they are very lightweight, which means you are more likely to bring them with you even on very long or multi-day hikes.
- Medium-level drones are still relatively lightweight and offer better image quality, especially for photos, compared to entry-level ones. Of course, they will take up more space and weight in your backpack and money from your wallet, but they offer the best balance between prices and features. For many hiking photographers or videographers, this is a sweet spot. Especially something like the Mavic Air 2s with its 1-inch sensors.
- Prosumer-level drones offer the best image quality and manageable weight. If you need the best image quality, these are the best models available. Sure, you will have to sacrifice some space in your backpack or make the extra effort with a heavier pack on the trail.
I won’t even mention larger and more expensive drones here, and it makes no sense for a hiker to bring one of those along. They won’t even fit in a backpack! But Hey, if you are extremely fit and weight is not a problem, you may consider something like Inspire 2!
Also, never forget to fly responsibly. Ensure you have all the permissions or insurance you need to fly a drone. Do not fly in restricted areas. Be considerate of people and wildlife. Last but not least, enjoy!
Additional Resources:
- Check out some spectacular hiking locations
- Read more Gear Reviews
I was so worried I wouldn’t be able to hear the hum of roads and highways in nature, at least now I know I’ll have a manmade him when I go out to enjoy nature.
Thanks for taking the time to comment, Josh. Believe it or not, despite being a registered operator and pilot, I am annoyed by drones too. It’s the reason why I only fly mine if no one is around, or I am far enough from other people for them not to see or hear it.
I hiked several times with my drone but didn’t take it out of my backpack because of other people nearby or on the trail – or wildlife. For the same reason, I recommend not using drones on some of the Hikes I report. Conscious pilots will know when to fly and when not. Unfortunately, some don’t care, which is bad for everyone.