Luminar Neo AI Photo Editor Review
If you are not familiar with it yet, Luminar Neo AI is the new AI-based photo editor from Skylum, one of the leading photo editing companies; in this post, I’ll review their latest Software from the perspective of a Landscape photographer, how it compares to Lightroom, Photoshop and how it actually integrates with both.
Yes, Luminar Neo AI is not only a great and cheaper alternative to Adobe’s products, but it integrates with them nicely. Also, there’s a lot of noise nowadays around the use of the term “AI” and AI tools and I will explain what that means precisely when using Luminar Neo AI, and how they can help you achieve your photo editing goals.
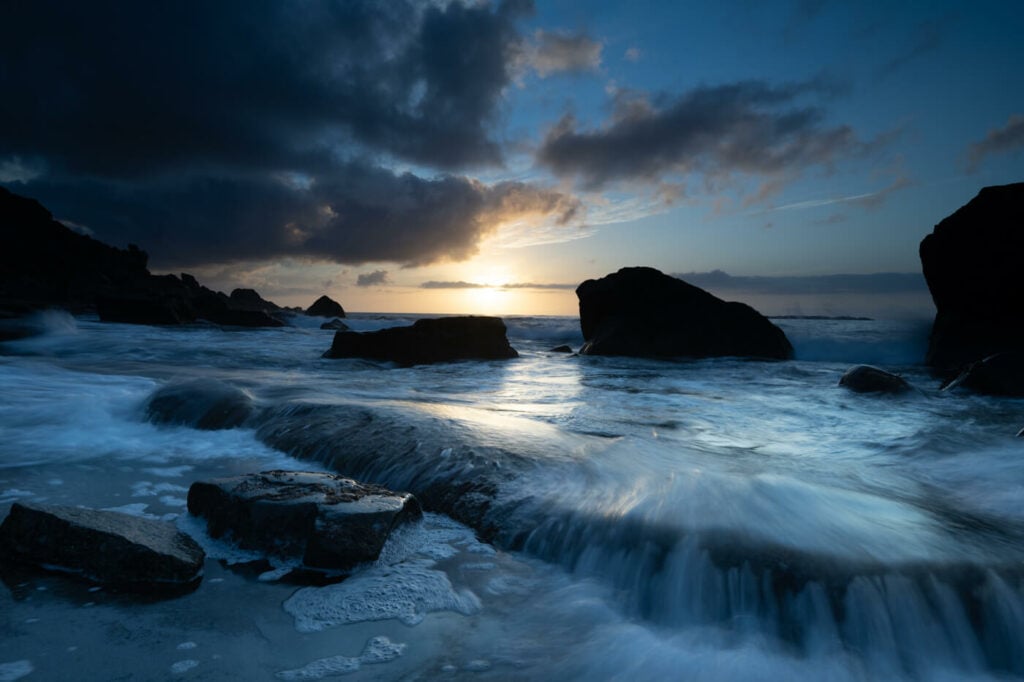

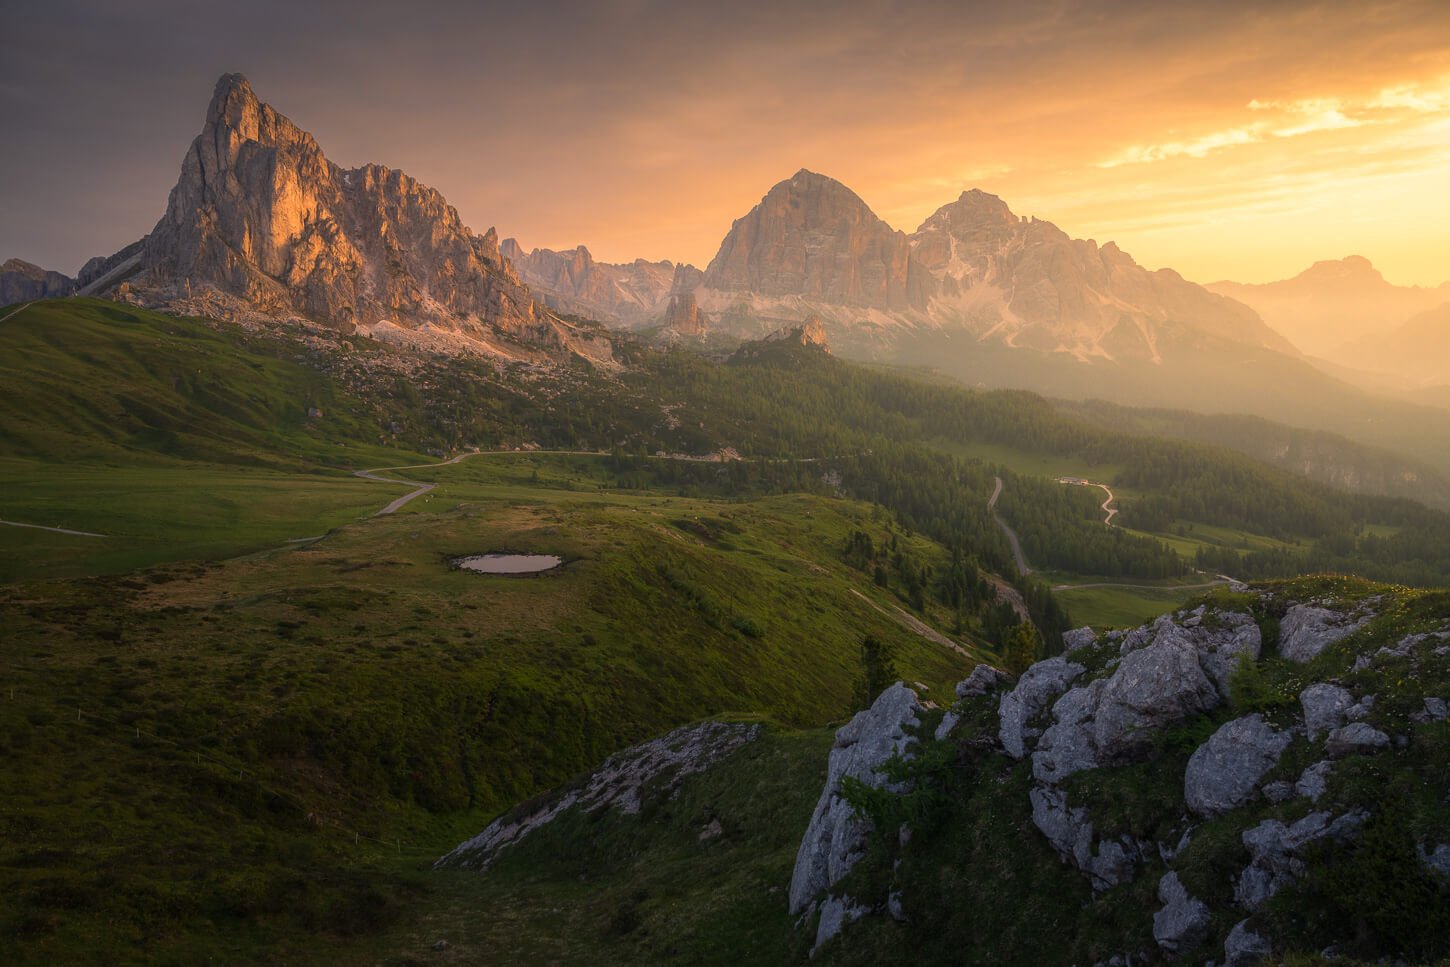
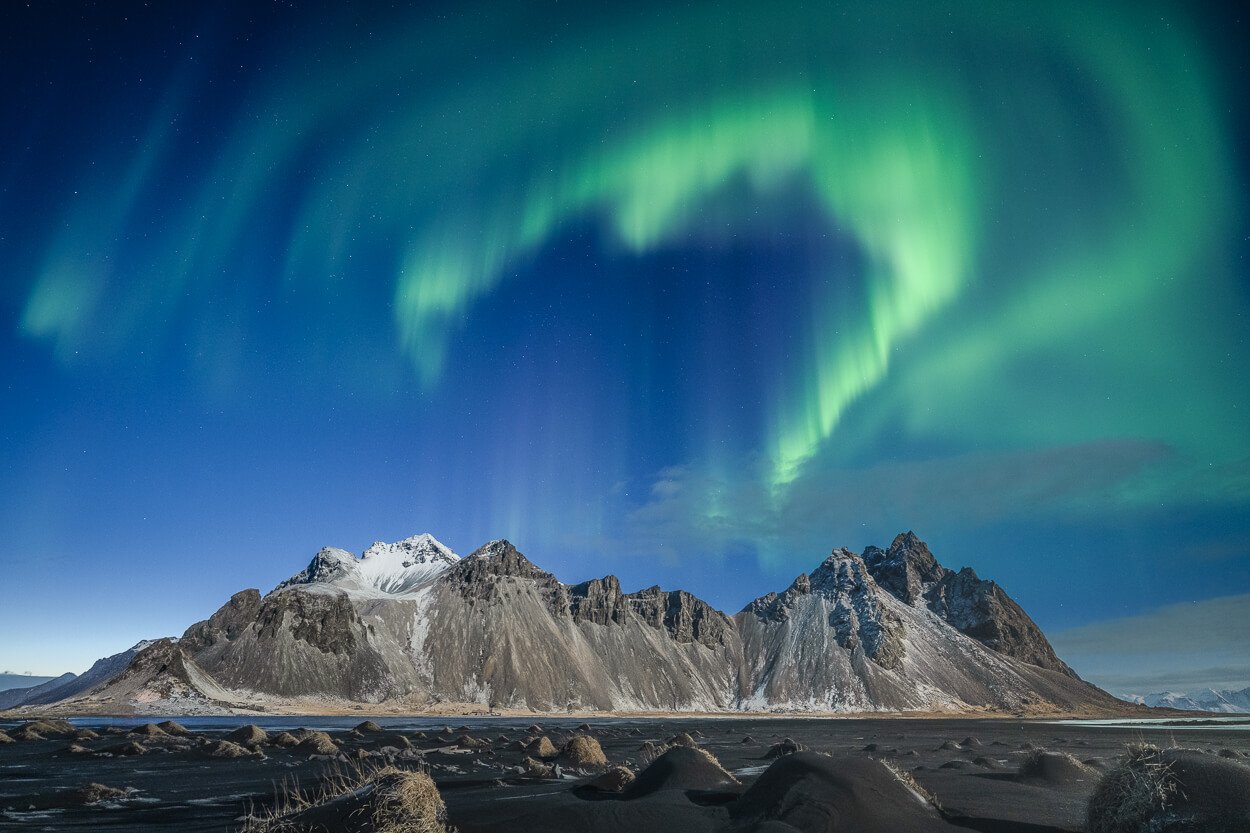
In a nutshell, there’s a lot to like in Luminar Neo AI. As a standalone photo editing software it offers a refreshing and streamlined photo editing experience. Easy to use and it offers all the major photo editing tools that are needed to produce quality images. I processed the image above and corrected the strong ND filter blue cast, as well as adjusted the perspective in less than 10 minutes.
You can tell it was designed for simplicity and fast editing. No steep learning curve. So how does it perform for new and advanced users alike, and how can your workflow benefit from it? Let’s find out.
Luminar Neo AI 1.9 First Impressions
First, the installation is super easy, it takes less than five minutes and you will be asked if you want to add Luminar as an extension to Lightroom and Photoshop if you have them.
The interface is nicely laid out, and everything is accessible within 2-3 clicks, maximum. This is something that I really like, as it simplifies and streamlines the workflow. Also, all the controls can easily be accessed through sliders or buttons, without going through menus or sub-menus. You can really tell the Skylum team paid a lot of attention to the design and accessibility of the interface.
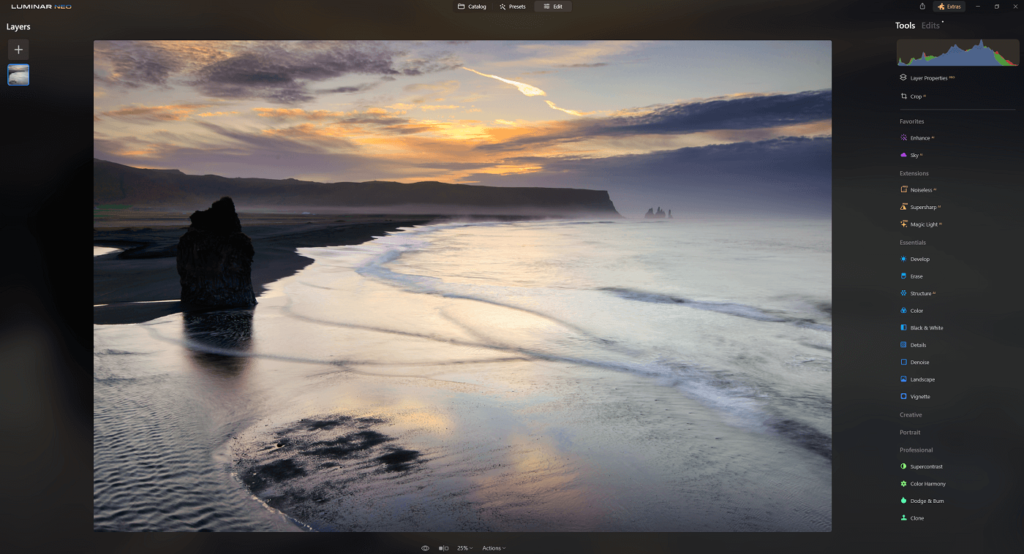
The Clean, nicely laid out “Edit” interface of Luminar Neo AI
If you compare it to Photoshop, for instance, you can easily see how each photo editing tool can easily be accessed within just a couple of clicks. It’s that simple. It’s also a very flexible software that could help anyone achieve any photo editing goals. By default, any of the edits is essentially layered up automatically, so you do not have to create Layers or Adjustment Layers yourself when editing an image.
To be picky, my only out-of-the-box complaint would be that the Histogram is not active by default but needs to be enabled. It’s just one click though, and then it remains active until you decide to deactivate it, so no big deal.

Right Click on any image to show the Histogram
Luminar Neo AI Photo Editor as Standalone Editing Software
Let’s take a look at the capabilities of Luminar Neo AI as a standalone photo editing software. The Interface has three main components, the Catalog, the Presets, and the Edit interface. It’s also worth noting that all the edits you make are non-destructive; you can easily go back and modify any trash and edit you no longer want or need.

Luminar Neo AI Catalog
Importing photos also is a refreshing experience compared to Adobe Lightroom. You can either just drag and drop or add entire folders or a selection of images within a couple of clicks.
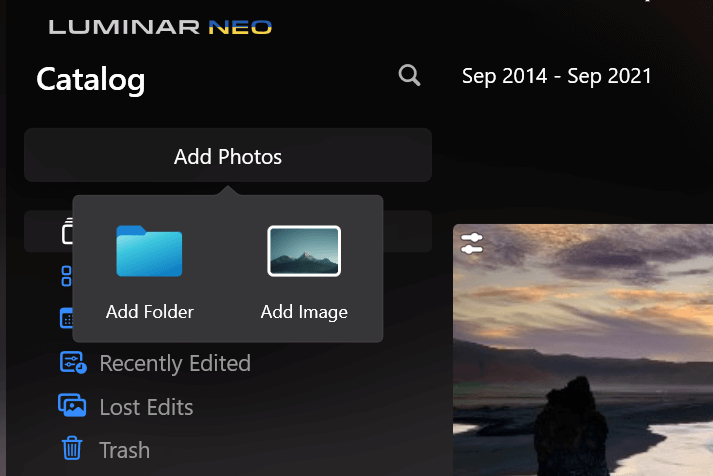
The “Add photos” interface
Presets
Numerous presets are available to quickly process suitable images. Essentially, presets are ready-to-use settings you can apply to an image with a click of a button. This is not a feature I normally use, because I do enjoy processing my images from start to finish and prefer to have total control of their look. Still, this can work well as a starting point to further refine the presets and adjust images to your liking. There are plenty of presets to choose from included in the price.
To be honest, though, I would have placed it on the left sidebar. I am not using presets much so I’d rather have it in a less visible/distracting place. However, these can be a great starting point to further refine an image to your likings.
The Edit interface
The Edit interface is also nicely laid out. On the left you have layers; these are different from Photoshop’s though. In Luminar Neo, Layers are effects that you can add to your image as transparent overlays, such as Lighting effects or bokeh effects. I don’t use them and I wish I could hide them to have more real estate to focus on the image.

The Develop tool module in the Essentials module
On the right, you have the “Tools” and “Edits” sections. The “Tools” section is where all the photo editing tools are. The “Edits” section is essentially your history of edits, but with one great advantage: here you can directly edit your edits! Essentially you can go back to your history and see all the actions you made and modify them one by one. All through sliders. Sweet!
What this means is that all the edits you make are non-destructive; you can easily go back and modify or trash and edit you no longer want or need, without affecting the image irreversibly. This is a big deal and a big thumbs up.

Easy to switch between the Tools and Edits (the history, essentially) if you need to modify any previous edits
Basic Adjustments – The Luminar Neo Essentials Module
Now let’s see the main features of the Essentials module. This is where most of the work would happen with your photos. All the basic adjustments and masking can be found here.
- The Develop Tool has all the basic tools you need to process your photos. Exposure, Contrast, Highlights and Shadows, Curves, Colors, Perspective, Lens correction, and so on. If an image does not require any particular processing, this module will be more than enough by itself. What I like about it is that all the features you need for most of the adjustments can be found here. So there is no need to keep scrolling up or down like in Lightroom.
- The Erase Tool allows you to easily delete dust spots or unwanted objects. This is also where you can find the Power Lines removal tool, which works great.
- The Color Tool contains all the basic color adjustments like Saturation and Vibrance. It also lets you control HLS values (Hue, Luminosity, Saturation) and lets you mask them for more targeted adjustments.
- Structure AI lets you adjust the detail and clarity of an image. You can increase them or make them less sharp. This works great as a finishing touch if you need to adjust further or increase the details after having completed all the other major adjustments.
- Denoise: this is a basic denoise feature, not to be confused with their Noiseless AI extension.
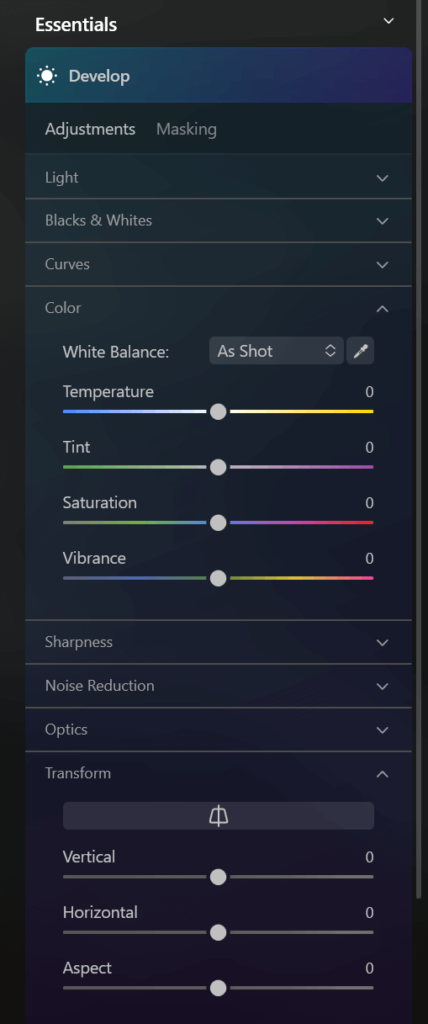
The Develop tool in the Essentials Module
The basic adjustment module also includes additional features like a dedicated Black and White conversion tool, a Detail Enhancer, a Landscape mode with a “Golden Hour” setting a “Dehaze” option, and foliage to control the intensity of foliage colors.
Professional Adjustments
The professional is where you can make more granular or targeted adjustments, which will be of interest to the most advanced users. This module includes the “Supercontrast”
- Super contrast: Here you can apply luminosity-based adjustments. Essentially you can target adjustment according to their brightness( or darkness). This is not yet advanced as as Lightroom’s luminosity selections and even less than the TKs panel, but it does a surprisingly good job. While you can only address highlights, Midtones and Shadows, you have the option to mask each one of them further using a Brush, Linear or Radial gradient and Neo’s AI Masks.
- Color Harmony: This is where you can address
- Dodge and Burn: This tool allows you to apply either Lighten or Darkne areas of an image selectively using a brush. You can control the size and the softness of the brush, and you can easily erase or adjust any brush stroke to refine the selection. Like the other tools, this is very easy to use and works well. The only improvement that could be made here would be allowing to select the color of the brush.
- Clone tool: with the clone tool you can clone areas of an image onto another i.e. duplicating patterns or removing objects. This works well too.
Batch Editing in Luminar Neo
It’s also possible to batch-edit your photos. While it is not technically batch editing, you can edit one photo to your needs and then you can copy and paste the settings on a batch of photos.

Luminar Neo AI Features
As an AI photo editor, Luminar AI offers several tools that help streamline photo processing tasks.
“Hard” AI tools
This is a term I came up with and not something you will find in Skylum’s documentation. By “Hard” AI tools, I am referring to those tools that can help you radically change the look of an image. For instance, the Sky Replacement, Background Removal, Relight, or Atmosphere features. While I am not using these, I did give them a try, and as far as I can tell they work just fine.
“Soft” AI tools
As you probably guessed, “Soft” AI tools is also a term I came up with to differentiate the following sets of tools from the previous one. In this case, By “Soft” AI tools, I am referring to those features that will allow you to better controls and adjust certain parts of an image without radically changing it. Specifically, tools like their masking or Structure feature. These work great allowing you to apply targeted adjustments without the need to resort to complicated masking selections. Essentially, they will save you quite some time.
Luminar Extensions
Another great feature is the availability of extensions. Think of them a bit like Photoshop plugins. These are included with the Lifetime plan, while you would have the option to purchase them separately with the monthly plans.
- HDR: easy drag-and-drop interface that will merge bracketed images into one single HDR file. The output is great, good-looking merged images right “out of the box”.
- Focus stacking: just as easy to use, it allows you to focus-stack up to 100 images at once.
- Noiseless AI: remove the noise without (supposedly) losing details and not blurring the image.
- Supersharp AI: this is actually a fantastic feature. it’s not about sharpness, but about recovering a misfocus or reducing/removing motion blur. This can help save photos!
- Upscale AI: this tool allows you to upscale an image up to 6X, enhancing its resolution. It works with non-raw files too
Luminar Neo AI as a Lightroom and Photoshop Plugin
As mentioned earlier, you can also install Luminar Neo AI as an extension in Lightroom and Photoshop. The reason you may want to do this is to have access to certain actions or to complete others more quickly. For instance, their masking AI feature can allow you to process some targeted adjustments more easily, especially in terms of color, contrast, or detail-enhancing work. If you have ever used Nik Color Efex Pro as a Photoshop or Lightroom plugin as part of your workflow, you know what I mean. Personally, I found this to work better than Color Efex.

In Lightroom, you can just right-click on an image and select “Lumina Neo” to open it

In Photoshop, you can launch Luminar form the “Filter” menu, than “Skylum Software”
Luminar Neo AI Photo Editor Pricing & Discount Code
A subscription price model and a full license are available, starting at around 9.95 Euros (as of May 2023), and you can compare the plans here. As a reader of The Photo Hikes, You also can get 10% off using the coupon code THEPHOTOHIKES. They also offer a 30-day money-back guarantee, so there’s plenty of time to test if you decide to return it. Much better than the 7 days Adobe offers.
Conclusion
Luminar Neo AI is a fantastic software that streamlines and simplifies the photo editing job. I would say Luminar Neo would cover most use cases for landscape photography. I can probably process 70-80% of my photos in Luminar Neo AI, without the need to enter Lightroom or Photoshop. For images that do not require a lot of in-depth work or very granular control, Luminar Neo AI is a great tool.
If you are starting out in photography, this is the software I would start with. Lightroom and Photoshop can be overwhelming in terms of all of their tools, features, and sometimes overly complicated user interfaces. Start here and you can learn all the basic and the most common techniques. Then you can add more Software later on, should you need to.
Also, this is the software you should use if you privilege shooting over spending time processing images. In most cases, you can easily the same results in less time compared to Lightroom or Photoshop.
Where the Luminar Neo AI photo editor still lags behind Lightroom and Photoshop is the granularity of adjustments and features from the more advanced users. For instance, light painting, image warping, or luminosity-based adjustments, especially if used with a plugin like the TK Panel. In this case, however, Luminar Neo AI can still find its place as either a plugin to simply some steps, or as a standalone software for images that do not require intensive processing.
All in all, this is great value for its price and the features it offers. To conclude, here’s a summary of my personal impressions, pros and cons:
| Pros | Cons |
|---|---|
| Intuitive User Interface | Limited export option features |
| Easy to learn | No automated option way to create Panoramas |
| Plenty of features accessible within one or two clicks | Lacks some advanced options like good customizable luminosity selections |
| Non-destructive and easily reversible editing | |
| Wide selection of adjustment tools |
Additional Resources
- Check out more tips and tutorials here.


Leave A Comment