How to Get into Landscape Photography for Hikers
If there’s one thing I’ve learned as a hiking photographer, is that hikers know all the best spots for landscape photography! Yes, even more than photographers. I believe that is for one very simple reason. Hikers usually know all the best and most scenic landscape photography locations or have the skills to find them.
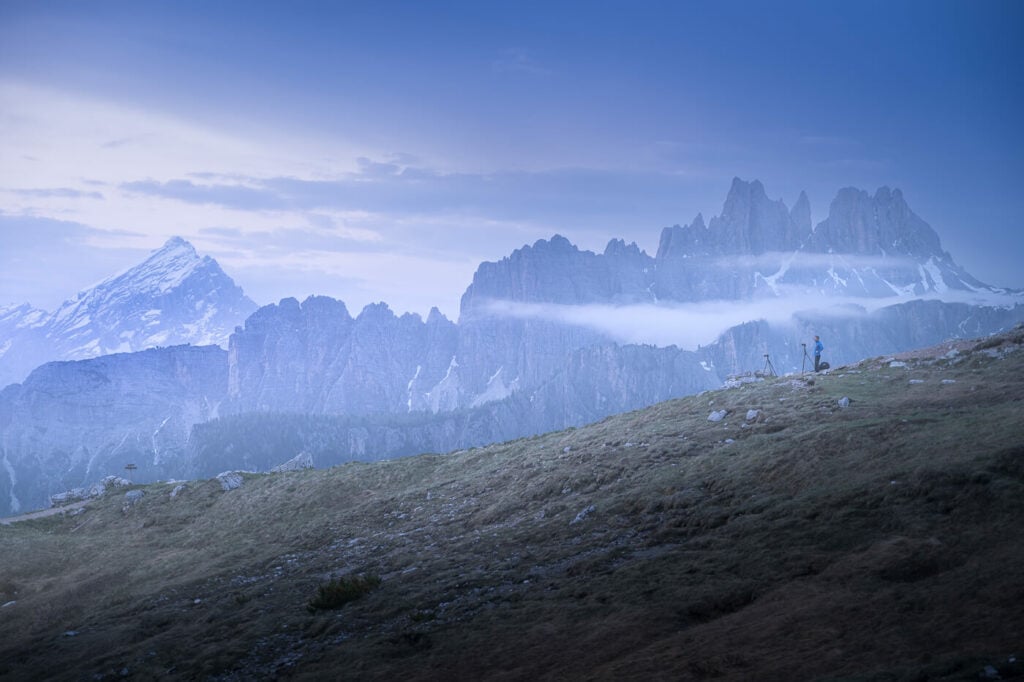
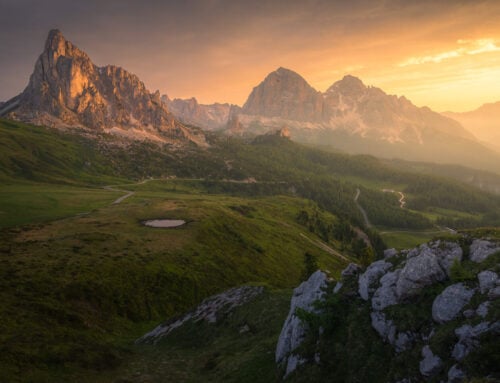
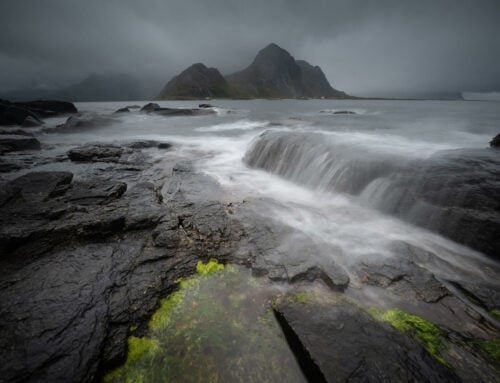
Dolomiti, waiting for Sunrise.
Hikers explore, look for new trails, and spend a lot of time out in nature. Most photographers, instead, tend to orbit around all the known spots, perhaps visiting them more than once, waiting for the “right” conditions.
With that knowledge, it is also easy to see how some hikers may want to pick up a camera and capture all those beautiful vistas, sunsets, and panoramic views along the trail. That’s what I do too and I enjoy it very much. That’s why this blog is called “The Photo Hikes”. Hiking and Photography.
So if you are a hiker looking to get into landscape photography, I can hopefully share some tips and recommendations to get you started on your photographic journey. From Camera and lens selection to packing gear and editing software, here you should find all the essentials to get started.
Learning Landscape Photography
Learning photography is a process that never ends, and that is the beauty of it too. There are several different ways to get into landscape photography and none of them are right or wrong. There’s just want what and what does not work for your enjoyment, that’s it. At least, that’s my approach.
First, the obvious; a mobile. If you landed on this page, chances are you’ve already been taking photos with your mobile for a while. Nowadays that’s all most people need and that’s completely fine. If you do not want to spend time sitting in front of the computer or learning all the ropes of a camera with full manual controls, mobiles are a great solution for hikers wanting to capture some landscape photography shots.
I sometimes take pictures with my mobile too and also upload them to some of my posts.
However, maybe now you want to take it up a notch. Perhaps you want to have more control over your photos and better image quality. In that case, a dedicated camera is the way to go. However, there are several factors to consider before purchasing a Camera and that’s what we are going to look at next.
Choosing the right camera and lens system is the starting point of your photographic journey. Take your time to choose it!
Choosing a Camera
Start with a Bridge Camera
Sometimes, even as beginners, we’re tempted to buy a DSLR or Mirrorless all the respectable landscape photographers seem to have. Well, I’d recommend not to; if you are getting into photography there are better types of cameras you should consider.
Instead, you should go for a Bridge camera. A bridge camera is, as the name says, a bridge between point and shot camera and a mirrorless or DSLR camera. It is like a mirrorless or DLSR camera with no interchangeable lens, but a fixed lens with a wide range.
That’s how I started too and I am super happy I did. My choice was Fujifilm Finepix S6500fd, a bridge camera with 12 megapixels and a 28-300mm lens.
Here are several good reasons why you should start with a bridge camera:
- Lenses: a camera is probably going to be the second most expensive piece of gear you’ll have to purchase. Your lenses will be the most expensive part. Bridge cameras will allow you to use a very wide range of focal lengths. This, in turn, allows you to discover your preferred ranges. Once you know that, you’ll be ready to jump to an interchangeable lens camera because you’ll know which lenses you’ll want and why.
- Saving money: by investing in a bridge camera you are easing your way into photography without investing too much money. If you continue with the hobby, you can upgrade your gear at a later date. If you don’t and discover photography is not something you want to invest much time and money into, then you
- Weight: one step at a time. First get comfortable with the additional weight of a camera, how to use it on the trail, and so on. With cameras come all of their accessories i.e. additional batteries, filters, tripods, and so on. The additional weight situation can escalate pretty quickly.
- Fun: having to change lenses quite often can detract a lot of the fun from shooting at least at the beginning. With a bridge camera instead, you can focus on learning the controls and the essentials of landscape photography, without having to think too much about switching lenses.
- Post-processing: these cameras also allow you to easily introduce you to post-processing. File size is reasonable and files are easy to handle. So you may not need a more powerful PC or laptop than the one you already have.
A versatile, all-round lens such as those found on bridge cameras allows you to experiement with different types of photography.
Tips on choosing a camera for hiking
- Make sure you buy a camera that shoots in RAW in addition to JPEG. RAW is are proprietary format of camera manufacturers. Raw files essentially capture much more *raw* data in the files. This comes in handy when post-processing your images because software like Photoshop will have more data to work with, hence allowing more post-processing latitude. This will be particularly useful later in your photographic journey as you’ll have more room to develop your style. Maybe you want to start shooting JPEG, that’s perfectly fine too. You’ll just have less room for post-processing because JPEGs essentially are images that have already been post-processed by the camera according to
- Choose a camera with the widest aperture possible (f value) and the biggest zoom range. You will want to have at least a zoom that covers from 24/28mm full frame equivalent to at least 300 or more. This is one of the main benefits of having a bridge camera, a lens that covers a wide range, so you can experiment and discover which works best for you without having to buy several different lenses beforehand. On top of that, make sure you have the widest aperture possible (or the smallest f value, like f2.8). Wider apertures (smaller f values allow you to take those photos with beautiful blurred backgrounds and do Bokeh, as well as being better in low light
- Get a camera with the biggest possible sensor; in terms of bridge cameras that would be a 1-inch sensor.
If you are planning to also do video, then consider the video features of each camera; especially the resolution (i.e. 4k) and the frame rate.
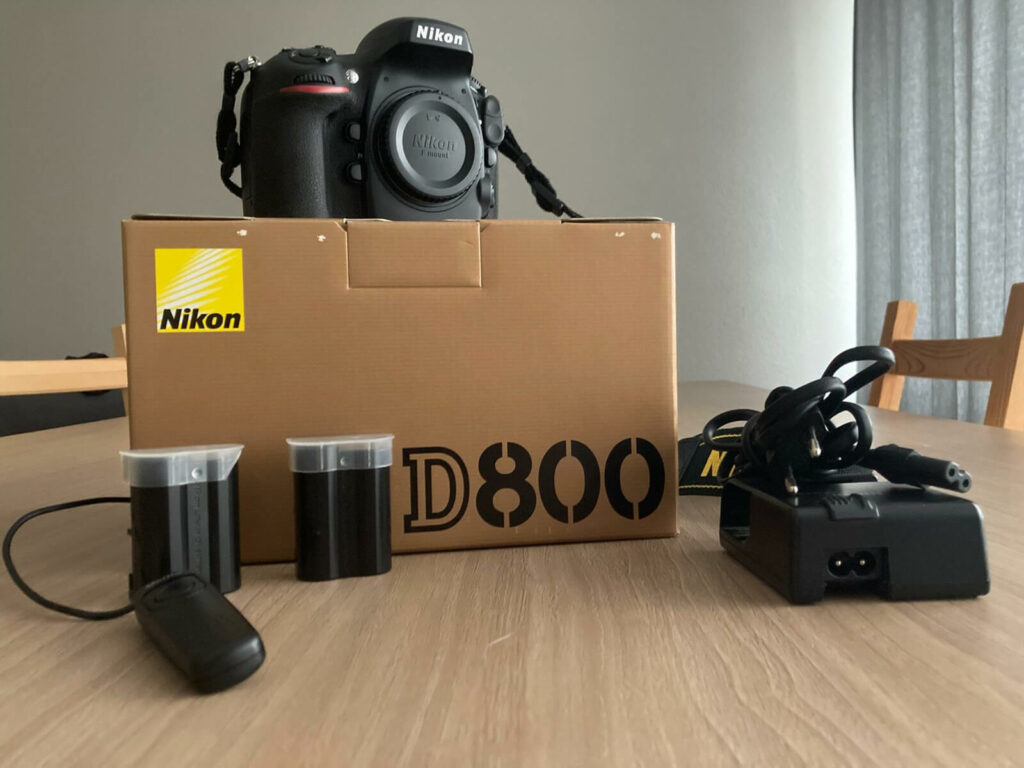
A Nikon D800, my third camera and first first full-frame one.
Moving to a DSLR or Mirrorless camera.
Once you’ve mastered the settings and the use of a bridge camera, you should have a clearer idea of where you want to move next in the camera world. The next step will be an interchangeable lens camera, but even here there are choices and tradeoffs to be made, especially for a hiker getting into photography.
Within the Interchangeable lens camera world, there are different systems. The most used ones are micro four-thirds, APS-C, and Full frame. There are others, like medium format, but you do not want to go there as a hiker. Anyway here is an overview of the three many systems:
- Micro Four Thirds (MFT): This system features a sensor size that is approximately a quarter of the size of a full-frame sensor. The dimensions are typically around 17.3mm × 13mm.
- APS-C: APS-C sensors are larger than Micro Four Thirds but smaller than full-frame sensors. They vary slightly in size depending on the manufacturer, but common dimensions are around 22mm × 15mm.
- Full Frame: Full-frame sensors are the largest among these options, with dimensions around 36mm × 24mm, equivalent to the size of a frame of 35mm film.
On top of that, you also want to consider whether to get a DSLR or a Mirrorless Camera. DSLRs essentially are cameras with a mirror inside like to old analog reflex, while mirrorless don’t have that. Nowadays it’s all about mirrorless, but there are great quality DSLRs on the second-hand market out there. Be aware though, that DSLR cameras and lenses are heavier than their Mirrorless counterparts.
Camera gear is heavy to carry around especially on long hikes, but it can be extremely rewarding!
Micro Four Thirds vs. APSC vs. full frame for the Hiking Photographer
This is a short list of the main features and differences you should consider when choosing a camera for hiking.
- Image Quality:
- Generally, larger sensors tend to offer better image quality, especially in low light conditions, due to their ability to capture more light.
- Full-frame sensors typically have better dynamic range and perform better at higher ISO settings compared to APS-C and Micro Four Thirds sensors.
- Size and Weight:
- Micro Four Thirds cameras and lenses are typically more compact and lightweight compared to APS-C and full-frame counterparts. This can be advantageous for hikers who prioritize portability and ease of carrying gear over long distances.
- APS-C cameras are generally larger and heavier than Micro Four Thirds but smaller and lighter than full-frame cameras.
- Lens Availability and Compatibility:
- Micro Four Thirds and APS-C systems offer a wide range of native lenses designed specifically for their respective sensor sizes.
- Full-frame systems often have the most extensive selection of lenses available, including many high-end and specialized options. However, these lenses tend to be larger and more expensive.
- Cost:
- Micro Four Thirds cameras and lenses are often more affordable than their APS-C and full-frame counterparts.
- APS-C cameras and lenses typically fall in the mid-range in terms of cost.
- Full-frame cameras and lenses are generally the most expensive option, although prices vary widely depending on the brand and specific model.
In my personal camera journey, I went from a Bridge camera to an APS-C, to a DSLR full frame, to a mirrorless full frame. So I increasingly traded off weight for better image quality up until switching to a mirrorless system.
To sum it up in a few words, if you want to have less weight and are ok with not having the best image quality, go with Micro Four Thirds. If you don’t care about the weight and want to have the best image quality with the best possible lens choices, go with Full Frame.
Don’t worry too much about the brand; leave the brand topic to the fanboys. the cameras out there are all pretty good in terms of features and quality. Just get a camera that suits your needs, that fits well in your hand you find easy to use. Remember, it’s not about the gear, it’s about that landscape :)!
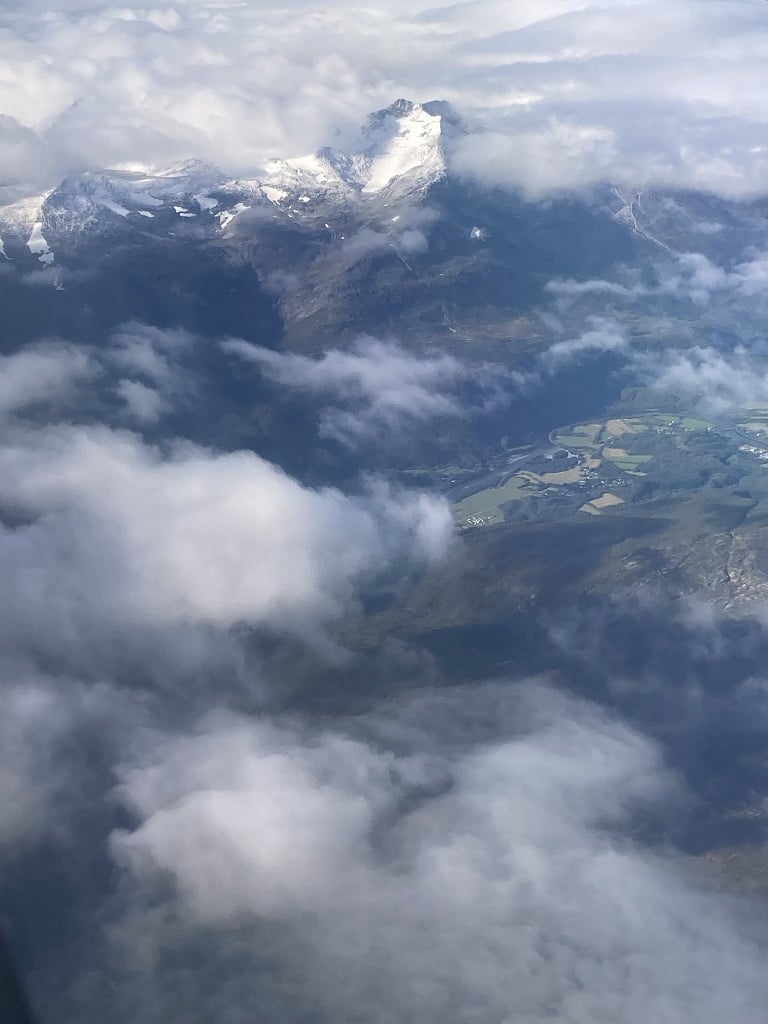
Landscape photo taken with an old mobile, iPhone 8. Better gear does no necessarily mean better photos.
Choosing lenses
Generally speaking, for landscape photography you will want to have a wide angle and at least a mid-range zoom. Optionally even a longer telephoto lens, but I’d recommend leaving longer lenses for later unless you know what to use them for already.
Anyway generally speaking you have the option to go for prime lenses or Zoom lenses. Prime lenses are lenses that have a fixed focal length. 14mm, 24mm, 35mm, and so on. They are lighter and offer better image quality for their specific purposes, but don’t offer the same flexibility a zoom offers.
- Wide angle lenses: in most cases, a 16/18mm full frame on the wide end is enough. if you want to go ultra-wide, then there are options for 14 and even 11mm. However ultra-wide lenses are not for casual shooting and
- Mid-range zoom: lenses in this category have focal lengths from 18mm to 135mm or so.
- Telephoto lenses: these are lenses that go up to 200, 300, or even 600mm or more, and aren’t to everyone’s taste in terms of landscape. I personally love them though. If you are curious about that type of landscape photography, check my post on landscape photography for hikers with a 70-200mm lens.
I only have three lenses nowadays, full frame: 14-24mm, 24-70mm, and 70-20mm. The default one on my camera is the 24-70, good for 70% of my shooting. I rarely have all of them with me, and I usually have one or two depending on the type of photography I am planning.
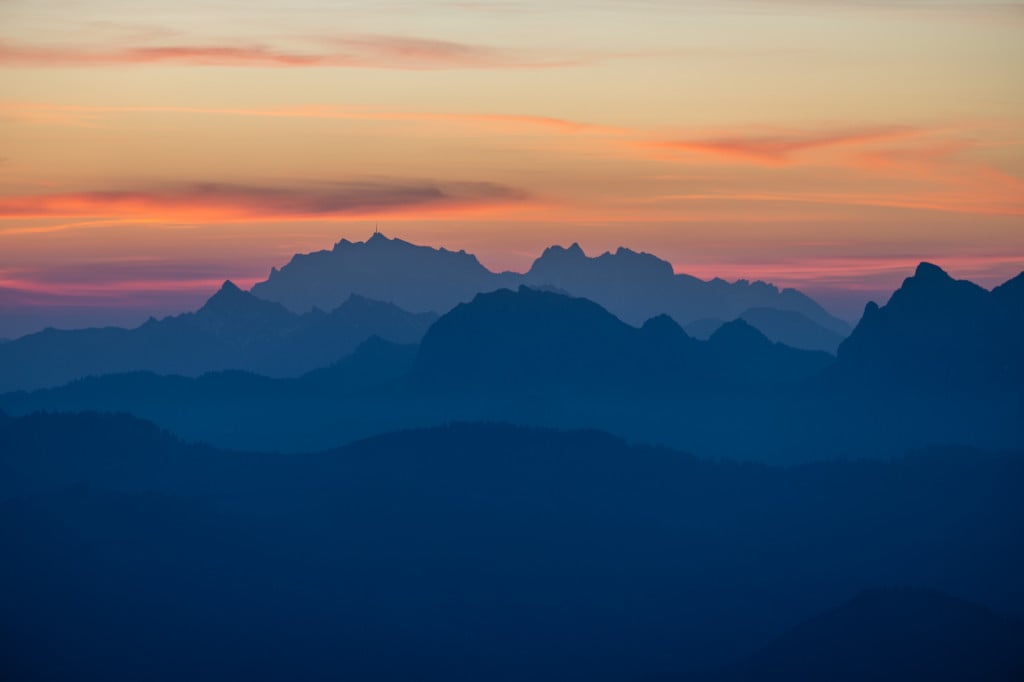
Longer Telephoto lenses are a great choice for mountain landscape photography. 200mm photo.
Filters
This will be quick; save yourself the money and don’t buy a UV filter. I never use one and never have. Never scratched the front element of a lens in almost 20 years either. Do however get a Polarizer to reduce glare, enhance color saturation, increase contrast, and add depth and dimension to images.
They are non-essential of course, but best to have one, and they are light. Use it for your lenses with a focal length above 24mm. Below that, they introduce some rather ugly artifacts in blue skies.
For now, we won’t get into the topic of Neutral Density or graduated filters as you are unlikely to need them at the beginning of your photographic journey. However, here is a quick overview of what they do
- Neutral Density (ND) filters: Neutral density filters are designed to uniformly reduce the amount of light entering the camera’s lens without affecting the color or hue of the image. They are essentially darkened pieces of glass or resin that you place in front of your lens. ND filters come in various strengths, measured in stops, indicating how much they reduce the light. For example, a 2-stop ND filter reduces the light by two stops, allowing only a quarter of the light to pass through. these are the filters you would use to blue the water of a waterfall, a river, or sea waves during the day.
- Graduated Neutral Density (GND) Filters: Graduated neutral density filters are similar to ND filters but have a gradient in their density, transitioning from dark at one end to clear at the other. They are typically used to balance the exposure in scenes where there is a significant difference in brightness between the sky and the foreground, such as during sunrise or sunset. They also come in a variety of shapes and sizes, i.e. Hard Grads with a well-defined transition line. Soft Grads with a more gradual transition and so on.
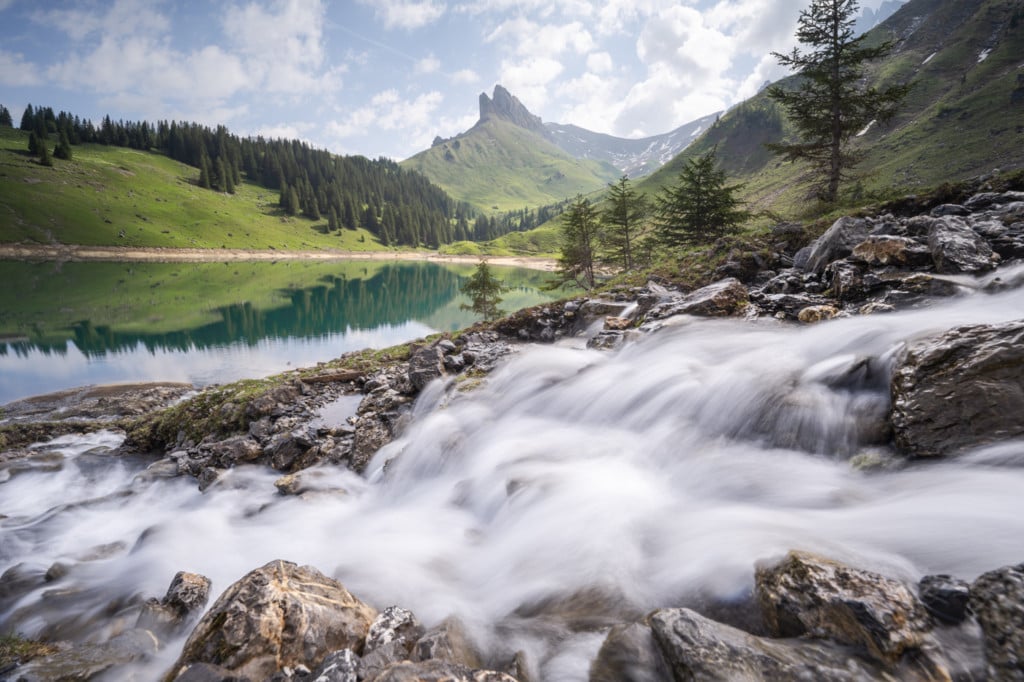
Neutral Density (ND) filters allow you to blur the water or clouds even in the middle of the day by increasing your shutter speed.
Drones
While I do have a drone and bring it with me where I am allowed to fly it, I would recommend not getting one if you are just getting started in photography. Learning all the ropes of operating a camera and shooting can be overwhelming in itself. If you add a drone on top of that, then you may risk taking all of the enjoyment out of a hike altogether. Do one thing at a time. Once you’ve learned the basics of photography, you can add a drone to the equation.
If you want to dive into drone photography for hikes, you may want to read my other post on Drones and Drone photography for hikers.
With that said, let’s move on to the more practical stuff. Getting out there and shooting!
Landscape photography tips for hikers
Let’s move to some of the essential landscape photography tips for hikers. From packing your camera gear to camera settings to composing the shot and post-processing your photos. The topics covered in this section can be overwhelming if discussed extensively. So I’ll try to keep it to the very essential tips.
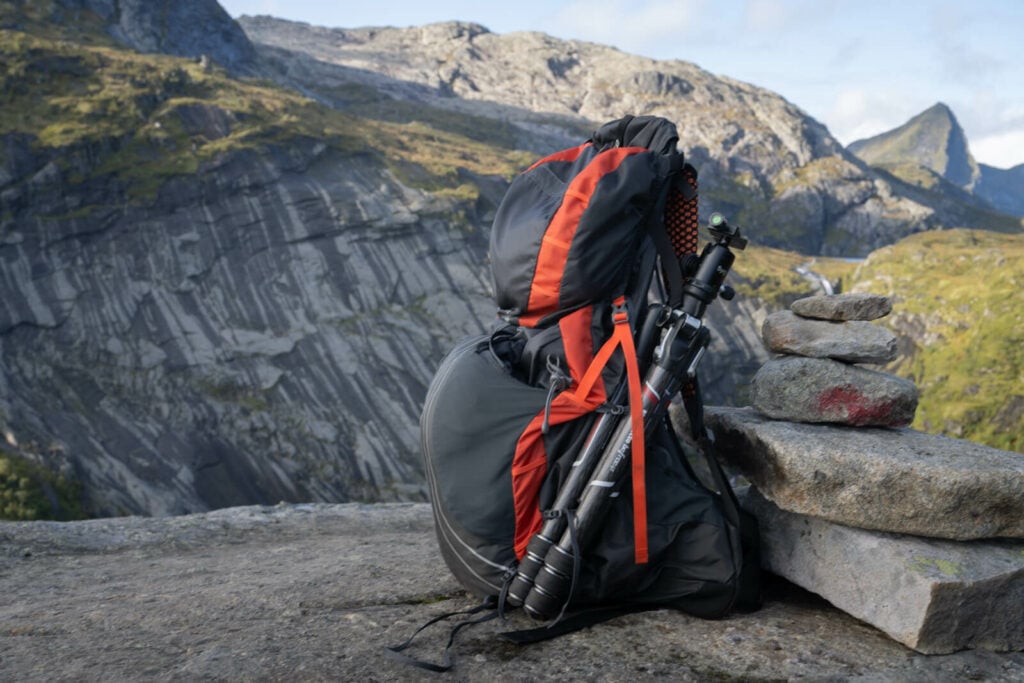
Hiking backpacks are an excellent choice for camera gear with the addition of camera inserts. They can easily be adapted to carry camera gear.
Packing camera gear for hikes
No, you don’t need a dedicated camera pack. A hiking backpack is perfectly fine to store camera gear, but you will need to buy a camera insert. That’s my setup too. Dedicated hiking backpacks with camera inserts are far superior to camera backpacks for hiking. They are built for hiking, while camera backpacks are built to carry gear around.
On the inserts; they come in different sizes and they are essential. They prevent damage to your camera gear in case of a fall or prevent it from smashing around in your backpack. I have two inserts, an 11-liter one and a 13-liter one. the 11-liter one is enough for my Nikon ZII with two lenses, or one lens and a drone. The 13-liter one is enough for two lenses and a drone.
Pack light, only bring the gear you think you’ll use, not all the gear you have. Do have a spare battery and a spare memory card. Save the weight of a tripod and leave it at home at least for the first few times. Bring it with you when you’ll know you’ll need it. Chances are you’ll know when you’ll need it pretty soon.
Also, you will want to have a rain cover for your backpack and I’d highly recommend a waterproof liner too. Chances are you already have them as a hiker, but I thought I’d mention that just in case.
If you want to read more on this topic check my other post on the best backpacks for hiking photographers.
Planning your photographic hike
Whether you want to do some mountain photography while hiking or do some sunrise or sunset photography on your hiking adventures, planning the shot is essential. You want to know where the sun is, especially if you want to photograph the sunset or the sunrise. Also check the position of the sun during the day, see where it rises and where it sets, and plan accordingly.
Study the terrain. You can use Google Earth to scout the terrain in 3D and look at it. Also, all the major Hiking apps like Komoot, Alltrails, and Outdooractive have plenty of features to study the terrain and user-submitted photos.
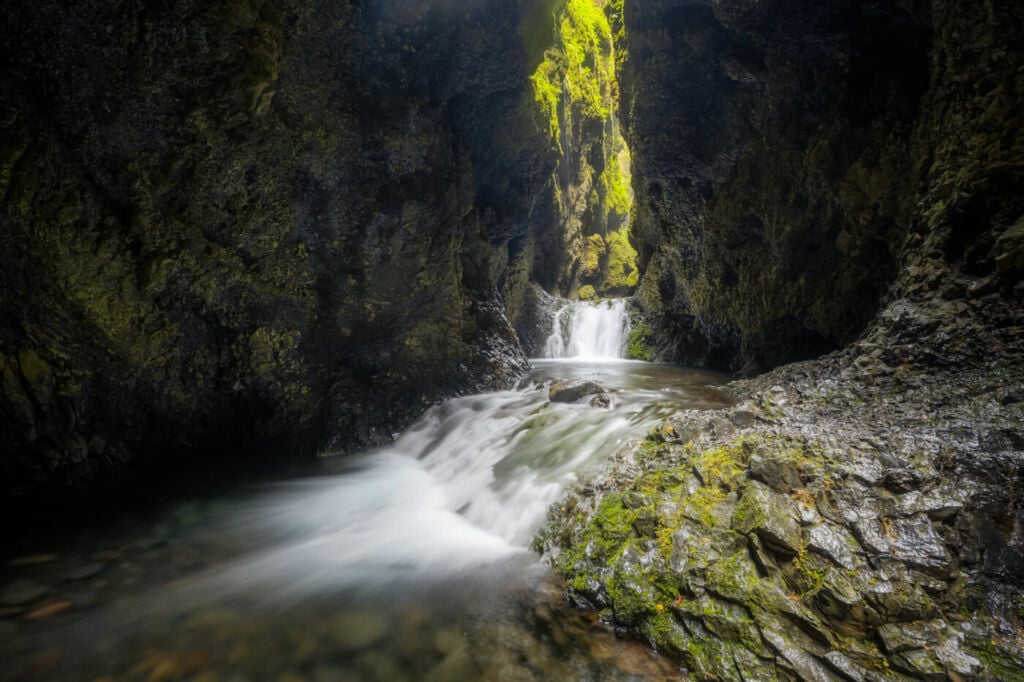
This will allow you to which lenses you can bring and which lenses you can leave at home. Are you going to hike in a narrow canyon? Take the wide angle. Are you going to hike on top of a mountain with views as far as the eye can see? Take a mid-range zoom, like 24-120mm. And so on.
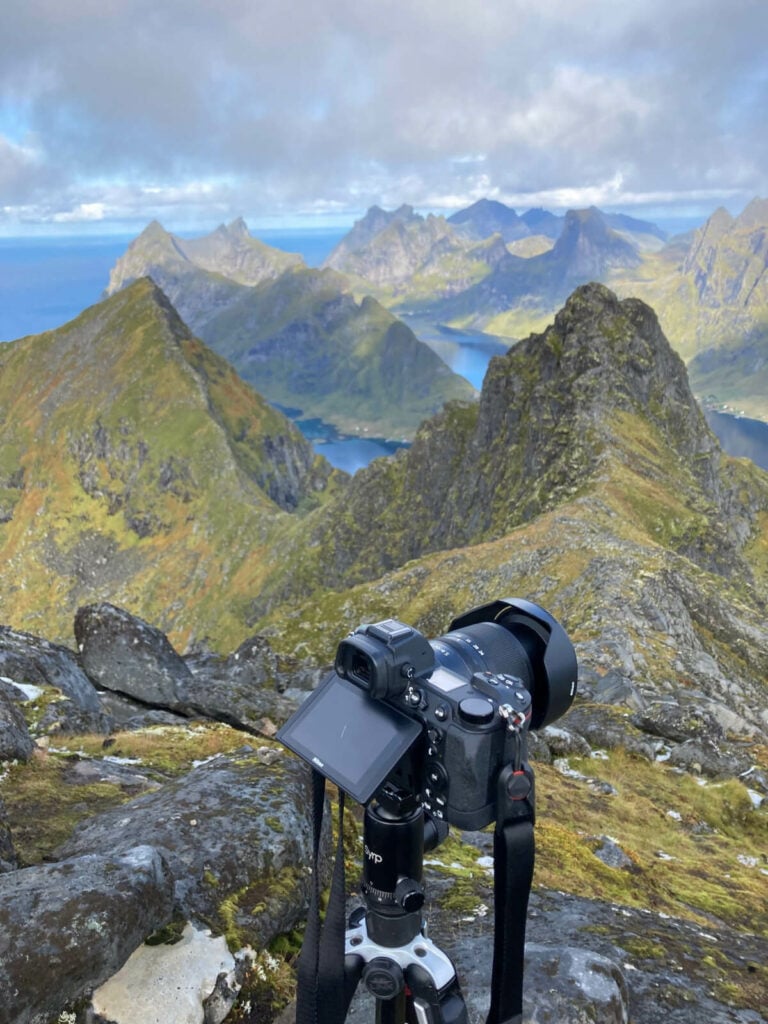
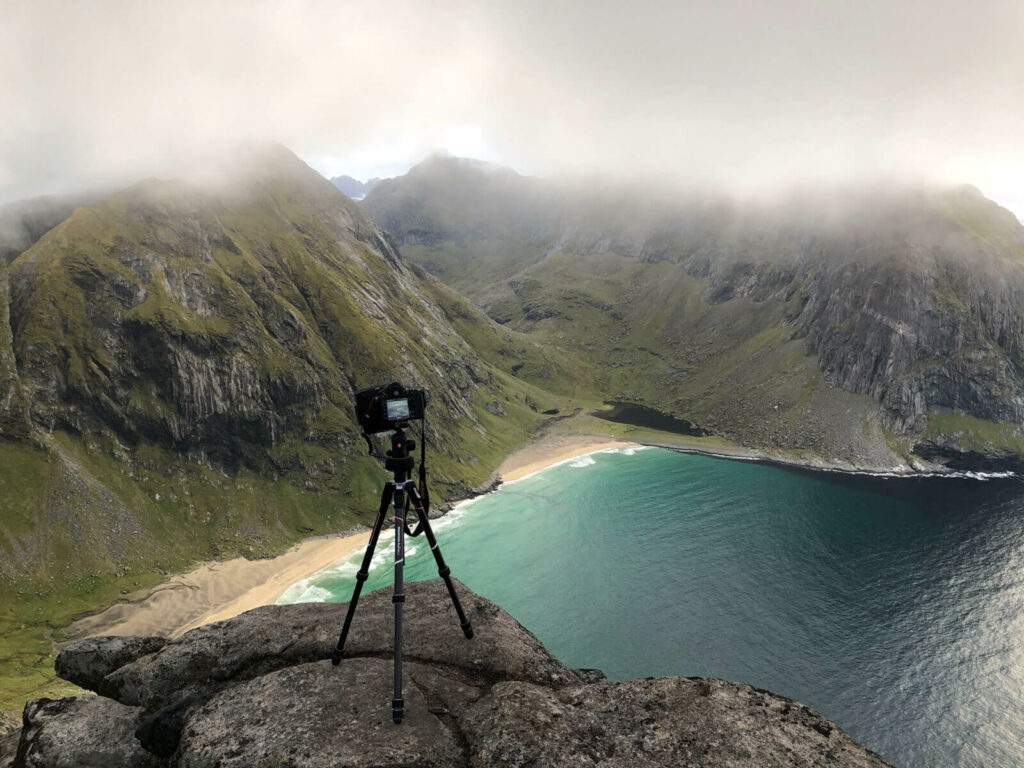
Gear and lens choice is critical for the type of landscape you are going to photograph. Plan and choose carefully!
Camera Settings
Using the right camera settings can make a big difference in the quality of your photos.
For landscape photography, you’ll want to use the sharpest aperture possible, which is usually around the aperture value of f/8. You also want to keep the lowest native ISO value possible. In some cameras, it’s 64, in some 100. A higher ISO value will introduce noise and lessen the quality of the image, so don’t increase it unless it is too dark to take any usable photo without doing so.
Manual settings will give you the most control over the final results. If you are not comfortable with that yet, start first using the auto mode and then gradually switch to more manual settings. For instance, you could use the A more, meaning aperture priority, so you can just set the aperture value, like f/8, and let the camera figure out the rest.
Composition
When composing your shots, try to create a sense of depth and perspective. This is critical to the overall impact an image can make, even more than the subject you are photographing. Use leading lines. Look for interesting foreground elements like rocks or plants to add interest to your photos. Experiment with different angles and perspectives to create a unique and compelling image.
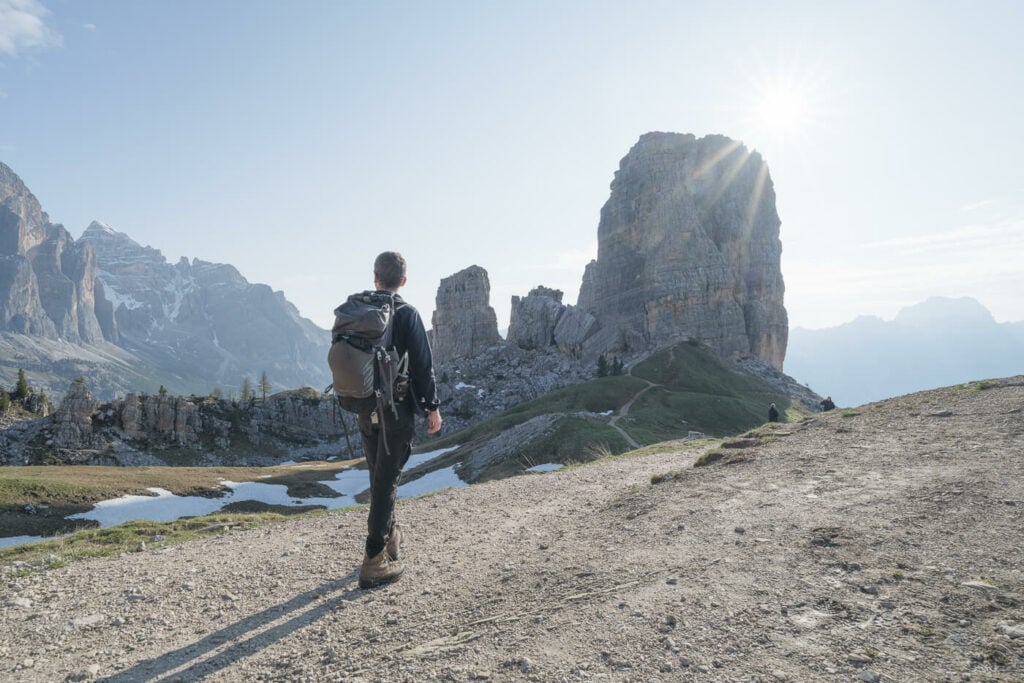
Compositionally, you may have heard of the rule of thirds. that’s what the good you see on mobiles or cameras is for. The idea is to place key focus points in the images where those lines intersect. For instance, you can take landscape photos with a hiker on the bottom left and the sun on the upper right, where the lines intersect. It is quite a basic compositional choice but should give you an idea of what to look for.
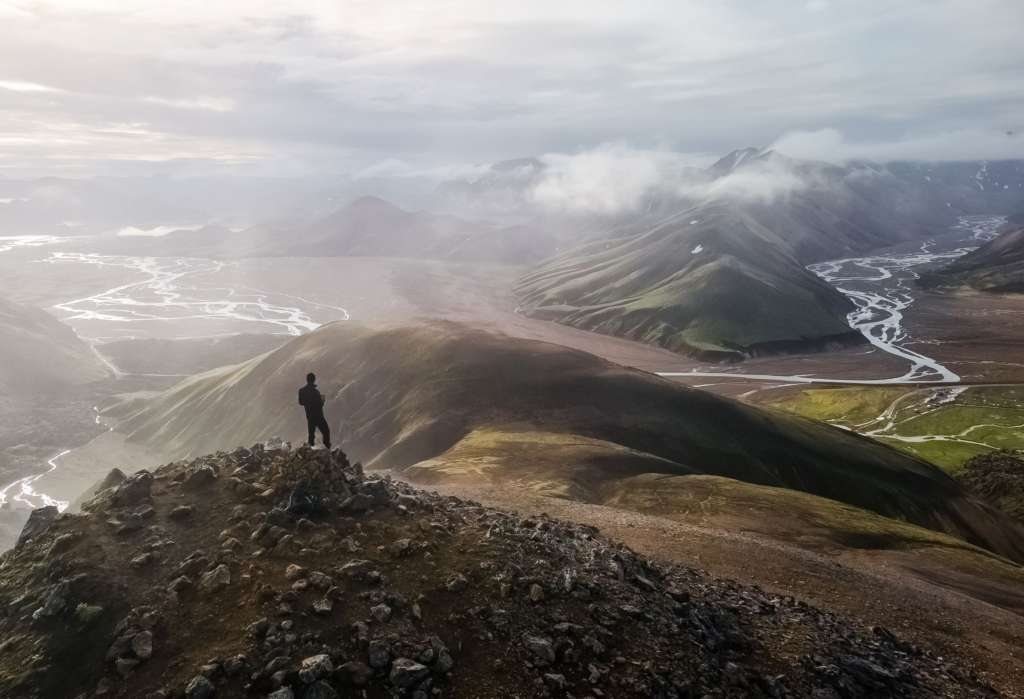
Example of the rules of thirds: a hiker ion the bottom left part, looking at the mountains and rivers on the upper left.
Here are some additional key methods:
- Leading Lines:
- Leading lines are elements within the composition that draw the viewer’s eye into the image and towards the main subject or focal point. These lines can be natural elements like rivers, roads, or pathways, or they can be artificial structures like fences or rows of trees.
- By incorporating leading lines into your composition, you can create a sense of depth by guiding the viewer’s gaze from the foreground to the background of the image.
- Contrast:
- The contrast in tones, colors, and textures can help to create separation between foreground, midground, and background elements, thereby enhancing the sense of depth.
- Use the differences in light and shadow to add depth to the scene. Strong contrasts between light and dark areas can emphasize the three-dimensional quality of the landscape.
- Sidelight:
- Sidelight, where the light source is positioned to the side of the scene, can help to reveal textures and contours within the landscape.
- By casting shadows across the terrain, sidelight creates a sense of volume and depth, emphasizing the relief of the landforms.
- Foreground Elements:
- Including interesting foreground elements in the composition can add depth and context to the image.
- By placing objects of varying size and scale in the foreground, you provide a visual anchor for the viewer and establish a sense of spatial relationships within the scene.
- Human Figures for Scale:
- Adding human figures to the landscape can provide a sense of scale, helping the viewer to understand the size and grandeur of the environment. As a Hiker, it should be easy for you to include yourself in your landscape photos!
- Placing a person or group of people within the frame can also add a narrative element to the image, inviting the viewer to imagine themselves within the scene. This is also a powerful method, as it helps create a connection with the image.
However, the best tip I can give you is not to limit yourself to similar tips. Try different things, see what works and what does not, and soon you’ll be coming up with your style.
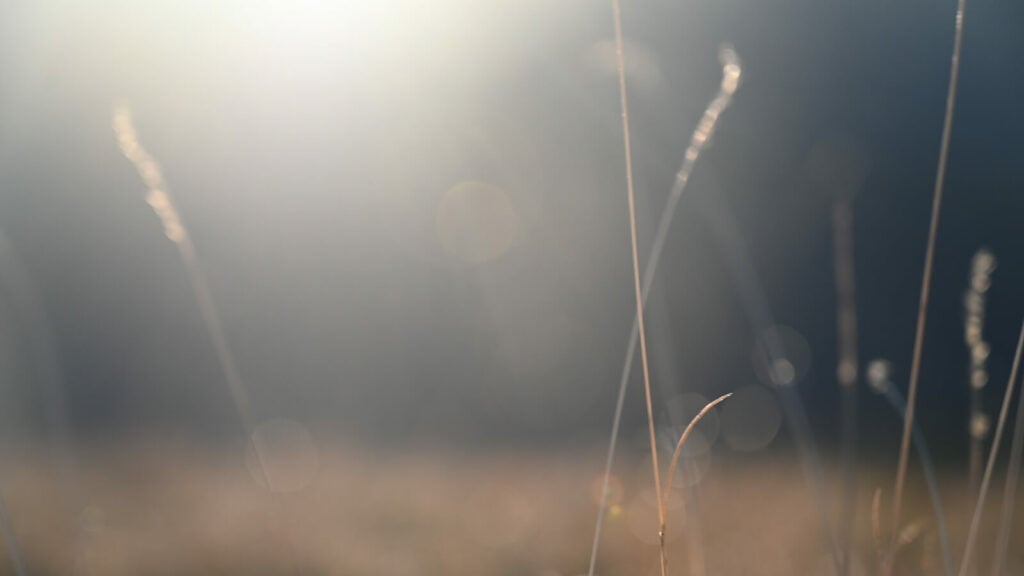
Experiment with subject and composition, try abstract or minimal too.
Apps and Websites for landscape photography
Now let’s take a look at some of the most useful apps for hiking photographers. I won’t go into the details of hiking apps. As hikers, I trust we all have our favorite hiking apps already.
- The Photo Ephemeris with Skyfire: see how the light falls on the earth and plan the shot accordingly. Free on the web, it has a paid version with Skyfire that forecasts the color of sunrise and sunset. The latter is a 50-50 chance in my experience.
- PhotoPills: a bit complicated to use and is a paid app, but lets you plan night shooting and has some great AR features to plan the shot on the spot.
- SunsetWX – this is a website that provides sunrise and sunset forecasts, and it’s free.
Editing Photos
Finally, don’t forget to edit your photos. Simple edits like adjusting brightness and contrast can make a big difference in the final result. There are many photo editing software options available, from free programs like GIMP to more advanced options like Adobe Lightroom, Photoshop, Affinity, Luminar, and so on.
The industry standards are Lightroom and Photoshop, which cost about 10 bucks a month – so not overly expensive.
However, if you are just starting I’d recommend using free editing software. For instance, you can use RawTherapee to process raw files and convert them to Tiff and then edit them in GIMP, also free. if you are using JPEGS, either will work.
Conclusion
That was it! Hopefully, now you are ready to capture some of those stunning landscapes you come across when hiking. I’m always happy to help a fellow hiker with a camera, so if you want to ask for more tips and recommendations on shooting landscape photography while hiking, let me know in the comments :). Likewise, if you have more tips I have not covered, drop them there too! Happy Shooting!


I recently got my first Mirrorless SLR but have been taking photographs for over 40 years. This guide was very useful and informative so I’ll definitely come back to it again and again.
Thanks, Jon, I’m glad you found it useful. Happy shooting with your new camera!