Stuðlagil Canyon Hike – East and West Hiking Trails, Iceland
If you are planning a hike to the Stuðlagil Canyon and are wondering what’s the difference between East and West or which one you should visit, I’ll get right to the point: the East part is the only one that will let you access the basalt columns inside the Canyon and give you a direct view inside.
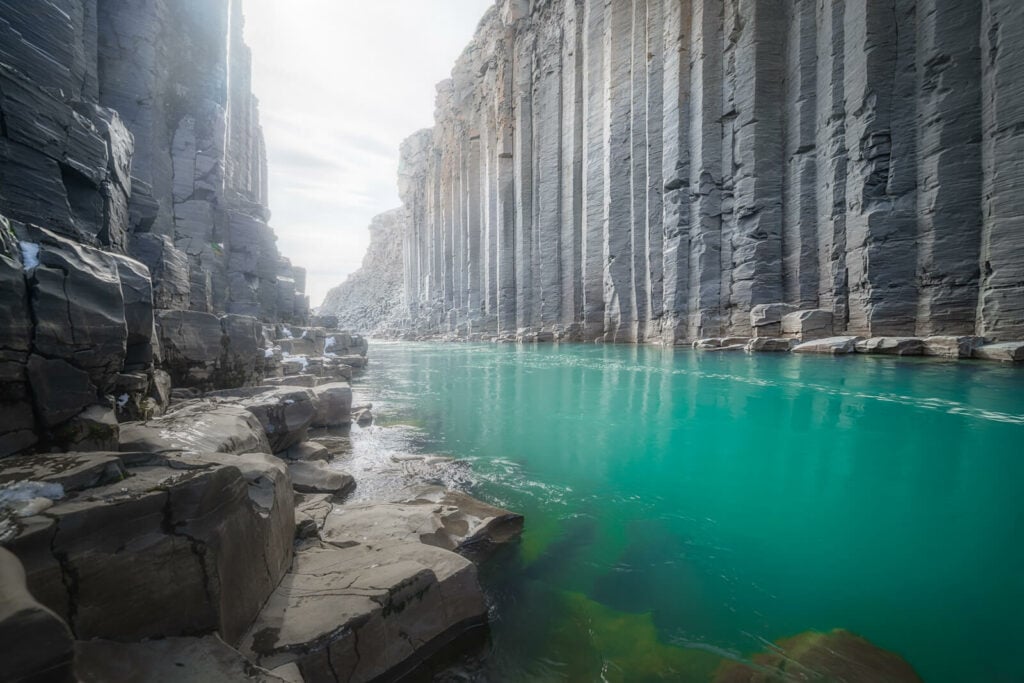
Inside the Canyon, West side.
The hike on the East side is longer but still easy, well worth the reward of the full view of the Canyon. So if you only have to pick one, go to the East side. There have also been talks about building a bridge across the two sides, so in the future, this may no longer be relevant, but for the time being and the foreseeable future.
But what’s the difference between the West and East sides? In a nutshell, the West side will be the quickest to visit but does not provide a good view inside the Canyon. On the other hand, the East side takes longer to visit but gives you the best views, the ones you would visit this place for.
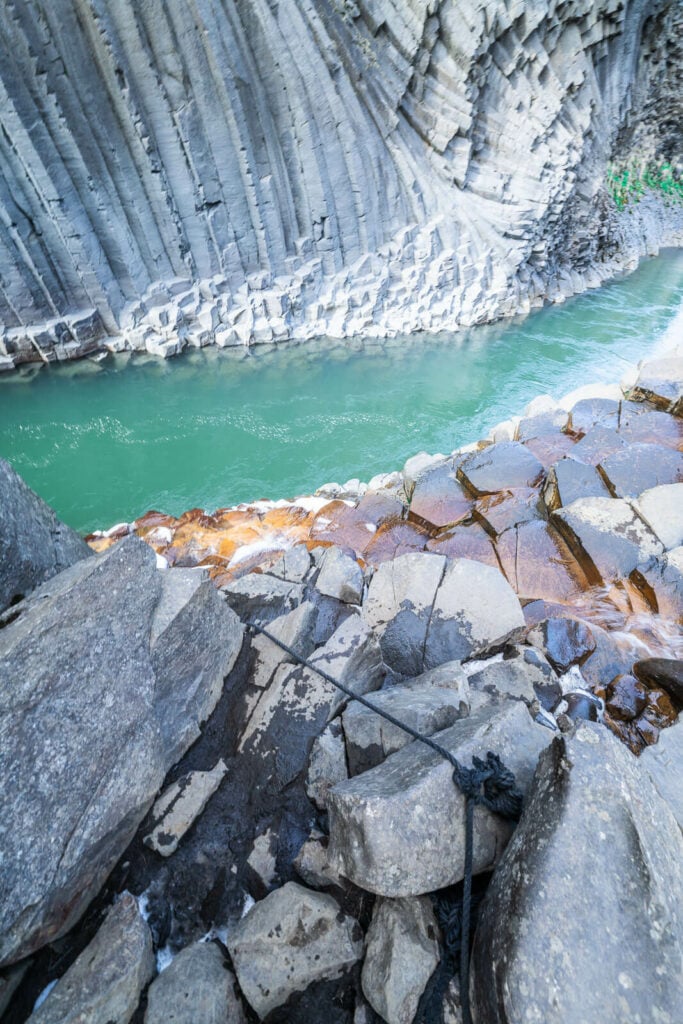
The steepish descent into the Canyon
A bit of a fun fact; in case you don’t know, the Stuðlagil Canyon was only recently discovered. that happened in 2007, to be precise. When the Kárahnjúkavirkjun hydroelectric plant was built and started its operation, the Jökla River’s water levels decreased, so the Canyon was discovered.
One has to wonder: how many gems are still hidden under the Icelandic rivers?
Going to Iceland? Blue Car Rental Discount!
As a reader of The Photo Hikes, you get a 5% discount on your car rental when booking with Blue Car Rental through this website. The discount will be automatically applied to the booking through the following link
Table of Contents
Overview of the Hikes & Map
As mentioned we have two options here, the East and the Westside. However, you have two options on the East side too.
On the East side, you have two parking areas. One before the bridge across the river, and a second one after. If you can drive to the second parking area on the west side, you will save about 30 minutes of walking each way. More details are in the next section.
The “east” data below refers to the second parking.
| Max Altitude | 346 m |
|---|---|
| Distance | 0.6KM (west) / 5.69KM (east) |
| Elevation gain | 50 m ↑ / 50 m ↓ (west) 130 m ↑ / 130 m ↓ (east) |
| Hike time | 00:15 (west) / 01:00 (east) Hours |
| Hike Difficulty | Easy |
Here are the hiking maps for both Stuðlagil’s east and west trails. You can download the GPS track for free should you want to.
Stuðlagil Canyon Hiking Trail East Side Map
Stuðlagil Canyon Hiking Trail West Side Map
How to get to the Stuðlagil Canyon and Parking
Studlagil is located in the Eastern part of the country and can be accessed via a detour from the Ring Road. The drive takes about 20/30 minutes and is partly on gravel. From Egilsstaðir, it will take about 40/50 minutes of driving time to get to the access road. From Myvatn, the drive takes about 1 hour and 20 minutes.
- Driving Directions: as you approach the access road, formally named Jökuldalsvegu, you should see a road sign pointing to ” Stuðlagil”, which marks the access road. The road follows the river upstream until it reaches to crossroads for the West and east sides. Here the road is a bit confusing. The road sign will tell you to go to the West Side like nothing exists on the other side. If you want to go to the East side, turn to your left down the access road and into the first parking area. From here you can also continue to the second parking area on the East side. The drive is less than ten minutes. The road is very rough but doable in a 2WD passenger car. Some potholes are very deep so practice care. I’d recommend avoiding this option in a 2WD car if it’s been raining heavily.
- Parking: you have one parking option on the West side and two on the East side. On the West side, you’ll find a nice, large parking area with some (paid) facilities, like covered toilets, automats, and sinks where you can refill water bottles for free. On the East side, the first parking area is located right before the bridge crossing the river. You can leave the car here, before the bridge, if you do not want to drive further. Otherwise, you can continue to the second parking area (recommended) across the bridge if the road is open.
- Public Transport: no good transportation options to either the east or the west sides.
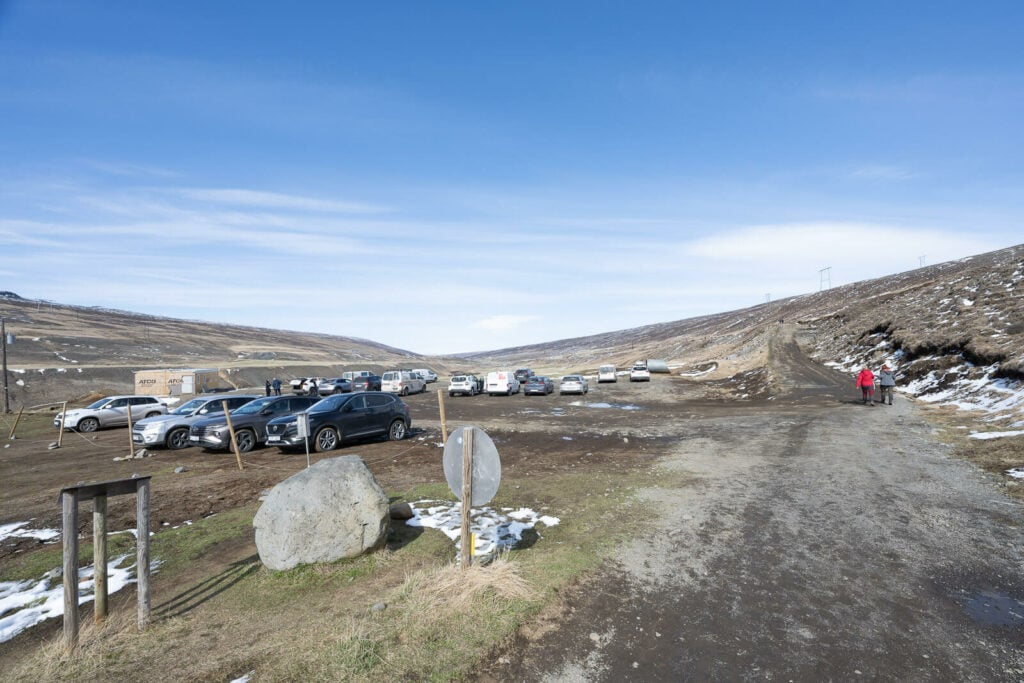
The second parking area on the east side, the one closer to the Canyon.
The Stuðlagil Canyon Hike East and West Trails
On my Studlagil Canyon hike, I visited both the east and west sides as I was curious to see the difference for myself. First, I visited the West side, and then I visited the East side. Therefore I’ll report on them in this order.
Stuðlagil West
The hike on the West side essentially is a short walk down a long metal staircase. A total of 245 steps. The staircase ends on a rather small platform looking over the canyon.
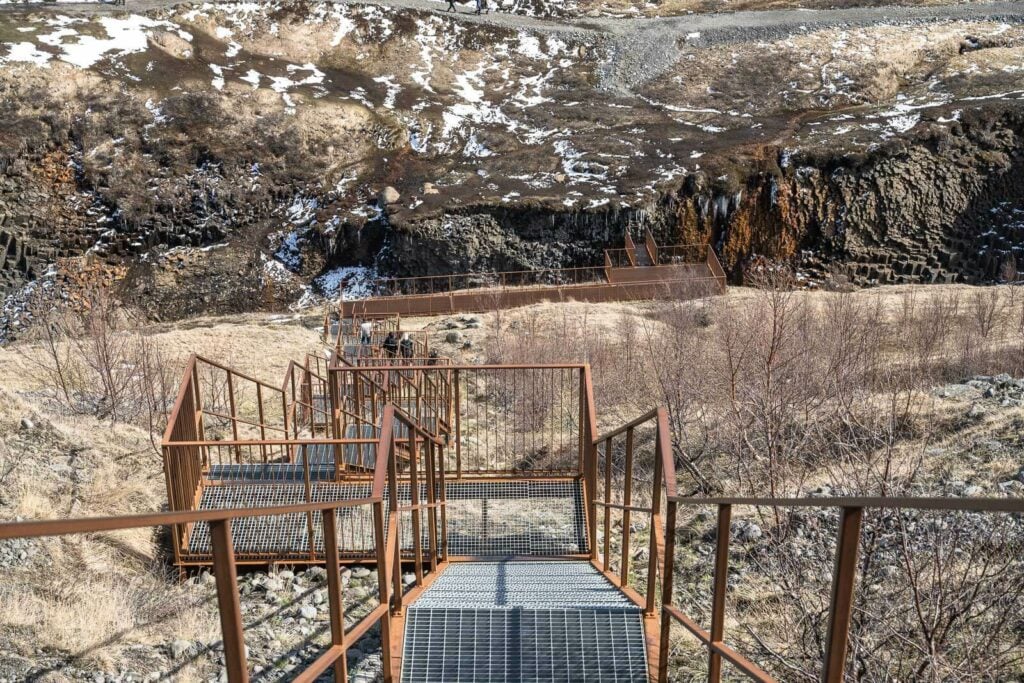
The metal staircase leading down to the Observation deck on the West side
You do get some decent views of the basalt columns, but unfortunately, the main part of the canyon is out of sight and just behind the bend of the river. It’s still a nice view, sure, but the main part of the canyon is completely out of sight.
There is another small lookout right next to the parking lot, but that does not provide much better views than the observation deck down in the Stuðlagil Canyon. All in all, you can probably visit the West side in 20/30 minutes.
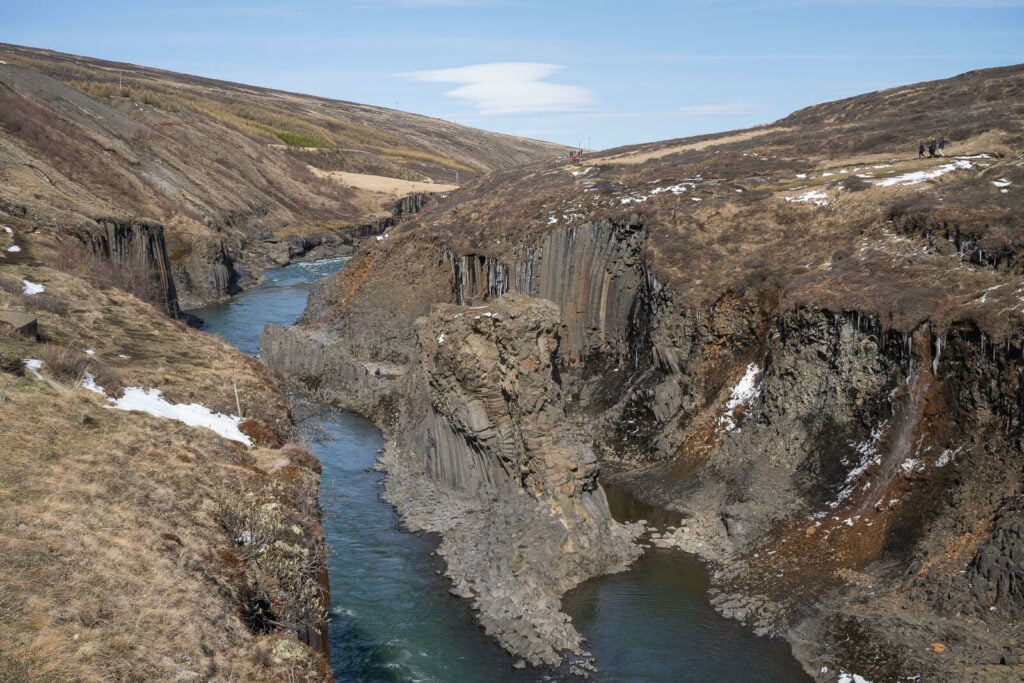
View from the West side.
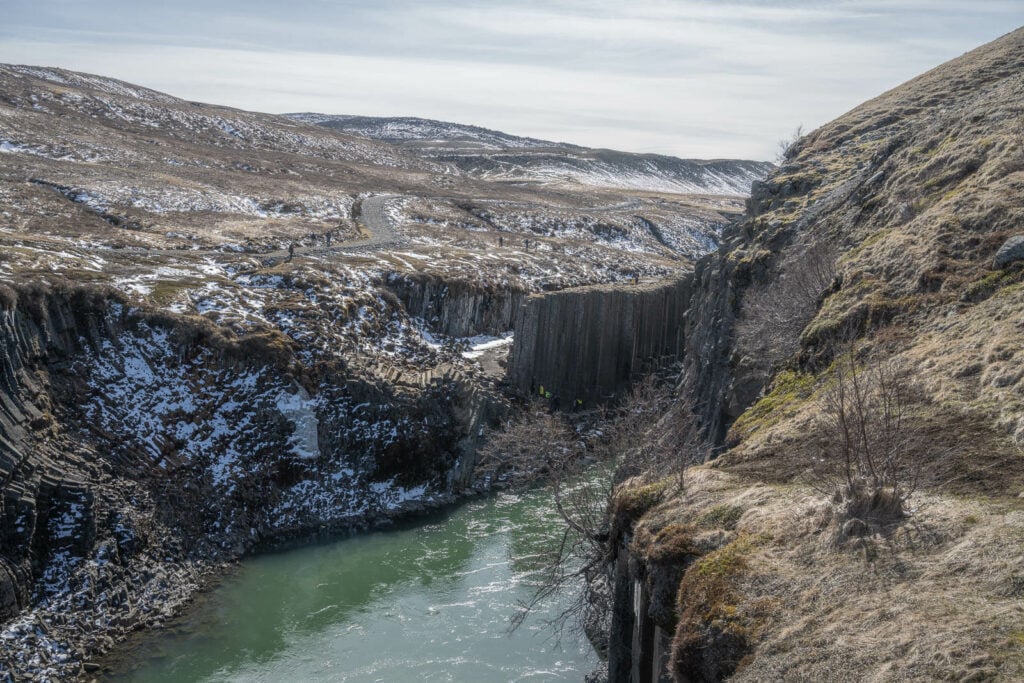
Same view from the platform on the West side, in the opposite direction. That’s where part of the main Canyon can be seen.
Stuðlagil East
Visiting the East side will take a couple of hours instead. The hike is pretty much flat apart from some short and gentle uphill and downhill sections. If you are walking from the first parking area before the bridge, you will have to walk the dirt road that leads to the second parking area.
From there, the road continues further until it reaches the side of the canyon, giving you the first glimpses into the waters below. First, you’ll probably notice the platform on the West side, then the layer of basalt columns in the middle of the canyon, the one everyone stands on top of.
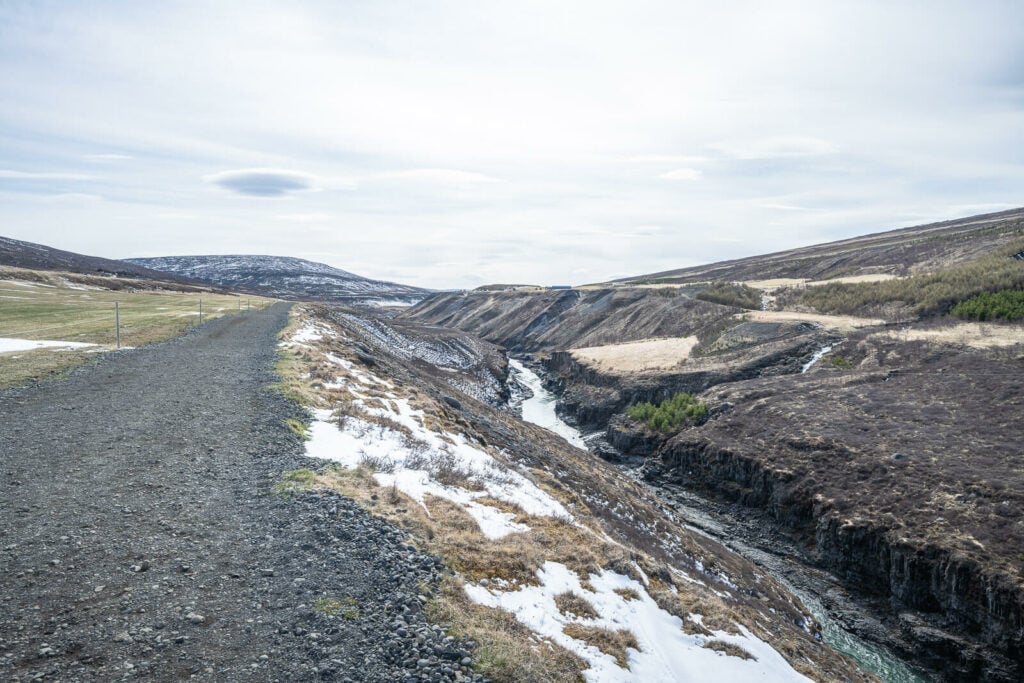
The initial part of the West trail, after the second parking area.
Getting to the top of the basalt columns on the West side of the Stuðlagil Canyon is very easy. It’s just a normal walk on flat ground. However it can be muddy and slippery and some of the columns do feel a little sketchy, to be honest.
Cracks appear here and there and there’s a lot of dirt which could make the surface slippery
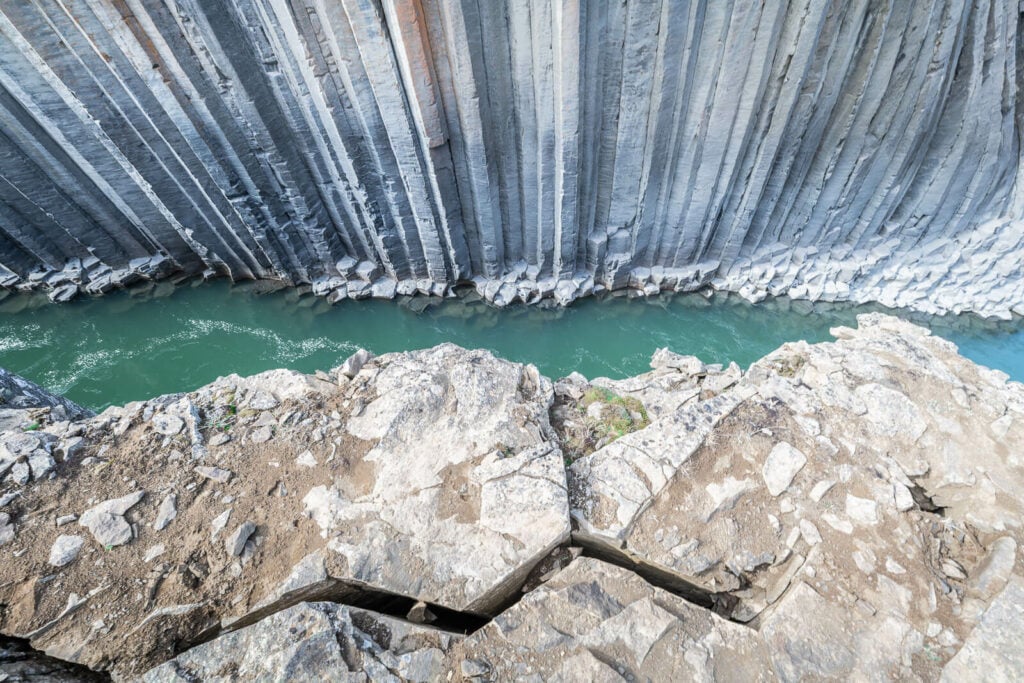
Perfectly straight cracks in between columns of Basalt.

Some of the areas on top of the basalt columns not looking exactly safe.
Descending into the canyon is not as easy but not impossible either.
First of all, there can be a lot of water dripping from the columns and onto the trail. This makes it slippery. Second, there are some chains/cords tethered to the columns you can and should help yourself with.
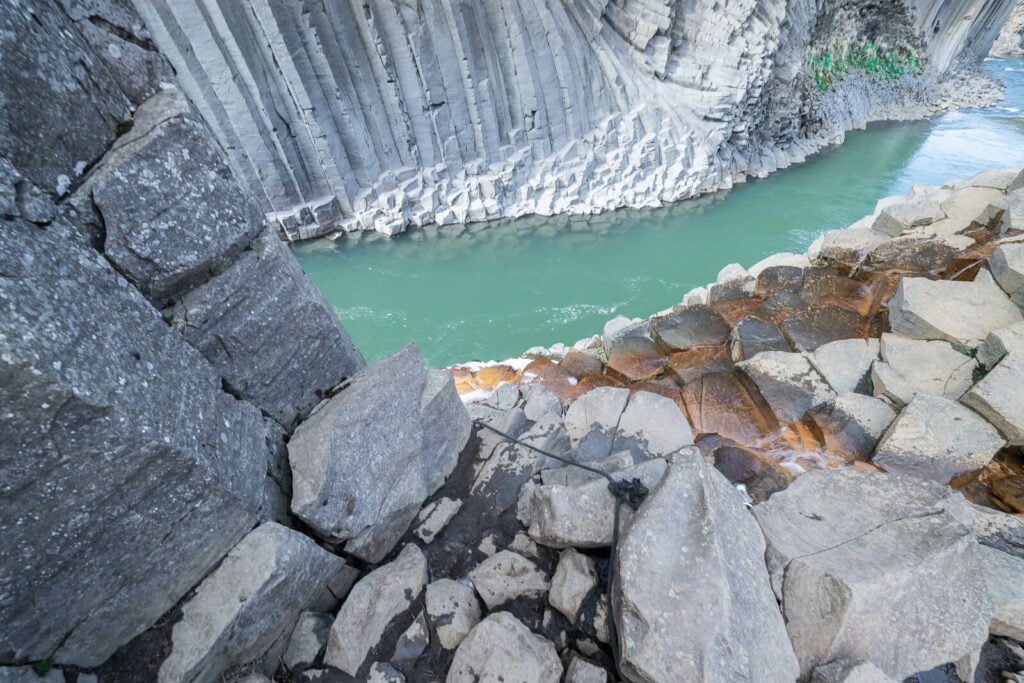
Access point to the Canyon. Do use the rope.
So it’s a little trickier to get down there but nothing challenging if you are used to light scrambling up and down mountains.
Some other areas may or may not be accessible, depending on weather/terrain conditions or water levels.
Lastly, If you are thinking about bathing in the Studlagil Canyon, think again. There are strong currents in the river and even falling into it can have extremely serious outcomes.
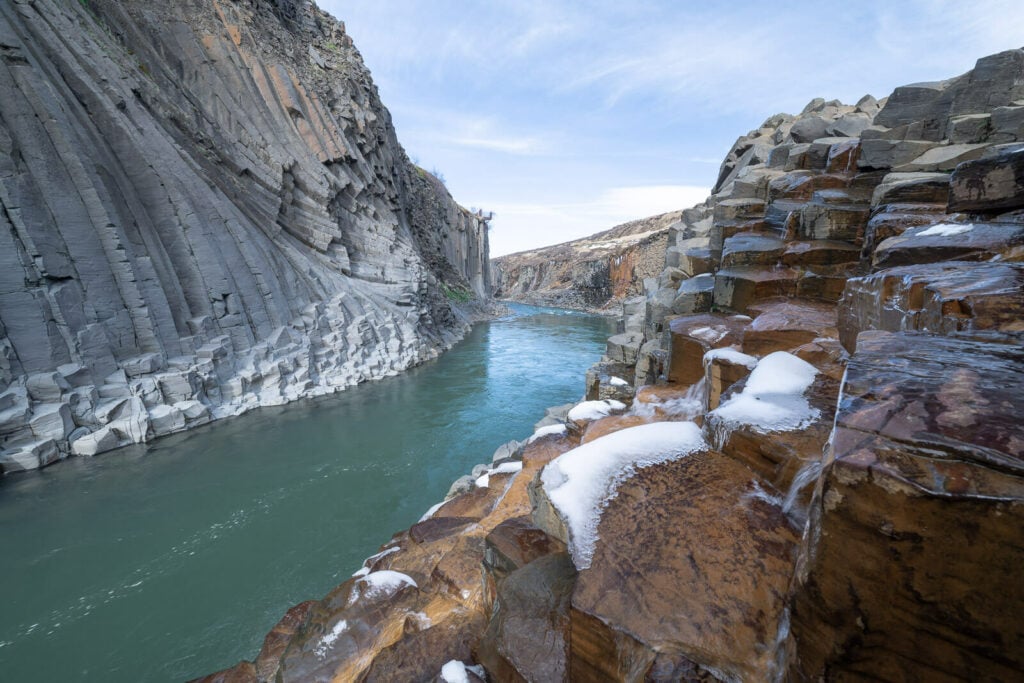
From inside the Canyon
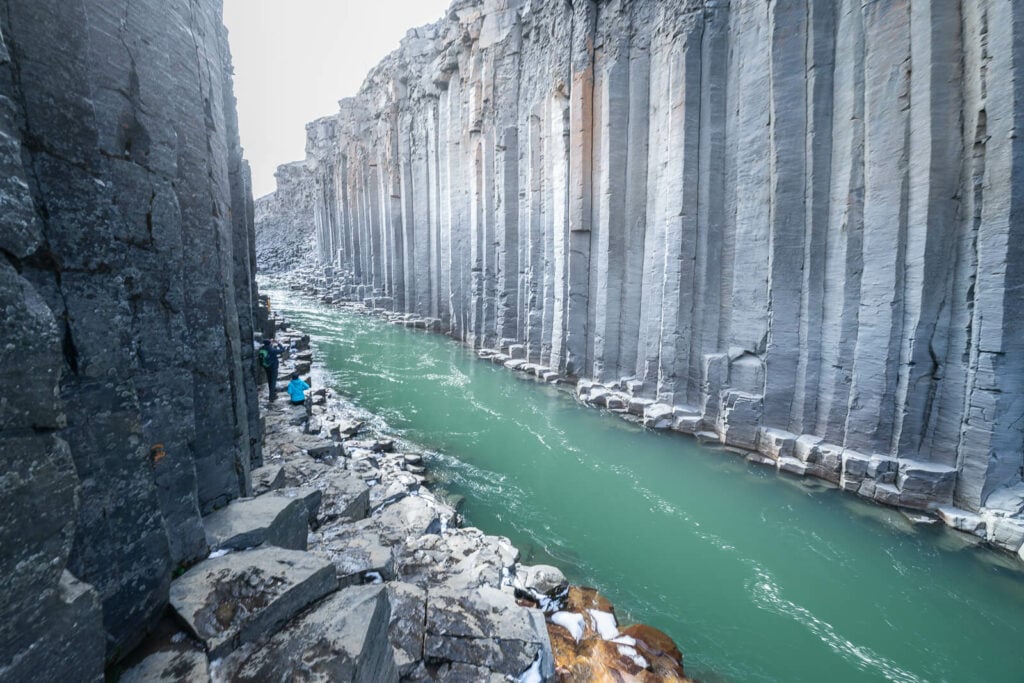
Water level permitting you can walk quite a bit into the Canyon.
The Stuðlagil Canyon Hike Photos and Photography Tips
First off, the color of the water. The best time to catch the water’s green/deep blue color is between March and July. After that time, due to glacial meltwater, the color will turn grey to brown.
This will also happen after a heavy rain. Even if it rained heavily upstream and not here, the flood water will be flowing downstream, raising the water leaves apart from changing its color. You will already be able to guess the color of the water before heading there; just look at the color of the water when turning into the road to Studlagil from the Ring Road. it’s the same river.
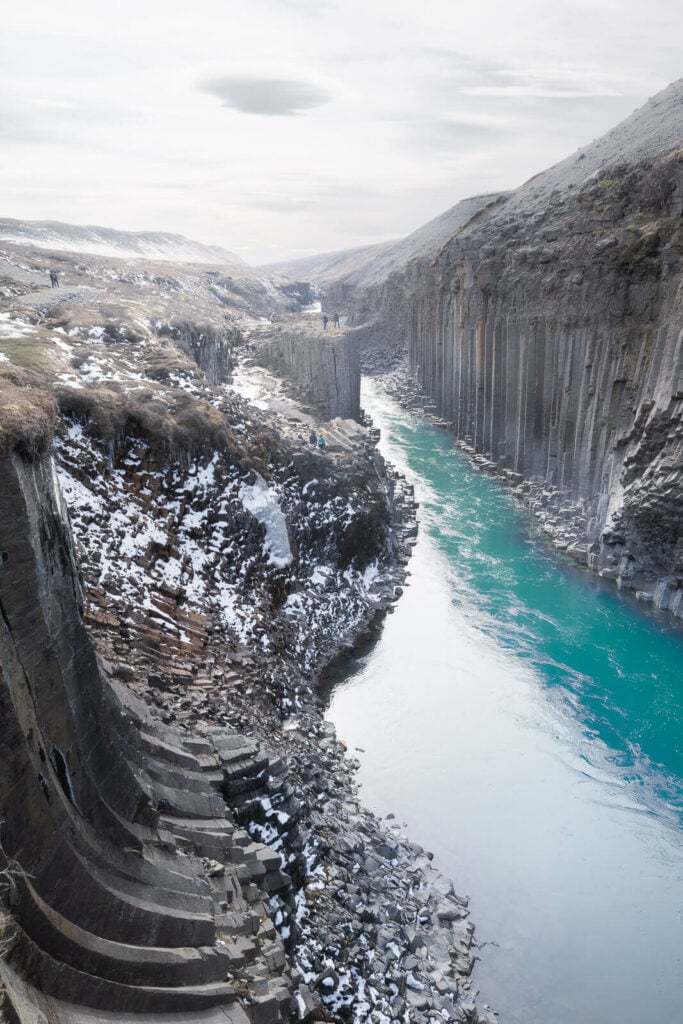
The columns in the middle of the Canyon are actually easy to access
Now about compositions; this is probably one of the most photographed places in Iceland in the last few years and we have all seen the classic shot of someone standing alone on the columns wearing a yellow or red raincoat.
Next to the raincoat people shots, the other classic compositions are from inside the Canyon, in between the two rows of basalt columns. Space here is limited and keep in mind there’s water with a strong current on one side.
If you are doing this for photography it’s a bit tricky to get the right light. The reason why I think it’s a location for a cloudy day, mostly. However, my idea was to be here to catch the light entering the Canyon, in the late afternoon. That proved a bit hard to manage even bracketing the exposure. The diffused glow was a bit too much and took all the details in the clouds away.
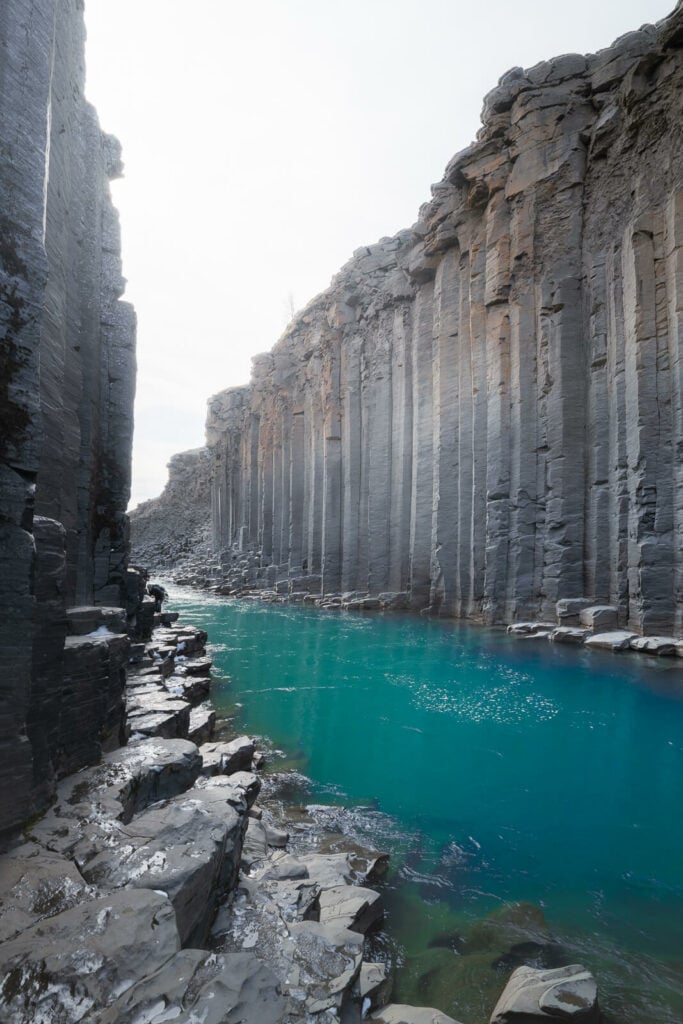

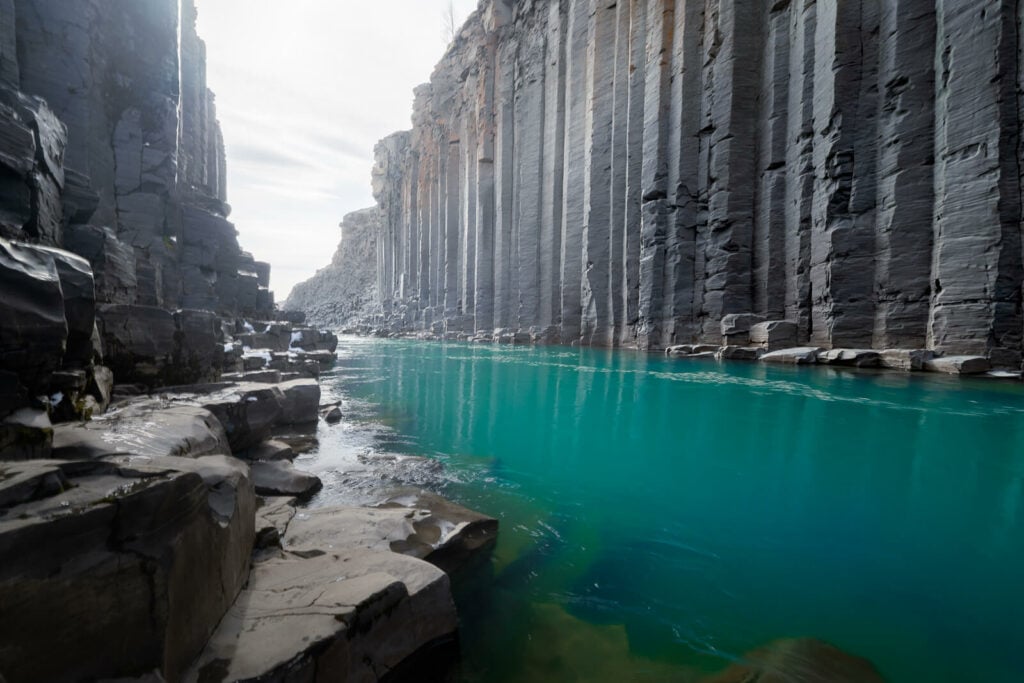
Lastly, Assuming you comply with local regulations you can fly a drone here – be careful though, as there will likely be quite a few others around. I bet you can get some pretty incredible footage and shots.
Studlafoss, an often overlooked beautiful waterfall
One great bonus this location has is a waterfall: Stuðlafoss. Located right after the second parking area on the east side, Stuðlafoss. It’s a beautiful waterfall framed by basalt columns. Most of the passers-by at this location somehow did not even glance at it, but I’d recommend at least a quick stop.
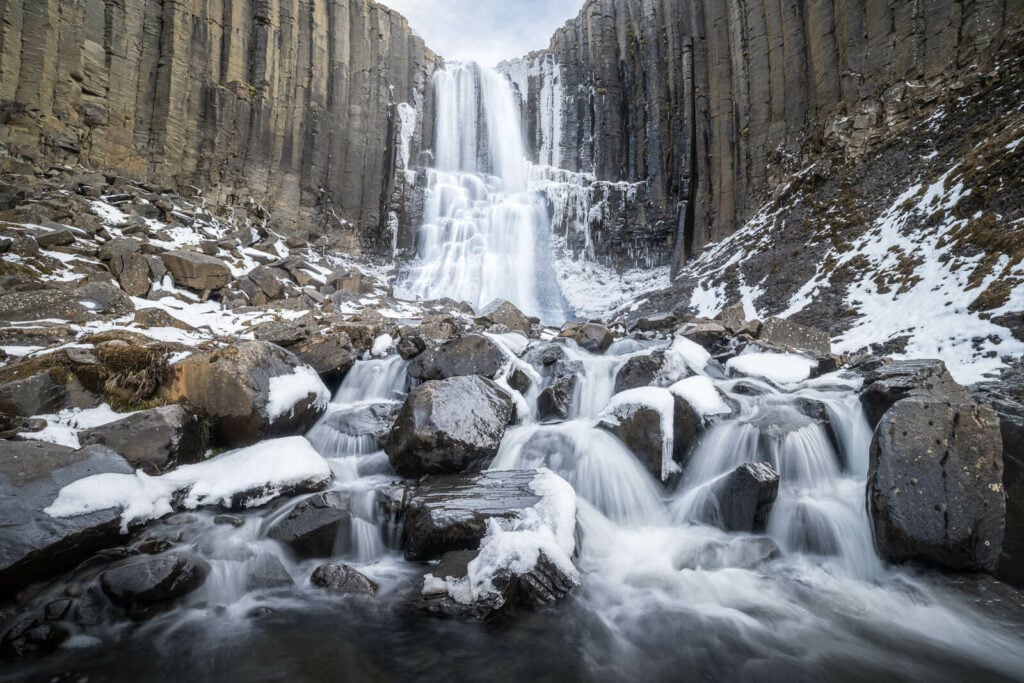
Stuðlafoss
Where to stay
If you have a van, you may stay at the parking/camping area (paid) on the West side – it also has some basic facilities like a sink and (paid) toilets. So yes, you would have to pay both for the stay and the toilets separately.
There also are a couple of guesthouses or huts in the area like the Studlagil Canyon Country Home. Staying here would make if you are planning to catch the sunset or the northern lights, for example.
Other than that, there is not much in the immediate vicinity so in most cases, it makes sense to just visit as a stop in your itinerary.
Additional Resources
- If you are traveling through the east of Iceland, you may want to visit some beautiful waterfalls in the area like Klifbrekkufossar or Flögufoss.
- This stop was part of an eight-day campervan trip across Iceland – check it out for more travel inspiration.
- Check out more Photo Hikes in Iceland here.


Great article. I do like to point out that it seems in the 2nd part of article explaining “The Stuðlagil Canyon Hike East and West Trails”, you seemed to have the content on East and West reversed….. For example you wrote “…One great bonus this location has is a waterfall: Stuðlafoss. Located right after the second parking area on the west side…”, but isn’t that the East side is where 2 parking lots are located?
Yes, Thanks Eric for pointing that out! I have now corrected it. I did mix the two sides up when writing the post first. I thought I had swapped them all but I guess I had typo blindness after rereading it a few times.
Great article giving all the details we could ask for. Thanks for your time and effort!
Glad it helped!