The Grænihryggur-Green Ridge Hike – Iceland
The Grænihryggur-Green Ridge Hike passes through some magnificent landscapes and leads to one of the most unique formations in the Landmannalaugar area, Grænihryggur.
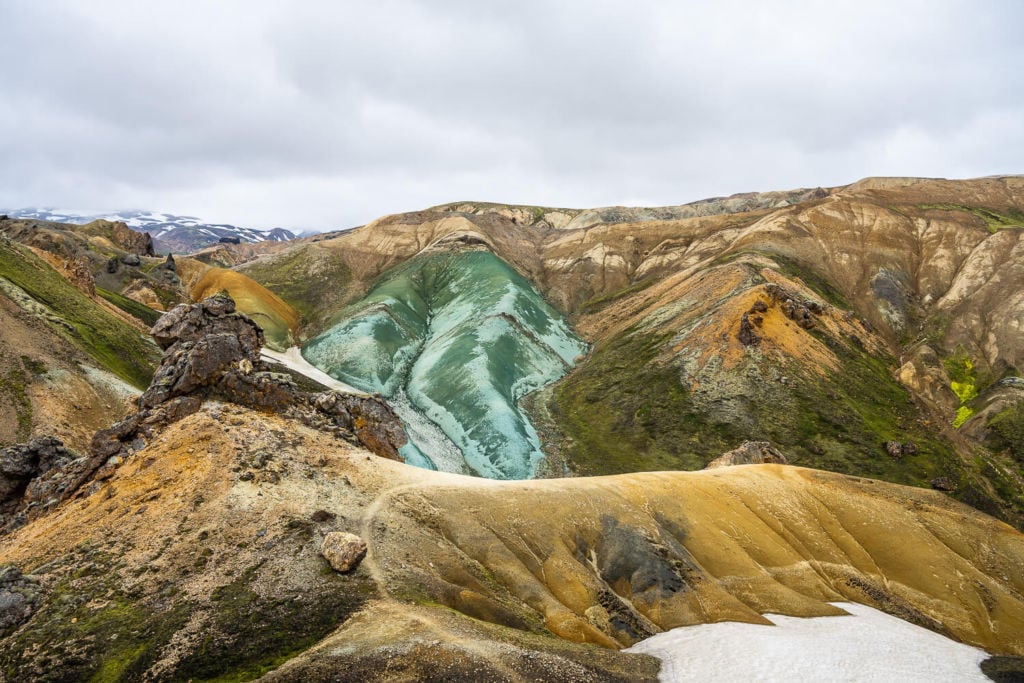
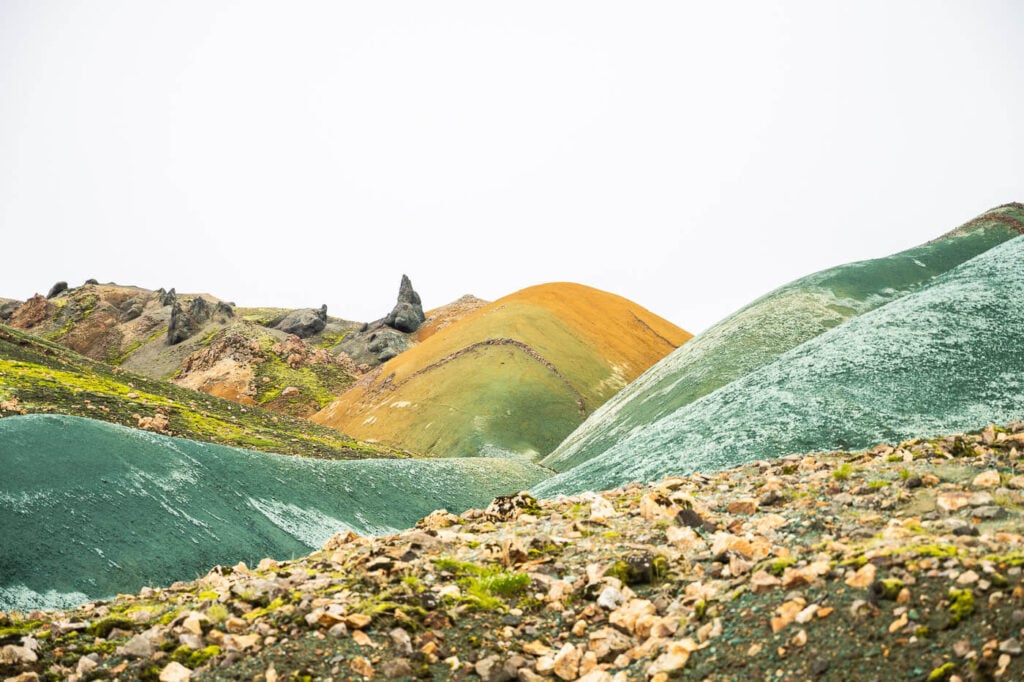
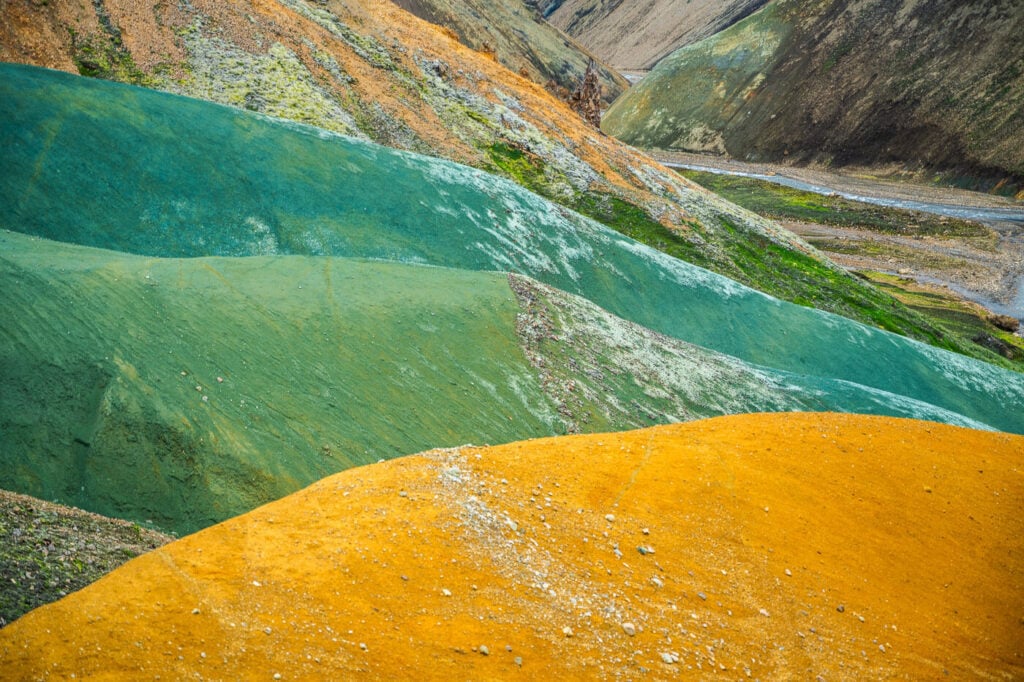
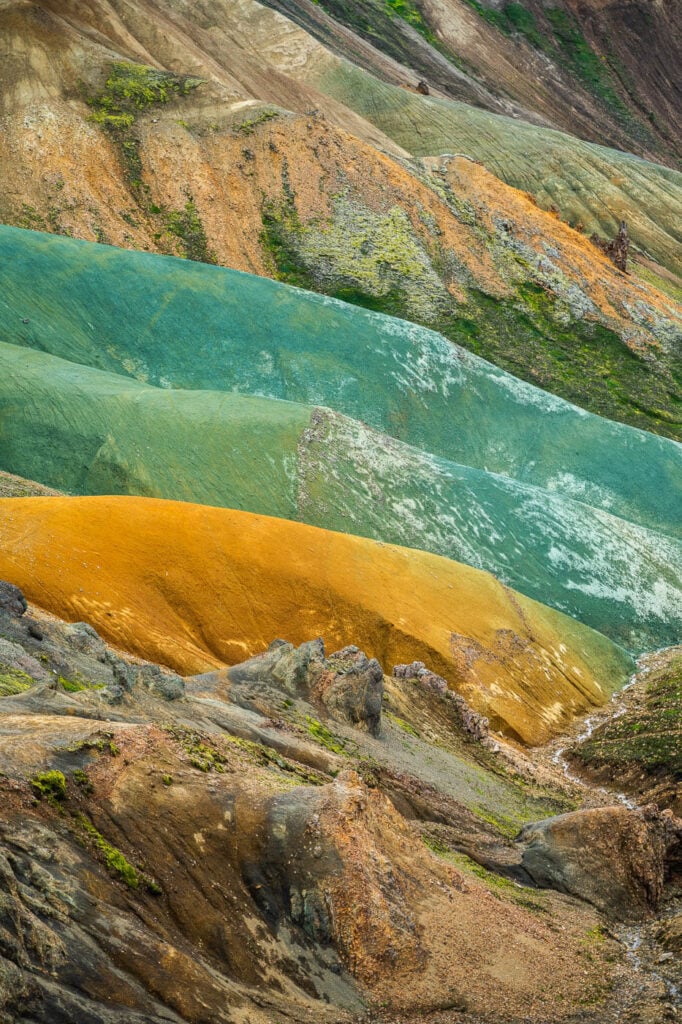
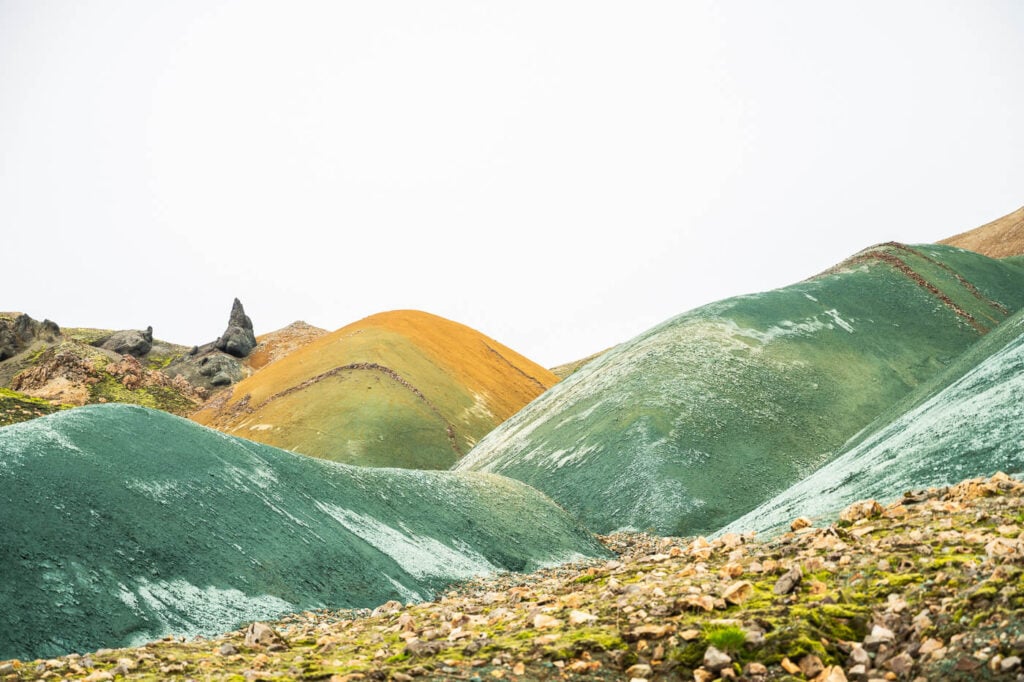
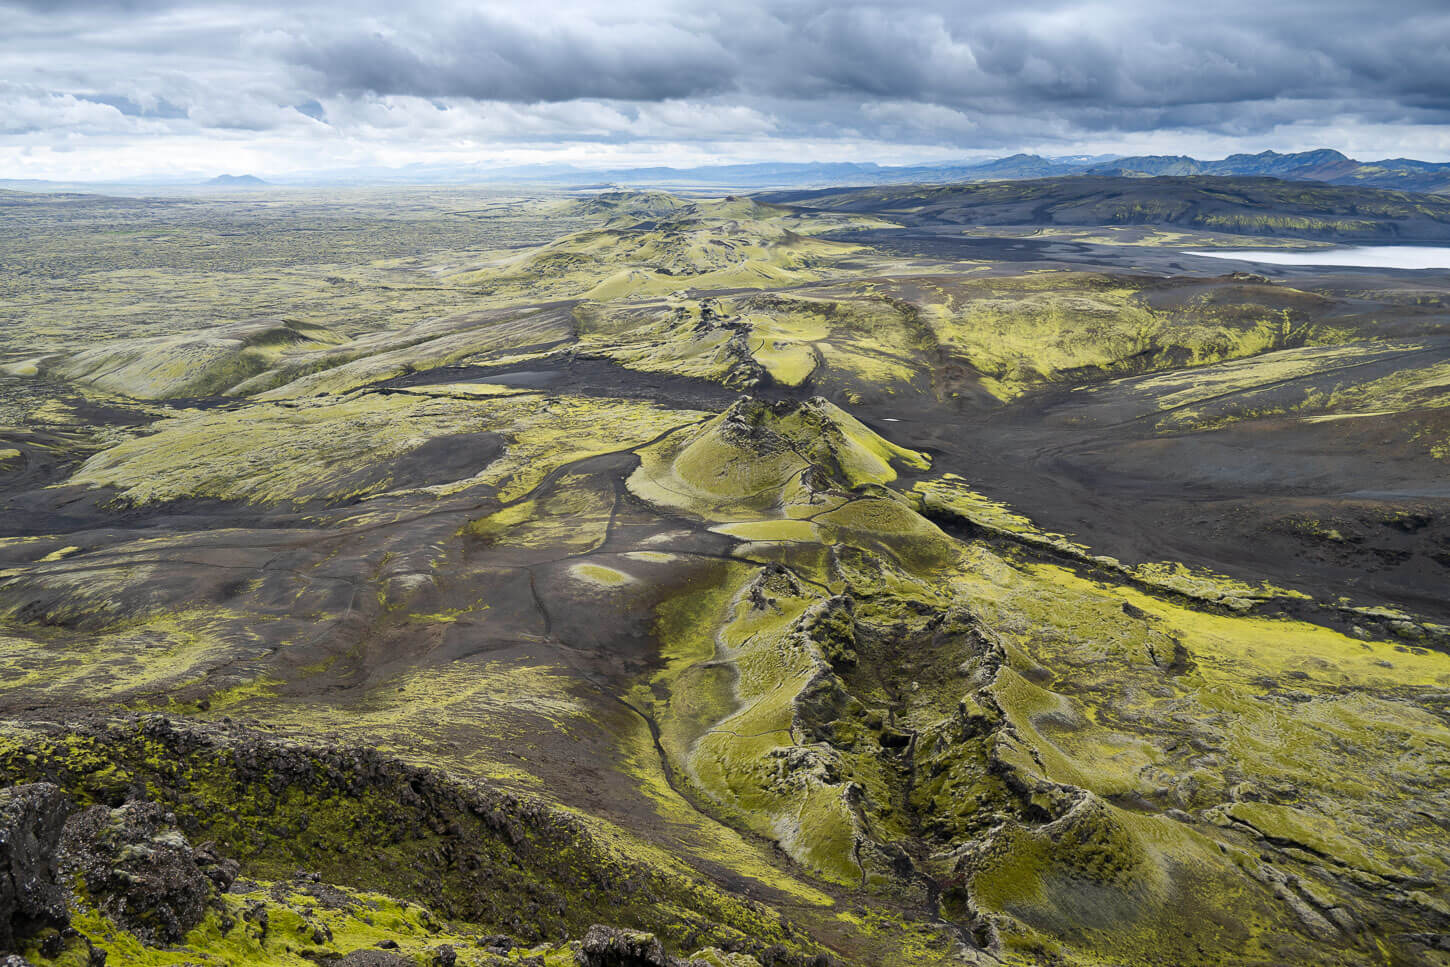
Not that there aren’t enough unique formations in Landmannalaugar, but Grænihryggur (or the green ridge, or green backbone) is one of the most striking and recognizable ones. Its intense Emerald green color, along with its shape, can’t be found elsewhere.
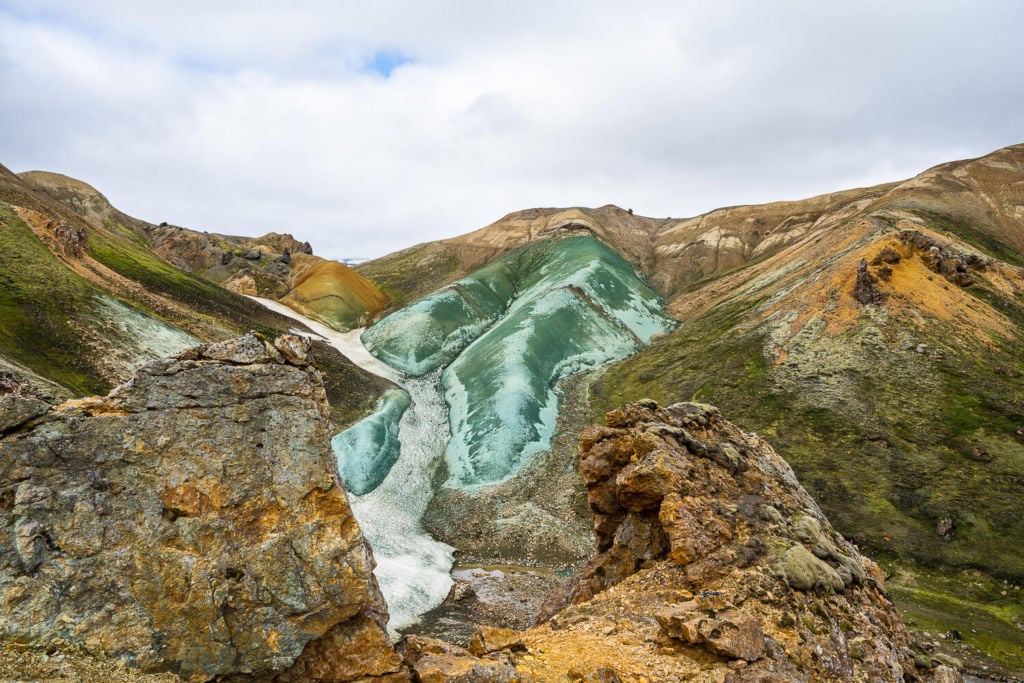
Grænihryggur.
Also, there are two main hiking trails. One trail is marked and the other is not. You can get to Grænihryggur via Halldórsgil, the marked and safer route. You can also get to Grænihryggur via Jökulgil, but that’s a much harder and potentially dangerous trail due to deeper river crossings and relatively exposed sections.
In each case, the trail passes through some very pristine and beautiful landscapes, and I’ll describe both. I also made a videos of each trail, and you’ll find them at the end of each trail description.
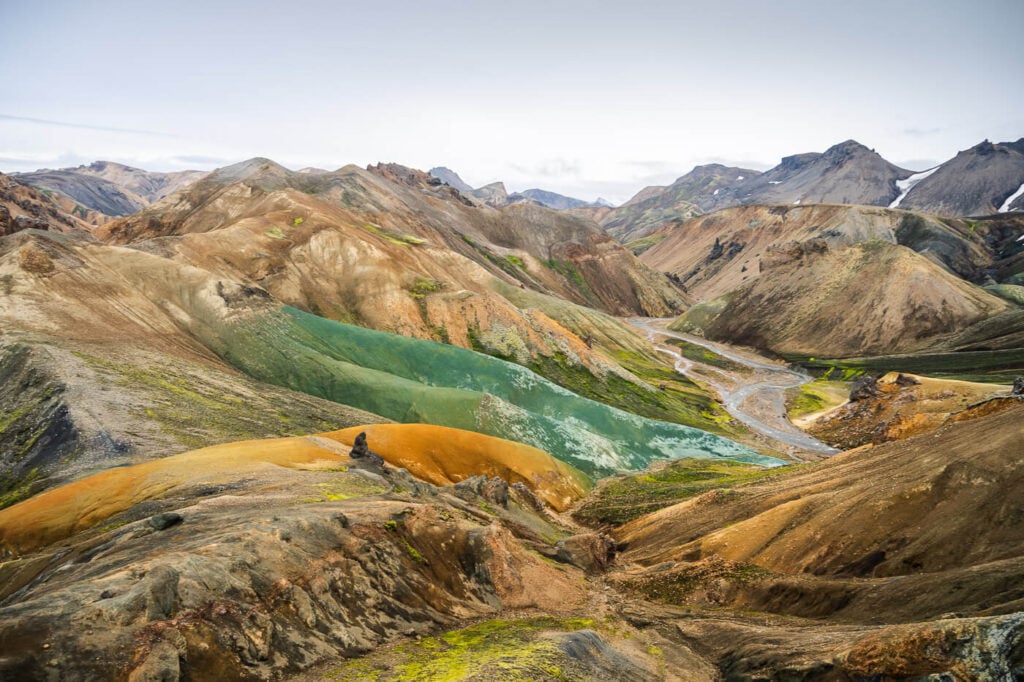
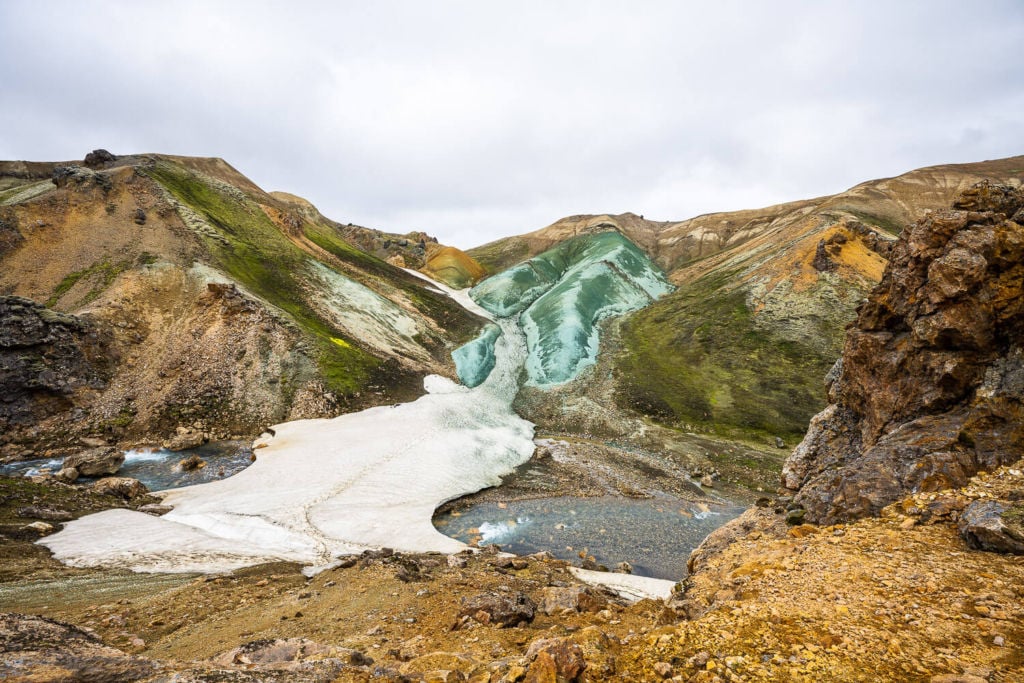
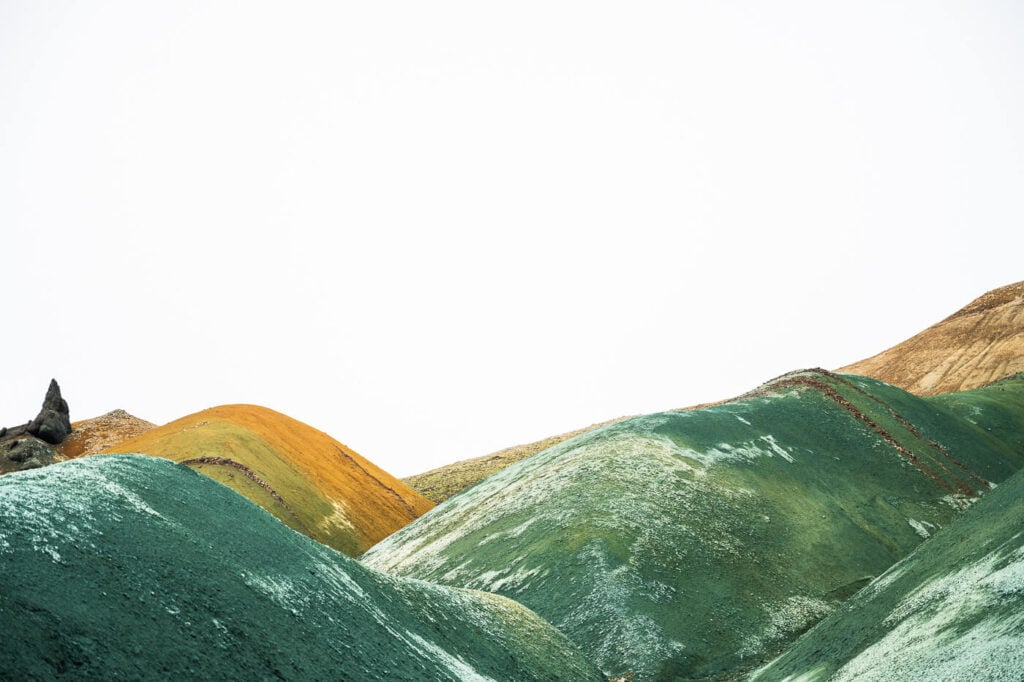
Another view of Grænihryggur.
Keep in mind both hikes are long and demanding, with some unsafe sections and river crossing. Local Adventure and Hiking guides also offer various tours to this location. If you are unfamiliar with the terrain or do not have the necessary equipment for this hike, I recommend joining one of those organized hikes.
Going to Iceland? Blue Car Rental Discount!
As a reader of The Photo Hikes, you get a 5% discount on your car rental when booking with Blue Car Rental through this website. The discount will be automatically applied to the booking through the following link
Table of Contents
Grænihryggur Hike via Halldórsgil
This is the easier of the two hikes, due to the trail being fully marked. The total elevation gain is less than 1,000m, and the rivers to cross are shallower and might be crossed without needing water shoes.
How to Get to the Grænihryggur-Halldórsgil Trailhead
This trailhead is not accessible from the Landmannalaugar camping ground. It is located along road f208 (GPS coordinate linked below), so a car suitable for f-roads is required
- How to get to the Halldórsgil Trailhead: Take Road 208 to Landmannalaugar (if you need more details on how to get there, check my other Landmannalaugar Guide), but instead of turning onto Road F-224, keep driving toward f208 south for another ten/fifteen minutes.
- Parking: The parking area is here: 63.985379, -18.967098. Be aware that if you are coming from the F-208 south, you will need to cross several rivers in your car. No river crossings from the north side instead. You do not need a parking reservation for this spot, because it is not located by the campground (which requires booking when arriving between 9 am and 4 pm).
- Hike Difficulty: Hard, expert hikers only. This hike includes shallow river crossings. There may also be snow bridges above rivers to cross, early in the season. This was the case when I went on this hike in late July.
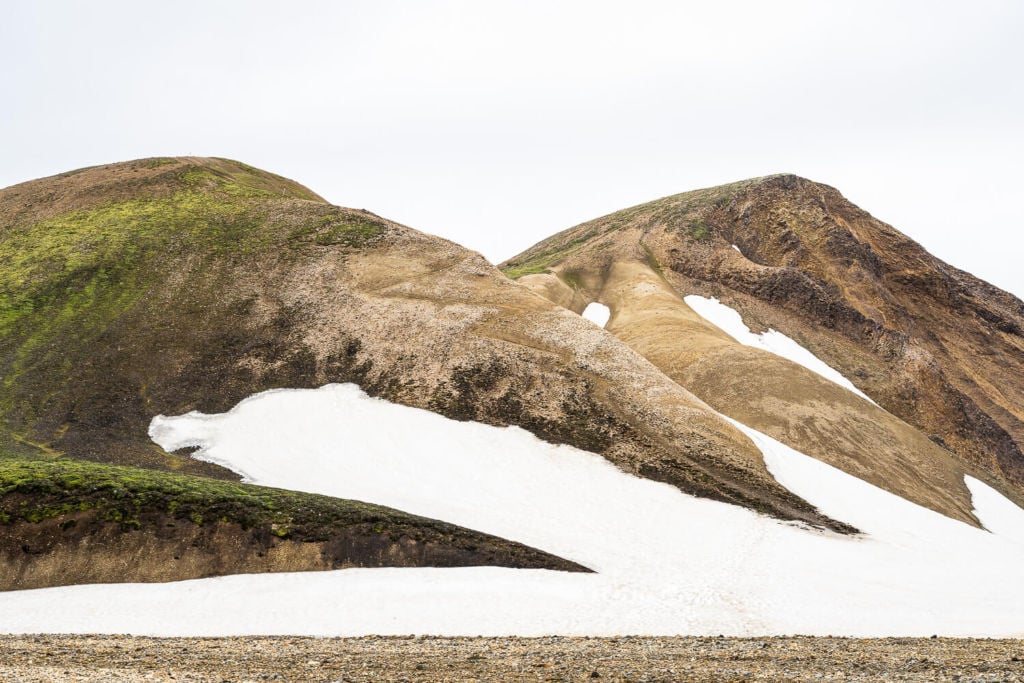
Halldorsgil Trailhead.
Here is the map of the Hike, with a downloadable GPX file:
Grænihryggur-Green Ridge Hiking Trail via Halldorsgil
| Max Altitude | 815 m |
|---|---|
| Distance | 16.8KM |
| Elevation gain | 820m ↑ / 820m ↓ |
| Hike time | 05:00/ 06:30 Hours |
| Hike Difficulty | Hard |
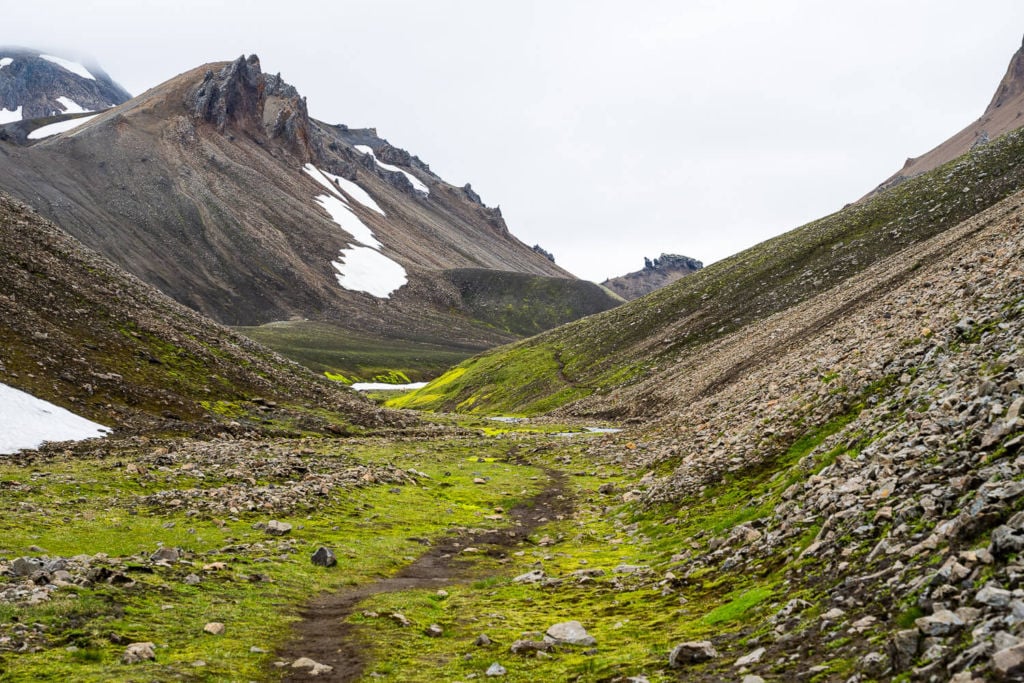
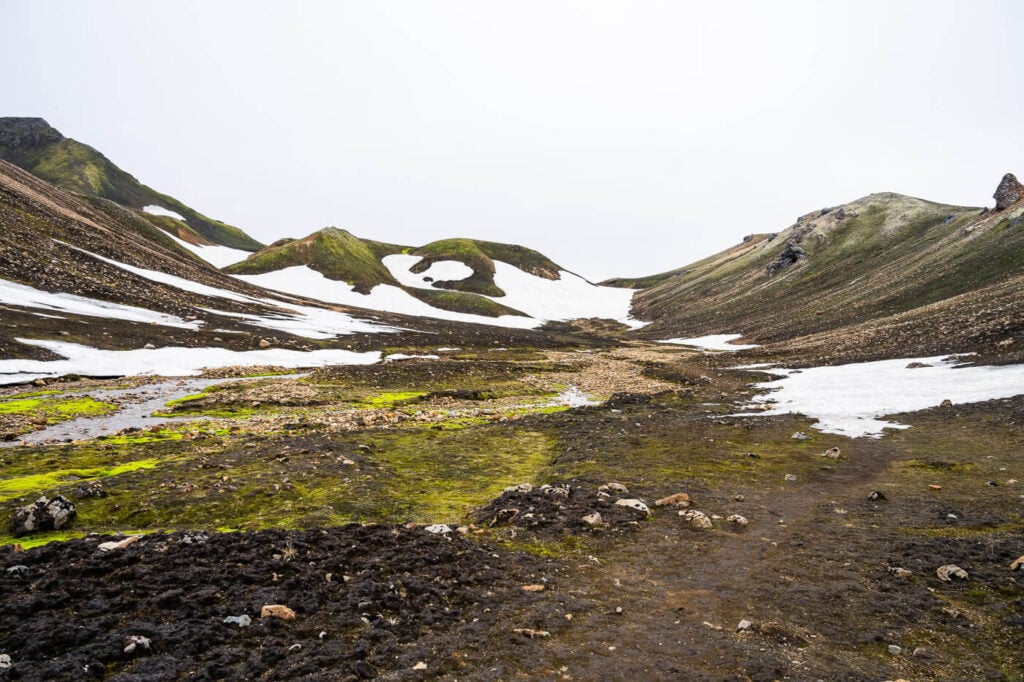
For the first hour or so, the trail will follow the central part of a small Halldórsgil Canyon. This area is different from the usual, colorful Landmannalaugar mountains, but it is a beautiful area nonetheless. Plenty of interesting rock formations and beautiful, raw landscapes along the way.
Beware there may be snow patches to cross. These will require carefulness since there’s a river under them in places. On the other hand, the trail in this section is mostly flat, so it does not require a big effort. the trail wil then gently gain elevation toward the end of the Halldórsgil canyon.
Section of the trail in the first part of the hike.
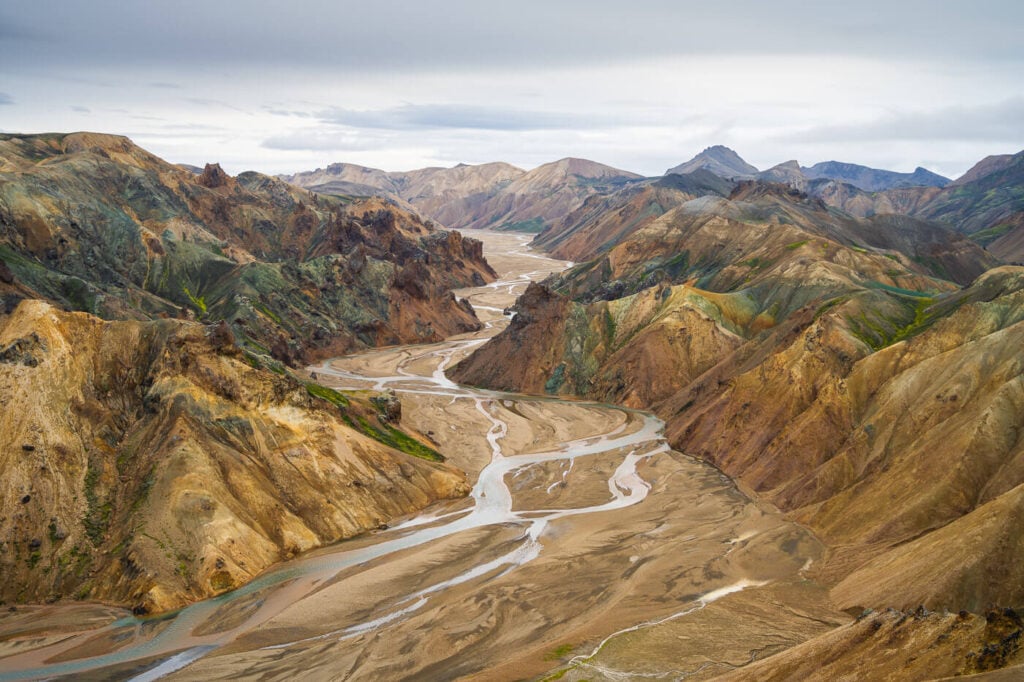
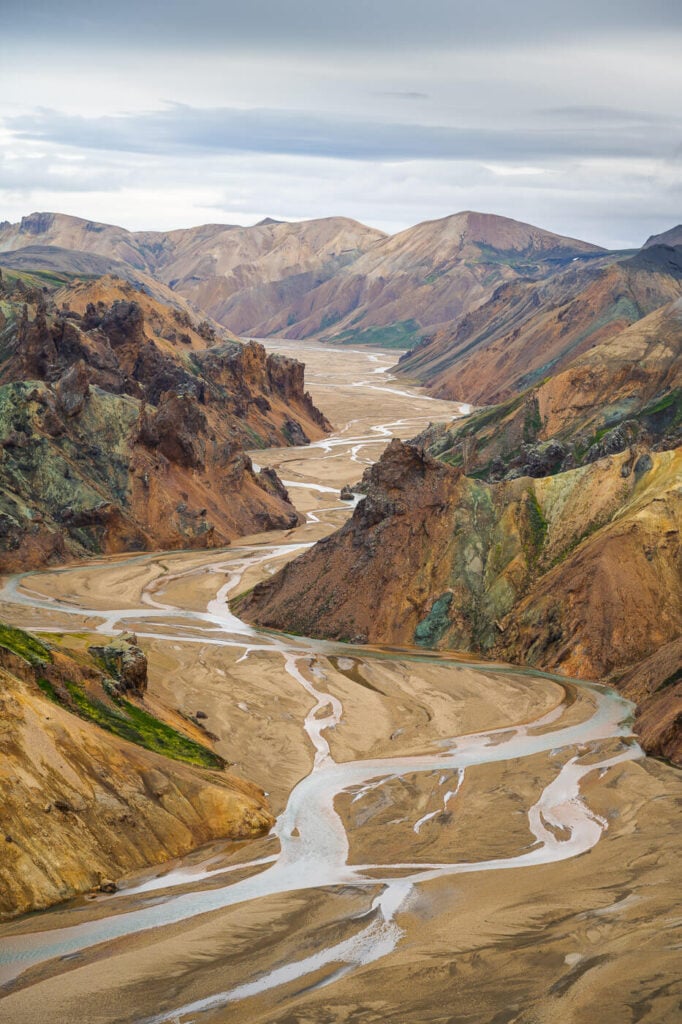
After a short climb at the end of the canyon, you will reach the first ridge. You’ll get the first great views over the more colorful Landmannalaugar mountains. Here, you’ll be looking at the southern part of the Jökulgil canyon. The trail then continues on the ridge for a bit, offering fantastic views of the nearby mountains.
From that ridge, you’ll then have to descend to the riverbed below. I’d recommend trekking poles here, as the ground is steep and soft.
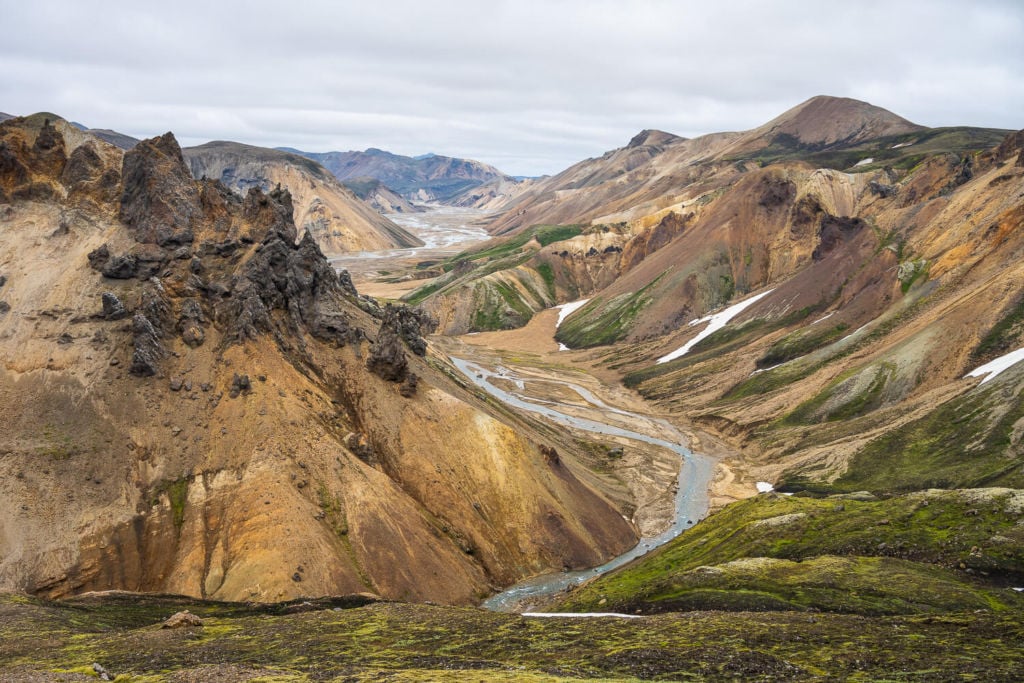
View from the First ridge, toward the southern part of the Jökulgil Canyon.

Once you get to the riverbed, you will have to negotiate some small river crossings. Depending on water levels, you may need to use wading shoes and help yourself with trekking poles. When I did this hike, water levels were relatively low, and I managed to cross the river in its shallowest parts with high-rise waterproof boots.
Once you cross the river, you will have to hike up to the next ridge, following the trail marks. Of course, more great views over the surrounding landscape. After about 15-20 minutes, you’lll have the first view of the green ridge from afar.
Grænihryggur in the distance, viewed from a section of the trail.
From there the trail continues on mostly flat grounds for another hour so. Then the trail will start going downhill. This is the last section of the trail, the one that leads down into and to the Grænihryggur viewpoint.
It is just a short walk from here, through some of the finest landscapes in Landmannalaugar.
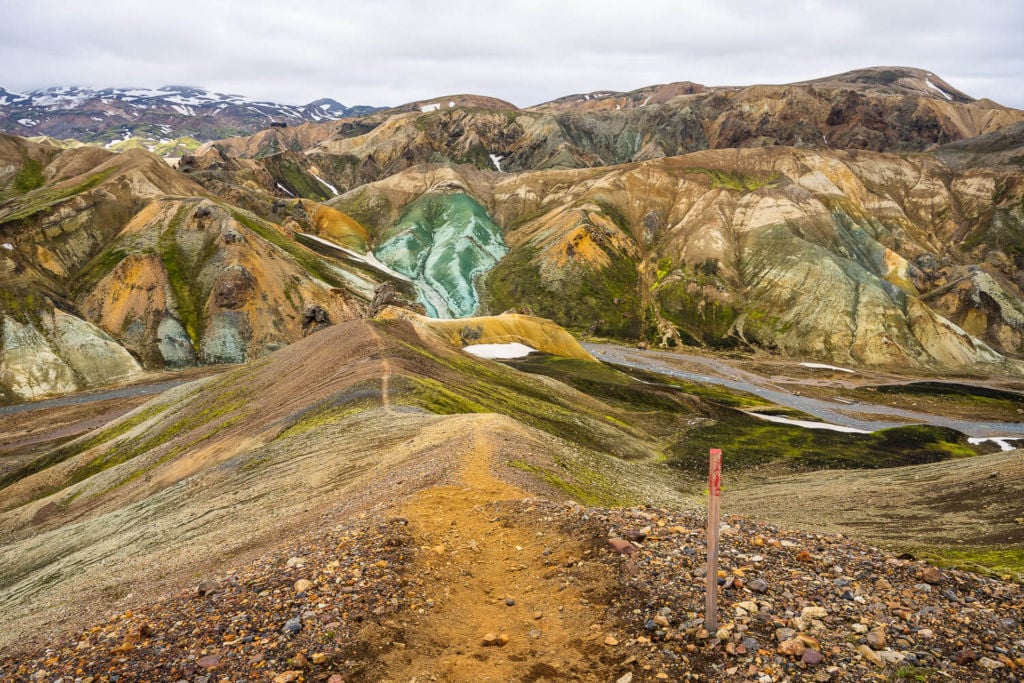
The last part of the trail.
Approaching the viewpoint.
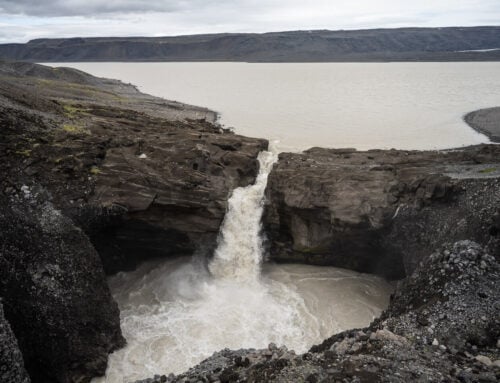
Once there, you can descend to the riverbed. Beware the river is deep and quite fast-flowing, so I do not recommend attempting to cross it. But anyway, here you have reached your destination!
Lastly, here is the video of this trail:
Grænihryggur-Green Ridge Hike via Jökulgil
This is the more difficult and harder of the two hikes. Partly unmarked trail. The total elevation gain is more than 1,000m, split across different uphill and downhill sections. River crossings are deeper. If you fall in, you are at serious risk of Hypothermia.
How to Get to the Grænihryggur-Jökulgil Trailhead
This trailhead is accessible from the Landmannalaugar camping ground. Still, a car suitable for F-roads is required, because to get to Landmannalaur you’d need to drive on road F-224. Keep in mind you will need to reserve your parking spot if you are planning to arrive between 8 AM and 3 PM.
- How to get to the Halldórsgil Trailhead: Take Road 208 to Landmannalaugar (if you need more details on how to get there, check my other Landmannalaugar Guide), turn onto Road F-224 at the intersection with Road F-208, and drive to the end of the road.
- Parking: I’d recommend parking before the river crossing. there is no [point risking drowking your car for an extra 200m on foot.
- Hike Difficulty: Very hard, expert hikers only. This hike includes deeper river crossings. Some moderately exposed sections. Physically, a very demanding hike.
Landmannalaugar campsite, tralhead of this hike.
Here is the map of the Hike:
The Grænihryggur-Green Ridge Hiking Trail via Jökulgil
| Max Altitude | 970 m |
|---|---|
| Distance | 22.4KM |
| Elevation gain | 1,260m ↑ / 1,260m ↓ |
| Hike time | 07:00/ 08:30 Hours |
| Hike Difficulty | Very Hard |
The trail starts at the Landmannalaugar campsite and initially follows the Skalli trail. This part of the trail takes about 1:30 hours to complete. It isn’t particularly difficult, but there is a lot of scree on the side of Skalli, which means slow going.
Keep following the trail until you reach the “Hattver” deviation. Hattver is a small valley next to the Jökulgil canyon.
Skalli, in the early morning light
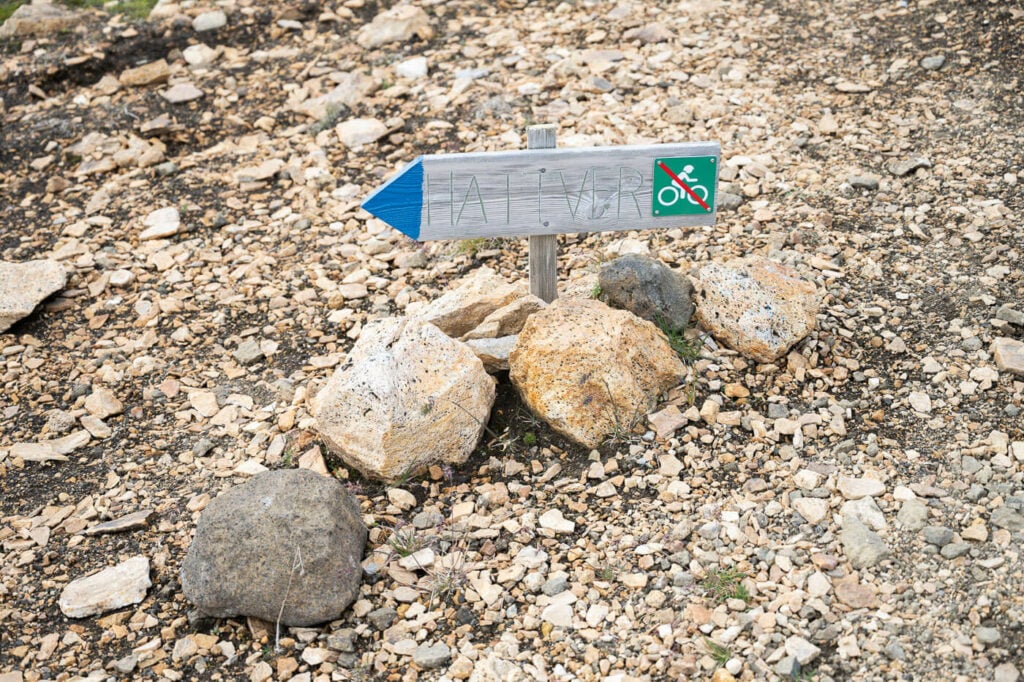
Follow the trail to Hattver.
This part of the trail descends toward the Uppgönguhryggur, before reaching the bottom of the Jökulgil canyon. That’s where the harder part of the trail begins.
First, you’ll have to walk the moderately exposed Uppgönguhryggur ridge, which leads down into the Canyon. Once in the canyon, you’ll have to wad two or three arms of the Jökulgil river. Warning: make sure you assess properly whether you can cross at all. Do not attempt without hiking poles if alone, you’ll fall in. If you have never crossed a river on foot, don’t even attempt this. Falling in will likely lead to hypothermia.

Uppgönguhryggur Ridge.
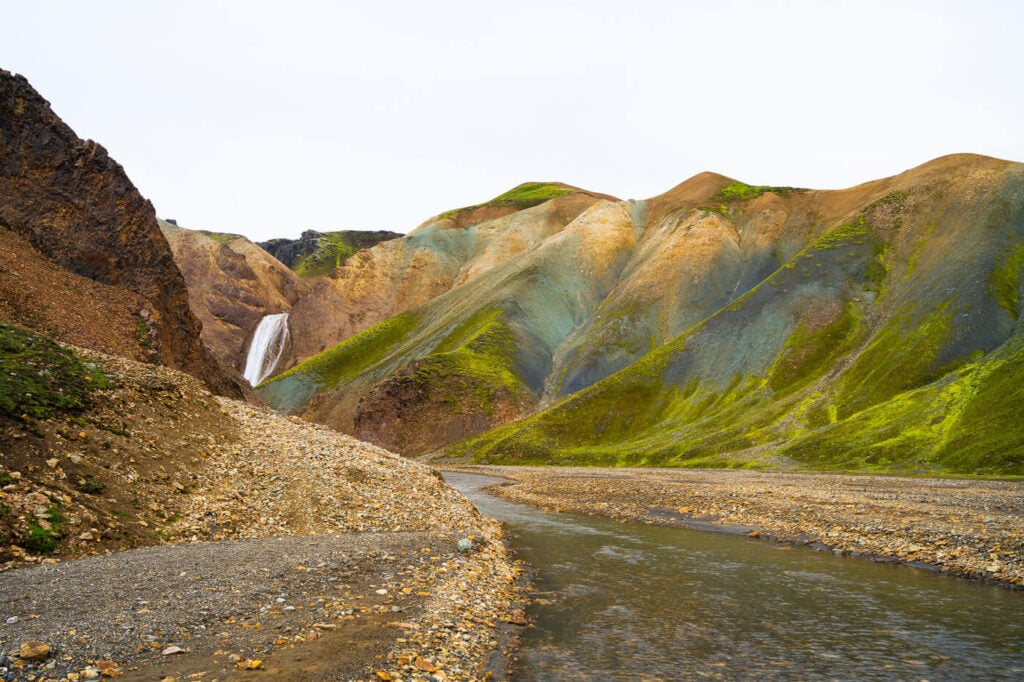
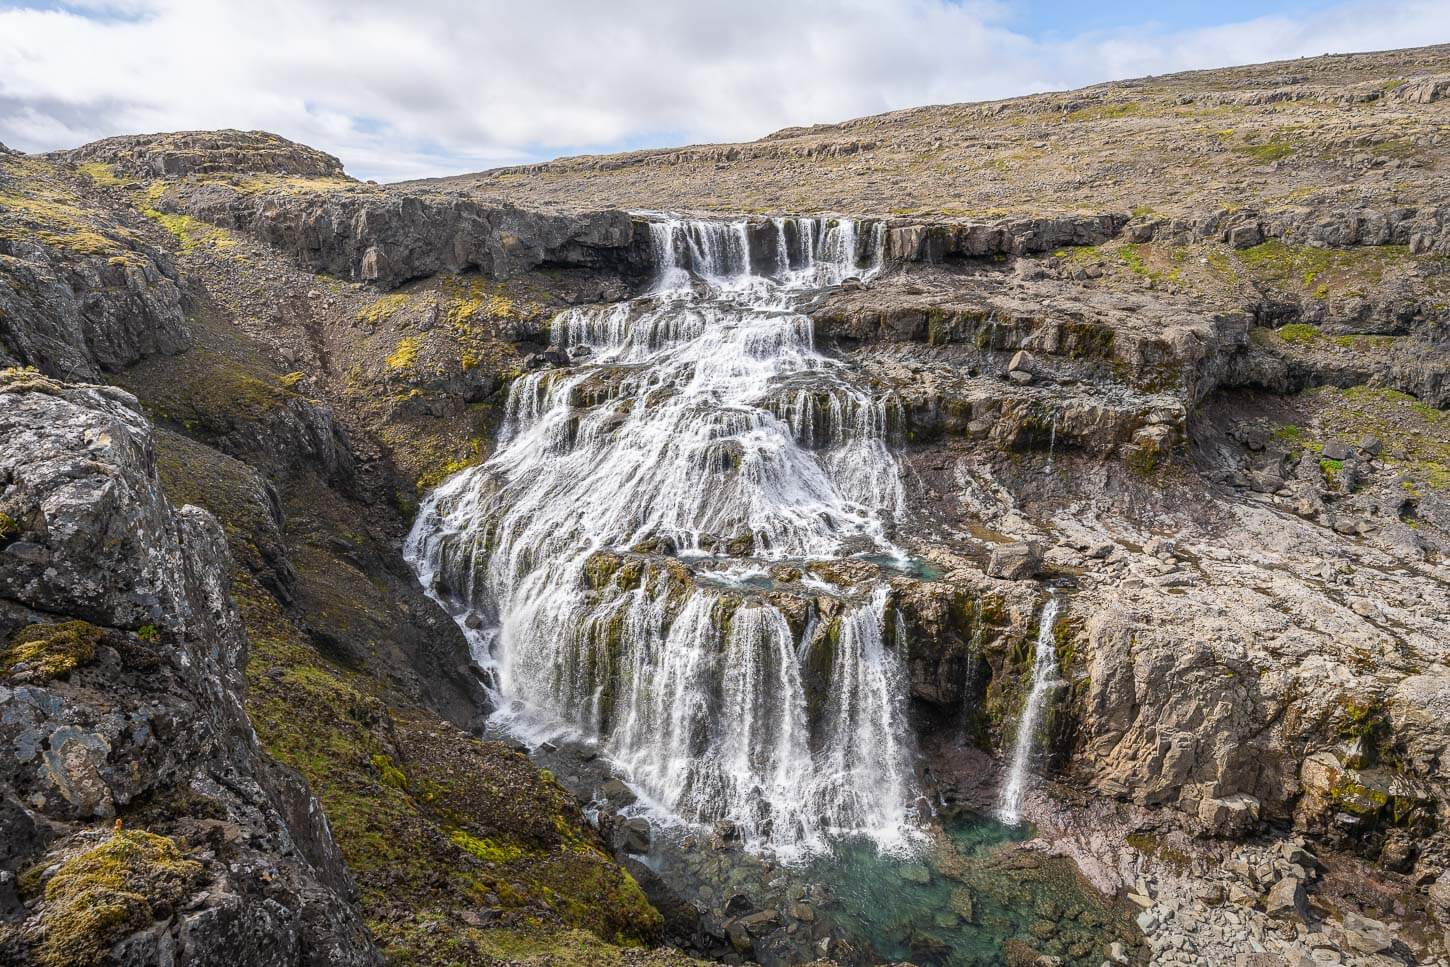
After the river crossing, you’d have to walk into another small canyon first. You’ll know it’s the right one if you see a waterfall in the distance.
From there, there’s a very steep section with lots of scree and loose rocks. Again, do not attempt without hiking poles. This is a very difficult climb, with lots of sharp and unstable rocks.
The trail is up to the left.
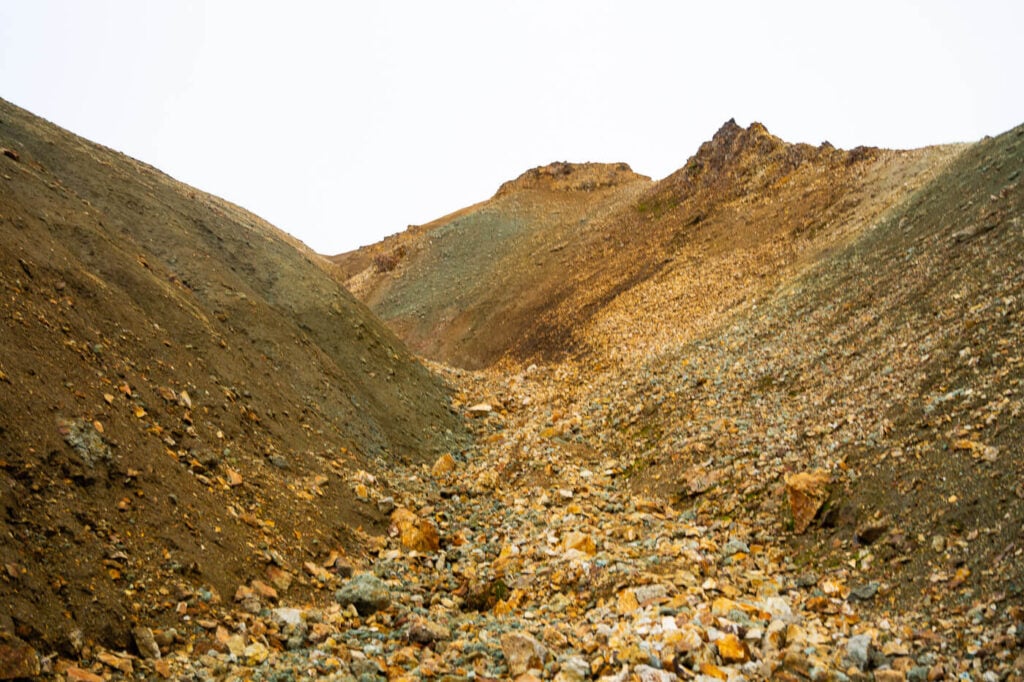
Steep section with lots of sharp and loose rocks.
This is slow going, and take your time to make sure you do it safely.
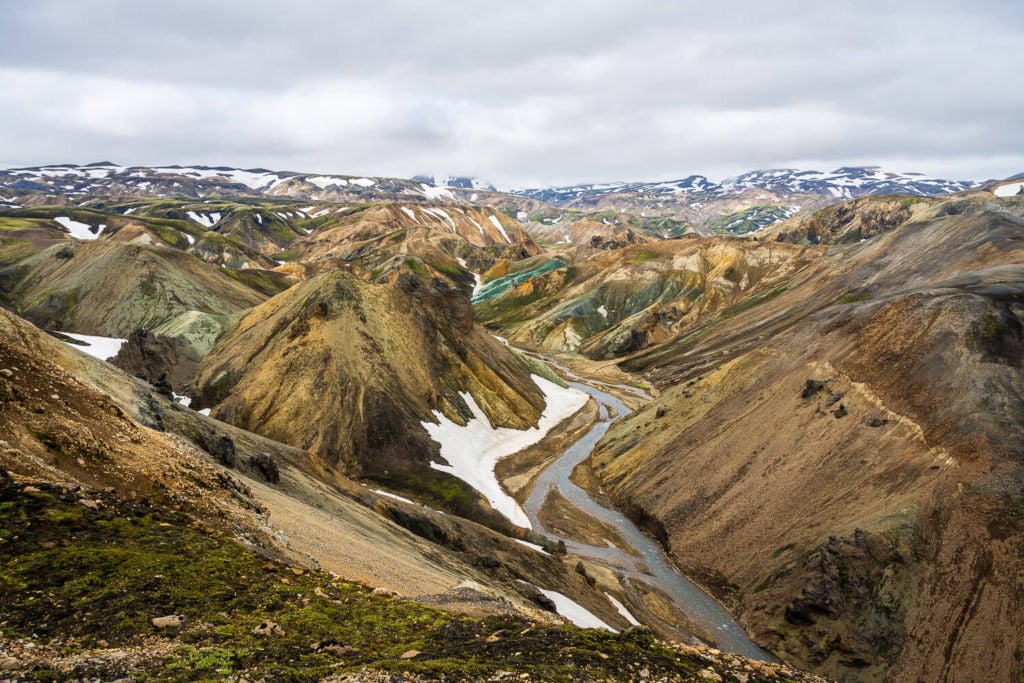
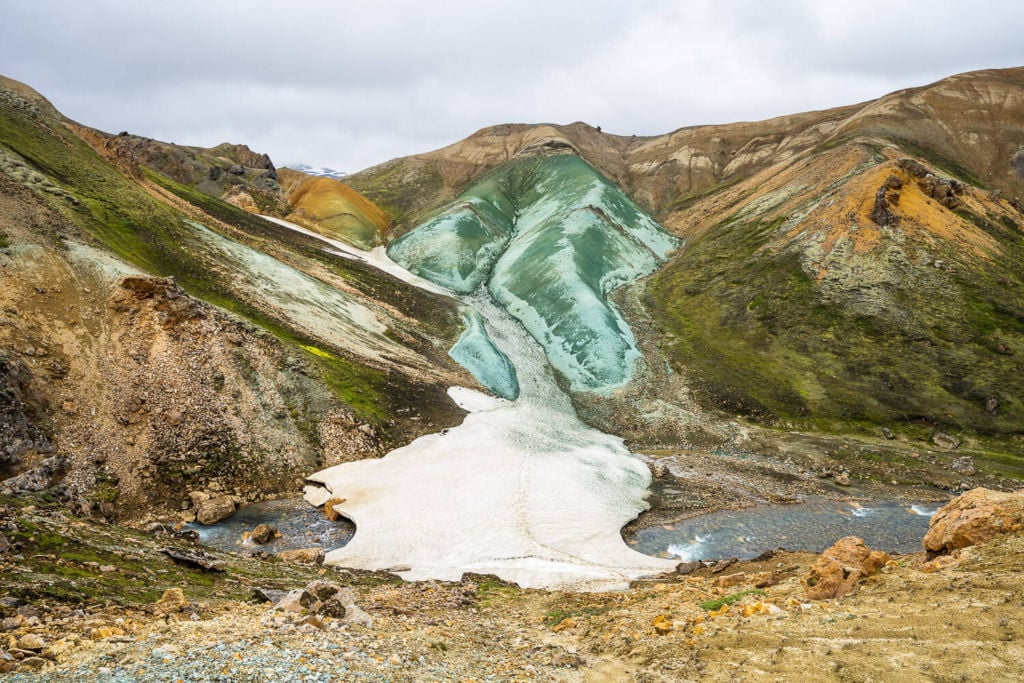
Jökulgil Canyon Viewpoint
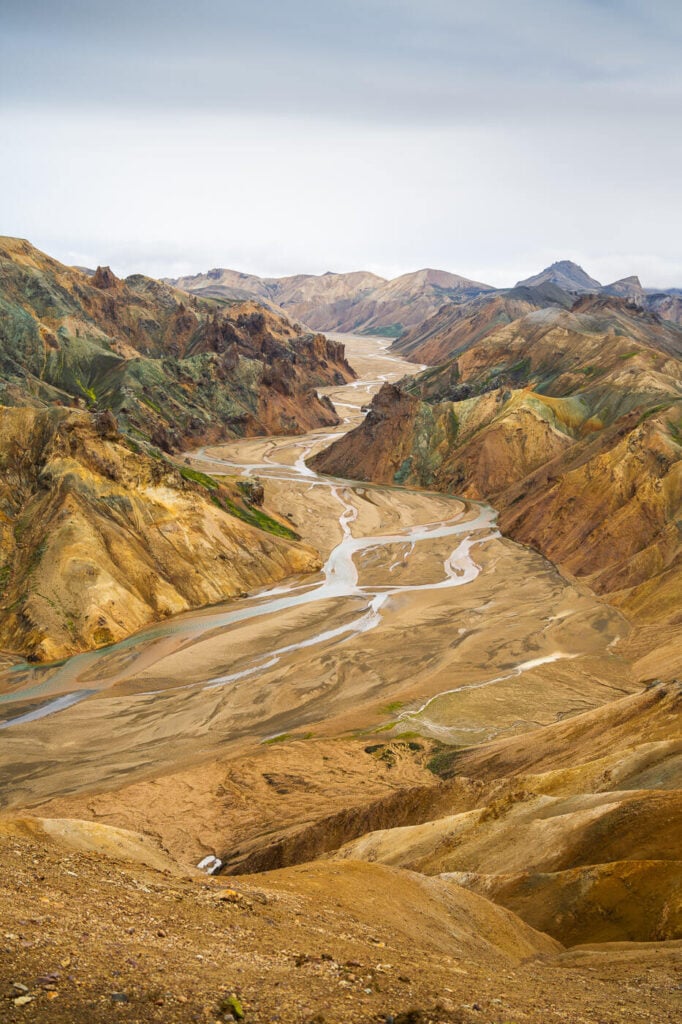
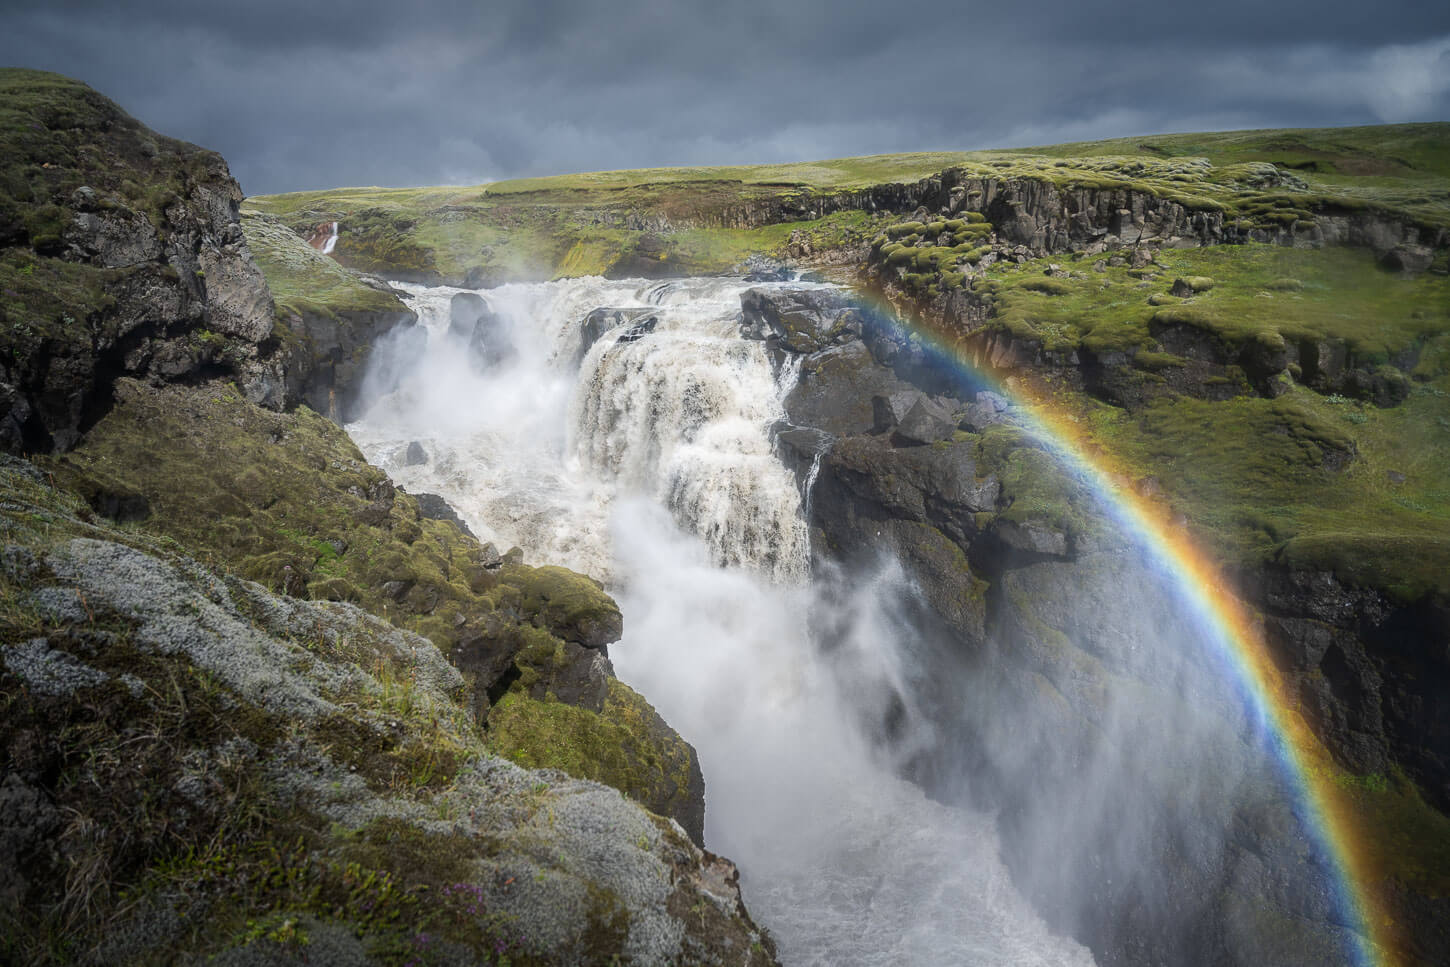
Once you reach the top of the ravine, you’ll find a mostly flat section of the trail. Here the views open up toward the magnificent Jökulgil canyon. The Jökulgil canyon viewpoint offers some fantastic views of the river and the surrounding colorful mountains. An extremely nice reward after an already long and demanding hike.
From here the trail will start the descent toward Grænihryggur, after a few more short up and downhill sections. The trail is moderately exposed here, but wide enough.
At last, you’ll see Grænihryggur appearing in front of you. You can walk down to the river, and make sure to not step on Grænihryggur at all. Not even close!

Last but not least, here is also the video of this hike:
Photos and Photography Tips for the Grænihryggur-Green Ridge
On the Grænihryggur-Green Ridge Hike, you will find plenty of photo opportunities. In the classic Landmannalaugar style, you will come across various shapes and formations of different colors, mountains, and Canyons. In a way, even though it is the main destination, Grænihryggur is a bit like the icing on the cake of this spectacular hike.
There’s room for both classic and abstract landscapes, which makes for a fun day with the camera on the trails.
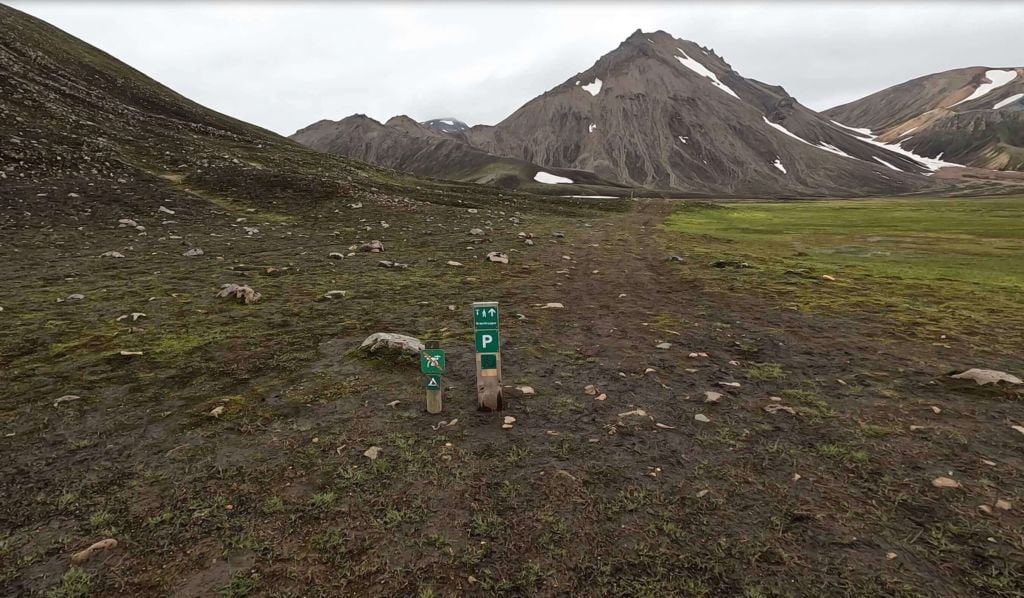
You can bring all the lenses you have; anything from ultra-wide to Tele lenses will find its use here. As usual in Landmannalaugar, I have the most fun shooting tele, which allows the framing of specific details of this surreal and unique landscape. Drones are not allowed here – as you will see from the sign at the start of the trail.


Where to Stay
Considering how close the start of the hike is to Landammalaugar, the camping ground there would be the obvious choice. If you are coming from Landmannalaugar and have already spent a night or two there, you can continue to the Hólaskjól highland centre and spend the night there instead. The lodge has a camping ground, a few huts, and sleeping bag accommodations.
However, there are several rivers to cross from Landmannalaugar to Hólaskjól. Ensure your AWD/4X4 rental car is allowed there, especially considering the insurance does not cover water damage to the vehicle.
Additional Resources
- Check out my comprehensive “Guide to hiking and camping in Landmannalaugar” or Check out more Photo Hikes in Iceland here.
- Check out the Best 5 Day Hikes in Landmannalaugar with Maps
- Discover the best hiking books and guides on Iceland.
- Check out my tips on what to pack for a hiking holiday in Iceland.


Hi Marco! What a great post! Such beautiful pictures and videos. What month of the year did you do these?
Thanks Veronica! The photos/videos of the hike via Jokulgil were taken on the last week of July 2021 (a failed attempt due to too much snow on parts of the trail with the risk of collapsing snow bridges) and the first week of August 2024. Those from the hike via Halldórsgil were taken on the last week of July 2022.