
Osprey Talon 44 Review, a Light, Practical Backpack
I’ve been using the Osprey Talon 44 for a few years now, and as I’m on my second model, I thought I’d give it a long term review and compare the current model with the older one. Why I like the pack, what changed between the two models, and where the old one failed on me.
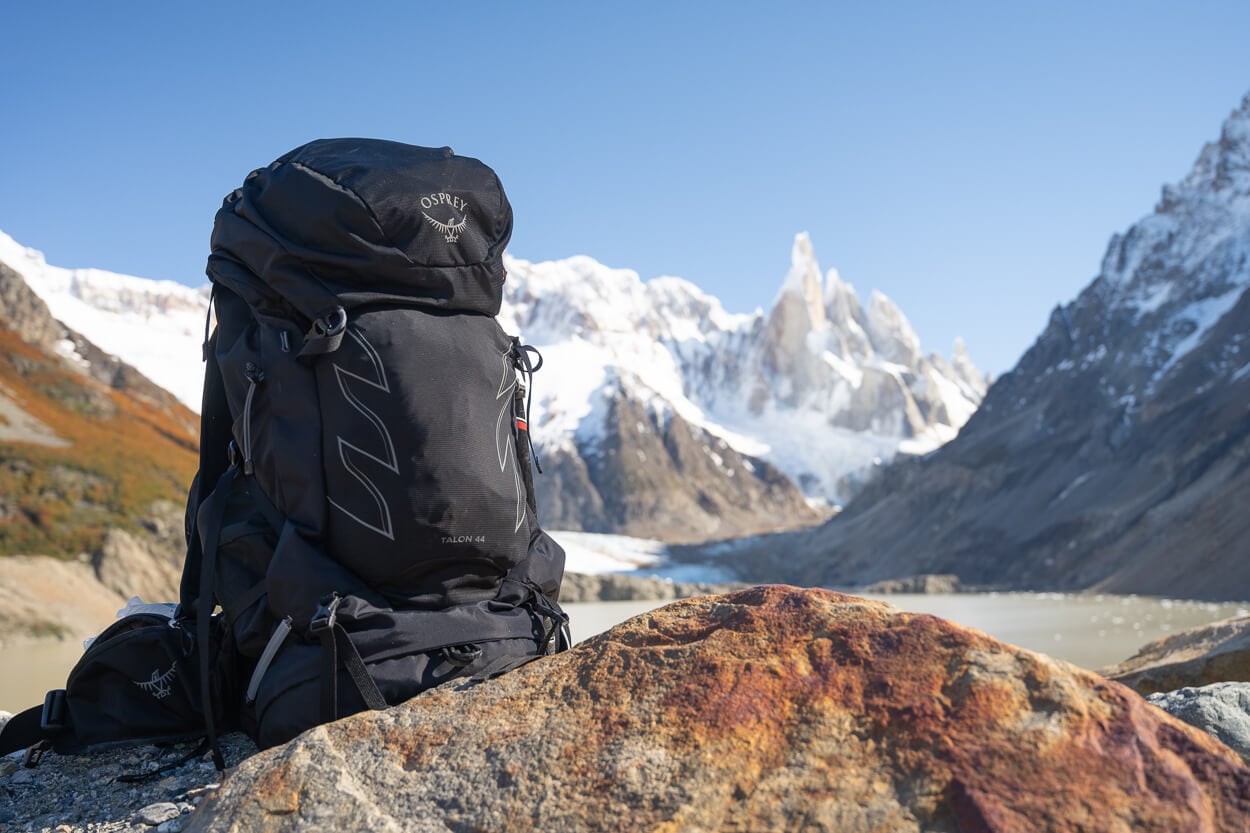
Osprey Talon 44
My first pack served me well for 6 years, and I used it an average of about 500km a year, usually with 8-10 kg of load, on average. Sometimes more, sometimes less. It’s been subject to the extreme heat of sunny summer days in the Alps, as well as many Arctic and sub-arctic storms, and temperatures well below zero on my Snowshoe hikes in Winter.
This is to say that if 6 years does not seem a lot of life, given the conditions it was used in and the weight it carried constantly, it’s really been pushed to its limits, and it held up well. This is considering it is supposed to be an light pack.
I’ve now been using the new model for a full season too, so here are my thoughts on it.
Table of Contents
What the Osprey Talon 44 is for
As a bit of a preface, this is my standard go-to pack for day hikes, and the pack I use the most. For most, a 44L pack may be overkill for day hikes, but as I always have camera equipment and various gear, as well as 2-3 liters of water, plus snacks and a bunch of other stuff, the way a 44l pack carries the weight makes it an ideal choice for most use cases.
So for me it is mostly a daypack. If I had no camera gear with me, I could comfortably fit a light 1-person tent, a sleeping pad like the Sea to Summit Comfort Light and a Sea to Summit Spark sleeping bag. Plus food and a change of clothes. Basically, all the needed gear to spend 1-2 days in the mountains with a lightweight setup.
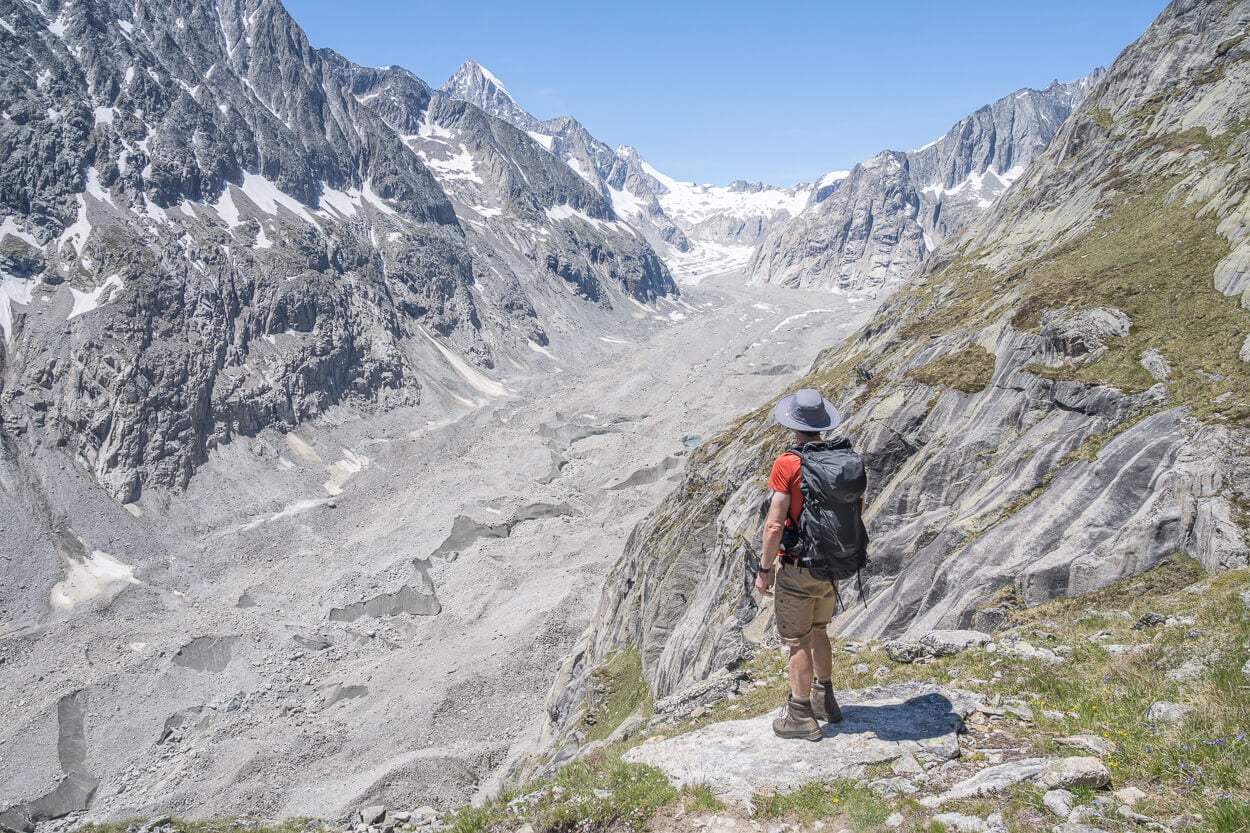
The Talon is both a great day-hike backpack and good for a light 1-2 nights out.
Osprey Talon 44 specs and comparison table (New vs Old Model)
Overall, the new model is not a complete overhaul, but it does have some key differences. Mainly the material and the layout of some components. Neither model is waterproof, but the new one seems to be more water-resistant due to the new fabric.
The new pack is also slightly heavier, but the difference is negligible. Here’s a quick overview of the features and comparisons between the two models. Do note the weight refers to the L/XL size, which is the one I have.
| Feature / Specification | Current Model | Previous Model |
|---|---|---|
| Main Fabric | bluesign®-approved 100D Recycled HT Ripstop Nylon – PFAS Free | ~70D–100D Shadow Check Nylon – PFC Free |
| Base Fabric | 420D Recycled Nylon | 210D Nylon |
| Weight (L/XL) | ~ 1.62 kg (3 lb 9 oz) | ~1.57 kg (3.46 lb) |
| Hydration Attachment | Rigid plastic slide-runner toggle (For Osprey’s bladders only) | Universal webbing strap with standard buckle clip |
| Top Lid Access | Restricted, tight zipper track | Wide-opening zipper curve |
| Hip Belt Pockets | Slightly expanded volume | Standard size |
| Drawcord Anchor | Off-center / routed near the right frame edge | Centered |
| Backpanel & Frame | Injection-molded AirScape™ backpanel | Cut-foam AirScape™ with LightWire frame |
| Mesh Pockets | One big mesh pocket on the back, two smaller ones on the sides | Same |
| Max Load | 18 kg according to Osprey (personally I’d say 12- 13 kg) | 18 kg according to Osprey (personally I’d say 12- 13 kg) |
Price
I noticed a lot of volatility in terms of how much it costs. In Switzerland, where I live, I saw it swing between 130 CHF and 200 CHF+ (about 150 USD/EUR to 230+). If you are thinking about purchasing one, it’s worth holding off until you can find a good deal on it, which is what I did too. You can also check prices and the latest offers on Amazon.
Please note that as an Amazon Associate, I earn from qualifying purchases. If you find any of these recommendations helpful and decide to purchase a product I recommend, I will receive a small commission. This commission will help me keep the site running, and it will not cost you anything extra. This also means you will effectively support this site for free if you purchase one of these guides through my site. If you do – thank you!
Sizing and Fitting
If you are wondering about sizing, I am about 183 cm/6 ft tall and weigh 68kg (about 150 lbs). The pack fits me well, and it’s easy to find a proper adjustment with the straps and adjustable shoulder height.
I should note, however, that with my size, I may be on the lower end of the L/XL size. I am saying this as I almost need to tighten the hip straps all the way, and there is just a bit left for an extra tightening.
In that sense, it is the same fitting as the previous model.
It’s comfortable to wear, and the backframe with the hip straps transfers the weight properly – but that is one of the things you’d take for granted with a pack from a brand like Osprey.
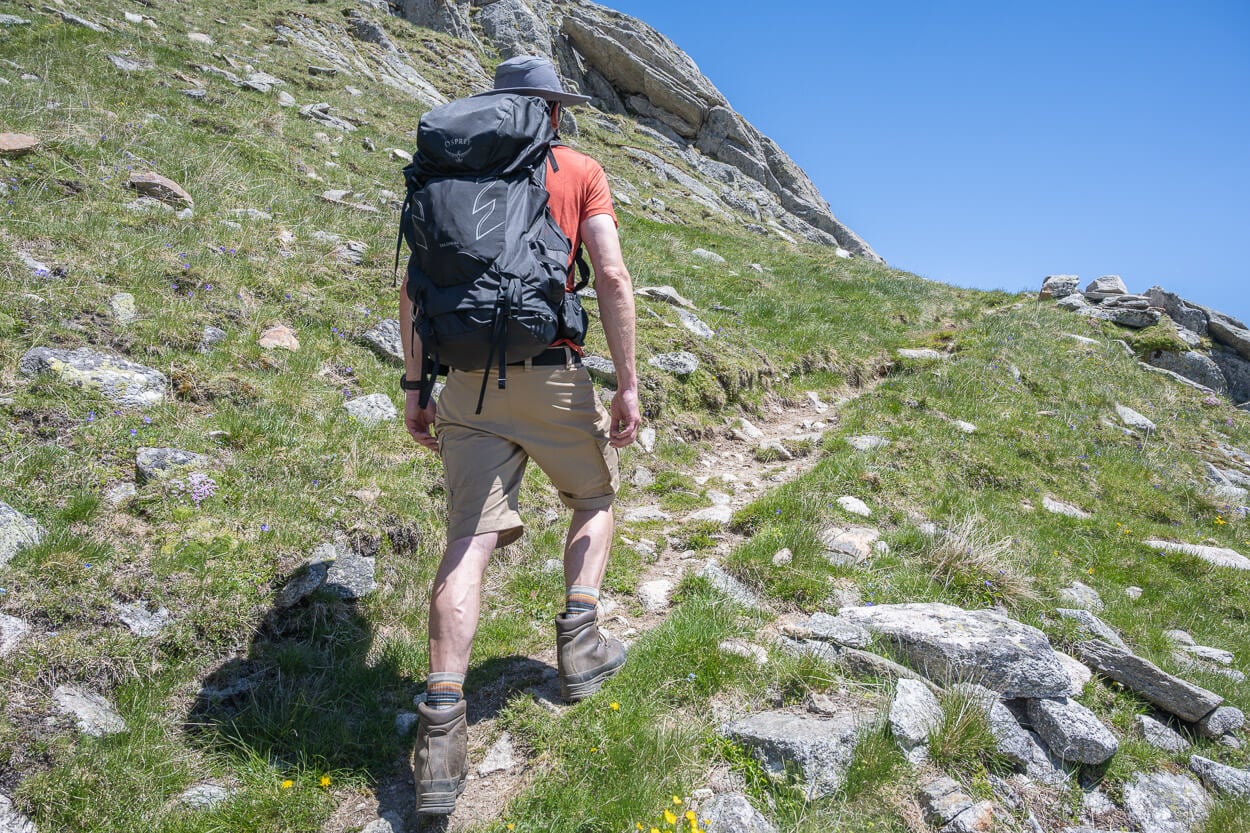
Fitting the pack is quite easy, and it is comfortable to wear.
Osprey’s Max Load Figure, and Reality
Osprey rates both the old and new Talon 44 for a max load of 18kg, which to me feels more like a marketing feature. This is just my own impression, but anything beyond 12- 13 kg of load starts to become uncomfortable for long distances and serious elevation gain.
Even when properly adjusted, the straps start to sag, and the weight is transferred to your shoulder, and it becomes somewhat uncomfortable on the hip too. By that I mean the hip belt puts too much strain on the hip and does not seem to be effectively transferring the weight anymore. Essentially, it tends to give way a little.
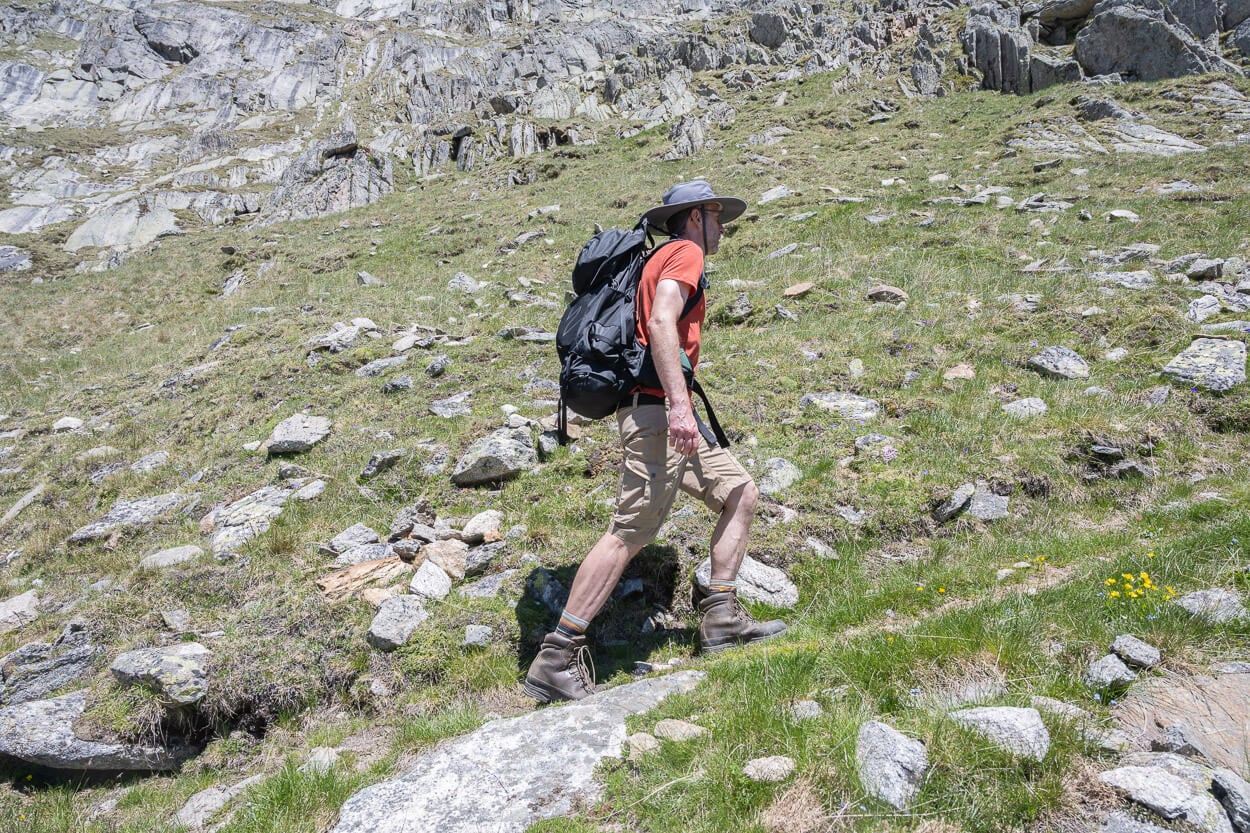
While comfortable to wear, it falls short of Osprey’s 18kg max load figure. Realistically, it’s 12-13kg.
So if you need something that can carry more than that for longer distances, I personally recommend looking at bigger packs.
However, if your base weight is within 12- 13 kg, the Osprey Talon can still carry that comfortably.
Again, that may be just me though. Someone with a more robust figure might find it more comfortable with slightly heavier weights.
What I like about the new Osprey Talon 44
Pretty much all the same reasons why I bought the previous model in the first place. It’s spacious, has plenty of pockets, is comfortable to wear, and keeps content very accessible. For instance, you can access the content from both the top and the bottom, where a zipper allows you to open the pack entirely from the bottom.
Plus, the new model has a few additional features and changes that make it more practical. The new material of the main compartment is much more robust to the touch. It feels much more resistant, compared to the previous model.
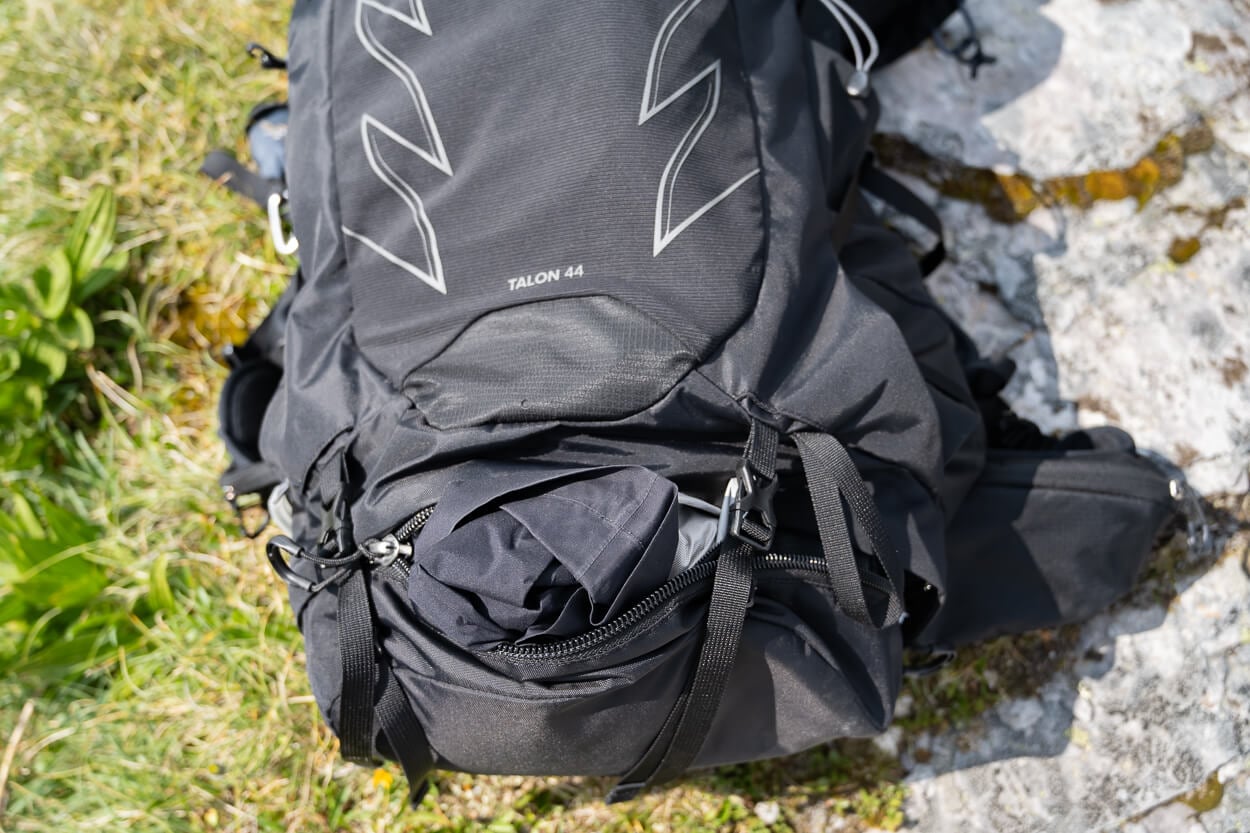
One of the best features is the bottom zip, which allows you easy and quick access to the items at the bottom of the pack.
The hip belt pockets seem to be slightly larger than the previous model. I could not find a direct measurement on this, but they do feel slightly bigger. My mobile fits better too.
The drawcord attachment has been moved to the side. That makes it easier to keep it out of the way when attaching other straps and puts less strain on the main compartment when pulling the cord, as the force is partially absorbed by the right frame
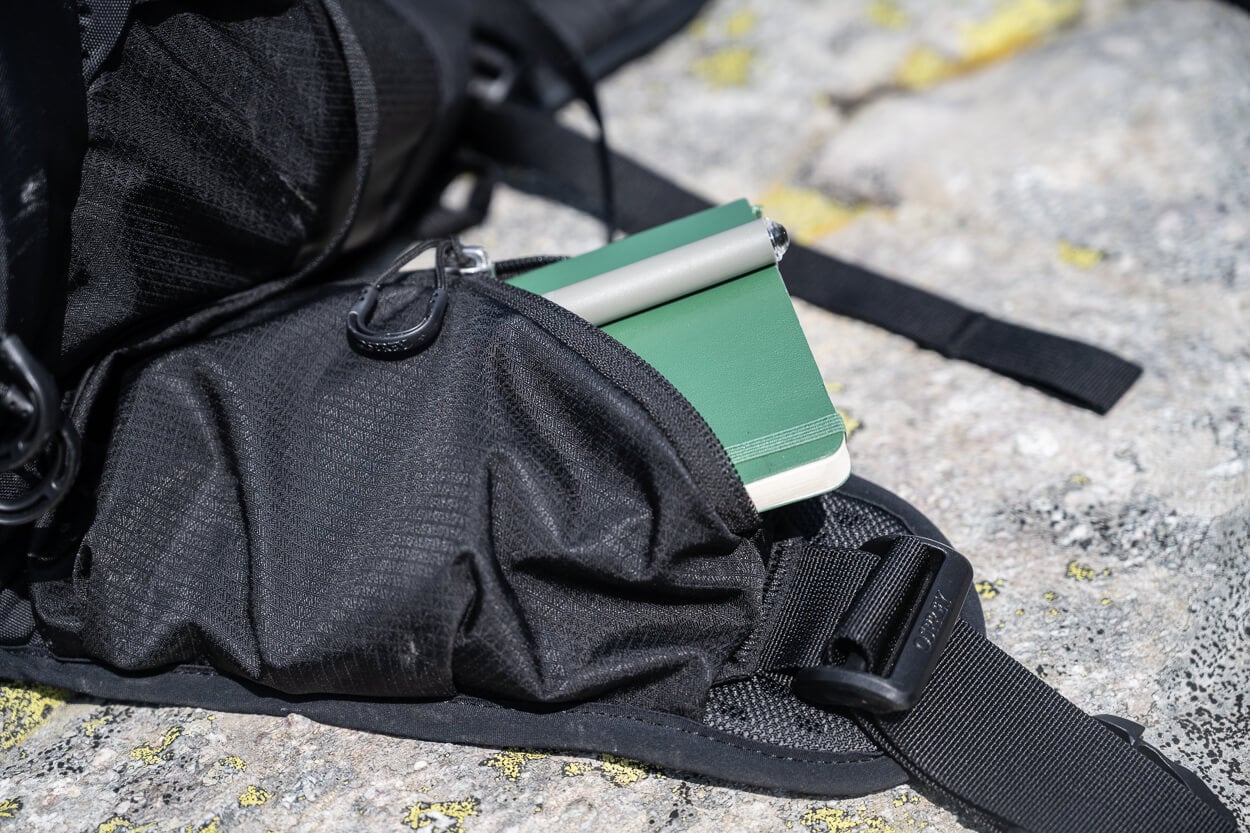
The two hipbelt pockets feel slightly larger than on the previous model. An iPhone 16/17 size fits comfortably with room to spare. Small notepads too (yes, I hike with a pad to take trail notes).
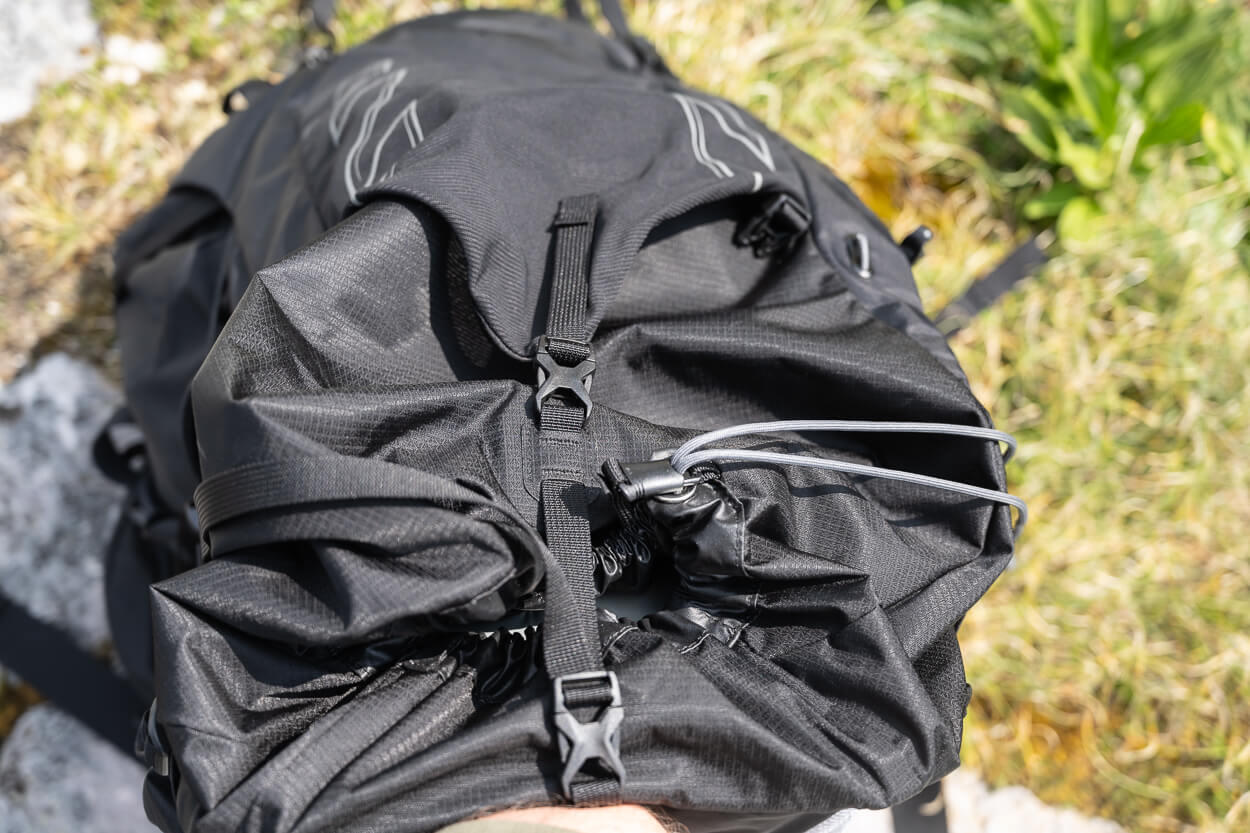
Then top Drawcord has been moved to the left.
There is also a new small, mesh pocket on the left strap. It’s big enough for a regular-size Swiss army knife, which is exactly where I keep mine now. It has a small clip to close it, but when in tension it unclips easily. That could work better.
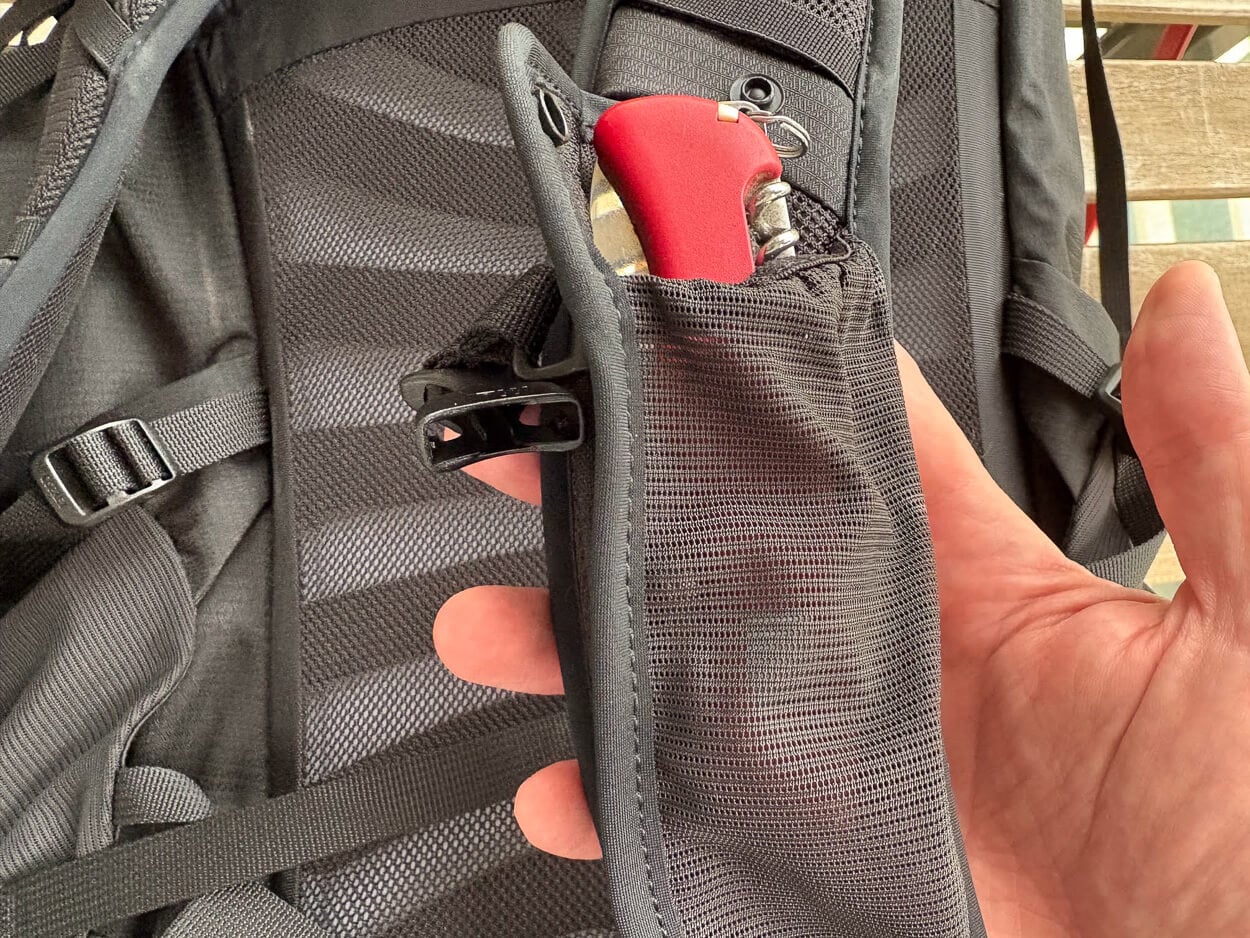
A new good feature. A small mesh pocket on the left strap, if the right size for a small pocket knife
Likewise, all the various straps feel better organized, and easier to keep them tied to the pack instead of having them dangling around
Other than that, the Airscape system feels pretty much the same, even if Osprey says it’s been improved. Not a big fan of that system, as I prefer the much airier arched mesh in packs, like the Exos models. The Side loops for the hiking poles also seem to be unchanged
Lastly, if you are using a Peak Design strap clip, it fits perfectly fine as in the previous model.
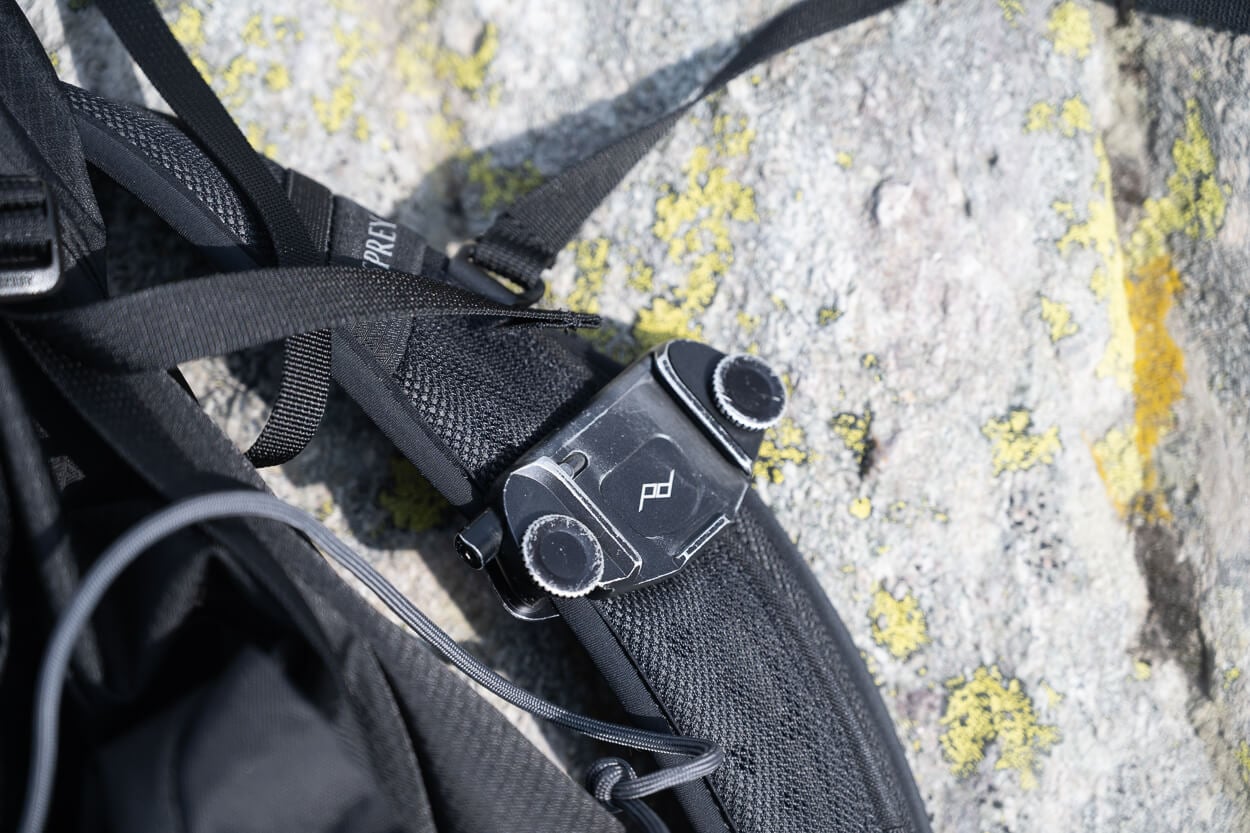
A peak design Capture Clip fits on the strap without issues too.
What I don’t like about the new Osprey Talon 44
The top lid seems more or less the same size, although in the new one it is somewhat harder to access the contents. By that I mean that the zipper seems to be slightly shorter than on the previous pack, and it does not open as wide.
On the previous pack, you could open it wide; on the new one, I can fit my hand in without too much space left. As a result, it is also more difficult to look inside the top lid, and you must use your tactile sensation to find the items you want, especially smaller ones. Furthermore, if you get the back version, the top lid is like a little black hole. You can’t see much of what’s inside, especially smaller items.
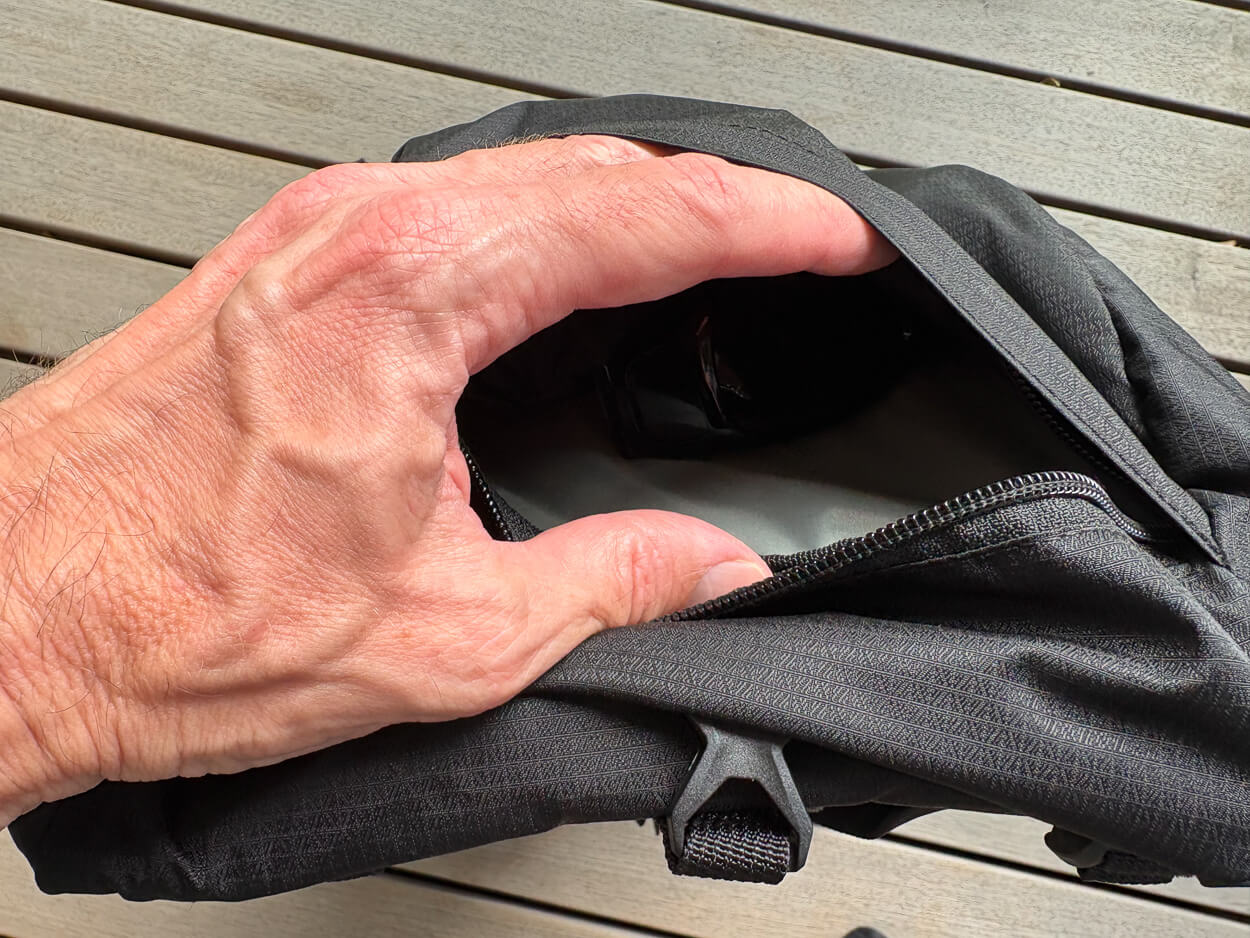
The top lid has been slightly redesigned, and the opening is considerably narrower
I would guess they did it so it’s more difficult for items to accidentally fall out, but I can’t really tell why they changed it. Not a big deal, but I find it somewhat too fiddly.
The other thing I don’t like is the new hydration pack attachment. The new hydration sleeve replaced the old universal buckled loop with a proprietary rigid plastic toggle. While it connects fine with Osprey’s own Hydration bladders, it does not hold standard third-party bladders. I can still use it without them, but there’s no way to attach it
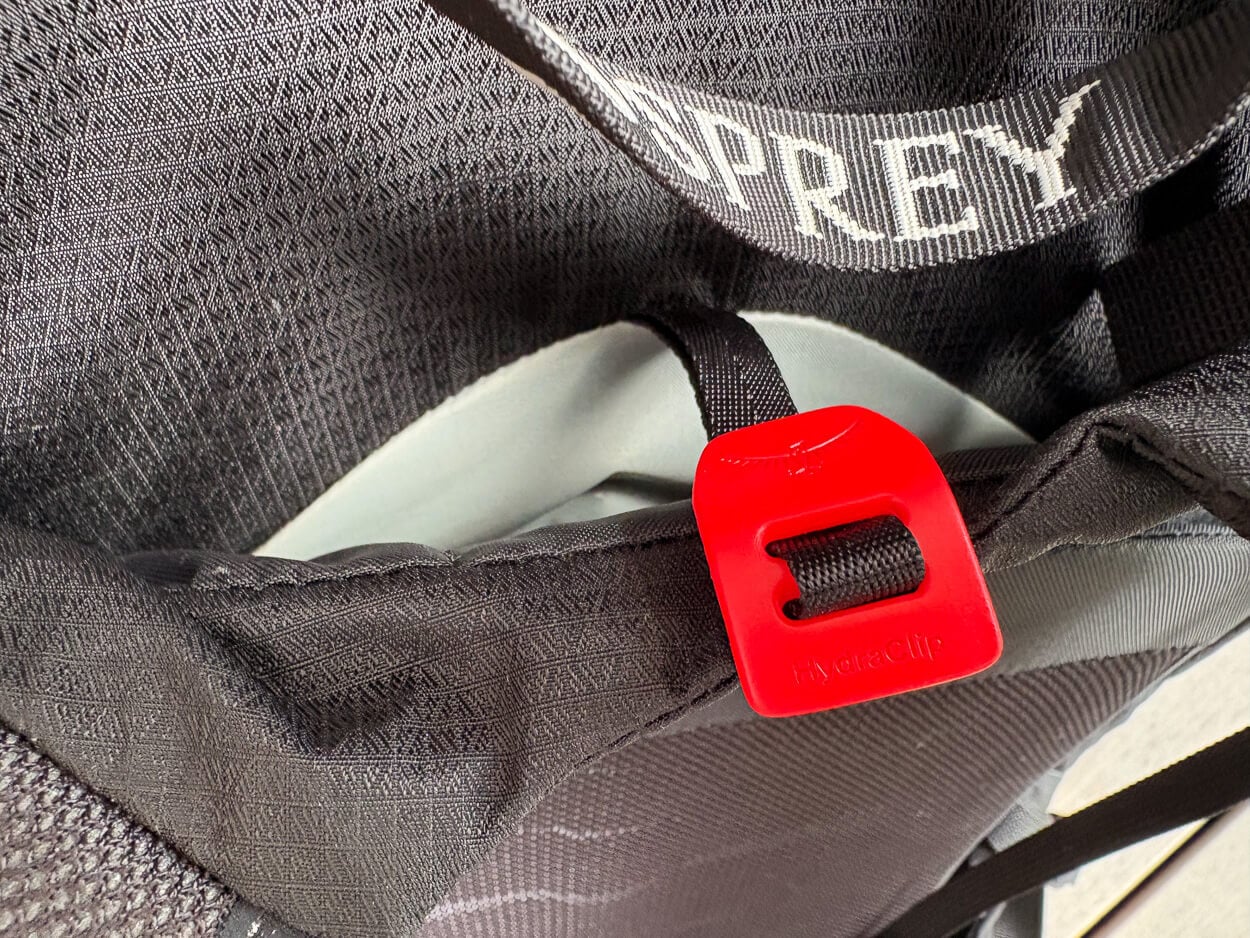
The Hydration bladder hook has been changed, and only seems to be compatible with Osprey’s own bladders.
For a brand that advocates for sustainability and the “Leave No Trace” principles, pushing a proprietary connection that forces you into their ecosystem and renders existing gear obsolete isn’t really a step in the right direction if you ask me.
As I said, my 3L Hydrapack bladder can still be used, but in some cases, or with smaller bladders, you may need to use a workaround like a small carabiner or come up with some self-made loop attachment.
Accessories
Apart from the above-mentioned Osprey bladder, there are a couple of additional accessories I’d highly recommend getting.
- Ultra-Light Rain cover. The pack does not come with one, so it’s sold separately. I’ve been using the same one I got for my old pack, and it still works fine; top-notch quality,
- Ultra-light waterproof liner. You may not find it necessary, but as I hike a lot in wet climates and carry a lot of camera gear, it makes sense to have an inner waterproof liner liner too
For the Osprey Talon 44, you can get the medium size rain cover, and the small liner.
Why I replaced the old one
As mentioned in the intro, I used and abused my first Talon 44, and while it held up well, it started to succumb to the constant wear and tear. So, time to replace it. For instance, the shoulder strap and hip belt padding flattened out.
But the main issue was that the main compartment developed a tear just below the drawcord attachment. Probably from all the tension it went through in several years and the various extreme temperatures it’s been subject to, the fabric gradually weakened until the “last draw” was too much and it ripped.
Osprey’s warranty won’t cover this type of wear and tear under warranty, but they will repair it. For me personally, it was worth replacing it considering I pretty much always use it at full load, and I need to trust it with my camera gear. But, other than that, all the zippers and stitching held up well and never gave me any issues.
To be fair, I think Osprey may have been aware this was an issue with the old model. That probably explains why they moved the drawcord attachment to one side, where it puts less strain on the fabric, and why the material is not more resistant.
I am quite confident the new one won’t have this issue, as the new material really feels much more durable and tear-resistant than the previous model.
Conclusion
To sum up, this review of the Osprey Talon 44: it’s a great pack, which I’m sure will serve me well for years to come.
I have already used it for several trips and hikes from Patagonia to Sweden, Summer and Winter. It served me very well; no defects or issues with the pack to report at all. No stitching coming undone and no signs of wear yet; the pack almost looks like brand new after almost one year of use.
Compared to the previous model, there have been a few “incremental” improvements that make it worth it if you are looking to replace your older model, or if you are thinking about getting one for the first time.
So, apart from the bladder clip mishap, it is a pack I could recommend to anyone looking for a spacious, lightweight backpack that can resist the elements and carry the weight well.
Additional Resources
- You can also check prices and the latest offers on Amazon.
- Check out more backpacks on my Hiking Backpacks for Photographers, which includes all about my setup too.



Leave A Comment