
Hike to El Chaltén’s Hidden Waterfall, Argentina, Patagonia
El Chaltén’s Hidden Waterfall, or Cascada Escondida in Spanish, is a scenic waterfall lookout you can hike to and one of the most popular landscape photography spots in Los Glaciares National Park.
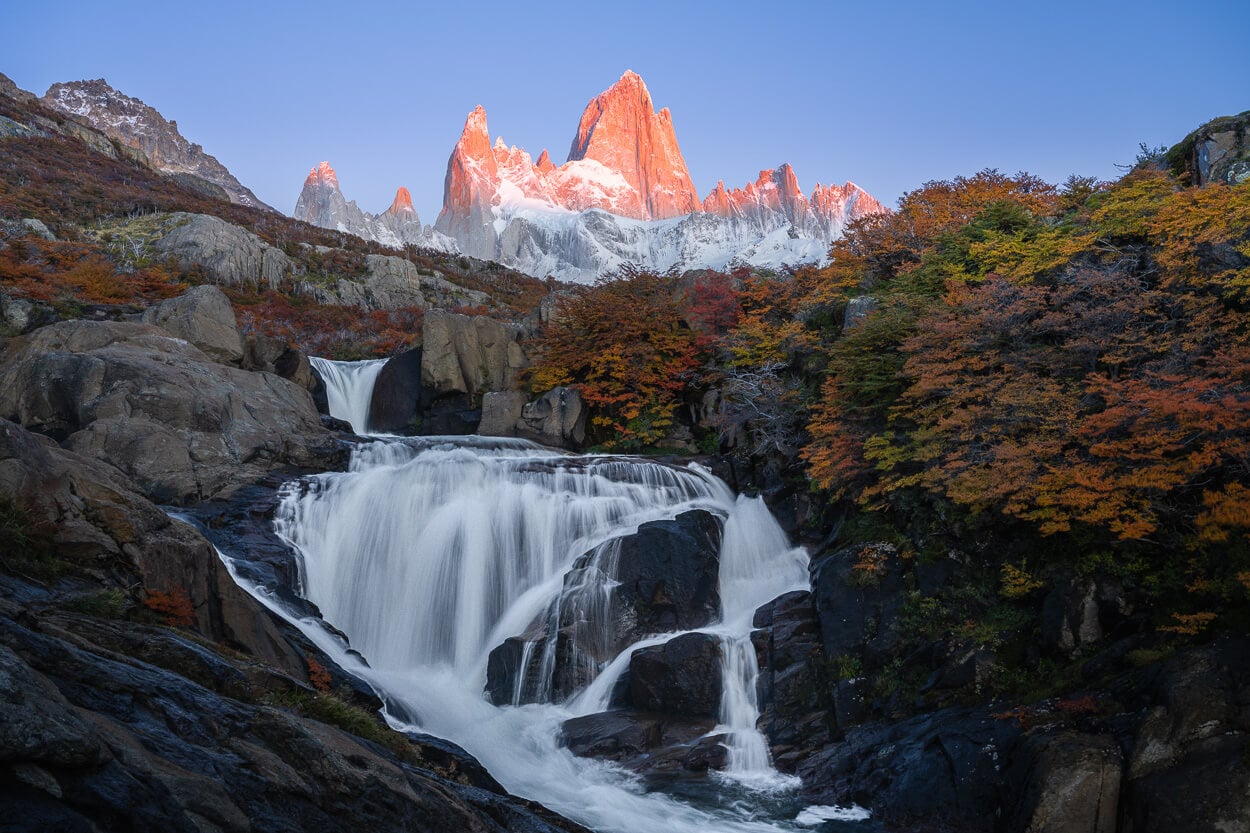
The Hidden Waterfall, with Mount Fitz Roy in the background.
| El Chaltén Hidden Waterfall Hike: Quick Overview |
| • Distance: 13.8 km / 8.6 mi (Out & Back) | Time: 3h 30m–4h 30m | Difficulty: Easy | Trail: Laguna de los Tres Trail |
| • Start & Parking: El Chaltén, Los Glaciares Park Entrance along Road 41 |
| • Best Season & Light: Sunrise / Blue Hour (For golden light on Fitz Roy above the waterfall) |
It’s easy to see why it is so popular. Picture the sun rising and casting its warm light onto the beautiful Fitz Roy, with the hidden waterfall in the cold shadows right below it. And an absolutely stunning, picture-perfect scene.
The Hike to the hidden waterfall is also quite easy, at about 13.8 km (8.6 miles) round trip from El Chaltén. And you can also combine this hike with a visit to other locations, as it is located on the Laguna de los Tres hiking trail.
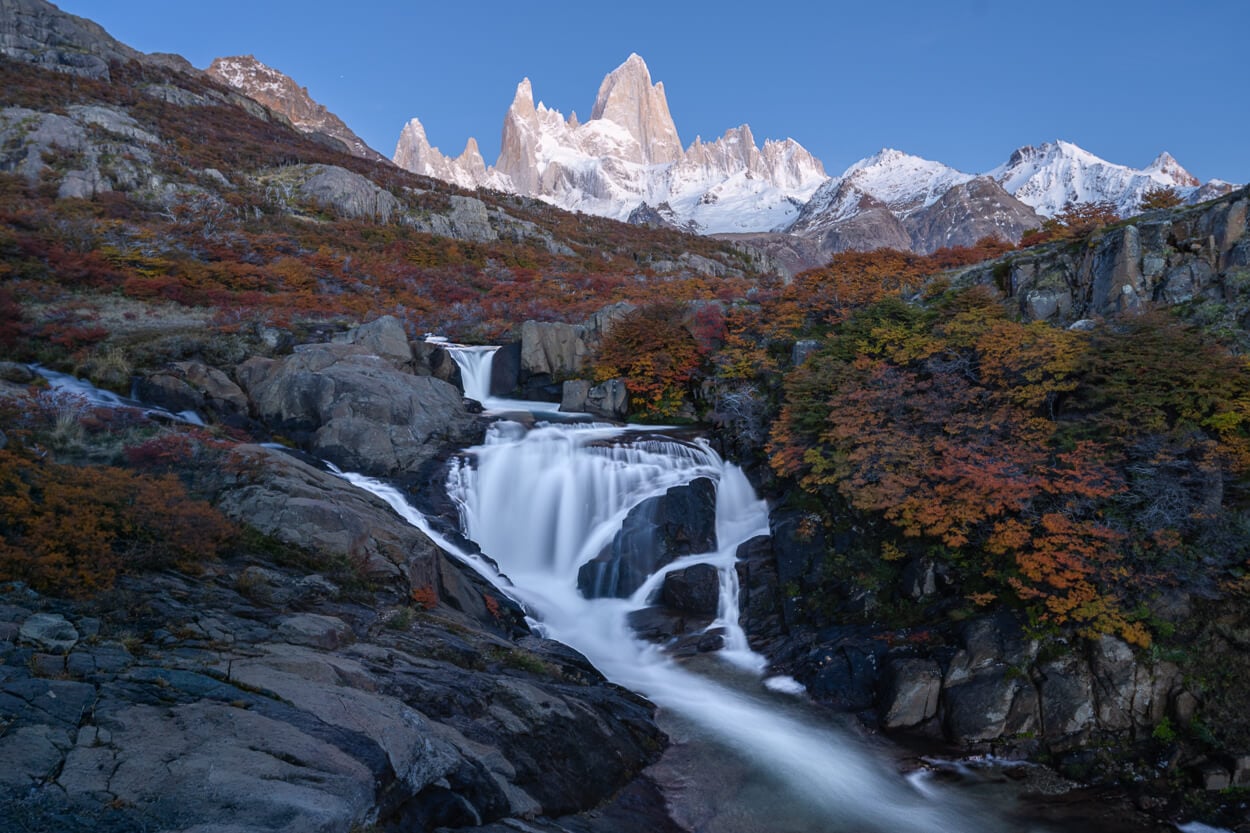
Blue Hour at Cascada Escondida, the “Hidden” or “Secret” Waterfall.
Also do note, sometimes this is referred to as the “Secret Waterfall”, but the real name, in Spanish, is Cascada Escondida, where “Escondida” means ” hidden”. They are the same waterfall, in case you are wondering.
But regardless of how it’s called, the Hidden Waterfall is a must-visit, whether you are hiking to Laguna de los Tres or planning a sunrise photo expedition to the waterfall. It’s a low-effort-high reward photo spot.
Fun Fact: This hidden waterfall is on the same river (Rio de la cascada) that Chorrillo del Salto is on.
Table of Contents
Overview of the Hidden Waterfall Hike in El Chaltén & Map
Overall, it’s an easy hike to the Hidden (or Secret) waterfall. It shares the same trail with Laguna de los Tres, up until the short deviation that leads down to the hidden waterfall. And from that deviation, it is just a short five-minute walk to the lookout above the waterfall. On the deviation: stick to visible trails only to prevent more damage to the soil and vegetation.
While the waterfall can be a destination in itself, you can also combine it with other hikes in the park. For instance, you can continue to Laguna de los Tres. Or to Laguna Torre too, via Laguna Madre e Hija. That is also what I did, as I had planned Laguna de los Tres for the next day. It’s a 30+km hike, but doable to Laguna Torre.
Lastly, like all the spots in Los Glaciares National Park, you’d need to purchase an entrance ticket. It can be done online, and also at the booth by the trailhead. Though that opens only at 8 a.m..
For now, here are the details of the Hidden Waterfall hike from El Chaltén and back. You can download the GPX file for free from the activity linked below. It’s useful mostly so you have a track that shows you where to turn off from the main trail.
Here is the map of the hike too.
How to get to the Hidden Waterfall Trailhead and Parking
The trailhead of the hike to the Hidden Waterfall is directly accessible on foot from El Chaltén. So if you are staying in town, you can just walk to the Laguna de los Tres trailhead and continue from there. Or drive there.
- Driving Directions: If you are coming from out of town and prefer to drive, take road 41, the main road through El Chaltén northward. As soon as the town ends, you will find the large parking area to your left.
- Parking: there is a relatively large parking area next to the Laguna de los Tres Trailhead, on the northern side of El Chaltén, free at the time of writing.
- Public Transport: while there is no public transport within El Chaltén, if you are arriving from out of town, you will be dropped off at the Bus Terminal, which is in the southern part of town. From there, the walk to the trailhead takes about 20 minutes.
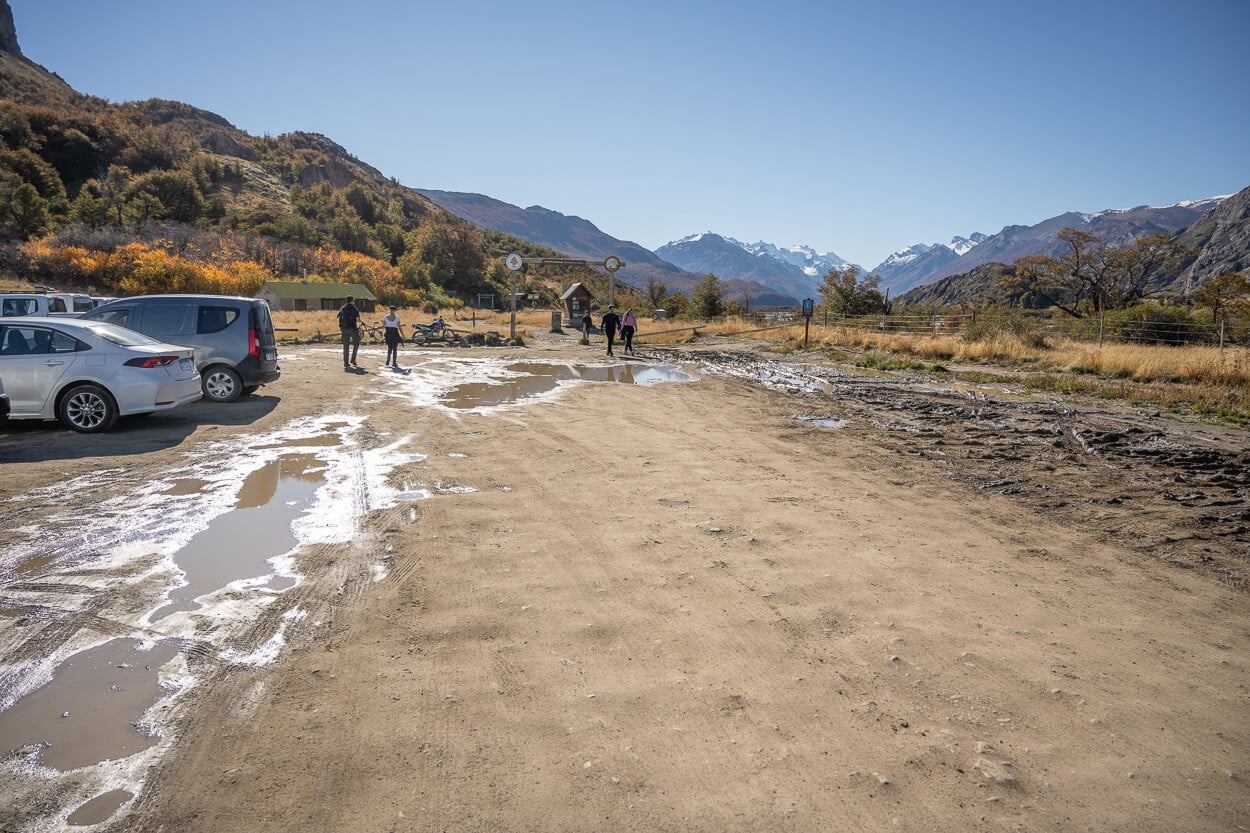
The Hidden Waterfall trailhead is the same as Laguna de los Tres from El Chaltén
The Hidden Waterfall Hiking Trail
As mentioned in the intro, the hidden waterfall is located along the Laguna de los Tres trail, so the trailhead is the same. The path is well marked and easy to follow. Most of the elevation gain is in the first part of the hike too, and after that it is easy walking.
Most of the trail is also in the forest, but here and there the vegetation opens up to enjoy the views of the landscape around the trail.
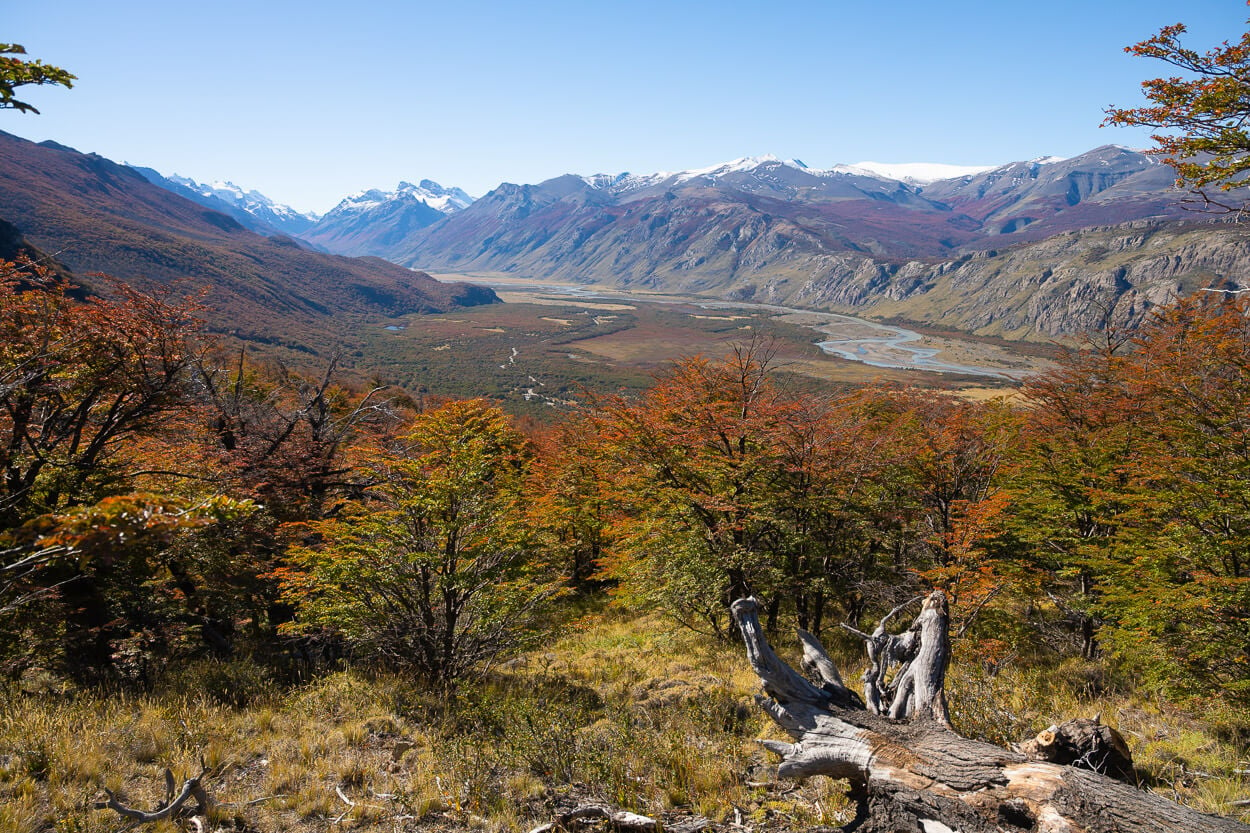
On the trail, the views open up to the landscape around from time to time, as the trail is mostly in the forest.
At one point, you will reach a fork in the trail. On paper, the official trail is on the right, but you can take the one on the left as well. Both will converge back in the same spot, in proximity to the deviation to the hidden waterfall.
The main reason to take the trail on the left is that it passes by Laguna Capri, where you can find another scenic lookout of Fitz Roy. To be fair, though, if you are doing this hike for sunrise, that does not really matter much; it’s best to visit it on the way back, when the sun is up.
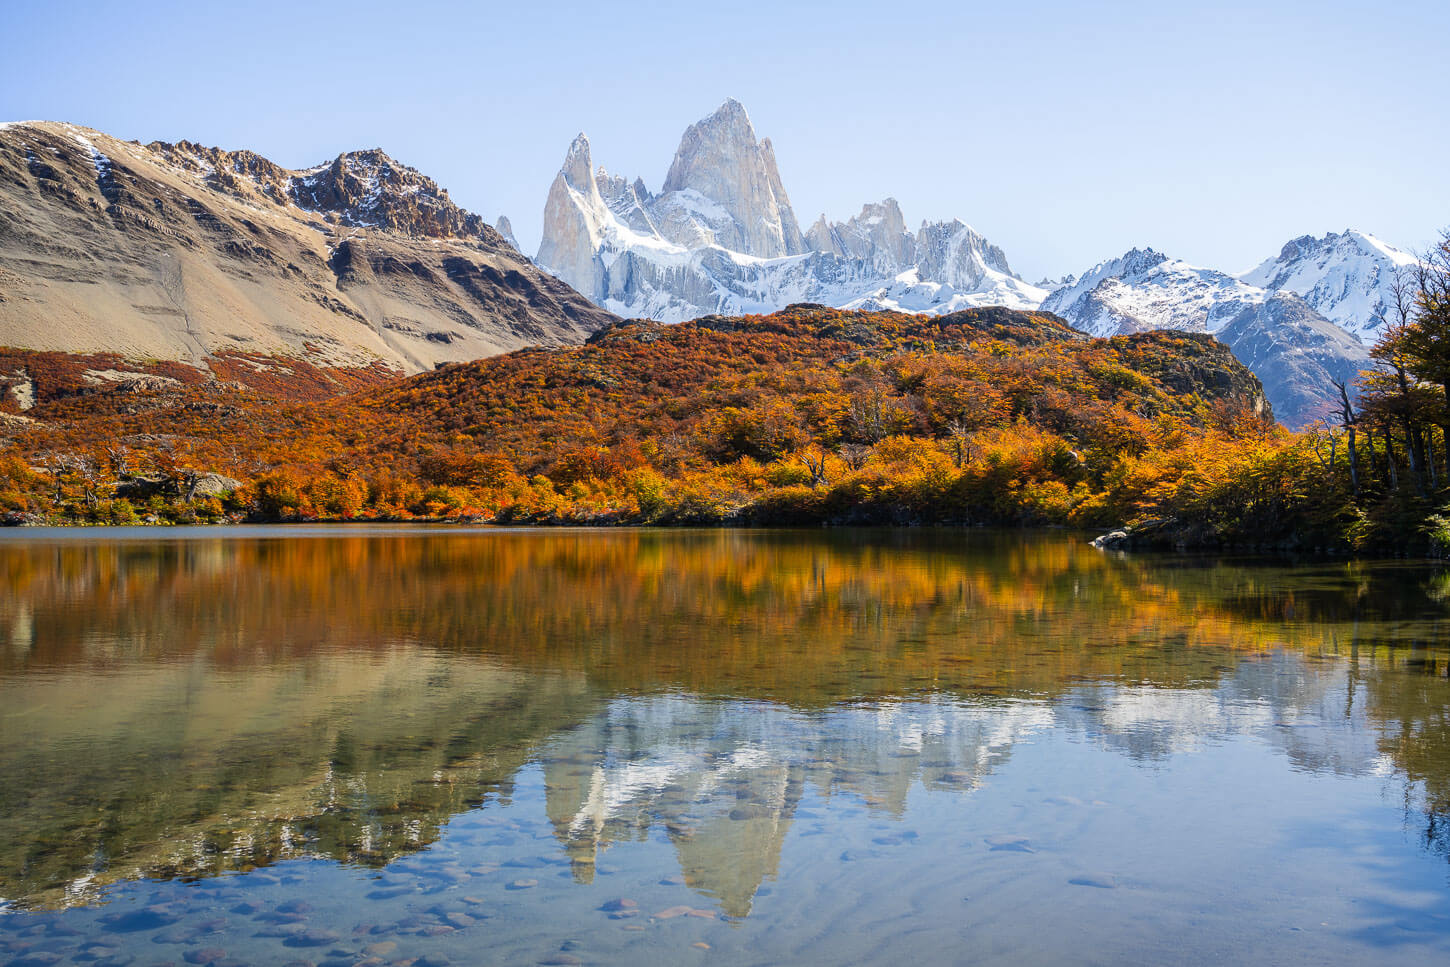
Laguna Capri is another nice sport near the waterfall that’s worth visiting on the same hike.
As you reach the point where the two trails merge back, look for an unmarked trail to your right. The coordinates are -49.296098, -72.934889. It’s easy to miss as it just looks like a widening in the trail. From the detour, it is a short five-minute walk downhill toward the river and the waterfall where the viewpoint is.
There, the fantastic view of the Fitz Roy emerging above the waterfall will appear in all of its glory.
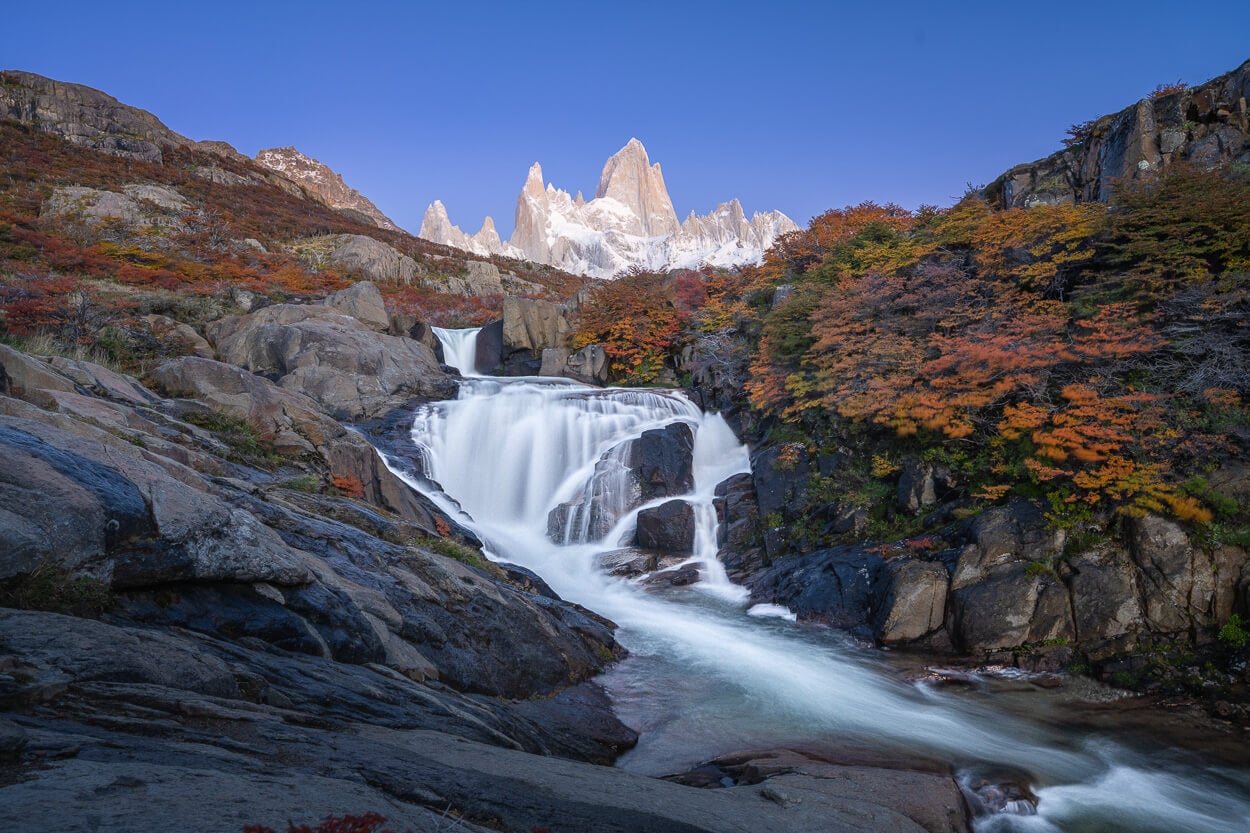
The Hidden Waterfall Photos and Photography Tips – A great Sunrise photo spot
First off, if it is a nice weather day, you’d have to be out there very early. I arrived a good 40 minutes before sunrise, and it was packed. There was a relatively large photo tour group, at least 8-10, plus a few other solo hikers/photographers like myself. In total, probably about 15, all of them “deployed” and ready to shoot. So they had arrived at least a good hour before sunrise.
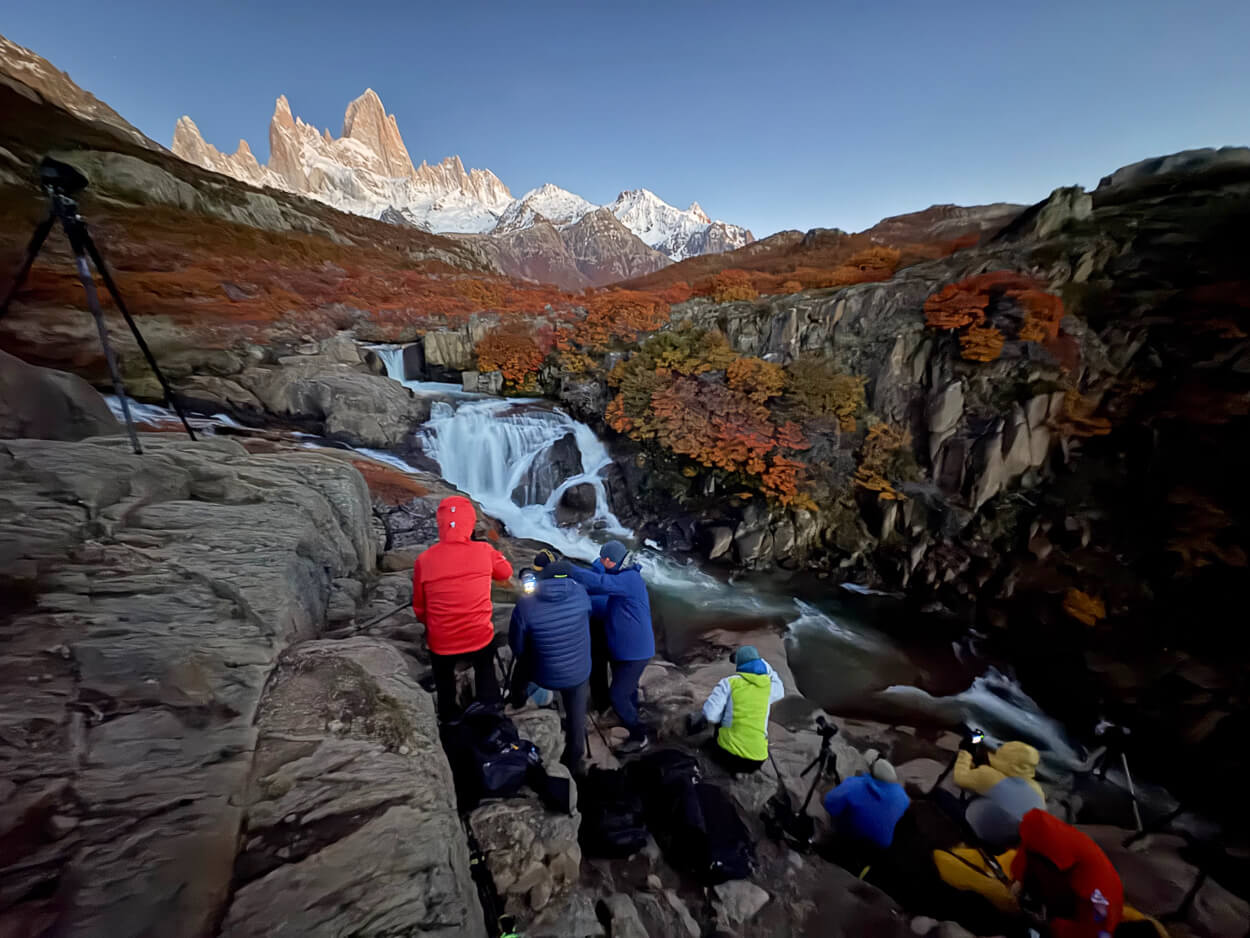
Photographers line up for Sunrise. if you are not a photographer, this is what a popular landscape photo spot looks like in the early AM.
The viewpoint in front of the hidden waterfall is a relatively small rocky outcrop, so space is kind of limited. I was able to find a spot right below the biggest rock in front of the falls, on the side of the river. There is a little niche you can climb down to and sit. Not a bad spot at all either, as it was more sheltered from the wind too.
The point is, by the time the sun was rising, there were no good spots left to stand on for some photos. If you wanted to just watch the sun rising, there was plenty of space, but no spots left on the main viewpoint, as they were all taken up by photogs and their tripods – myself included, of course.
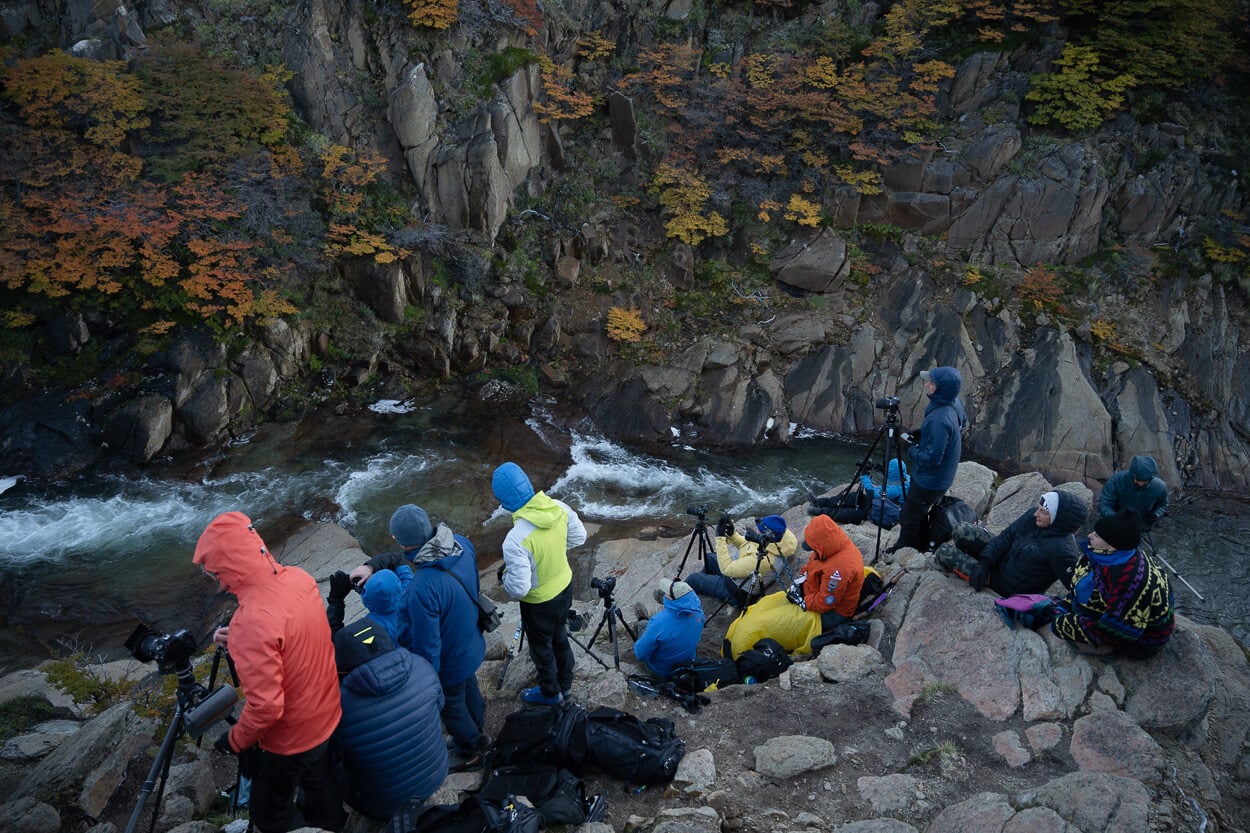
The main viewpoint is a relatively small rocky outcrop and it pays off to be out early.
Lenses to Bring and Filters
In terms of lenses, I found anything in the range of 18-35mm to be ideal. While the viewpoint is fairly close to the waterfall, anything wider will likely result in the Fitz Roy being too small. And you’d want some compression to make the Fitz Roy stand out as that massive mountain that it actually is. Personally, I mostly used focal lengths in the range of 30-35mm.
In terms of filters, I personally found a GND to be not needed. Many were using it to balance the exposure, but to my personal preferences it wasn’t. I did use a polarizer filter, mostly to cut some of the reflections of the wet rocks around the waterfall, and it was enough to bluer the water too, if that is to your taste.
On the shutter speed, I mostly used a shutter speed of 1/8, enough to blur the water while keeping some texture. Again, only with a CPL filter.
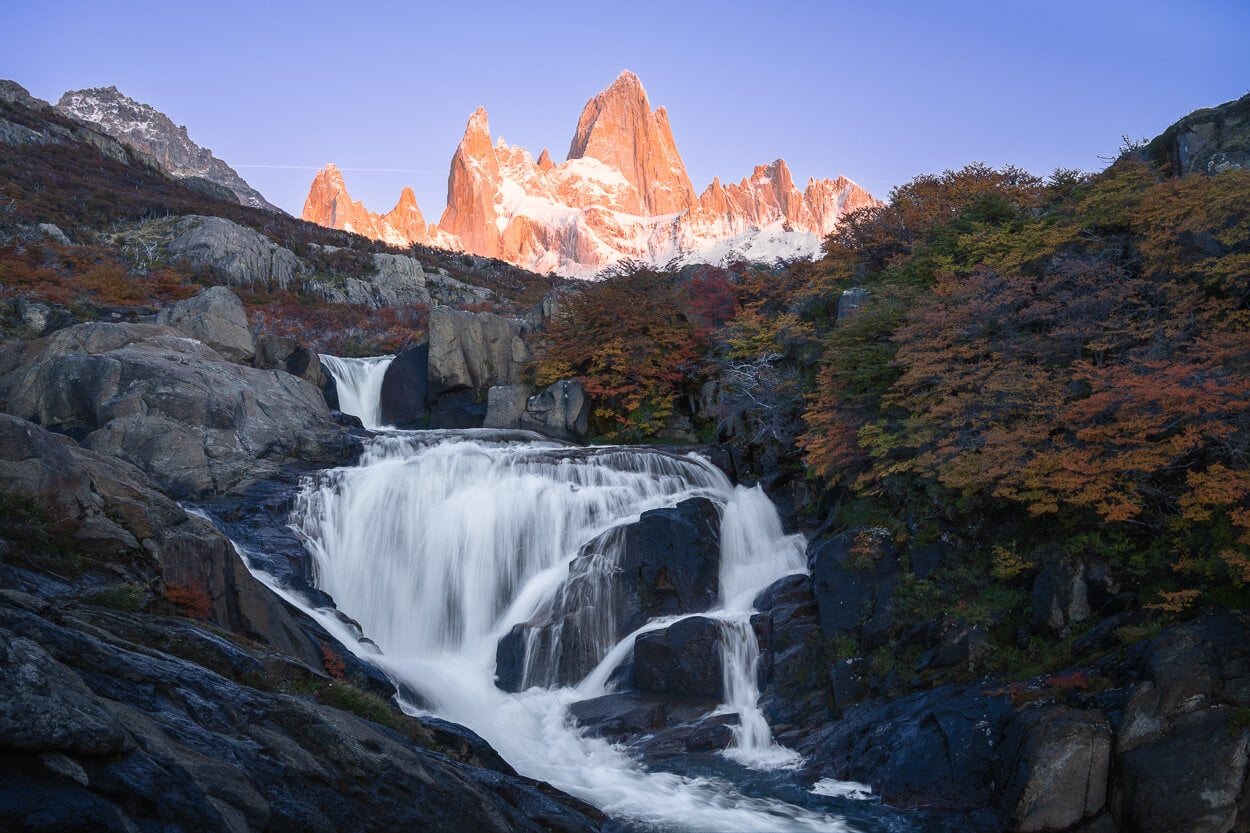
Photo taken at 35mm, 1/8th of a sec, f/8.
Definitely bring a sturdy tripod with you; the Patagonian winds can be intense. And, for the same reasons, enough clothes to stay warm and toasty while you wait for the sun to rise.
Light Stages
There are three different light stages when the Fitz Roy will be tinted in different colors. All worth attending to.
First, a cold glare at the end of the twilight. Then, an orange-reddish glow, as the sun rises. And, lastly, a beautiful golden light, at the start of the golden hour.
The First Stage is a cold glow on mount Fitz Roy, during the blue hour.
The second stage is the orange-reddish glow of the rising sun. Photo taken at 35mm, 1/8th of a sec, f/8.
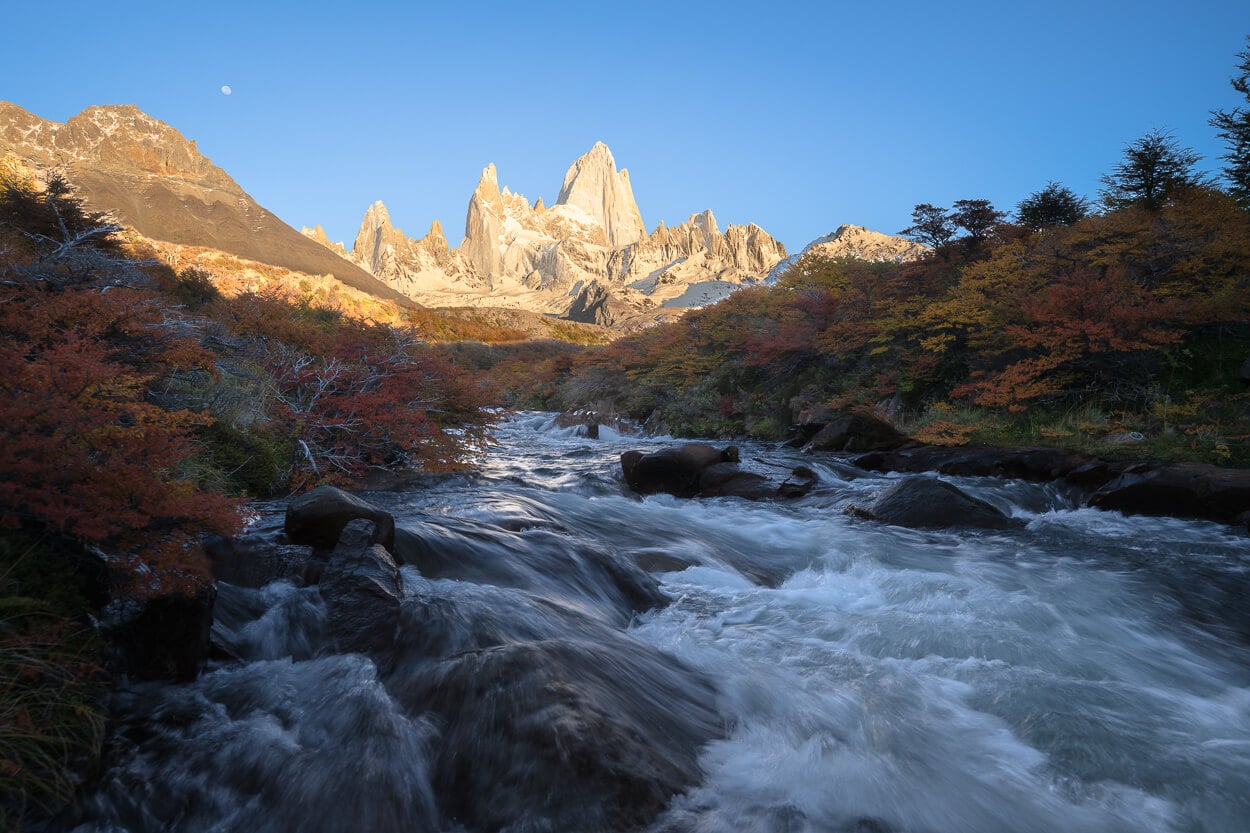
The Third Stage is the golden hour, when the Fitz Roy catches the warm, golden tones of the sun, higher above the horizon. For this stage. i had moved to another viewpoint upstream.
That is to say: it’s worth arriving early for the blue hour and not going away after the orange-reddish light is gone. And don’t plan to be there 15 minutes before sunrise; all the best spots will be taken.
You do not need to stay in the same spot at the waterfall if you do not want to either. I didn’t stay there as there are good photo spots both upstream and downstream of the river. There is at least one good waterfall farther downstream, and a great viewpoint along the river upstream.
That is why in the light stages sequence above, you see different compositions.
My personal favorite time is when the light of the sun only partly lit the Fitz Roy, like in the photo below.
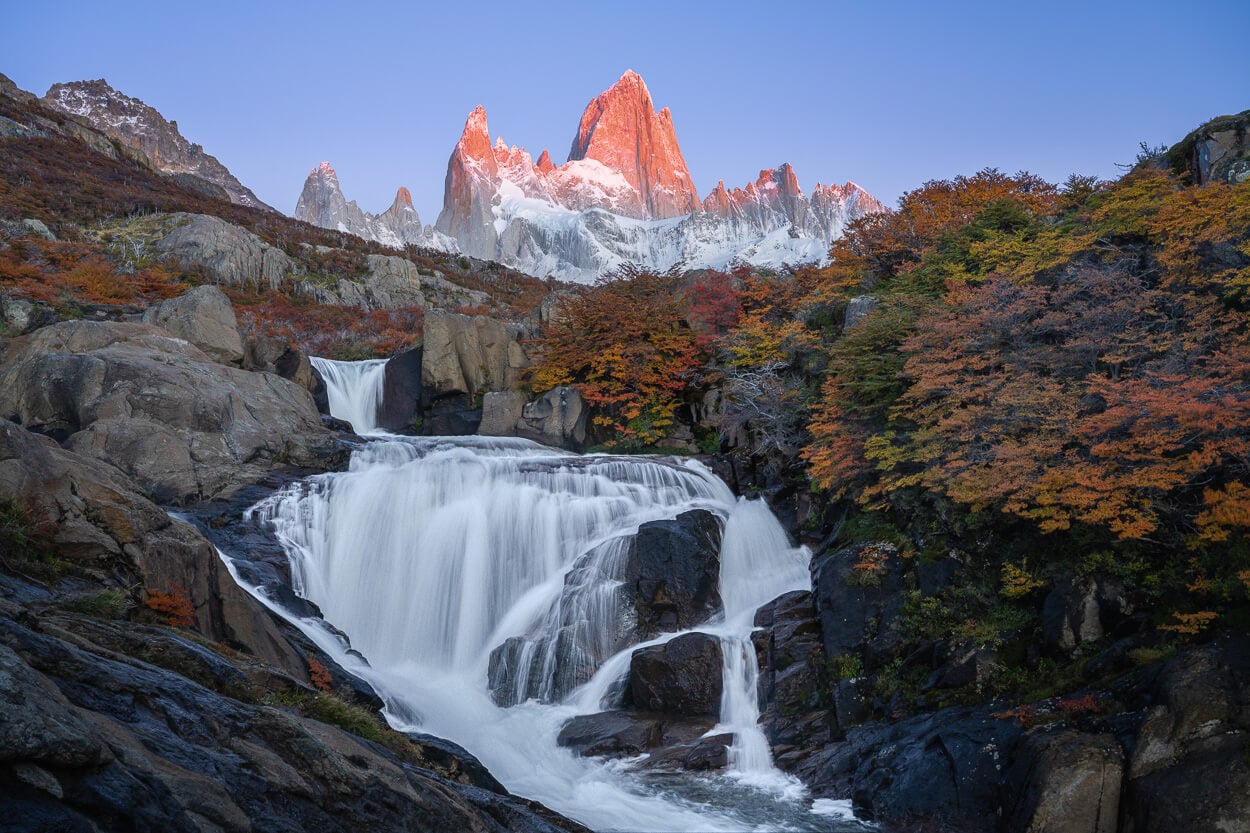
My personal favorite time is when the light of the rising sun just starts to lit the Fitz Roy.
Additional Viewpoints around the Waterfall
I personally moved to another upstream viewpoint along the river to capture the second stage of that light, the golden one. I personally prefer to vary and move around a spot instead of taking the same photo of the same exact spot several times.
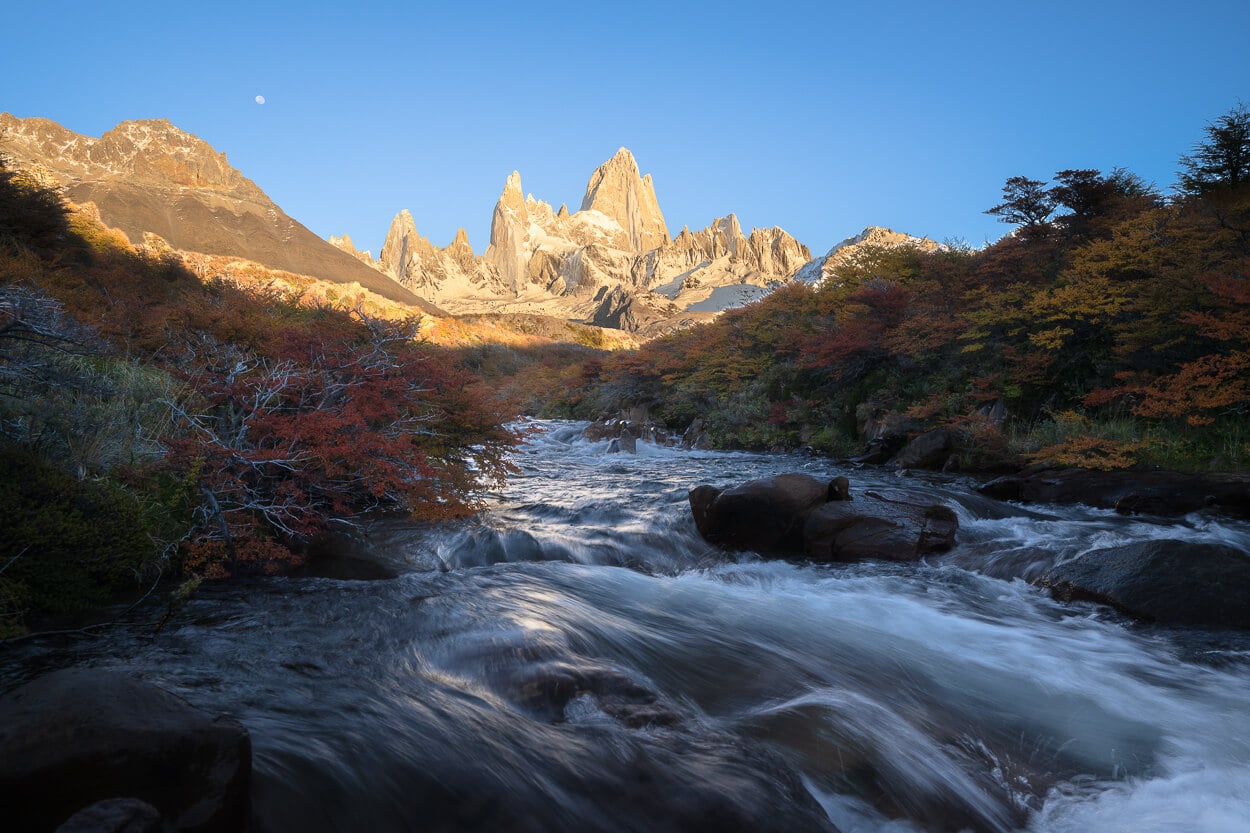
Five-ten minutes hiking upstream of the waterfall, there is another great viewpoint along the river.
So here it is. I moved to this spot along the river (coordinates: -49.292042, -72.940538) I had planned on visiting. It’s just a short 10-minute walk upstream, so right about enough time to pack your gear from the waterfall, get there, and be ready to capture the “golden light” stage.
And again, there is at least another waterfall I know of downstream, if you are interested in a variation to the classic “Hidden Waterfall”. I was more interested in the river and could not do both, so I chose the river for more variation.
That comes down to personal style and preferences, of course, but I was happy with the choice of moving around to get some different shots.
Where to Stay
El Chaltén is the only town around and the best place to stay, and the closest to the trailhead, which is right on the north outskirts of town. There is no shortage of Hotels, Hostels, or Guest Houses in El Chaltén.
If you are planning on camping, Campamento Poincenot is the closest campsite. It can be booked online here.
Additional Resources
- You may also want to read my full El Chaltén Hiking and Landscape Photography guide if you are planning a trip to the area.
- For a general overview of hiking and landscape Photography locations in Argentina, check out my main Argentina page.
- If you are planning a trip to El Chaltén and Los Glaciares, you may want to check out my guide to the Laguna de los Tres Sunrise Hike, with photography tips too.
[/fusion_text][/fusion_builder_column][/fusion_builder_row][/fusion_builder_container]

Leave A Comment